Sizing and Cropping Photos
After placing a photo on a slide, you will probably need to adjust its size, and/or crop it, to make it fit in the allotted space the way you want it. The following sections explain these techniques.
Sizing a photo
Sizing a photo is just like sizing any other object. Drag its selection handles. Drag a corner to maintain the aspect ratio, or drag a side to distort it. (Distorting a photo is seldom a good idea, though, unless you’re after some weird funhouse effect.)
You can also specify an exact size for a photo the same as with drawn objects. Right-click the photo and choose Size and Position to set a size in the Size and Position dialog box (see Figure 24-42). Alternatively, you can display the Format tab, and then use the Height and Width boxes in the Size group.
Figure 24-42. Size a photo via either the dialog box or the Format tab.
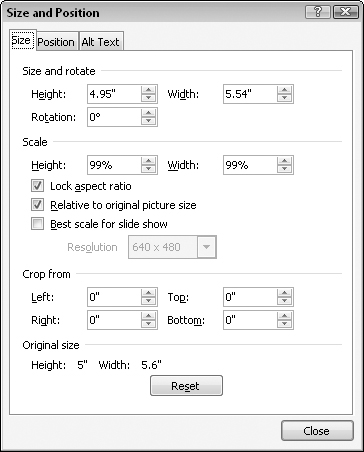
The most straightforward way to specify the size is in inches in the Height and Width boxes, either in the dialog box or on the tab. These measurements correspond to the markers on the onscreen ruler in Normal view. The size of a slide varies depending on how you have it set up (by using the Page Setup tab), but an average slide size is 10 inches wide by 7.5 inches tall. You can also size the photo using the Scale controls in the Size and Position dialog box, in which you adjust the size based on a percentage of the ...
Get Office 2007 Bible now with the O’Reilly learning platform.
O’Reilly members experience books, live events, courses curated by job role, and more from O’Reilly and nearly 200 top publishers.

