Applying Table Styles
The quickest way to format a table attractively is to apply a table style to it. When you insert a table using any method except drawing it, a table style is applied to it by default; you can change to some other style if desired, or you can remove all styles from the table, leaving it plain black and white.
When you hover the mouse pointer over a table style, a preview of it appears in the active table. The style is not actually applied to the table until you click the style to select it, however.
If the style you want appears on the Table Tools Design tab without opening the gallery, you can click it from there. If not, you can scroll row by row through the gallery by clicking the up/down arrow buttons, or you can open the gallery’s full menu as shown in Figure 23-10.
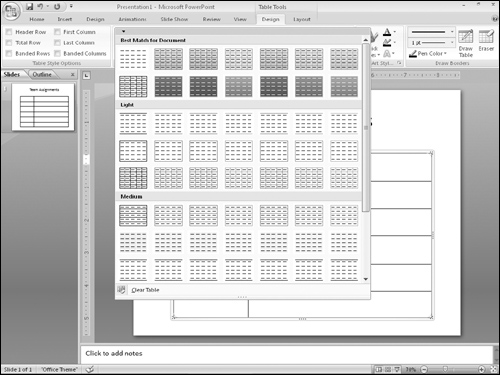
To remove all styles from the table, choose Clear Table from the bottom of the gallery menu. This reverts the table to default settings: no fill, and plain black 1-point borders on all sides of all cells.
The table styles use theme-based colors, so if you change to a different presentation theme or color theme, the table formatting might change. (Colors, in particular, are prone to shift.)
By default, the first row of the table (a.k.a. the header row) is formatted differently from the others, and every other row is shaded ...
Get Office 2007 Bible now with the O’Reilly learning platform.
O’Reilly members experience books, live events, courses curated by job role, and more from O’Reilly and nearly 200 top publishers.

