
YOUR NOOK TABLET DOES many things, but above all it’s a great eReader for books, newspapers, and magazines. You’ll find countless tools that make your reading experience efficient and enjoyable—and you’ll learn all about them in this chapter.
To open a book, simply tap its cover, or else hold your finger on the cover and select Read from the pop-up menu. Here are the main places you’ll find a book cover to tap:
On your Home screen, if you’ve placed one there
On the Daily Shelf
In your Library
In the Books media shortcut at the bottom of the Home screen (Moving Items Between the Daily Shelf and the Home Screen)
Tip
When browsing or searching the NOOK Store, when you come across a book that you already have on your NOOK, the green button below it displays “Read” rather than a price. Tap it to read the book.
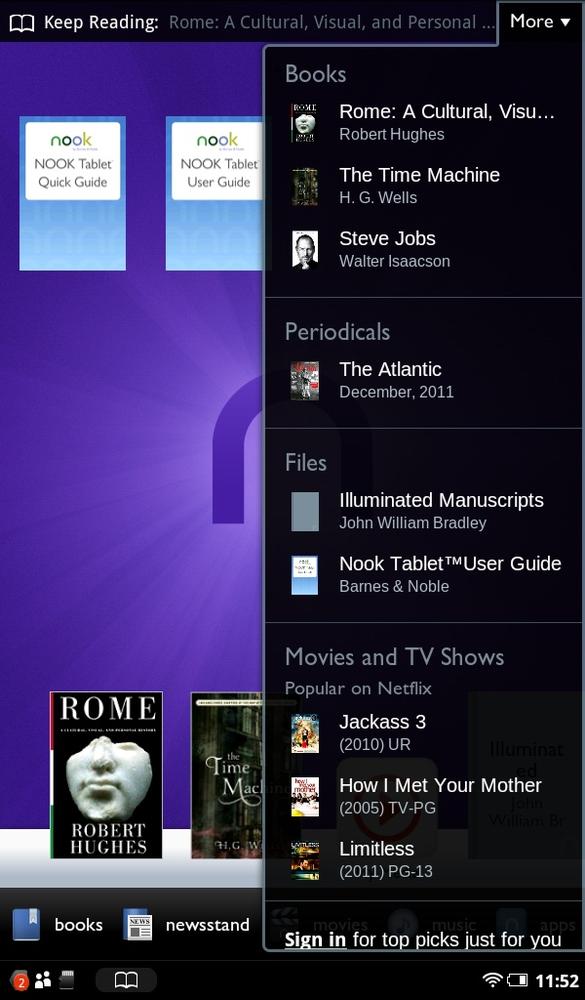
There are other ways to open a book without even hunting around in the Library for them. If you want to jump to the last book you were reading, tap the book icon at the bottom of the screen in the Notification area, or tap the Keep Reading book icon at the top of the Home screen. The Keep Reading feature is particularly handy, because it also shows the title of the book you’re reading—which you’ll appreciate if you have multiple books going at a time.
Tip
When you buy a book and download it to your NOOK, it’s protected with a technology called digital rights management (DRM). DRM is there to prevent illegal copying, selling, or distribution of books. The NOOK’s built-in technology ensures that you can read any book you’ve legitimately purchased. However, due to a DRM-related hiccup, you may need to unlock a book after you’ve downloaded it. If that happens to you, you’ll be prompted to enter your name and the credit card number you used to buy the book. After that the book unlocks, and it’s clear reading ahead.
If you want to read a book that you’ve recently been reading, but not the most recent one, tap the More button at the top right of the Home screen. Down drops a long list of recent books and periodicals you’ve read, files you’ve opened, and movies and TV shows you’ve watched (or that have been recommended to you). Books are at the top of the list.
Tip
If you’ve been reading a book that you’ve transferred to your NOOK from your PC or Mac (see Transferring Files to Your NOOK Tablet), it won’t show up in the Books area under the More button. Instead, you’ll find it in the Files area.
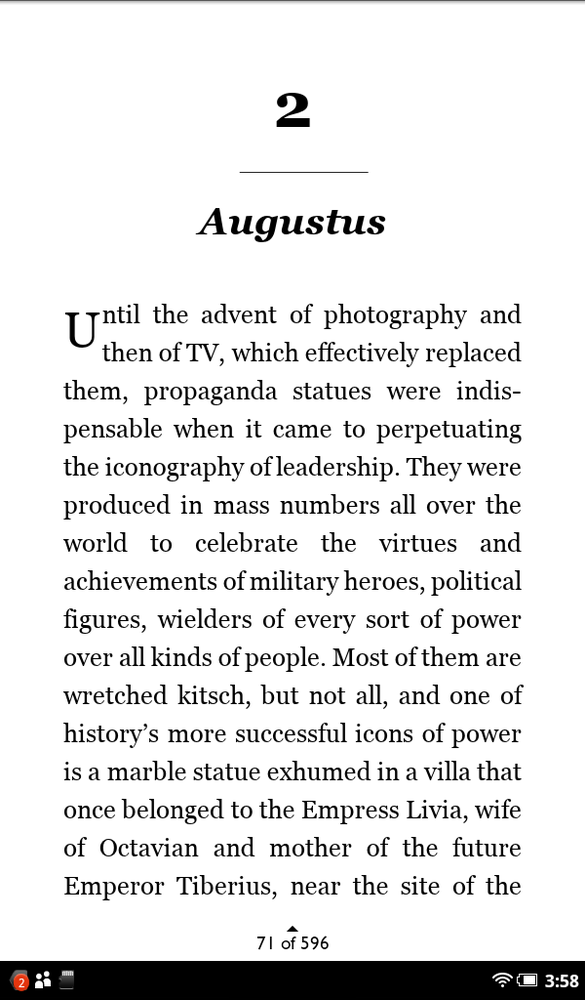
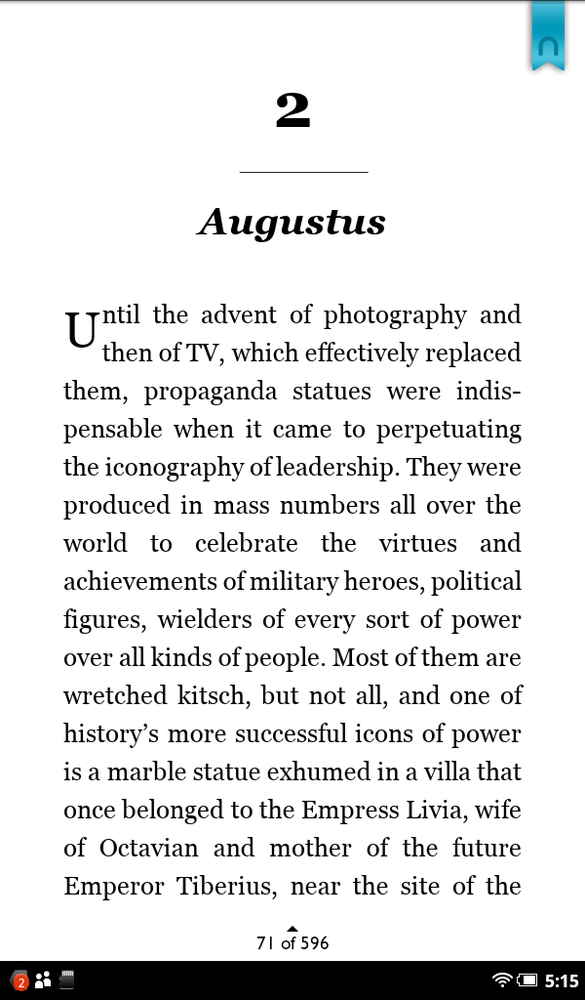
Tap a book cover, and you get sent to the first page of the book, or if you’ve been reading it, you go to the last page you read. You’ll get a simple, uninterrupted view of the book page—text along with any illustrations, photos, and so on. At the very bottom of the page, you see the page number you’re on and the total number of pages in the book. You may also see icons that look like blue notepads along the right side of the page—these indicate notes that you or another reader has added to the book. Tap a note to read it. (For the full story on notes, see Handling Notes.)
Note
The page numbers at the bottom of the page are for the NOOK version of the book, not the print version.
To move ahead one page, tap any spot along the right edge of the screen, or swipe your finger to the left. To move back one page, tap any spot along the left edge of the screen, or swipe your finger to the right.
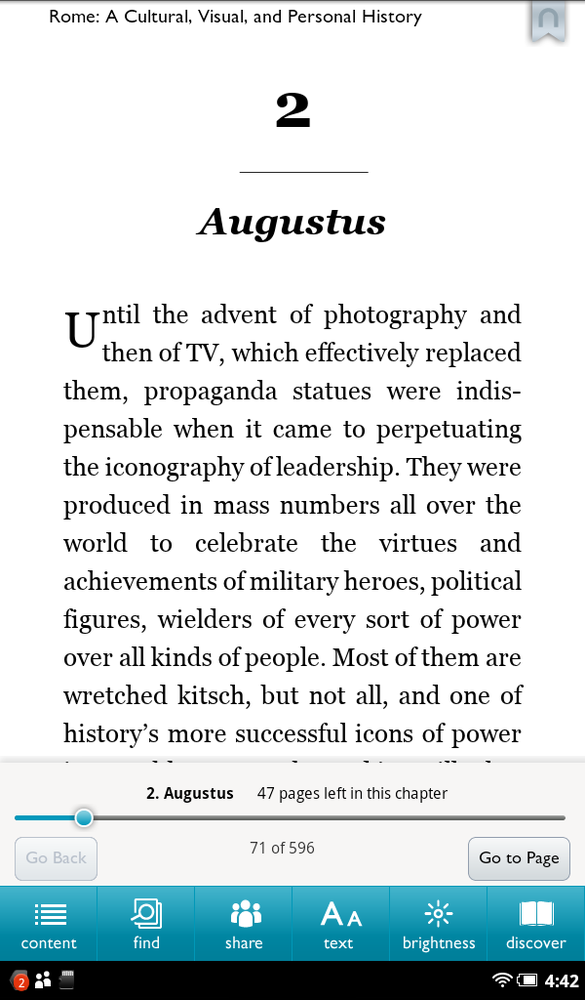
That’s just the basics, though. To unleash the full power of the NOOK’s reader, tap anywhere in the center of the page or at the bottom of the page to bring up the Reading Tools menu. This menu does all kinds of nifty things—hops to the interactive table of contents, searches the book, changes the font size and brightness, and more.
Tip
You may need a bit of practice bringing up the Reading Menu. If you tap too far to the right, you’ll go forward one page, and too much to the left you’ll go back a page. Aim for square in the middle.
Here are the six reading tools:
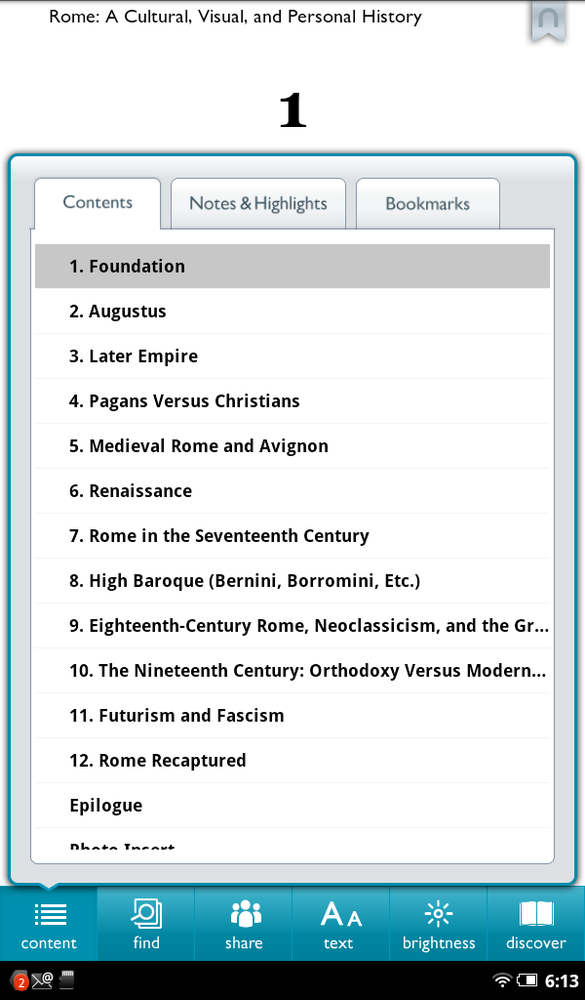
Contents. Jumps you back to the book’s table of contents, with the current chapter highlighted. It’s interactive—tap a listing in the table and you’ll jump to that location in the book. Separate tabs show notes, highlights, and bookmarks and let you jump to them as well.
Find. Pops up a search box and keyboard so you can search the book you’re reading.
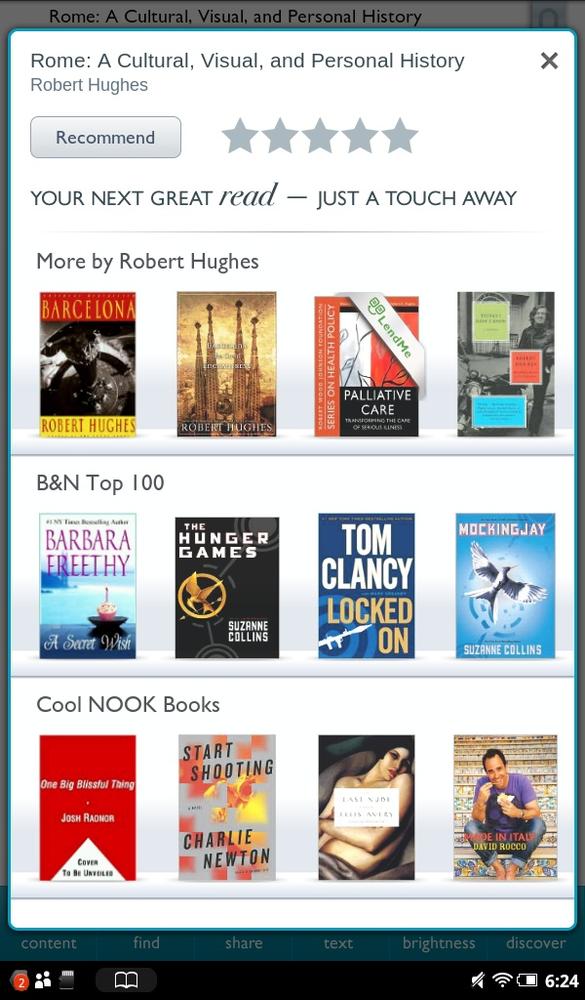
Share. Tap here and you can share information about the book with others—recommend it, review it, “Like” it on Facebook, and more. See Sharing Your Reading for details.
Text. Lets you make the text just right—not too large, not too small, just the right font, and with just the right background color. See Changing the Text and Display for details.
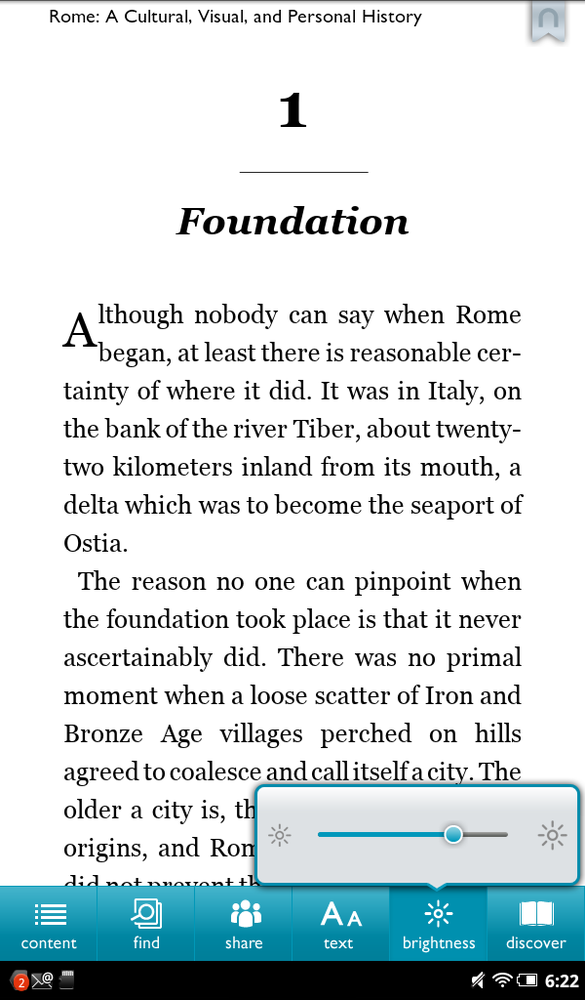
Brightness. Tap to launch a slider that lets you adjust the screen brightness. Slide it to the right to make the screen brighter, and to the left to make it dimmer.
Discover. Tap here to see books related to the one you’re reading—for example, books by the same author. You’ll often see unrelated books as well, such as the B&N Top 100. As with everywhere else on the NOOK, tap a book to see details.
Note
If you download a book to your PC or Mac, and then transfer it to your NOOK (Transferring Files to Your NOOK Tablet), the Discover feature may not be available; in that case the icon will appear dimmed.
Look at the top-right corner of the screen when you bring up the Reading Tools menu, and you see a gray NOOK icon. That’s for creating a bookmark. Tap the icon: It turns blue and elongates. You’ve just added a bookmark, and it stays there even when the Reading Tools menu disappears. Tap it again and it disappears—you’ve just deleted a bookmark.
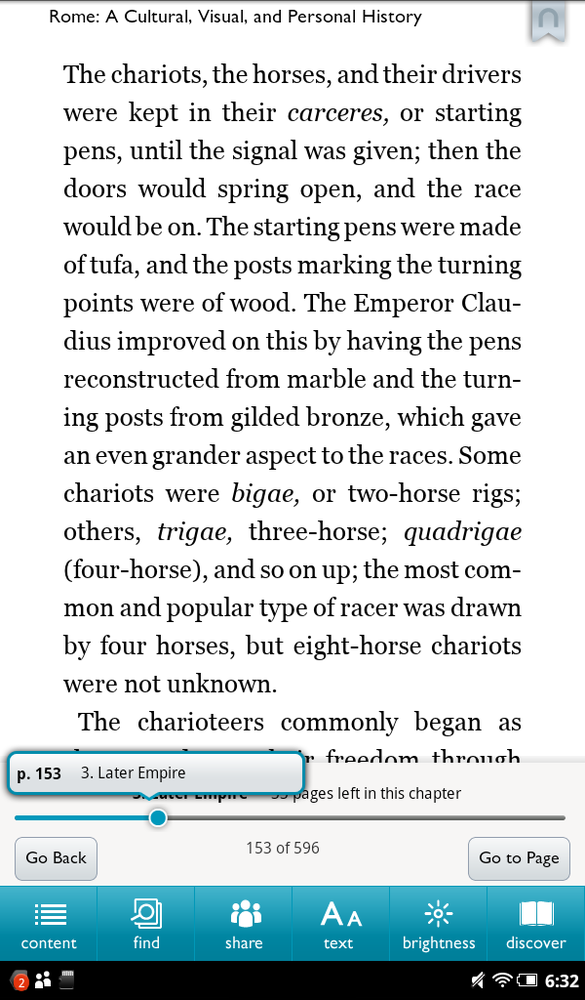
Just above the Reading Tools menu, you’ll find some handy tools for navigating through the book. Tap the “Go to Page” button, and a screen appears that lets you type in a page number to head to. Tap in the page number, tap Go, and off you go.
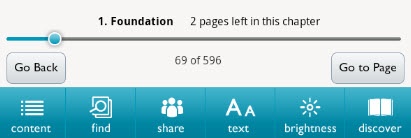
After you do that, to get to the page you were just reading, tap the Go Back button.
There’s also a nifty slider that shows you your current location in the book, including the chapter number and title, and how many pages remain in the chapter. Drag the slider to move forward or back in the book. As you drag the slider, the page number and chapter number and title appear to show the location you’re moving through.
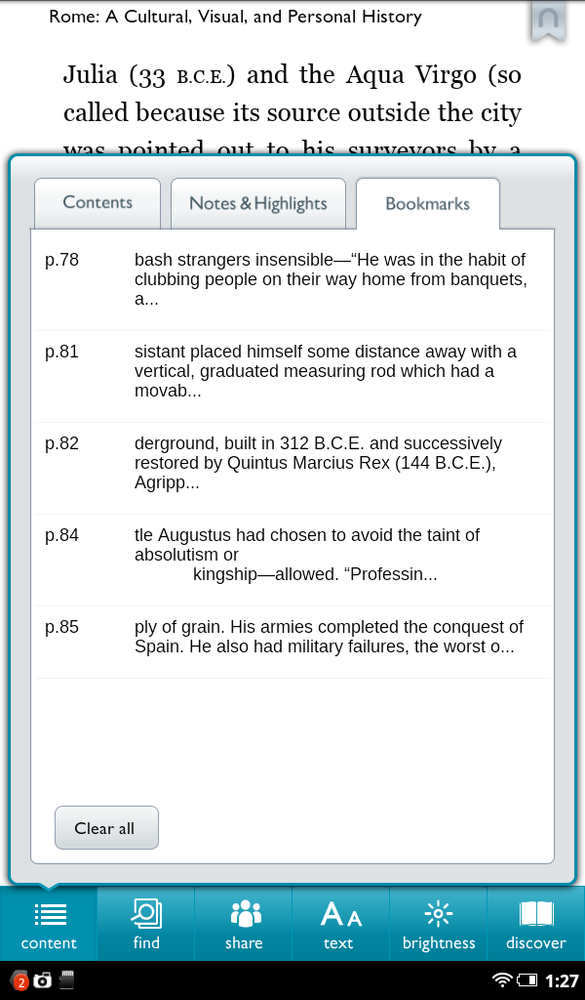
A book’s table of contents does a lot more than just let you navigate by chapter title. It’s also your gateway into three great NOOK features—Notes, Highlights, and Bookmarks. (You learned how to create a bookmark in A Tour of the Book Reader; for help on creating notes and highlights, turn to Handling Notes.)
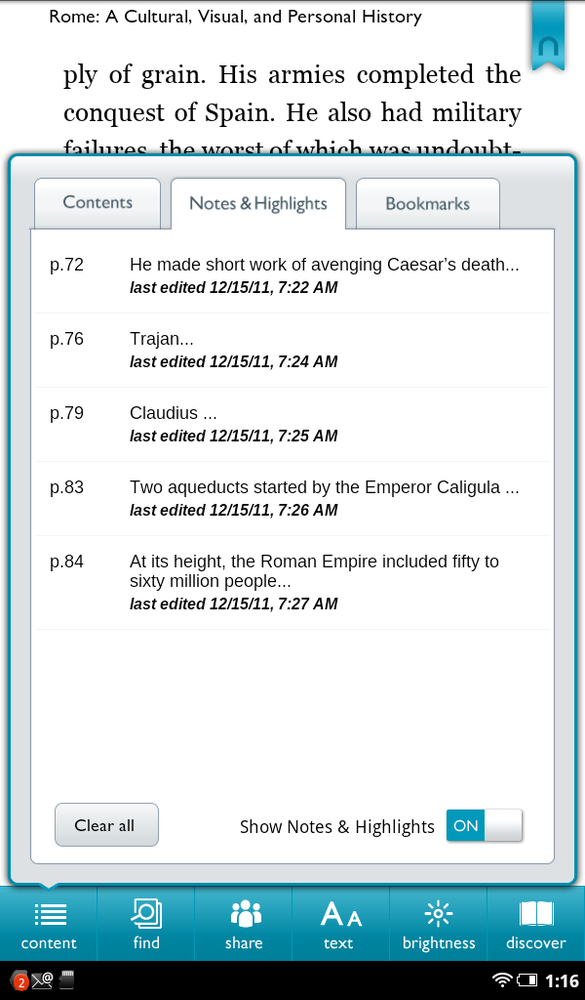
Tap Contents on the Reader Tools menu, and you come to a page with three tabs: Contents, Notes & Highlights, and Bookmarks.
Tap the Notes & Highlights tab and you’ll see the list of all the notes and highlights you’ve added to your book. To jump to any, tap it.
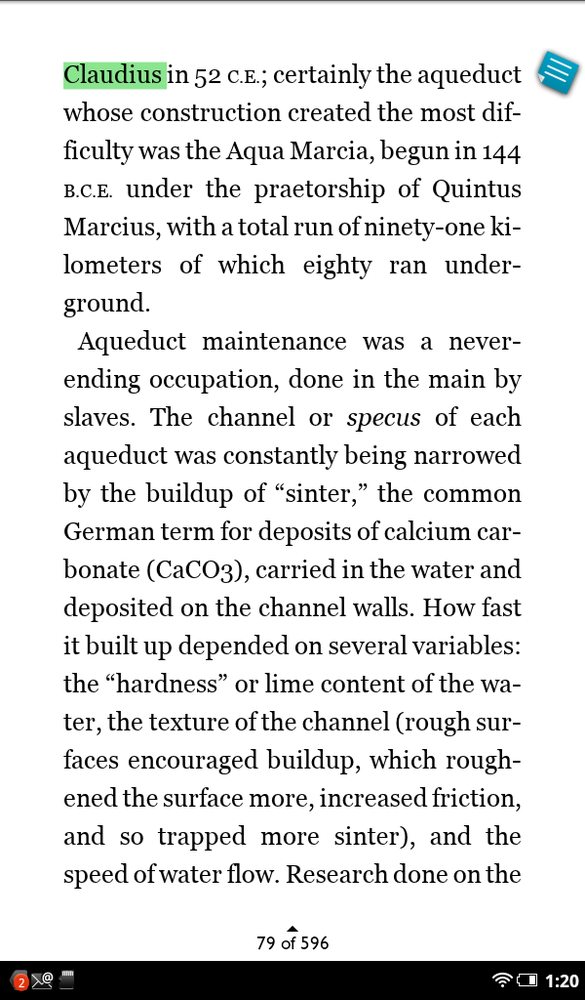
Tap a listing, and you go to the page with the note or highlight. The text that you highlighted or attached a note to is highlighted in green. If there’s a note, you see a small blue note icon in the right margin. Tap the icon to read or edit the note.
Note
The list in the table of contents doesn’t distinguish between notes and highlights, so you won’t know what you’re tapping until you get there.
Tap the Bookmarks tab, and you see a list of your bookmarks. Tap any to go to one. If you’d like to delete all your bookmarks, tap “Clear all” at the bottom of the tab and they all vamoose.
If you’re looking at the table of contents and decide not to use it, tap on the page behind it. The table of contents vanishes.

Note
If you read a book on a device other than your NOOK, such as a computer, tablet, or smartphone, the next time you open the book on your NOOK, you’ll jump to the page you were reading on that device, even if you haven’t yet read the page on the NOOK. This magic only happens, though, if both the device you’re reading the book on and the NOOK have Internet access while you’re reading.
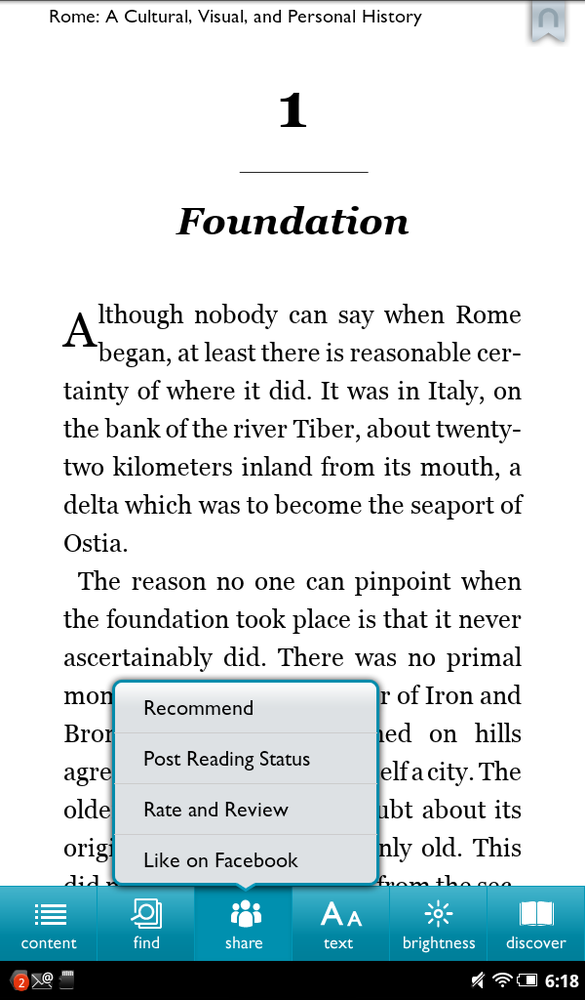
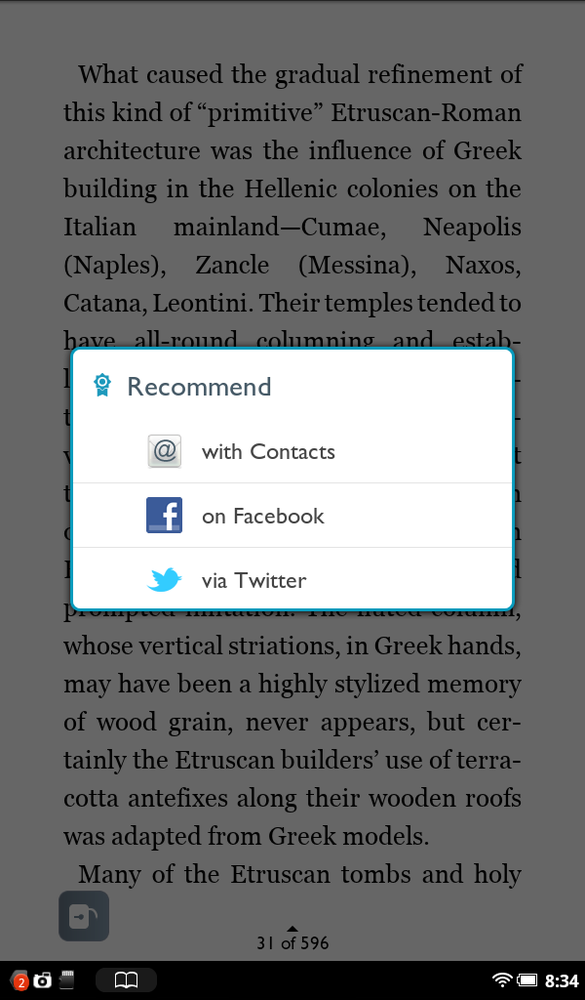
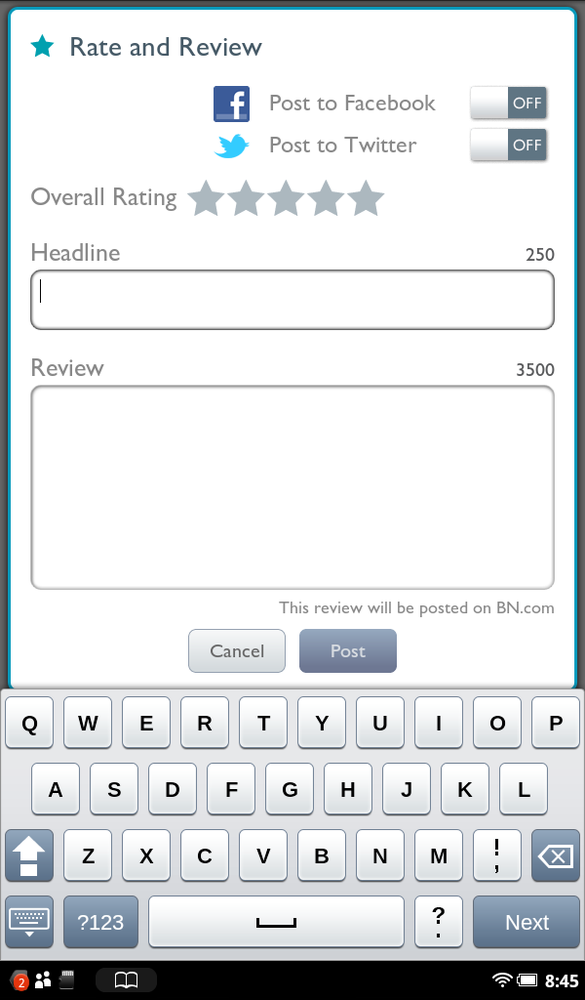
For many people, reading is more than a solitary pleasure; it’s one that they enjoy sharing with others as well. That’s where the Share icon on the Reading Tools menu comes in. Tap it, and a menu pops up that lets you share your thoughts about the book you’re reading with others. You can even write book reviews. Think of it as your own personalized book club.
Note
If you download a book to your PC or Mac, and then transfer it to your NOOK (Transferring Files to Your NOOK Tablet), the Share feature may not be available; in that case the icon will appear faint instead of bright.
If you already hang out on Facebook or Twitter, you may find that the easiest way to share what you’re reading. You can link your NOOK account to your existing Facebook or Twitter account; to learn how, flip to Linking Your NOOK Tablet to Facebook. You can also share by email with your NOOK Contacts.
Once you’ve linked your accounts, you’re ready to start sharing. Tap the Share button, and here’s what you can do:
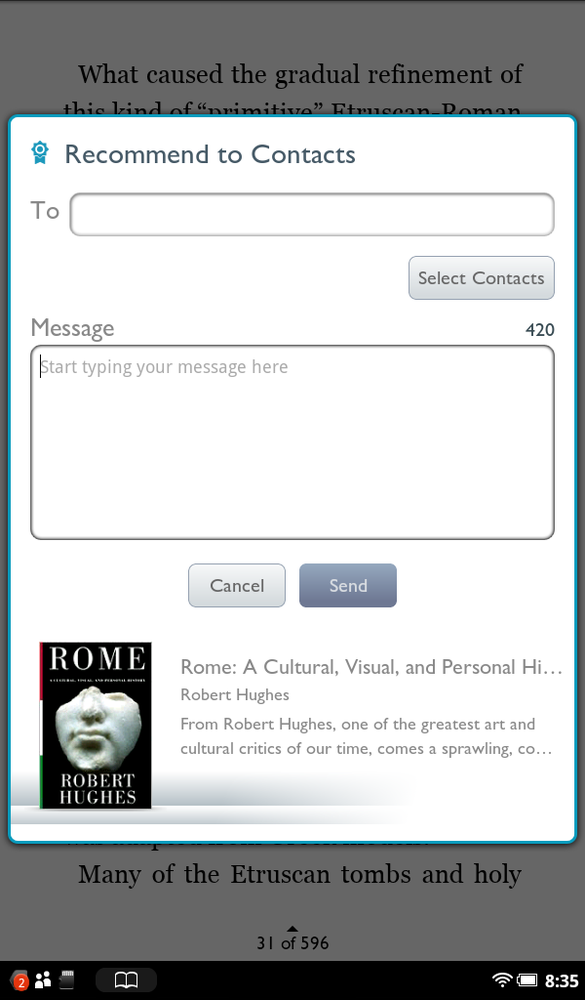
Recommend. Tap to launch and you’ll be able to recommend your book to others using Facebook or Twitter, or to your contacts. The exact form you fill out depends on which sharing method you choose.
When you select Contacts, for example, an email-like screen appears that lets you select the contacts to whom you want to recommend the book. The NOOK thoughtfully enters all the basic information for you about the book—title, description, author, and so on—so that you don’t have to do it yourself. There’s a place on the form to add a message of your own, but there’s a 420-character limit.
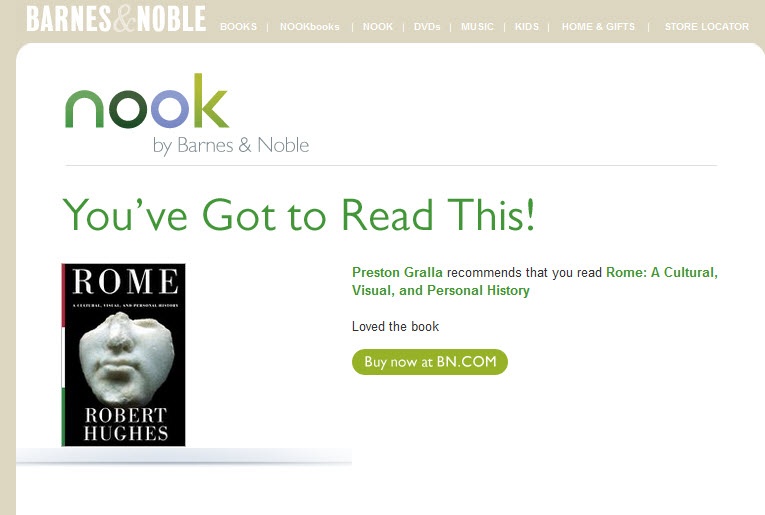
When you send a recommendation, there’s also a link to the book so people can buy it, and a photo of the cover. In addition, if the person to whom you’ve sent the recommendation uses a NOOK, he gets a small notification in the shape of a medal or ribbon on his Notification bar. Tapping that icon and then tapping the screen that appears opens up the full recommendation, book cover and all. He can then download a sample of the book, view all the details about it, or remove the recommendation.
Post Reading Status. Lets the world know via Facebook or Twitter not only what book you’re reading, but what percentage of the book you’ve read. It calculates that by looking at where you are in the book when you tap the Share button, so no cheating and jumping ahead.
Rate and Review. How good or bad is the book you’re reading on a one-to-five star scale? What do you have to say about it? Tap here to share your views. Your review is posted on BN.com and appears when people browse the book; it also shows up when people view the book on their NOOK. You can also post the review to Facebook or Twitter.
Like on Facebook. Tap here and you instantly add a “Like” to the book on your Facebook account.
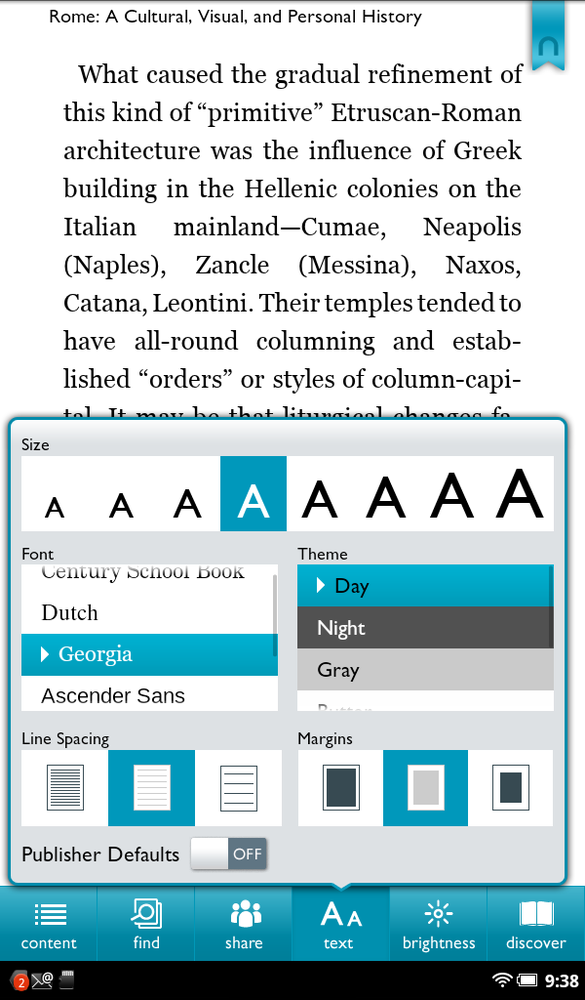
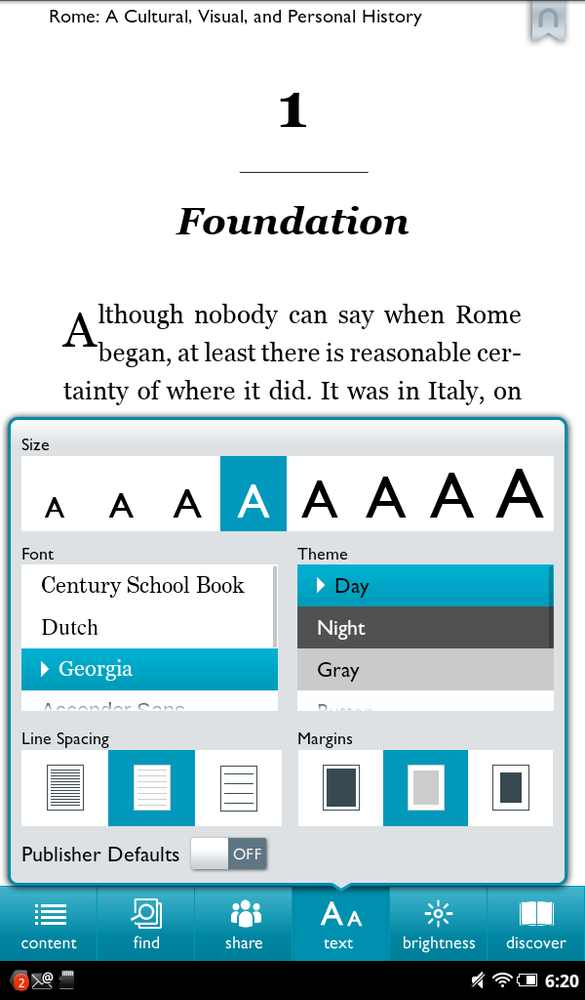
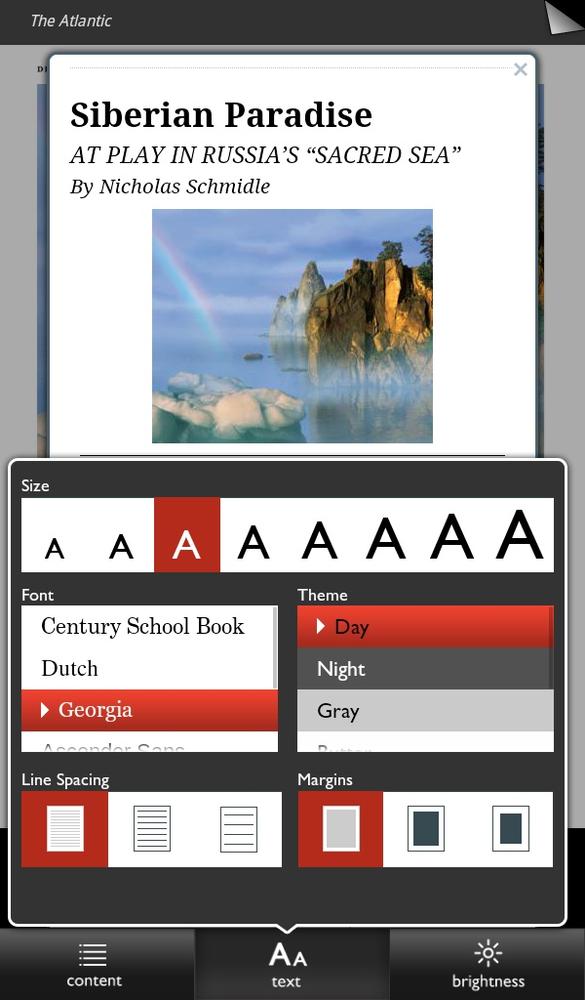
Want to make the text of the book larger or smaller, change its font, spacing, and more? Simply tap the Text icon in the Reading Tools menu. Here’s what you can customize:
Size. Yes, when it comes to reading, size does matter. Just tap any one of the eight font sizes. The text behind the menu changes so you can see a preview.
Font. Scroll through the list and make your choice. As with all other selections, the text behind the menu changes so you can see how the font you chose will look.
Line spacing. Changes how much space there is between lines of text. The leftmost choice puts the least amount of space between the lines, the rightmost choice puts the most, and the one in the middle is somewhere between the two. With this choice, you want to seek a balance between more lines on a page (so you do less page turning) and the potential eye strain of having lines too close together.
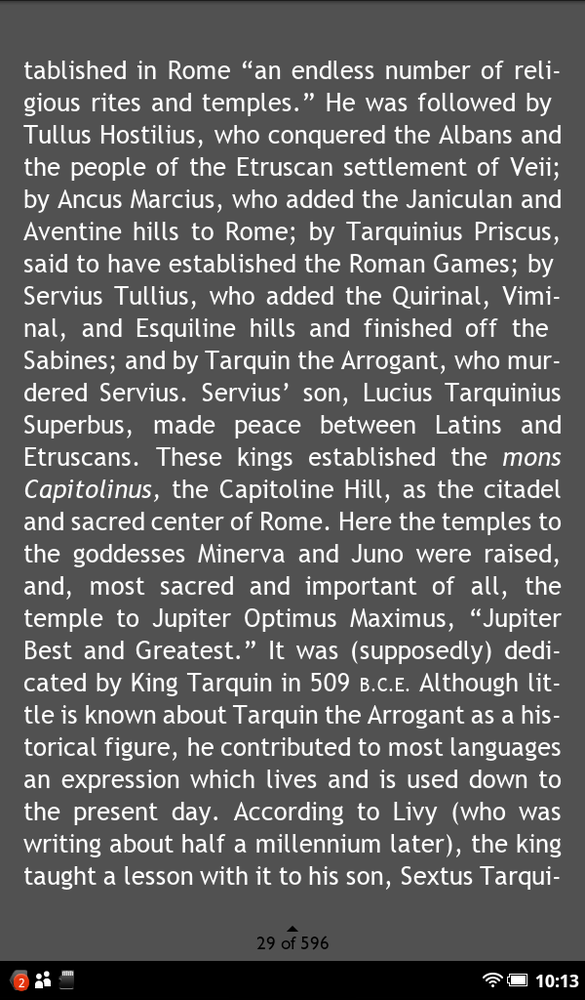
Theme. Changes the background and text color combination. Out of the box, the NOOK uses the Day theme, which has black text against a white background; Night has white text against a black background. Other choices include different colored text, such as black text on a sepia background.
Margins. Do you like wide margins? Narrow ones? Somewhere in the middle? Make your choice here.
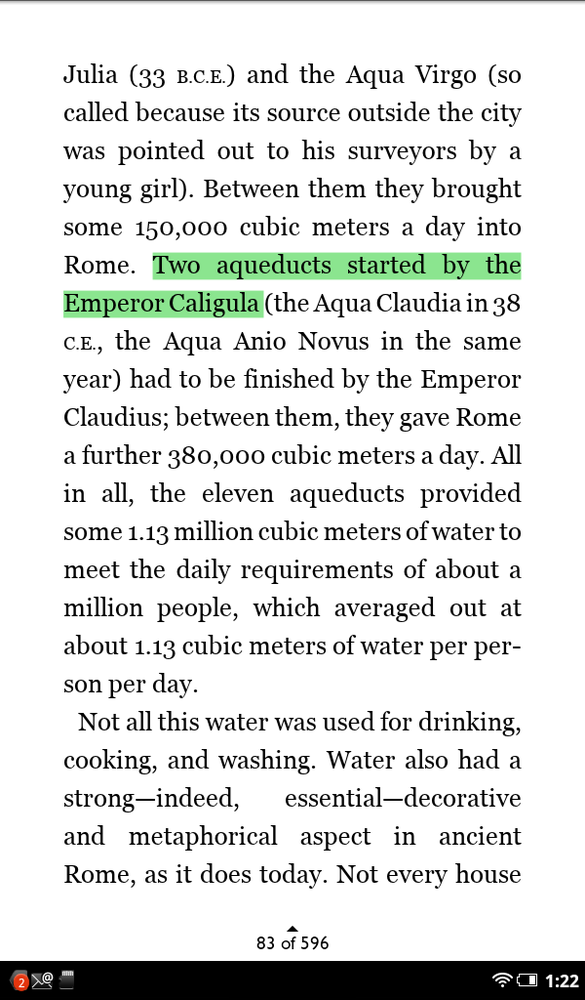
As you can see in the nearby figures, the changes you can make are quite dramatic—one figure shows the text and display as out of the box, the other after it’s been customized.
One of the niftiest things about the NOOK Tablet—and what sets it apart from reading a paper book—are the extras it gives you: notes, text highlighting, and the ability to select text and then do something with it—look up a word in a dictionary, say, or share it with others via email or social networking sites like Facebook.
It all starts with selecting text. Press and hold your finger on a word. As you hold your finger on it, the word gets highlighted and appears magnified inside a balloon so you can more easily read it.
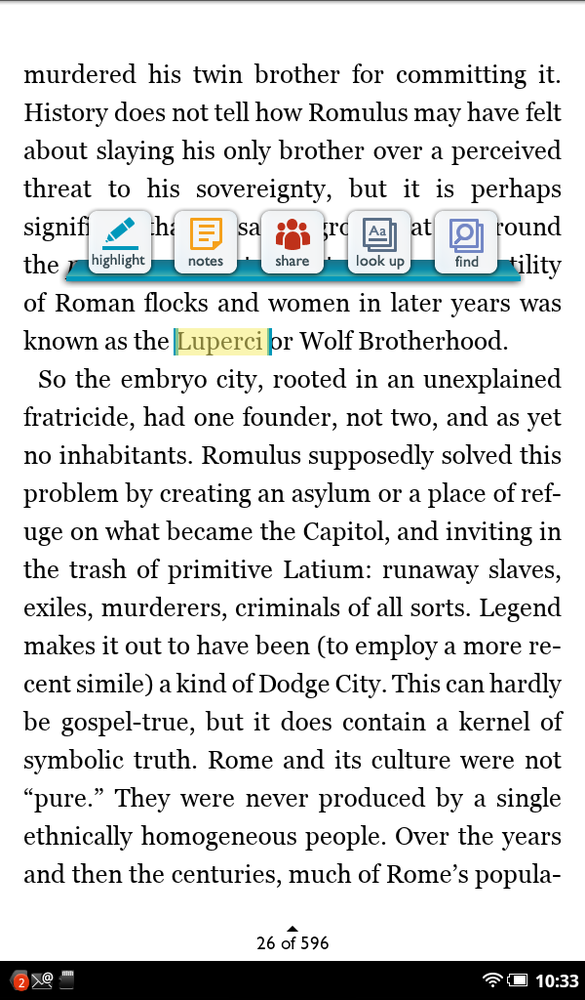
When you release your finger, two vertical bars appear at each end of the word, and the Text Selection toolbar pops up as well. If you want to select more than the single word you just highlighted, drag one or both of the bars to highlight more text. The Text Selection toolbar stays above the highlighted section.
Now tap an icon on the toolbar to do one of the following:
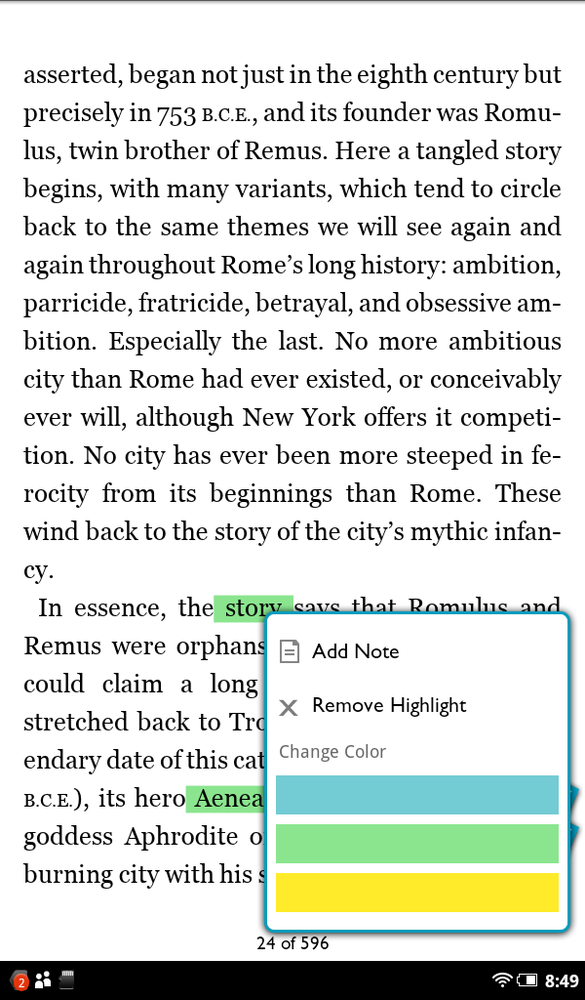
Highlight. Does what the name says. After you highlight the text, as explained earlier, you can see a list of all your highlights by tapping Reading Tools→Contents.
Notes. Highlights the text and adds a note, as explained in Handling Notes. As you read a book, you see a blue note icon where you’ve added a note. Tap a note to read and edit it. As with highlights, you can see a list of all your notes by tapping Reading Tools→Contents.
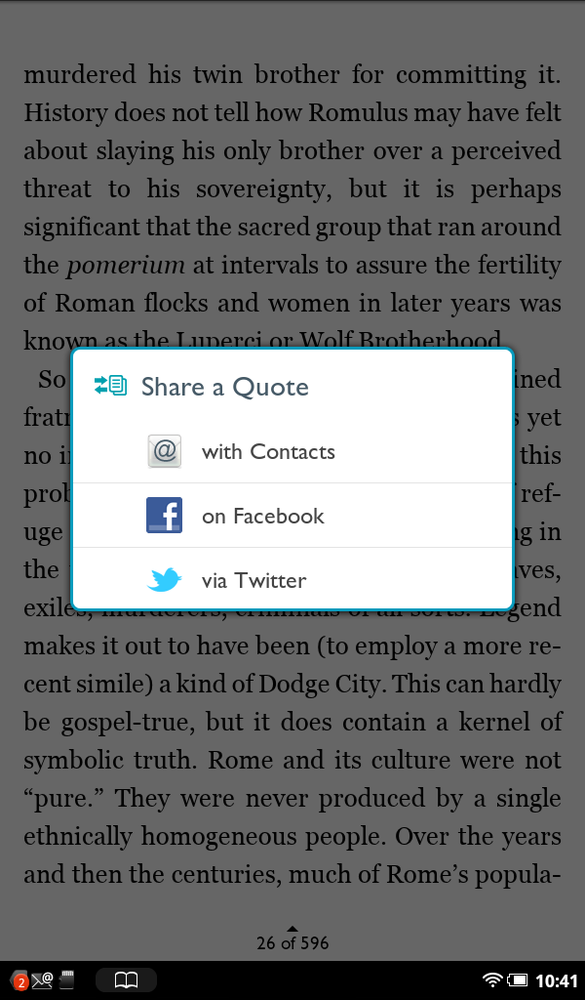
Share. Tap and you can share the highlighted text (what the NOOK calls a quote) with your contacts, or with others on Facebook or Twitter. You’ll have to first link your NOOK account to your Facebook and Twitter accounts (Linking Your NOOK Tablet to Facebook) if you want to share on those services. When you share via Contacts, a window opens where you can choose a contact or multiple contacts with whom to share the highlighted text via email; tap the Add Contacts button to select them. When you select Facebook, a window pops up that lets you post the highlighted text along with a note to your (or a friend’s) Facebook Wall. When you select Twitter, a window pops up letting you post it to your Twitter account.
Note
When you share the quote, there’s also a link to the book on the BN.com website. Keep in mind that Twitter only lets you post messages of 140 characters or less, so your quote and any comment have to be shorter than that. In fact, they’ll have to be even shorter, since the link included in the Tweet uses some characters. Check the number in the lower-right corner of your Twitter window, which tells you how many characters you have left. If you see a negative number, you’ve gone over the limit, so you’ll have to delete some text.
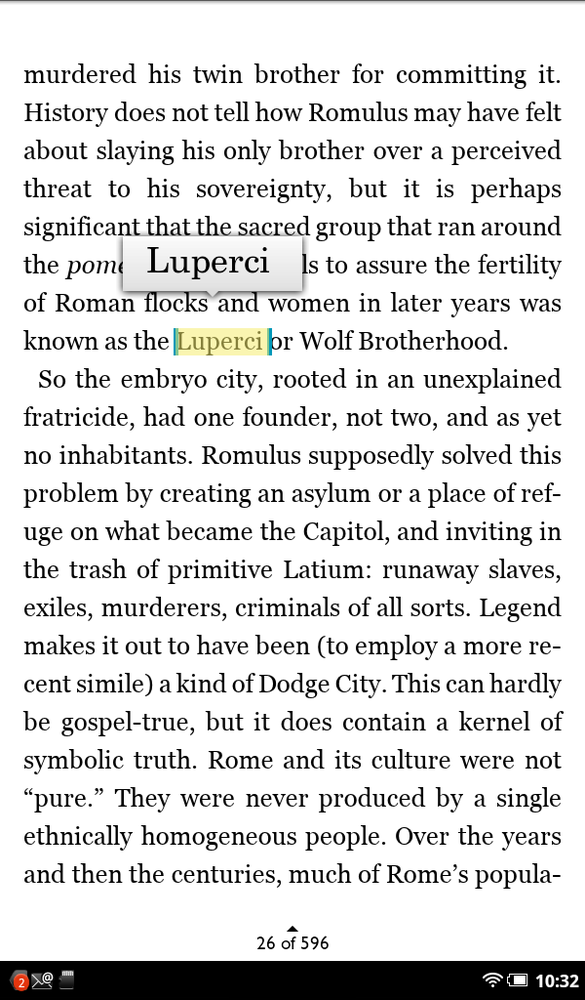
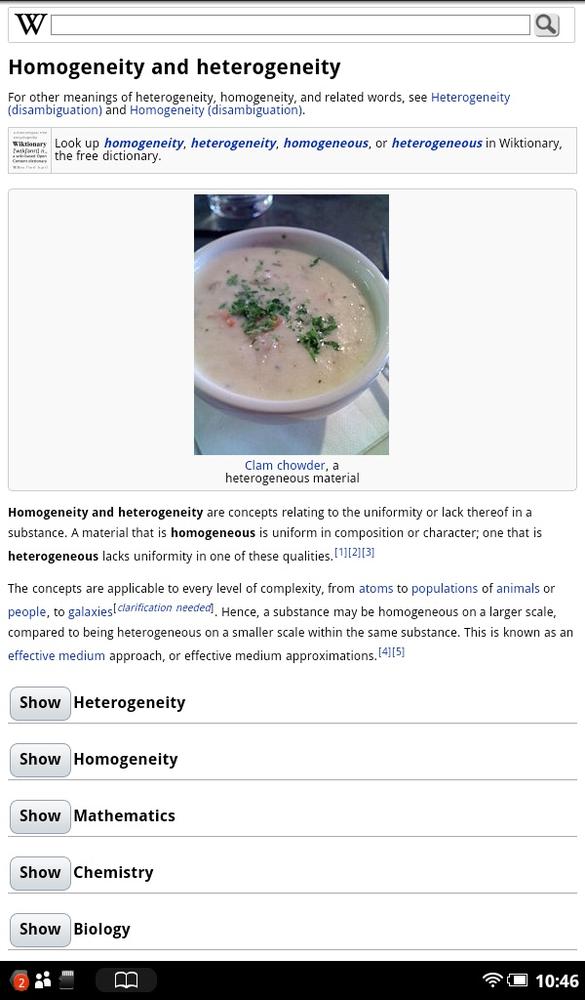
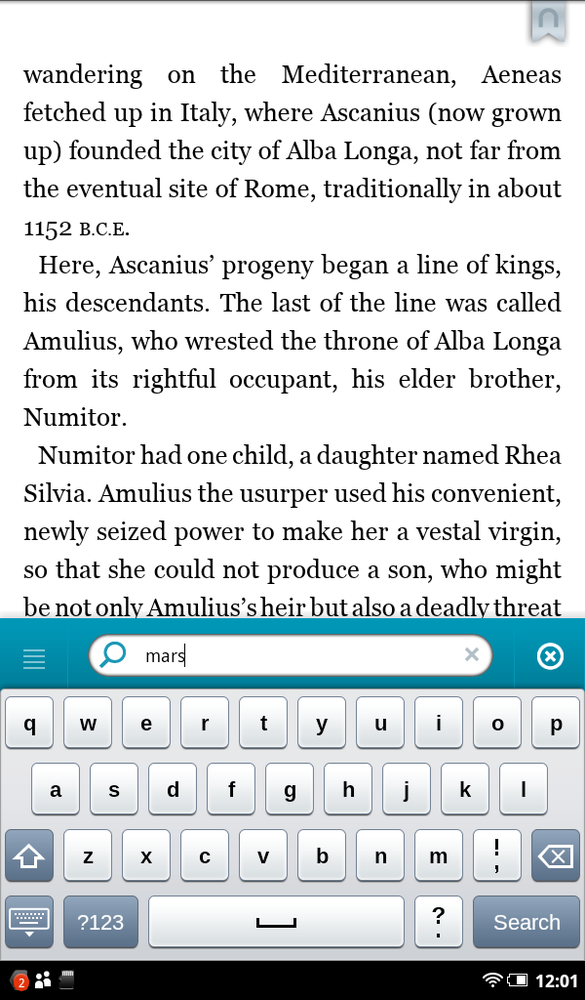
Look up. Searches the Merriam-Webster Collegiate Dictionary built into the NOOK, and shows you the results. But it does more than that as well. Down at the bottom of the screen is a search box with three icons to its right. To change or edit your search term, simply change it in the box. The first of the three icons is for the dictionary. You’re already using it, so don’t bother tapping it. (The only time you may tap the dictionary icon is if you enter a new search term and want to look it up in the dictionary.)
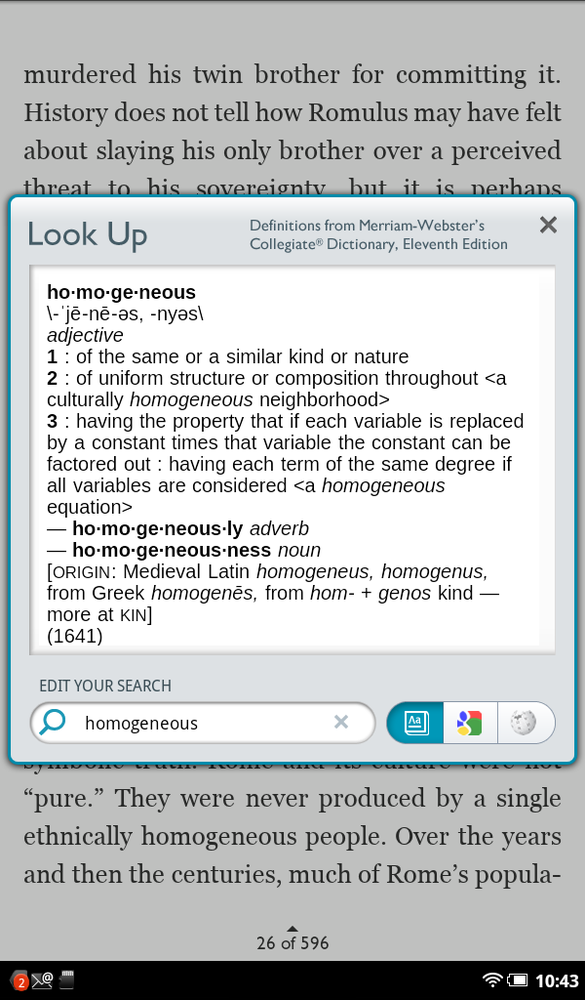
The other two icons may look familiar—they’re for Google (the colorful letter g in the middle) and the online encyclopedia Wikipedia. Tap either icon and you’ll go to Google or Wikipedia in the NOOK’s browser and see the results of your search there.
Tip
If you’ve launched a search that leads you to the Web and want to get back to your book, simply tap the icon of an open book in the Notification bar.
Find. Tap this to search the book for other mentions of the term. For details about how use the Find feature, see Tip.

If you decide to call the whole thing off and don’t want to do anything with the text you just highlighted, tap anywhere on the screen; the Text Selection toolbar vanishes. The toolbar will also vanish if you don’t tap anything on it for 10 seconds.
Note
If you’ve disabled the NOOK Tablet’s browser (Disabling the Browser), you won’t be able to search for text via Google or Wikipedia.
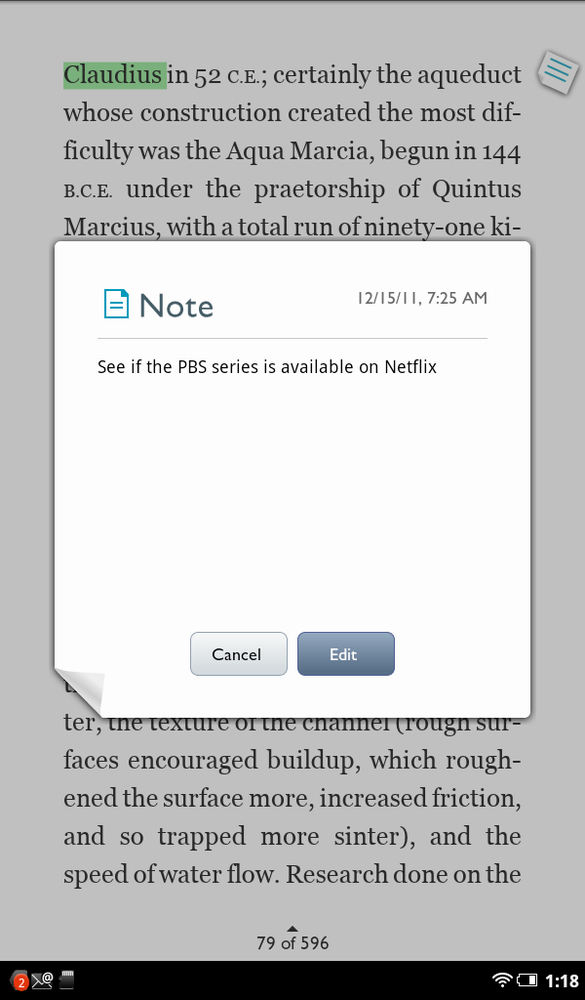
When you tap the notes icon on the Text Selection toolbar, a note-writing screen appears. You’ve got up 512 characters, so you can be more expansive than when using Twitter, with its 140—character limit. You can’t write the Great American Novel in the text box, though—or even the Great American Short Story.
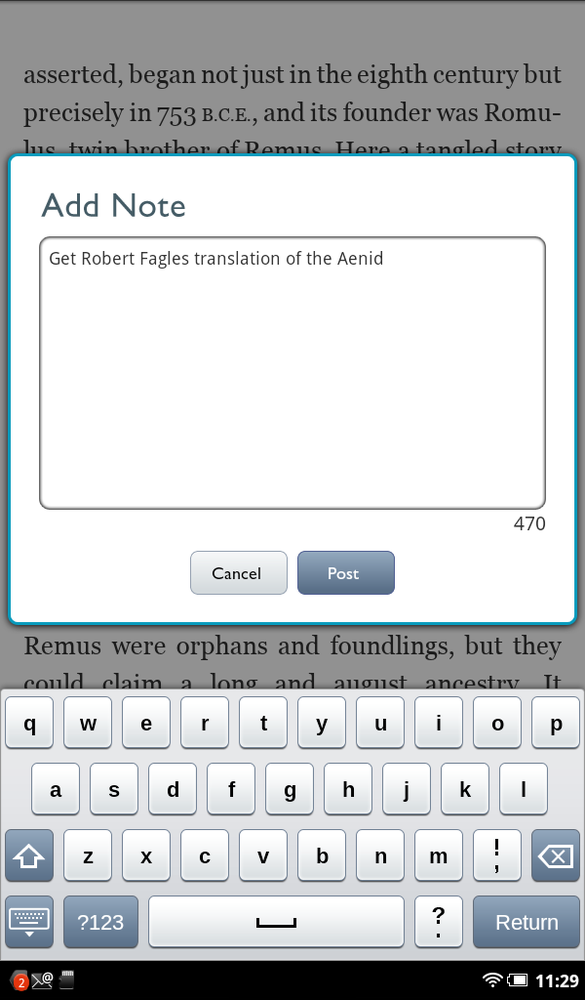
When you’re done writing the note, tap Post. The Text Selection toolbar vanishes, and you’re sent back to the book. The text you’ve just highlighted is in green, and there’s a blue note icon on the right margin of the page next to it.
To read the note, tap it. If you then want to edit it, tap Edit. You go back to the note-writing screen.
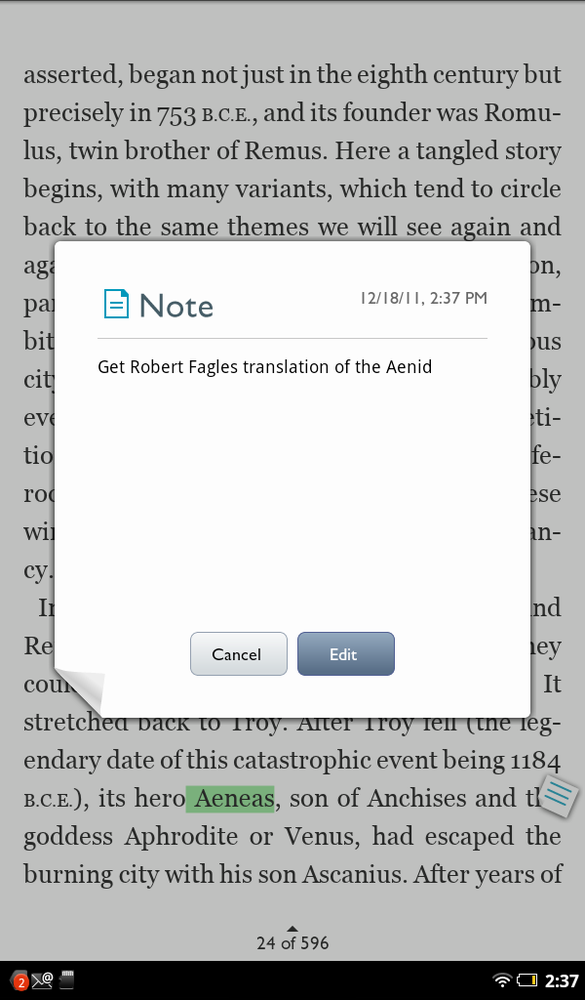
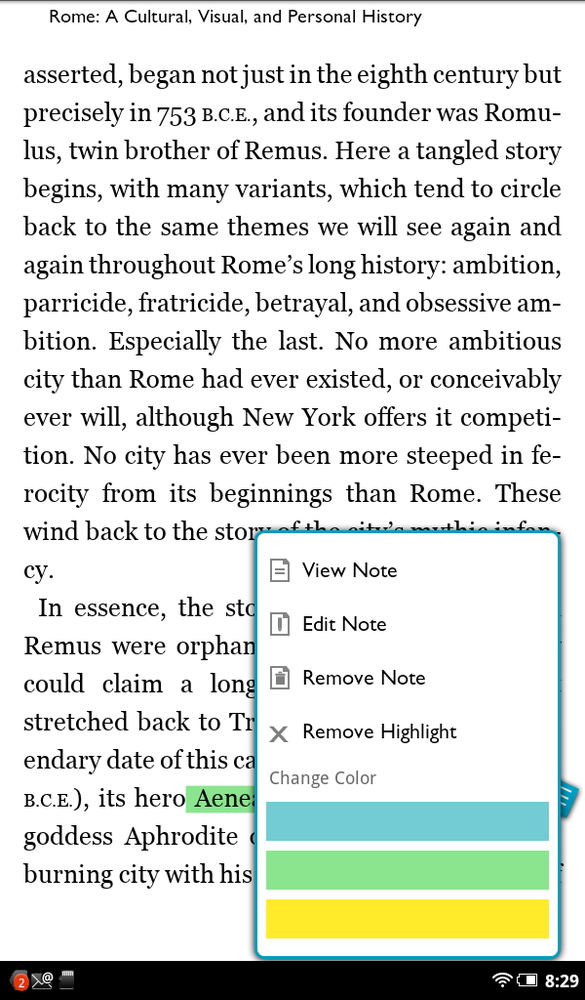
Want to do more with the note, such as changing its color? There’s a simple way to do it. Tap the highlighted text (not the note icon), and a screen appears with these options:
View Note. Does the same thing as tapping the note icon—you read the note.
Edit Note. Takes you to the now-familiar note-editing screen.
Remove Note. Deletes the note but keeps the text highlighted
Remove Highlight. Deletes both the note and the highlight.
Change Color. Tap the color you want your notes to be, and that’s what they’ll use from now on.
Tip
Want to remove all notes in one fell swoop? Use the Text Selection toolbar to go to the table of contents, and then tap the Notes & Highlights tab and tap “Clear all”.
To see all your notes, go to the book’s table of contents from the Text Selection toolbar, and then tap the Notes & Highlights tab. You’ll see them all listed by the highlighted text associated with them. To jump to the note itself, tap the listing. Remember, the list of notes and highlights doesn’t distinguish between the two, so from that tab, you can’t tell which listings are merely highlighted text and which have a note attached.
When you’re on the Notes & Highlights tab, you can also hide all of your notes and highlights for a clutter-free reading experience. Turn off the Show Notes & Highlights button at the bottom of the screen. You can still see your notes and highlights on the Notes & Highlights tab; they just don’t show up in the text itself.
You handle highlights in the same way you handle notes. Create them by using the Text Selection toolbar, and view the list by going to the Notes & Highlights tab of the table of contents. Tap any highlight to see a menu of options similar to the one you get when you tap a note, although it’s more limited. You can add a note to the highlight, remove the highlight, or change its color. If you add a note to the highlight, it then acts like any other note.
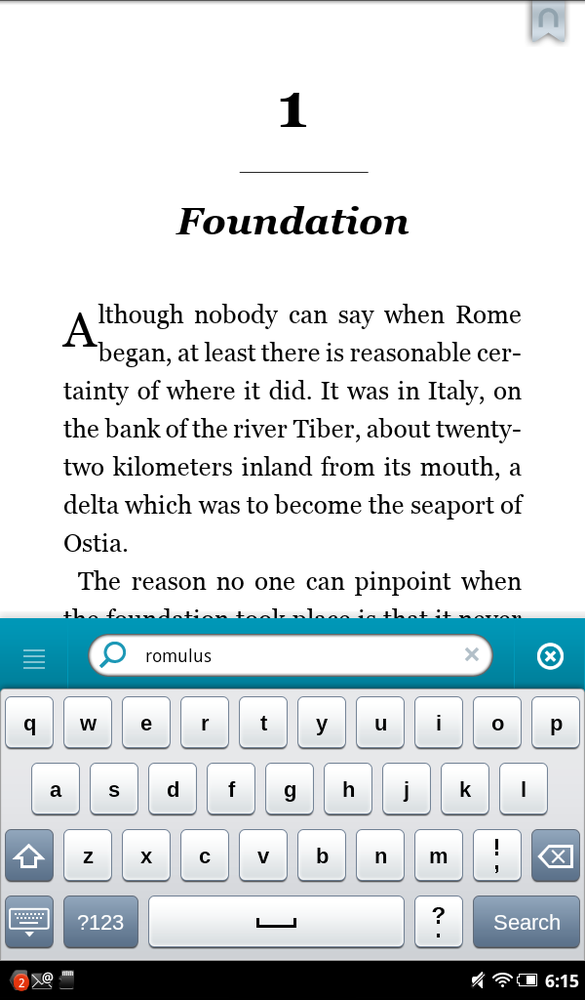
One of the most useful things you can do on your NOOK Tablet is search for a word or phrase in it. Try that with a printed book! You have two convenient ways to do it—the Reading Tools menu or the Text Selection toolbar.
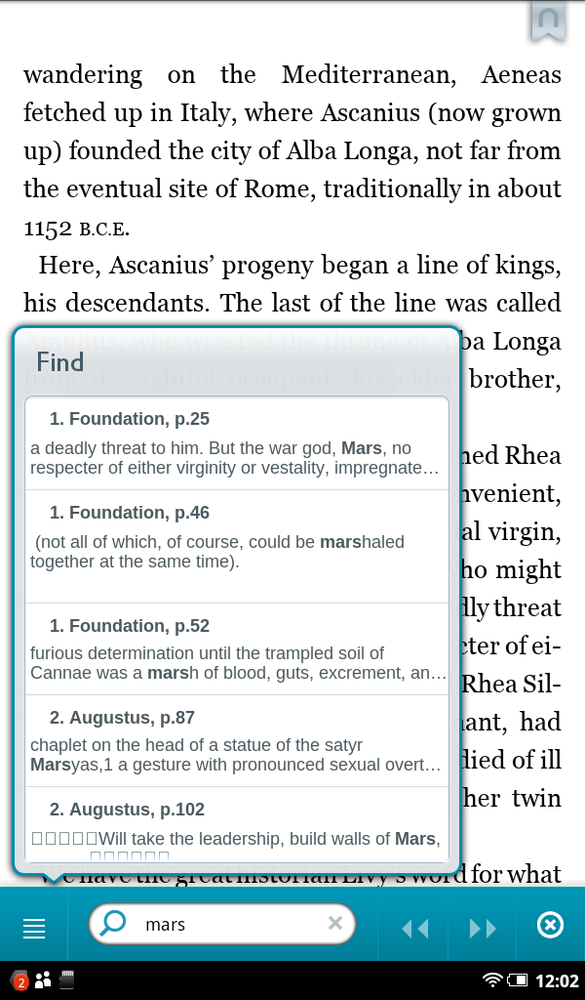
To search using the Reading Tools menu, bring up the menu by tapping anywhere in the center of the screen; then tap Find. A search box and the keyboard appear. Type your search word or term, and then tap the Search button.
Tip
When the search box appears, you see two X’s at its right—one inside the box, and one to the far right outside the box. Tap the X inside the box to delete the search term already in the box. Tap the X outside the box to make the search box and keyboard disappear.
After a little while, a screen pops up showing you the results. You’ll see the chapter and page number, the text surrounding your search term, and the search term itself. Scroll through the results and tap any of them; you jump to that spot in the book with the search term highlighted.
Underneath the results screen, you see a Search toolbar.
You can type a new search in its search box, or tap the double forward
arrow to jump to the next search result, or tap the double back arrow
to jump to the previous search result. Tap the small Table of Contents
icon ![]() to the left of the search box to make the
search results screen disappear or to make it appear again if you’ve
made it go away.
to the left of the search box to make the
search results screen disappear or to make it appear again if you’ve
made it go away.
When you select text and choose Find from the Text Selection toolbar, that does the exact same thing as choosing Find from the Reading Tools menu. The NOOK searches the book for the term you highlighted, and it shows the results in the same way.
Most of the time, you’ll read books with the NOOK Tablet held vertically—the standard reading mode. But there may come a time when you’d prefer to read in landscape mode—with the NOOK held horizontally. For example, you may come across a picture or photo that’s best viewed horizontally, or a table that looks best that way. Or you may just be in the mood for some widescreen reading—you renegade! No matter the reason, all you have to do is turn your NOOK so the longest side is at the bottom, and your NOOK automatically orients the book that way. Meanwhile, a small lock icon appears in the right corner of the screen and stays there for a few seconds. Tap it, and you lock the screen to the new orientation for any books you read (the icon changes to a locked lock). So even if you turn your NOOK back vertically, it still displays books in landscape mode. To let the NOOK change the book’s orientation as you change the orientation of the NOOK, turn the NOOK to another orientation, and when the locked icon appears, tap it so the lock opens.
Note
Turning the NOOK horizontally doesn’t always put it into landscape mode. For example, you’ll never see the Home screen in landscape mode. If you put the NOOK into landscape mode while reading a book, when you go back to the Home screen, sure enough, it’s vertically oriented.

When you’re viewing graphics or photos, the NOOK gives you an awesome power—the power to zoom. Tap the picture twice to zoom in. Tap the Close button at upper right to return to the normal view.

If you want to make sure your NOOK never changes orientation, tap the gear icon on the Notification bar so the Quick Settings screen appears. Then turn off the “Auto-rotate screen” checkbox. That way, the NOOK always stays in landscape mode. To let it change its orientation, check the box.
Reading a book on the NOOK Tablet is more than a text-based experience; you can enjoy videos embedded in books, too. When you come across a video, tap its triangle to play it. Control the video using the usual controls at bottom for stopping and resuming, and dragging the bar to go forward or backward.
If you’d like to see the video taking up the full screen, tap the icon that has four outward-pointing arrows. You’ll see video controls for a few seconds, but then they vanish. To make them reappear, tap the screen. To get back to the page you were just reading, tap the Back button at upper left.
Some books include links in them, for example, from text to footnotes or endnotes. Links aren’t underlined as they often are on the Web. Instead, they’re in blue. Tap to follow the link. Generally, when you tap a link and go to its destination, there’s also a link you can tap to get you back to where you were before you followed the link.
When you buy books for your NOOK Tablet, they’re in a format called EPUB. NOOK books you borrow and lend are in that format as well. But your NOOK is a do-everything device when it comes to eReading, and it can handle more than EPUB books—it can read PDF files as well.
You typically get PDF files by copying them to your NOOK from your computer, as described in Transferring Files to Your NOOK Tablet.
Note
When you tap a PDF in your Library to read it, you’ll be asked whether you want to open it in Quickoffice Lite (Tip) or the Reader. The Reader has more reading features than Quickoffice Lite, so it’s your best bet. If you want PDFs to always open in the Reader (or Quickoffice Lite), turn on the checkbox next to “Use by default for this option” before making your choice.
Reading a PDF is much like reading a book, with some important differences:
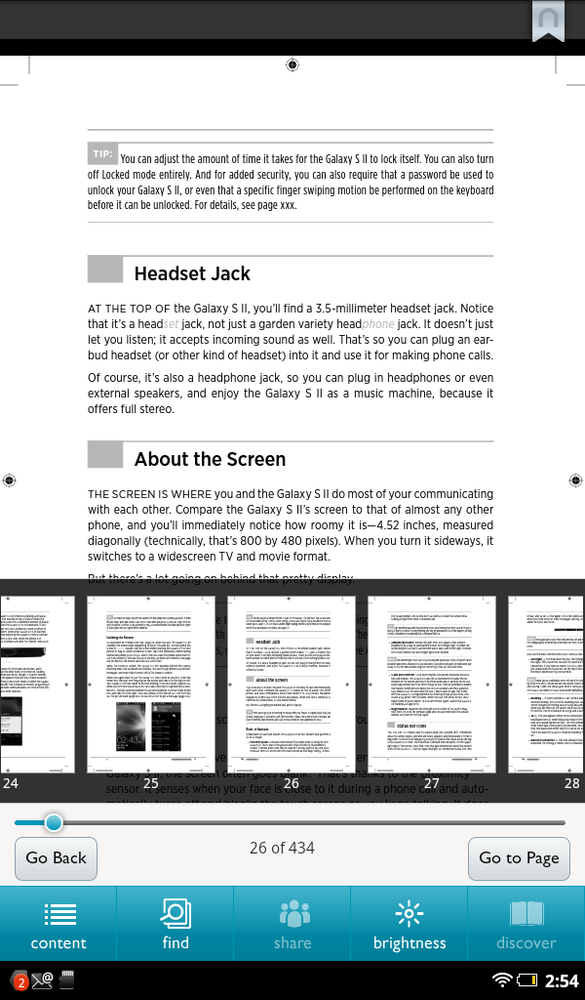
At the top of the Reading Tools menu there’s a thumbnail viewer that shows thumbnails of every page in the PDF. Swipe through the thumbnails, and when you find a page you want to read, tap it. Tapping it also closes the Reading Tools menu.
Zoom in on a page by double-tapping it; zoom out by double-tapping it again.
Not all the tools on the Reading Tools menu are available for PDFs. You can’t share quotes or reviews of the PDF, use the Discover feature to find related books, or change the display of the pages.
Note
To return to reading a PDF, tap the More button from the Home screen, but remember that you’ll find it listed in the Files section, not in the Books section (The Keep Reading and More Menus).
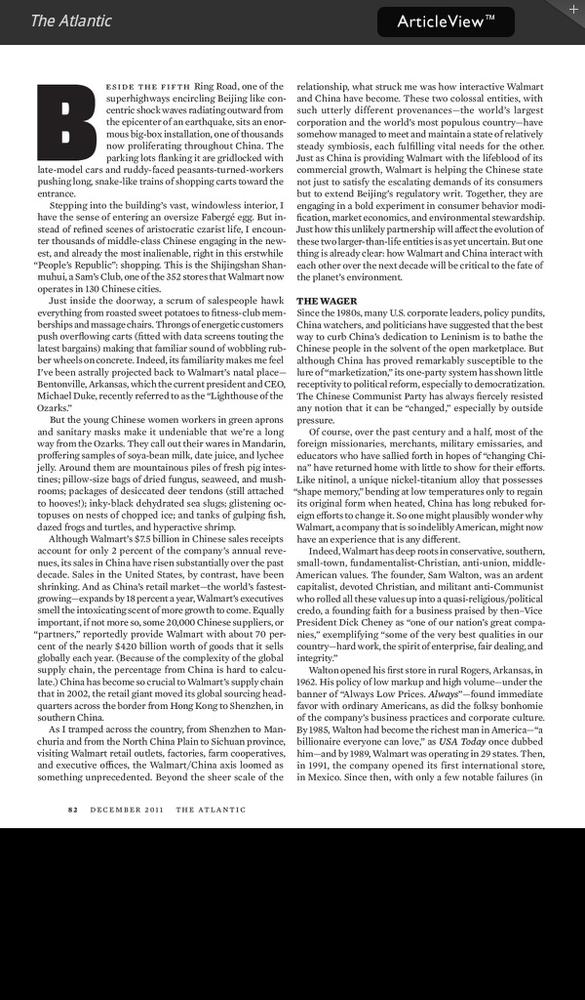
The NOOK Tablet is great for reading magazines as well as newspapers, with plenty of features designed specifically for magazines. Some tools are similar—like the way you turn the pages—but others are entirely new, like ArticleView, where you see only the text of an article, without illustrations.
Note
Magazines come in a variety of formats, and so the features in each magazine may vary somewhat. This section covers the format used by most popular magazines.

You can read a magazine in two different views:
Page View. In this view, the magazine looks exactly like the printed version of the magazine, including the page layout, photos and graphics, and advertising.
ArticleView. In this view, you see only the text of articles, with no layout, photographs, graphics, or advertising to get in your way.
Just as with a book, you get around a magazine in Page View by swiping your fingers or tapping on the right or left edges of the screen to go forward one page or back one page.
You can use regular (portrait) or landscape mode when reading a magazine. Depending on the magazine’s layout, one or the other may look better. Photo spreads or the beginning of highly designed articles often look better in landscape than portrait mode, as do certain photographs.

In Page View, text may be small and difficult to read. If that’s the case, spread your thumb and forefinger outward to zoom in; pinch them in to zoom back out. You can also double-tap to zoom in and then zoom out, but pinching gives you finer control over the level of zoom. (For a refresher on gestures, see Using Gestures to Control the NOOK Tablet.)

Magazines also have their own specialized Reading Tools menu. Tap the center of the screen to make it appear. It doesn’t have the full complement of tools you’ll find in the Reading Tools menu for books—no sharing, no changing the display. But it does the job, and it also has a feature that you won’t find in books: A row of small thumbnails of every page in the magazine. Swipe through the pages, tap the one you want to read, and you’re there.
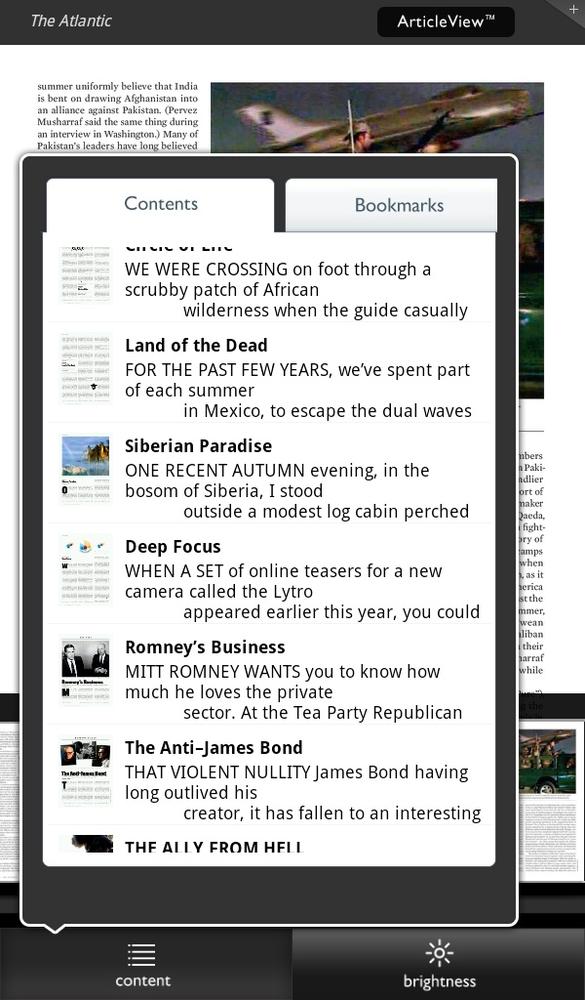
There’s also a Table of Contents icon. Tap it to see the magazine’s table of contents, which lists every article, along with its title and part of the article’s first sentence. To jump to the article, tap its listing.
In the table of contents, tap the Bookmarks icon to see any bookmarks you’ve placed in the magazine. Adding a bookmark is simple: There’s a very small plus sign at the top right of each magazine page. Tap that plus sign, and it turns into a dog ear—you’ve just bookmarked the page. To remove the bookmark, tap the dog ear and it turns back into a plus sign.
You can also change the brightness of the screen by tapping the Brightness button.
When you’re getting down to serious article reading, you may want to use ArticleView. Although you won’t see the layout or pictures, the text is larger and appears in a long, scrollable window—no distractions. You can also adjust the text size and font in ArticleView, something you can’t do in Page View.
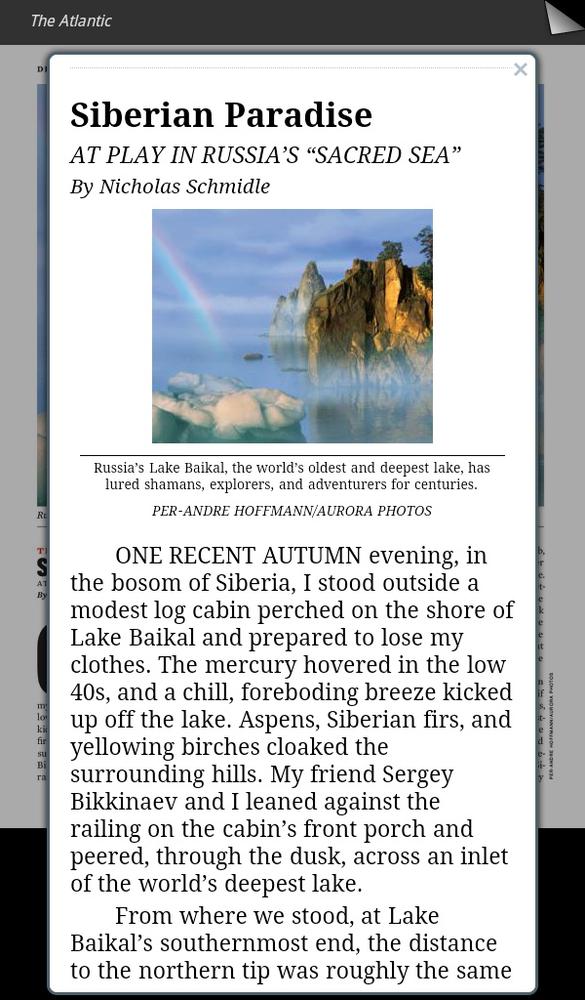
To use ArticleView, when you’re in Page View, tap the ArticleView button at the top of the screen to open the scrollable text window. The entire article is in that window, so you don’t have to turn pages. Sometimes there’ll be a photo or graphic at the very beginning of the article, but apart from that, there are no pictures.
To read the article, just scroll. To close ArticleView and return to Page View, tap the X at the top of the ArticleView screen or tap outside the ArticleView window.
ArticleView has its own Reading Tools menu. Tap the center of the screen, and you’ll find not just the Content and Brightness buttons, but also a Text button that lets you change the size of text, font, line spacing, margins, and so on (black on white, white on black, black on gray, and so on), in the same way you can do it in books.
Navigating isn’t as easy in ArticleView as in Page View, because each article is its own self-enclosed world and there’s no thumbnail display. So to get around in ArticleView, tap the middle of the page to open the Reading Tools menu, tap the Content icon to get to the table of contents, and then tap the next article you want to read. When you get there, though, you’ll be in Page View, so if you want to read in ArticleView, tap the ArticleView icon again.

Reading newspapers is much like reading books, and even includes the same Reading Tools menu. You open a newspaper in the same way you do a book or a magazine—by tapping its cover. The NOOK newspaper won’t look like its print counterpart. Instead of laid-out newspaper pages, you’ll see scrollable lists of stories.
Note
The NOOK version of a newspaper may not include everything that’s in the paper-based version. It may not have all the photos, comics, or puzzles, for example.

Tap any story to read it. Navigate through the story just as you do in a book, by swiping your finger or tapping the page edges. You get one additional navigational gesture: If you swipe your finger from the bottom of the screen toward the top, you go to the next page, and if you swipe it from the top of the screen down, you move to the previous page. Tap anywhere in the center of the page to bring up the Reading Tools menu, which works just as it does in books (Tip). To bookmark a page, tap in the upper-right corner. The Text Selection toolbar works the same way as well (Note), but it may be a bit tricky to manage when you’re reading the newspaper on the subway.
The NOOK Tablet also lets you read comic books. You navigate the same way as with books, and you can use the Reading Tools (Tip) the same way. The Text Selection toolbar doesn’t work, however.
Get NOOK Tablet: The Missing Manual now with the O’Reilly learning platform.
O’Reilly members experience books, live events, courses curated by job role, and more from O’Reilly and nearly 200 top publishers.

