Chapter 3. Understanding the Ionic Command-Line Interface
One of the key tools that we will be using while developing our Ionic applications is the Ionic command-line interface, or CLI. We touched briefly upon this tool during our initial setup, but this chapter will explore the various options this utility gives us.
First, if you have not installed the Ionic CLI, you can use npm to do so. If you are on a Macintosh, launch the Terminal application. For Windows users, launch Git Bash (or another command prompt). Then enter the following command:
$ npm install -g ionic
This will install the latest version of the Ionic CLI. The Ionic CLI is fully backward compatible with version 1 projects, which is helpful if you have already done some Ionic development.
Note
macOS users might need to prepend the npm command with sudo for the installations to work.
Once the installation of the Ionic CLI is complete, we can test its installation by building our first test application:
$ ionic start myApp [template name] --v2
This command will create a new Ionic application in a new directory named myApp using the template that we pass to the command. Let’s explore the various template options that we can use.
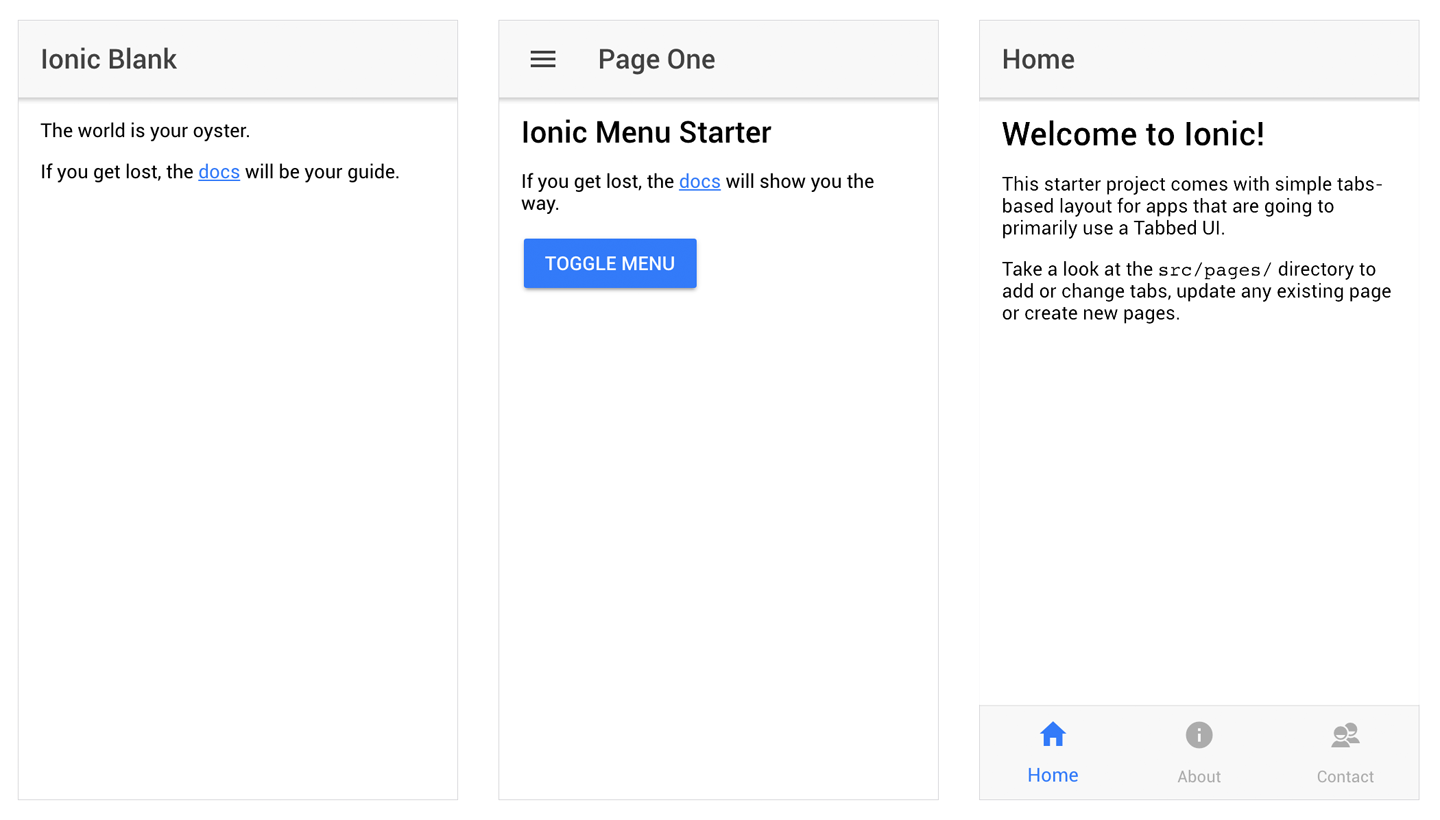
Ionic currently has three named starter templates: blank, sidemenu, and tabs. If no template is passed as a parameter, then the tabs template will be used (Figure 3-1).

Figure 3-1. The Ionic ...
Get Mobile App Development with Ionic 2, 1st Edition now with the O’Reilly learning platform.
O’Reilly members experience books, live events, courses curated by job role, and more from O’Reilly and nearly 200 top publishers.

