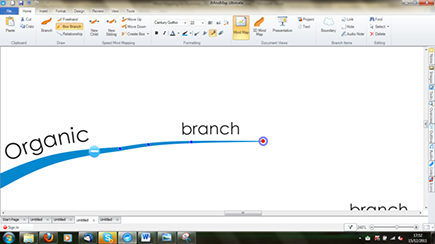
Figure 11-2: Altering and adding branches.
Branches
With iMindMap you can generate organic Mind Maps, meaning they look like they’ve been drawn with a pen and paper, or a more linear, straight branching style. You can also decide how long branches should be and in which directions they should point. Branches are mainly added with the mouse. For rapid entry of large amounts of information in iMindMap there is the Speed Mind Mapping mode which I shall be presenting a little later in this chapter.
Adding branches
To add a branch:
1. Hover the mouse across your central idea or the end of an existing branch so that a red dot appears.
2. From this red dot, you can now add a branch by clicking, dragging out and releasing.
This procedure applies to both the central idea and to any branch. As soon as you move the mouse cursor to the end of a branch, a red dot and a blue circle appear (see Figure 11-2).
You can add new branches by moving the red dot. By moving the blue cross you can alter the position, direction and length of an existing branch.
Altering the shape of branches
In addition to the length and direction of individual branches you can also manually change their shape. To do this, highlight a branch by clicking on it with the mouse. Small blue dots called ‘control points’ then appear along the branch. By moving these dots around you can alter the shape of branches (see Figure ...
Get Mind Mapping For Dummies now with the O’Reilly learning platform.
O’Reilly members experience books, live events, courses curated by job role, and more from O’Reilly and nearly 200 top publishers.

