Verifying the Hard Drive
The S.M.A.R.T. diagnostics (discussed in the previous section) look for catastrophic errors — those that might cause the entire hard drive to go belly up. However, hard drives can also fall prey to smaller maladies that, although they won’t cause it to push up daisies, could cause it to behave erratically or even damage files.
For example, MacBook Air maintains what it calls a Catalog file that stores the overall structure of the hard drive, including all the folders and files. If that file gets corrupted, it might mean that you, or an application, can no longer access a folder or file.
You should check MacBook Air’s hard drive for these types of errors every month or so. Here’s how:
1. Click Finder in the Dock.
2. Choose Applications →Utilities →Disk Utility. The Disk Utility window appears.
3. Click Macintosh HD in the list of drives.
4. Click Verify Disk. Disk Utility warns you that your Mac may slow down or appear to hang during the verification.
5. Click Verify Disk. Disk Utility begins the verification check, which takes several minutes.
6. When the check is complete, read the results, as shown in Figure 10.6.
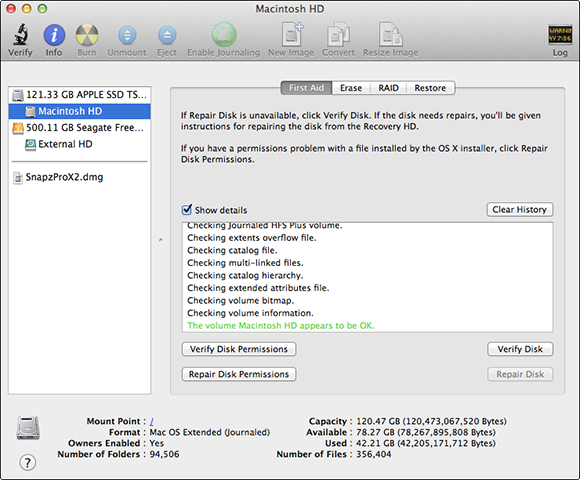
10.6 Check the results of the Verify Disk operation.
7. There are two possible results.
• No problems. Say “Whew!” and close Disk Utility.
• Problems. You need to repair the hard drive, as described in Chapter 11.
Get MacBook Air Portable Genius, 4th Edition now with the O’Reilly learning platform.
O’Reilly members experience books, live events, courses curated by job role, and more from O’Reilly and nearly 200 top publishers.

