Supporting iCal 4 Clients
Users with Mac OS X 10.6 get the iCal 4 client, which is Apple's most advanced client for iCal Server 2. This section describes how to get the client running with the server.
Adding an iCal Server account to an iCal client
To connect the iCal 4 or 5 client (from Mac OS X 10.6 and 10.7) to the server, you add an account in the client. On the user's Mac, open iCal and do the following:
- Choose Preferences from the iCal menu and click the Accounts icon.
- Click the Add (+) button at the bottom left of the window.
The Add an Account dialog slides down.
- In the Account Type pop-up menu, choose CalDAV.
- Type a username (the short name), password, and the server address (myserver.domain.edu, for example).
- Click Create.
You can now change some of the default settings in the main Account Information tab, as shown in Figure 12-6:
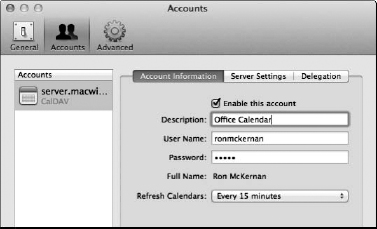
Figure 12-6: The Account Preferences window of the iCal 5 client.
- The Description field lists the user's domain. You can change this to something more descriptive, such as Office Calendar.
- The Refresh Calendars pop-up menu sets how the client Mac updates calendar information (including invitations) with the server. The default is Push, which means that the server contacts the client. You can change this to a time interval or manually.
Creating another server-based calendar using an iCal client
When you create an account, which I describe ...
Get Mac OS X Lion Server For Dummies® now with the O’Reilly learning platform.
O’Reilly members experience books, live events, courses curated by job role, and more from O’Reilly and nearly 200 top publishers.

