The
first order of business when exploring a new flavor of Unix is to
find the command prompt. In Mac OS X, you
won’t find the command prompt in the Dock or on a
Finder menu. The Terminal application is instead located in the
/Applications/Utilities
directory. Don’t open it just yet, though. First,
drag the Terminal’s application icon to the
Dock so you’ll have quick
access to it when you need to use the Terminal. To launch the
Terminal, click its icon in the Dock once, or double-click on its
icon in the Finder view.
Tip
The full path to the Terminal is
/Applications/Utilities/Terminal.app, although
the Finder hides the
.app extension.
Terminal.app is not a binary file. Instead,
it’s a Mac OS X
package
,
which contains a collection of files, including the binary and
support files. You can Control-click (or right-click) on the Terminal
in the Finder and select Show Package Contents to see
what’s inside. You can alternatively use the
standard UNIX commands ls and
cd to explore the directory
/Applications/Utilities/Terminal.app/.
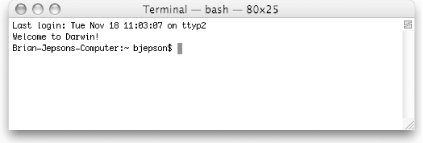
After the Terminal starts, you’ll be greeted by the
banner message from /etc/motd and a
bash prompt, as shown in Figure 1-1.
One difference
xterm users will notice is that there is no
obvious way to launch a new Terminal window from the command line.
For example, the Mac OS X Terminal has no equivalent to the following
commands:
xterm &
xterm -e -fg green -bg black -e pine -name pine -title pine &
Instead, you can create a new Terminal window by typing
-N or selecting File → New Shell from the menu bar.
Tip
To cycle between open Terminals, you can use the same keystroke that most other Mac OS X applications use,
-`. You can also switch between open Terminals by pressing
-Right Arrow or
-Left Arrow, using the Window menu, or by Control-clicking on the Terminal’s Dock icon to reveal a context menu of open Terminals. You can also jump to a particular Terminal window with
-number (see the
Window menu for a list of numbers).
You can customize startup options for new Terminal windows by
creating .term and .command
files.
You can
launch a customized Terminal window from
the command line by
saving some prototypical Terminal settings to a
.term file, then using the
open command to launch the
.term file (see Section 1.7, later in this chapter). You should save the
.term file someplace where you can find it
later: if you save it in ~/Library/Application
Support/Terminal, the .term
file shows up in Terminal’s File
→ Library menu.
To create a .term file, open a new Terminal
window, and then open the Inspector (File
→ Show Info, or
-I) and set the desired attributes, such as window size, fonts, and colors. When the Terminal’s attributes have been set, save the Terminal session (File → Save, or
-S) to a .term file,
say named proto.term. If you save this file to
~/Library/Application Support/Terminal,
you’ll be able to launch a new Terminal window with
the proto. term file’s special
attributes from the File →
Library menu.
Alternatively, you can launch such a Terminal window from the command
line, by issuing the following command (depending on where you saved
proto.term):
open ~/Library/Application\ Support/Terminal/proto.term
open ~/Documents/proto.term
The .term file is an
XML property list (plist)
that you can
edit with a text editor like
vim (it can be invoked with
vi, which is a symbolic
link to vim) or with the
Property
List
Editor application
(/Developer/Applications/Utilities).[1]
By default, opening the
.term file creates a new Terminal window. You
can configure the window so it executes a command by adding an
execution string
to the .term file. When you launch the Terminal,
this string is echoed to standard output before it is executed.
Example 1-1 shows an execution string that connects to a remote host
via ssh and exits when you log out.
Adding the
.command extension to
any executable shell script will turn it into
a
double-clickable executable.
The effect is similar to that of a .term file,
except that you can’t control the
Terminal’s characteristics in the same way. (A
.command file will use the default Terminal
settings.) However, you can stuff the shell script full of
osascript commands
to set the Terminal characteristics after it launches. The
osascript utility lets you run
AppleScript from the command
line.[2]
Example 1-2 is
a shell script that sets the size and title of the Terminal, and then
launches the pico
editor.
Example 1-2. Launching the pico editor
#!/bin/sh
# Script RunPico.command
osascript  <<EOF
tell app "Terminal"
  set number of rows of first window to 34
  set number of columns of first window to 96
  set custom title of first window to "PICO Editor"
end tell
EOF
pico $@
If you don’t want to give the shell a
.command extension, you could also use the
Finder’s
Get Info option (File → Get
Info, or
-I) to choose which application will open the executable. To do this, perform the following steps:
Highlight the script’s icon in the Finder.
Choose Get Info from the File menu (
-I).
In the Get Info dialog, choose Open with:.
Click the drop-down menu and choose Other.
In the Choose Other Application dialog, select All Applications rather than Recommended Applications.
Find and choose the Terminal (
/Applications/Utilities) application.Click Add.
Close the Get Info window (
-W).
You can assign a custom-made icon to your shell scripts, and place them in the right section of the Dock. You can also drag the executable’s icon to the lower section of the Places sidebar in the left column of the Finder, although this section of the Finder is intended primarily for quick access to frequently visited folders. To change an icon, use the following procedure:
Copy the desired icon to the clipboard.
Select your script in the Finder and open the Get Info window (
-I). The file’s icon appears in the upper-left corner.
Click the current icon, and use the Paste option (Edit → Paste, or
-V) to paste the new icon over it.
Close the Get Info window (
-W) to save the icon to the application.
To add the shell script application to the Dock, locate the application in the Finder and drag its icon to the Dock. Now you can click on the script’s Dock icon to invoke the script.
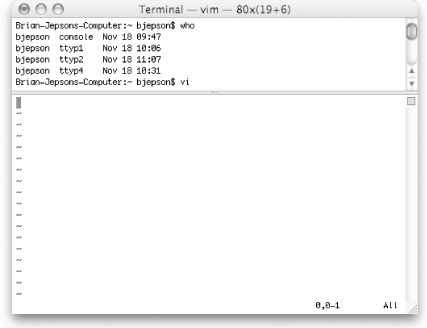
You can split a Terminal window into upper and lower sections by clicking on the small broken rectangle located just above the Terminal’s scroll bar. The upper window contains the buffer (i.e., what you would see if you scrolled up in a non-split window), while the lower window contains your current Terminal section. This feature is useful for example, if you need to edit a file and copy and paste output from earlier in the Terminal session. Figure 1-2 shows a split Terminal window.
Users familiar with the X Window System know that right-clicking an xterm window opens a terminal-related contextual menu. Mac OS X’s Terminal also has a contextual menu that can be accessed by Control-clicking (or right-clicking if you have a two- or three-button mouse). The Terminal contextual menu includes the choices: Copy, Paste, Paste Selection, Select All, Clear Scrollback, Send Break (equivalent to Control-C), Send Hard Reset, Send Reset, and Window Setting. Each of these items has keyboard shortcuts.
Get Mac OS X Panther for Unix Geeks, Second Edition now with the O’Reilly learning platform.
O’Reilly members experience books, live events, courses curated by job role, and more from O’Reilly and nearly 200 top publishers.

