Mounting a WebDAV Share
WebDAV, or Web-based Distributed Authoring and Versioning, allows you to share directories and files via your web server for remote editing of documents and other files. (See [Hack #95] for more detail on WebDAV and WebDAV-enabled servers.)
Mac OS X has support for WebDAV built right into the operating system and integrated seamlessly into the desktop environment. Simply point to a server, much as you would an AppleShare or SMB (Windows) share, log in, and bingo!, you have a new virtual drive right on your desktop. WebDAV is actually the technology behind much of iCal calendar publishing [Hack #30] and iPhoto sharing.
Connecting and Mounting
To connect to a WebDAV share, you’ll need to start from the Finder. Click the Finder icon in your Dock or on any open space on your Desktop. Select Go → Connect to Server . . . or type
-K (that’s K as in Konnect) to bring up the Connect to Server dialog box shown in Figure 6-28.
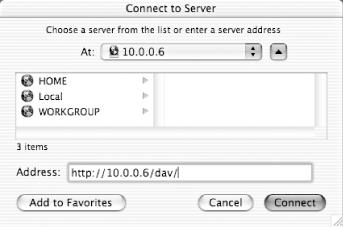
Figure 6-28. Connecting to a WebDAV server
Enter the URL of the WebDAV share into the Address field. In Figure 6-28, I’ve used a share created with [Hack #95], 10.0.0.6 on my private local network.
Tip
You’ll notice that the share doesn’t show up in any of my local AppleShare and SMB (Windows) domain lists; unfortunately, WebDAV doesn’t offer the ...
Get Mac OS X Hacks now with the O’Reilly learning platform.
O’Reilly members experience books, live events, courses curated by job role, and more from O’Reilly and nearly 200 top publishers.

