This chapter covers questions regarding starting development with Lift: running a first Lift application and setting up a coding environment. You’ll find answers regarding production deployment in Chapter 10.
The only prerequisite for installing and running Lift is to have Java 1.5 or later installed. Instructions for installing Java can be found at http://java.com/.
You can find out if you have Java from the shell or command prompt by asking for the version you have installed:
$ java -version
java version "1.7.0_13"
Java(TM) SE Runtime Environment (build 1.7.0_13-b20)
Java HotSpot(TM) 64-Bit Server VM (build 23.7-b01, mixed mode)
Once you have Java, the following instructions will download, build, and start a basic Lift application.
- Visit http://liftweb.net/download and download the most recent Lift 2.5 ZIP file.
- Unzip the file.
- Start Terminal or your favourite shell tool.
- Navigate into the unzipped folder and into the scala_29 subfolder and then into the lift_basic folder.
-
Run
./sbt. - Required libraries will be downloaded automatically.
-
At the SBT prompt (>), type
container:start. - Open your browser and go to http://127.0.0.1:8080/.
-
When you’re done, type
exitat the SBT prompt to stop your application from running.
- Visit http://liftweb.net/download and locate the link to the most recent ZIP version of Lift 2.5 and save this to disk.
- Extract the contents of the ZIP file.
- Navigate in Explorer to the extracted folder, and once inside, navigate into scala_29 and then lift_basic.
- Double-click sbt.bat to run the build tool; a Terminal window should open.
- Required libraries will be downloaded automatically.
-
At the SBT prompt (>), type
container:start. - You may find Windows Firewall blocking Java from running. If so, opt to “allow access.”
- Start your browser and go to http://127.0.0.1:8080/.
-
When you’re done, type
exitat the SBT prompt to stop your application from running.
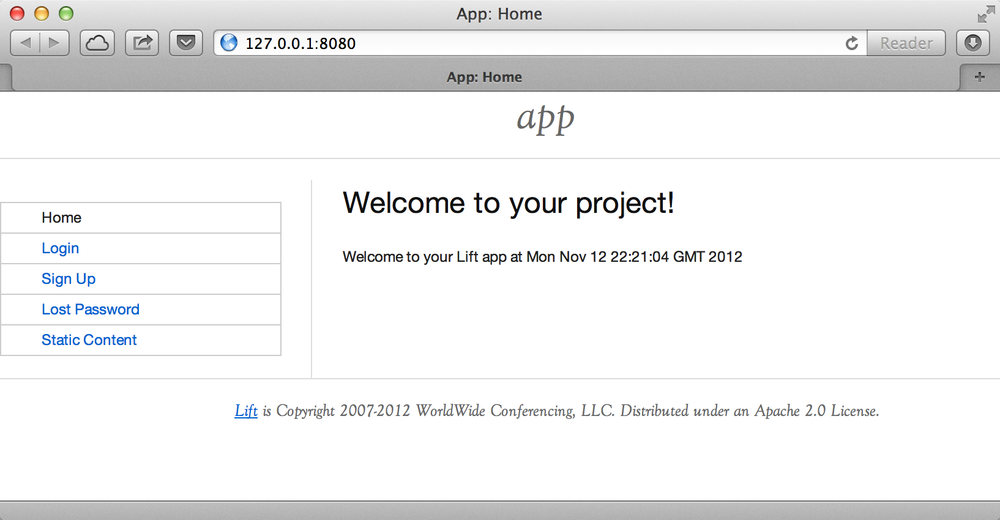
The result of these commands should be a basic Lift application running on your computer, as shown in Figure 1-1.
Lift isn’t installed in the usual sense of “installing software.” Instead, you use standard build tools, such as SBT or Maven, to assemble your application with the Lift framework. In this recipe, we downloaded a ZIP file containing four fairly minimal Lift applications, and then started one of them via the build tool.
Typing sbt starts a Simple Build Tool used by Scala projects (it’s not specific to Lift). SBT will check the project definition and download any libraries required, which will include the Lift framework.
This download happens once, and the downloaded files are stored on disk in .ivy2 under your home folder.
Your application build is configured by build.sbt. Looking inside, you’ll see:
- Basic information about your application, including a name and version
- Resolvers, which inform SBT where to fetch dependencies from
- Settings for plugins and the Scala compiler
- A list of dependencies required to run your application, which will include the Lift framework
The SBT command container:start starts the web server on the default port of 8080 and
passes requests to your Lift application. The word container refers to the
software you deploy your application into. There are a variety of containers (Jetty and
Tomcat are probably the best known) all of which conform to a standard for deployment.
The upshot is you can build your application and deploy to whichever one you prefer.
The container:start command uses Jetty.
The source code of the application resides in src/main/webapp and src/main/scala. If you take a look at index.html in the webapp folder, you’ll see mention of lift:helloWorld. That’s a reference to the class defined in scala/code/snippet/HelloWorld.scala. This is a snippet invocation and an example of Lift’s view first approach to web applications. That is, there’s no routing set up for the index page to collect the data and forward it to the view. Instead, the view defines areas of the content that are replaced with functions, such as those functions defined in HelloWorld.scala.
Lift knows to look in the code package for snippets, because that package is declared as a location for snippets in scala/bootstrap/liftweb/Boot.scala. The Boot class is run when starting your application, and it’s where you can configure the behaviour of Lift.
The Simple Build Tool documentation is at http://www.scala-sbt.org.
Tutorials for Lift can be found in Simply Lift, Instant Lift Web Applications How-to (PACKT Publishing), and in Lift in Action (Manning Publications Co.).
You want want to create a Lift web project from scratch without using the ZIP files provided on the official Lift website.
You will need to configure SBT and the Lift project yourself. Luckily, only five small files are needed.
First, create an SBT plugin file at project/plugins.sbt (all filenames are given relative to the project root directory):
libraryDependencies<+=sbtVersion(v=>vmatch{case"0.11.0"=>"com.github.siasia"%%"xsbt-web-plugin"%"0.11.0-0.2.8"case"0.11.1"=>"com.github.siasia"%%"xsbt-web-plugin"%"0.11.1-0.2.10"case"0.11.2"=>"com.github.siasia"%%"xsbt-web-plugin"%"0.11.2-0.2.11"case"0.11.3"=>"com.github.siasia"%%"xsbt-web-plugin"%"0.11.3-0.2.11.1"casexifxstartsWith"0.12"=>"com.github.siasia"%%"xsbt-web-plugin"%"0.12.0-0.2.11.1"})
This file tells SBT that you will be using the xsbt-web-plugin and chooses the correct version based upon your version of SBT.
Next, create an SBT build file, build.sbt:
organization:="org.yourorganization"name:="liftfromscratch"version:="0.1-SNAPSHOT"scalaVersion:="2.10.0"seq(com.github.siasia.WebPlugin.webSettings:_*)libraryDependencies++={valliftVersion="2.5"Seq("net.liftweb"%%"lift-webkit"%liftVersion%"compile","org.eclipse.jetty"%"jetty-webapp"%"8.1.7.v20120910"%"container,test","org.eclipse.jetty.orbit"%"javax.servlet"%"3.0.0.v201112011016"%"container,compile"artifactsArtifact("javax.servlet","jar","jar"))}
Feel free to change the various versions, though be aware that certain versions of Lift are only built for certain versions of Scala.
Now that you have the basics of an SBT project, you can launch the sbt console. It should load all the necessary dependencies, including the proper Scala version, and bring you to a prompt.
Next, create the following file at src/main/webapp/WEB-INF/web.xml:
<!DOCTYPE web-app SYSTEM "http://java.sun.com/dtd/web-app_2_3.dtd"><web-app><filter><filter-name>LiftFilter</filter-name><display-name>Lift Filter</display-name><description>The Filter that intercepts Lift calls</description><filter-class>net.liftweb.http.LiftFilter</filter-class></filter><filter-mapping><filter-name>LiftFilter</filter-name><url-pattern>/*</url-pattern></filter-mapping></web-app>
The web.xml file tells web containers, such as Jetty as configured by xsbt-web-plugin, to pass all requests on to Lift.
Next, create a sample index.html file at src/main/webapp/index.html for our Lift app to load. For example:
<!DOCTYPE html><html><head><title>Lift From Scratch</title></head><body><h1>Welcome, you now have a working Lift installation</h1></body></html>
Finally, set up the basic Lift boot settings by creating a Boot.scala file at src/main/scala/bootstrap/Boot.scala. The following contents will be sufficient:
packagebootstrap.liftwebimportnet.liftweb.http.{Html5Properties,LiftRules,Req}importnet.liftweb.sitemap.{Menu,SiteMap}/*** A class that's instantiated early and run. It allows the application* to modify lift's environment*/classBoot{defboot{// where to search snippetLiftRules.addToPackages("org.yourorganization.liftfromscratch")// Build SiteMapdefsitemap():SiteMap=SiteMap(Menu.i("Home")/"index")// Use HTML5 for renderingLiftRules.htmlProperties.default.set((r:Req)=>newHtml5Properties(r.userAgent))}}
Congratulations, you now have a working Lift project!
You can verify that you have a working Lift project by launching the Jetty web container from the SBT console with the container:start command. First, the Boot.scala file should be compiled and then you should be notified that Jetty has launched and is listening at http://localhost:8080. You should be able to go to the address in your web browser and see the rendered index.html file you created earlier.
As shown previously, creating a Lift project from scratch is a relatively simple process. However, it can be a tricky one for newcomers, especially if you are not used to the Java Virtual Machine (JVM) ecosystem and its conventions for web containers. If you run into problems, make sure the files are in the correct locations and that their contents were not mistakenly modified. If all else fails, refer to the sample project next or ask for help on the Lift mailing list.
Lift projects using SBT or similar build tools follow a standard project layout, where Scala source code is in src/main/scala and web resources are in src/main/webapp. Your Scala files must be placed either directly at src/main/scala or in nested directories matching the organization and name you defined in build.sbt, in our case giving us src/main/scala/org/yourorganization/liftfromscratch/. Test files match the directory structure but are placed in src/test/ instead of src/main/. Likewise, the web.xml file must be placed in src/main/webapp/WEB-INF/ for it to be properly detected.
Given these conventions, you should have a directory structure looking quite, if not exactly, like this:
- project root directory
  | build.sbt
  - project/
    | plugins.sbt
  - src/
    - main/
      - scala/
        - bootstrap/
          | Boot.scala
        - org/
          - yourorganization/
            - liftfromscratch/
              | <your Scala code goes here>
      - webapp/
        | index.html
        | <any other web resources - images, HTML, JavaScript, etc - go here>
        - WEB-INF/
          | web.xml
    - test/
      - scala/
        - org/
          - yourorganization/
            - liftfromscratch/
| <your tests go here>There is a sample project created using this method.
You want to develop your Lift application using your favourite text editor, hitting reload in your browser to see changes.
Run SBT while you are editing, and ask it to detect and compile changes to Scala files. To do that, start sbt and enter the following to the SBT prompt:
~; container:start; container:reload /
When you save a source file in your editor, SBT will detect this change, compile the file, and reload the web container.
An SBT command prefixed with ~ makes that command run when files
change. The first semicolon introduces a sequence of commands, where if
the first command succeeds, the second will run. The second semicolon
means the reload command will run if the start command ran OK. The start
command will recompile any Scala source files that have changed.
When you run SBT in this way, you’ll notice the following output:
1. Waiting for source changes... (press enter to interrupt)
And indeed, if you do press Enter in the SBT window, you’ll exit this triggered execution mode and SBT will no longer be looking for file changes. However, while SBT is watching for changes, the output will indicate when this happens with something that looks a little like this:
[info] Compiling 1 Scala source to target/scala-2.9.1/classes...
[success] Total time: 1 s, completed 15-Nov-2012 18:14:46
[pool-301-thread-4] DEBUG net.liftweb.http.LiftServlet - Destroyed Lift handler.
[info] stopped o.e.j.w.WebAppContext{/,[src/main/webapp/]}
[info] NO JSP Support for /, did not find org.apache.jasper.servlet.JspServlet
[info] started o.e.j.w.WebAppContext{/,[src/main/webapp/]}
[success] Total time: 0 s, completed 15-Nov-2012 18:14:46
2. Waiting for source changes... (press enter to interrupt)
Edits to HTML files don’t trigger the SBT compile and reload commands. This is because SBT’s default behaviour is to look for Scala and Java source file changes, and also changes to files in src/main/resources/. This works out just fine, because Jetty will use your modified HTML file when you reload the browser page.
Restarting the web container each time you edit a Scala file isn’t ideal. You can reduce the need for restarts by integrating JRebel into your development environment, as described in Incorporating JRebel.
However, if you are making a serious number of edits, you may prefer to issue a container:stop command until you’re ready to run you application again with container:start. This will prevent SBT compiling and restarting your application over and over. The SBT console has a command history, and using the up and down keyboard arrows allows you to navigate to previous commands and run them by pressing the Return key. That takes some of the tedium out of these long commands.
One error you may run into is:
java.lang.OutOfMemoryError: PermGen space
The permanent generation is a Java Virtual Machine concept. It’s the area of memory used for storing classes (amongst other things). It’s a fixed size, and once it is full, this PermGen error appears. As you might imagine, continually restarting a container causes many classes to be loaded and unloaded, but the process is not perfect, effectively leaking memory. The best you can do is stop and then restart SBT. If you’re seeing this error often, check the setting for -XX:MaxPermSize inside the sbt (or sbt.bat) script, and if you can, double it.
Triggered execution has a number of settings you can adjust, as described in the SBT documentation.
See the SBT Command Line Reference for an overview of available commands.
Commands and configuration options for the SBT web plugin are described on the GitHub wiki.
There are three steps required: install JRebel once; each year, request the free Scala license; and configure SBT to use JRebel.
First, visit https://my.jrebel.com/plans and request the free Scala license.
Second, download the “Generic ZIP Archive” version of JRebel, unzip it to where you like. For this recipe, I’ve chosen to use /opt/zt/jrebel/.
When you have received your account confirmation email from JRebel, you can copy your “authentication token” from the “Active” area of ZeroTurnaround’s site. To apply the token to your local install, run the JRebel configuration script:
$ /opt/zt/jrebel/bin/jrebel-config.sh
For Windows, navigate to and launch bin\jrebel-config.cmd.
In the “Activation” setting, select “I want to use myJRebel” and then in the “License” section, paste in your activation token. Click the “Activate” button, and once you see the license status change to “You have a valid myJRebel token,” click “Finish.”
Finally, configure SBT by modifying the sbt script to enable JRebel. This means setting the -javaagent and -noverify flags for Java, and enabling the JRebel Lift plugin.
For Mac and Linux, the script that’s included with the Lift downloads would become:
java -Drebel.lift_plugin=true -noverify -javaagent:/opt/zt/jrebel/jrebel.jar \
 -Xmx1024M -Xss2M -XX:MaxPermSize=512m -XX:+CMSClassUnloadingEnabled -jar \
 `dirname $0`/sbt-launch-0.12.jar "$@"
For Windows, modify sbt.bat to be:
set SCRIPT_DIR=%~dp0
java -Drebel.lift_plugin=true -noverify -javaagent:c:/opt/zt/jrebel/jrebel.jar \
 -XX:+CMSClassUnloadingEnabled -XX:MaxPermSize=256m -Xmx1024M -Xss2M \
 -jar "%SCRIPT_DIR%\sbt-launch-0.12.jar" %*
There’s nothing else to do to use JRebel. When you start SBT, you’ll see a large banner stating something like this:
#############################################################

  JRebel 5.1.1 (201211271929)
  (c) Copyright ZeroTurnaround OU, Estonia, Tartu.

  Over the last 30 days JRebel prevented
  at least 335 redeploys/restarts saving you about 13.6 hours.
....
With JRebel installed, you can now container:start your application, modify and compile a Scala file, and reload a page in your application. You’ll see a notice that the class has been reloaded:
[2012-12-16 23:15:44] JRebel: Reloading class 'code.snippet.HelloWorld'.
That change is live, without having to restart the container.
JRebel is very likely to speed up your development. It updates code in a running Java Virtual Machine, without having to stop and restart it. The effect is that, on the whole, you can compile a class, then hit reload in your browser to see the change in your Lift application.
Even with JRebel you will need to restart your applications from time to time, but JRebel usually reduces the number of restarts. For example, Boot.scala is run when your application starts, so if you modify something in your Boot.scala, you’ll need to stop and start your application. JRebel can’t help with that.
But there are also other situations that JRebel cannot help with, such as when a superclass changes. Generally, JRebel will emit a warning about this in the console window. If that happens, stop and start your application.
The -Drebel.lift_plugin=true setting adds Lift-specific functionality to JRebel. Specifically, it allows JRebel to reload changes to LiftScreen, Wizard, and RestHelper. This means you can change fields or screens, and change REST serve code.
This recipe uses a free Scala license for a service called myJRebel. This communicates with JRebel servers via the activation code. If you have purchased a license from ZeroTurnaround, the situation is slightly different. In this case, you will have a license key that you store in a file called jrebel.lic. You can place the file in a .jrebel folder in your home directory, or alongside jrebel.jar (e.g., in the /opt/zt/jrebel/ folder, if that’s where you installed JRebel), or you can specify some other location. For the latter option, modify the sbt script and specify the location of the file by adding another Java setting:
-Drebel.license=/path/to/jrebel.lic
Details about how JRebel works can be found in the ZeroTurnaround FAQ.
The Lift support was announced in a blog post in 2012, where you’ll find more about the capabilities of the plugin.
You want to develop your Lift application using the Eclipse IDE, hitting reload in your browser to see changes.
Use the “Scala IDE for Eclipse” plugin to Eclipse, and the sbteclipse plugin for SBT. This will give Eclipse the ability to understand Scala, and SBT the ability to create project files that Eclipse can load.
The instructions for the Eclipse plugin are given at http://scala-ide.org. There are a number of options to be aware of when picking an update site to use: there are different sites for Scala 2.9 and 2.10, and for different versions of Eclipse. Start with the stable version of the plugin rather than a nightly or milestone version. This will give you an Eclipse perspective that knows about Scala.
Once the Eclipse plugin is installed and restarted, you need to create the project files to allow Eclipse to load your Lift project. Install sbteclipse by adding the following to projects/plugins.sbt in your Lift project:
addSbtPlugin("com.typesafe.sbteclipse"%"sbteclipse-plugin"%"2.1.2")
You can then create Eclipse project files (.project and .classpath) by entering the following into the SBT prompt:
eclipse
Open the project in Eclipse by navigating to “File → Import…” and selecting “General → Existing Projects into Workspace.” Browse to and choose your Lift project. You are now set up to develop your application in Eclipse.
To see live changes as you edit and save your work, run SBT in a separate terminal window. That is, start sbt from a terminal window outside of Eclipse and enter the following:
~; container:start; container:reload /
The behaviour of this command is described in Developing Using a Text Editor, but if you’re using JRebel (see Incorporating JRebel), then you just need to run container:start by itself.
You can then edit in Eclipse, save to compile, and in your web browser, hit reload to see the changes.
One of the great benefits of an IDE is the ability to navigate source, by Cmd+click (Mac) or F3 (PC).
You can ask the SBT eclipse command to download the Lift
source and Scaladoc, allowing you to click through to the Lift source from
methods and classes, which is a useful way to discover more about Lift.
To achieve this in a project, run eclipse with-source=true in SBT, but if you want
this to be the default behaviour, add the following to your build.sbt file:
EclipseKeys.withSource:=true
If you find yourself using the plugin frequently, you may wish to declare it in your global SBT configuration files so it applies to all projects. To do that, create a ~/.sbt/plugins/plugins.sbt file containing:
resolvers+=Classpaths.typesafeResolveraddSbtPlugin("com.typesafe.sbteclipse"%"sbteclipse-plugin"%"2.1.2")
Note the blank line between the resolvers and the addSbtPlugin. In .sbt files, a blank line is required between statements.
Finally, set any global configurations (such as withSource) in ~/.sbt/global.sbt.
There are other useful settings for sbteclipse. You’ll also find the latest version number for the plugin on that site.
The SBT ~/.sbt/ structure is described in the guide to using plugins and in the wiki page for global configuration.
You need the Scala plugin for IntelliJ, and an SBT plugin to generate the IDEA project files.
The IntelliJ plugin you’ll need to install only once, and these instructions are for IntelliJ IDEA 12. The details may vary between releases of the IDE, but the basic idea is to find the JetBrains Scala plugin, and download and install it.
From the “Welcome to IntelliJ IDEA” screen, select “Configure” and then “Plugins.” Select “Browse repositories…” In the search box, top right, type “Scala.” You’ll find on the left a number of matches: select “Scala.” On the right, you’ll see confirmation that this is the “Plugin for Scala language support” and the vendor is JetBrains, Inc. Select the “Download and Install” icon from the top of the window, or right-click to download and install. “Close” the dialog, and OK out of the plugins window. You’ll be prompted to restart IntelliJ IDEA.
With the IDE configured, you now need to include the SBT plugin inside your Lift project by adding the following to the file projects/plugins.sbt:
addSbtPlugin("com.github.mpeltonen"%"sbt-idea"%"1.4.0")
Start SBT, and at the SBT prompt, create the IDEA project files by typing:
gen-idea
This will generate the .idea and .iml files that IntelliJ uses. Inside IntelliJ you can open the project from the “File” menu, picking “Open…” and then navigating to your project and selecting the directory.
To see live changes as you edit and save your work, run SBT in a separate Terminal window. That is, start sbt from a Terminal window outside of IntelliJ and enter the following:
~; container:start; container:reload /
This behaviour of this command is described in Developing Using a Text Editor, but if you’re using JRebel (see Incorporating JRebel), then you just need to run container:start by itself.
Each time you compile or make the project, the container will pick up the changes, and you can see them by reloading your browser window.
By default, the gen-idea command will fetch source for dependent libraries. That means out of the box you can click through to Lift source code to explore it and learn more about the framework.
If you want to try the latest snapshot version of the plugin, you’ll need to include the snapshot repository in your plugin.sbt file:
resolvers+="Sonatype snapshots"at"http://oss.sonatype.org/content/repositories/snapshots/"
Setting up the SBT IDEA plugin globally, for all SBT projects, is the same pattern as described for Eclipse in Developing Using Eclipse.
The sbt-idea plugin doesn’t have a configuration guide yet. One way to discover the features is to browse the release notes in the notes folder of that project.
JetBrains has a blog for the Scala plugin with feature news and tips.
You’re developing using the default lift_proto.db H2 database, and you would like to use a tool to look at the tables.
Use the web interface included as part of H2. Here are the steps:
- Locate the H2 JAR file. For me, this was: ~/.ivy2/cache/com.h2database/h2/jars/h2-1.2.147.jar.
-
Start the server from a Terminal window using the JAR file:
java -cp /path/to/h2-version.jar org.h2.tools.Server. - This should launch your web browser, asking you to log in.
- Select “Generic H2 Server” in “Saved Settings.”
-
Enter
jdbc:h2:/path/to/youapp/lift_proto.db;AUTO_SERVER=TRUEfor “JDBC URL,” adjusting the path for the location of your database, and adjusting the name of the database (lift_proto.db) if different in your Boot.scala. - Press “Connect” to view and edit your database.
The default Lift projects that include a database, such as lift_basic, use the H2 relational database, as it can be included as an SBT dependency and requires no external installation or configuration. It’s a fine product, although production deployments typically use standalone databases, such as PostgreSQL or MySQL.
Even if you’re deploying to a non–H2 database, it may be useful to keep H2 around because it has an in-memory mode, which is great for unit tests. This means you can create a database in memory, and throw it away when your unit test ends.
If you don’t like the web interface, the connection settings described in this recipe should give you the information you need to configure other SQL tools.
The H2 site lists the features and configuration options for database engine.
If you’re using the console frequently, consider making it accessible from your Lift application in development node. This is described by Diego Medina in a blog post.
The example Lift project for Chapter 7 has the H2 console enabled.
You need to make two changes to your build.sbt file. First, reference the snapshot repository:
resolvers+="snapshots"at"http://oss.sonatype.org/content/repositories/snapshots"
Second, change the liftVersion in your build to be the latest version. For this example, let’s use the 2.6 snapshot version of Lift:
valliftVersion="2.6-SNAPSHOT"
Restarting SBT (or issuing a reload command) will trigger a download
of the latest build.
Production releases of Lift (e.g., 2.4, 2.5), as well as milestone releases (e.g., 2.5-M3) and release candidates (e.g., 2.5-RC1) are published into a releases repository. When SBT downloads them, they are downloaded once.
Snapshot releases are different: they are the result of an automated
build, and change often. You can force SBT to resolve the latest
versions by running the command clean and then update.
To learn the detail of snapshot versions, dig into the Maven Complete Reference.
You may find that the latest snapshot of Lift is built using the latest Scala version. Failing that, and assuming you cannot wait for a build, you may still be in luck. Providing that the Scala version is binary compatible with the latest version used by Lift, you can change your build file to force the Scala version.
For example, let’s assume your build.sbt file is set up to use Lift 2.5 with Scala 2.9.1:
scalaVersion:="2.9.1"libraryDependencies++={valliftVersion="2.5"Seq("net.liftweb"%%"lift-webkit"%liftVersion%"compile->default")}
Suppose you now want to use Scala 2.9.3 but Lift 2.5 was only
built against Scala 2.9.1. Replace %% with % for the net.liftweb
resources and explicitly include the Scala version that Lift was built
against for each Lift component:
scalaVersion:="2.9.3"libraryDependencies++={valliftVersion="2.5"Seq("net.liftweb"%"lift-webkit_2.9.1"%liftVersion%"compile->default")}
What we’ve done here is change the scalaVersion to the new version we want
to use, but explicitly specified we want the 2.9.1 Scala version for Lift.
This works because the two different Scala versions are binary compatible.
Dependencies have a particular naming convention. For example, the lift-webkit library for Lift 2.5 is called lift-webkit_2.9.1-2.5.jar. Normally, in build.sbt we simply refer to "net.liftweb" %% "lift-webkit", and SBT turns that into the name of a file that can be downloaded.
However, in this recipe, we have forced SBT to explicitly fetch the 2.9.1 version
of the Lift resources rather than allow it to compute the URL to the
Lift components. This is the difference between using %% and % in a
dependency: with %% you do not specify the Scala version, as SBT will append
the scalaVersion number automatically; with % this automatic change is not made,
so we have to manually specify more details for the name of the library.
Please note this only works for minor releases of Scala: major releases break compatibility. For example, Scala 2.9.1 is compatible with Scala 2.9.0, but not 2.10.
Binary compatibility in Scala is discussed on the Scala user mailing list.
The SBT Library Dependencies page describes how SBT manages version numbers.
Using the Latest Lift Build describes how to use a snapshot version of Lift.
Get Lift Cookbook now with the O’Reilly learning platform.
O’Reilly members experience books, live events, courses curated by job role, and more from O’Reilly and nearly 200 top publishers.

