Now we are ready for what we really want to do, and that is to load an image and to put
it into the window where we can view it and appreciate its profundity. We do this via one
simple function, cvShowImage():
void cvShowImage(
  const char*  name,
  const CvArr* image
);
The first argument here is the name of the window within which we intend to draw. The second argument is the image to be drawn.
Let's now put together a simple program that will display an image on the screen. We can read a filename from the command line, create a window, and put our image in the window in 25 lines, including comments and tidily cleaning up our memory allocations!
int main(int argc, char** argv)
{
// Create a named window with the name of the file.
cvNamedWindow( argv[1], 1 );
// Load the image from the given file name.
IplImage* img = cvLoadImage( argv[1] );
// Show the image in the named window
cvShowImage( argv[1], img );
// Idle until the user hits the "Esc" key.
while( 1 ) {
if( cvWaitKey( 100 ) == 27 ) break;
}
// Clean up and don't be piggies
cvDestroyWindow( argv[1] );
cvReleaseImage( &img );
exit(0);
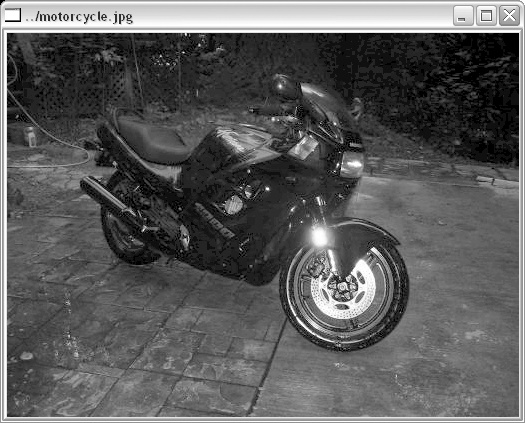
}For convenience we have used the filename as the window name. This is nice because OpenCV automatically puts the window name at the top of the window, so we can tell which file we are viewing (see Figure 4-1). Easy as cake.
Before we move on, there are a few other window-related functions you ought to know about. They are:
void cvMoveWindow( const char* name, int x, int y );
void cvDestroyAllWindows( void );
int  cvStartWindowThread( void );
cvMoveWindow() simply moves a window on the screen so
that its upper left corner is positioned at x,y.
cvDestroyAllWindows() is a useful cleanup function that closes all of the windows and de-allocates the associated
memory.
On Linux and MacOS, cvStartWindowThread() tries to start a
thread that updates the window automatically and handles resizing and so forth. A return
value of indicates that no thread could be startedâfor example, because there is no support
for this feature in the version of OpenCV that you are using. Note that, if you do not start
a separate window thread, OpenCV can react to user interface actions only when it is
explicitly given time to do so (this happens when your program invokes cvWaitKey(), as described next).
Observe that inside the while loop in our window
creation example there is a new function we have not seen before: cvWaitKey(). This function causes OpenCV to wait for a specified number of milliseconds for a user keystroke. If the key
is pressed within the allotted time, the function returns the key pressed;[42] otherwise, it returns 0. With the
construction:
while( 1 ) {
  if( cvWaitKey(100)==27 ) break;
}
we tell OpenCV to wait 100 ms for a key stroke. If there is no keystroke, then repeat ad infinitum. If there is a keystroke and it happens to have ASCII value 27 (the Escape key), then break out of that loop. This allows our user to leisurely peruse the image before ultimately exiting the program by hitting Escape.
As long as we're introducing cvWaitKey(), it is
worth mentioning that cvWaitKey() can also be called
with 0 as an argument. In this case, cvWaitKey() will wait indefinitely until a keystroke is
received and then return that key. Thus, in our example we could just as easily have used
cvWaitKey(0). The difference between these two
options would be more apparent if we were displaying a video, in which case we would want
to take an action (i.e., display the next frame) if the user supplied no keystroke.
Now that we can display an image to a user, we might also want to allow the user to
interact with the image we have created. Since we are working in a window environment and
since we already learned how to capture single keystrokes with cvWaitKey(), the next logical thing to consider is how to "listen to" and
respond to mouse events.
Unlike keyboard events, mouse events are handled by a more typical callback mechanism. This means that, to enable response to mouse clicks, we must first write a callback routine that OpenCV can call whenever a mouse event occurs. Once we have done that, we must register the callback with OpenCV, thereby informing OpenCV that this is the correct function to use whenever the user does something with the mouse over a particular window.
Let's start with the callback. For those of you who are a little rusty on your event-driven program lingo, the callback can be any function that takes the correct set of arguments and returns the correct type. Here, we must be able to tell the function to be used as a callback exactly what kind of event occurred and where it occurred. The function must also be told if the user was pressing such keys as Shift or Alt when the mouse event occurred. Here is the exact prototype that your callback function must match:
void CvMouseCallback(
  int   event,
  int   x,
  int   y,
  int   flags,
  void* param
);
Now, whenever your function is called, OpenCV will fill in the arguments with their appropriate values. The first argument, called the event, will have one of the values shown in Table 4-1.
Table 4-1. Mouse event types
|
Event |
Numerical value |
|---|---|
|
|
0 |
|
|
1 |
|
|
2 |
|
|
3 |
|
|
4 |
|
|
5 |
|
|
6 |
|
|
7 |
|
|
8 |
|
|
9 |
The second and third arguments will be set to the x and y coordinates of the mouse event. It is worth noting that these coordinates represent the pixel in the image independent of the size of the window (in general, this is not the same as the pixel coordinates of the event).
The fourth argument, called flags, is a bit field
in which individual bits indicate special conditions present at the time of the event. For
example, CV_EVENT_FLAG_SHIFTKEY has a numerical value
of 16 (i.e., the fifth bit) and so, if we wanted to test whether the shift key were down,
we could AND the flags variable with the bit mask (1<<4). Table 4-2 shows a complete list of the
flags.
Table 4-2. Mouse event flags
|
Flag |
Numericalvalue |
|---|---|
|
|
1 |
|
|
2 |
|
|
4 |
|
|
8 |
|
|
16 |
|
|
32 |
The final argument is a void pointer that can be used to have OpenCV pass in any
additional information in the form of a pointer to whatever kind of structure you need. A
common situation in which you will want to use the param argument is when the callback itself is a static member function of a
class. In this case, you will probably find yourself wanting to pass the this pointer and so indicate which class object instance the
callback is intended to affect.
Next we need the function that registers the callback. That function is called
cvSetMouseCallback(), and it requires three
arguments.
void cvSetMouseCallback(
  const char*     window_name,
  CvMouseCallback on_mouse,
  void*           param      = NULL
);
The first argument is the name of the window to which the callback will be attached.
Only events in that particular window will trigger this specific callback. The second
argument is your callback function. Finally, the third param argument allows us to specify the param information that should be given to the callback whenever it is
executed. This is, of course, the same param we were
just discussing in regard to the callback prototype.
In Example 4-1 we write a small program
to draw boxes on the screen with the mouse. The function my_mouse_callback() is installed to respond to mouse events, and it uses the event to determine what to do when it is
called.
Example 4-1. Toy program for using a mouse to draw boxes on the screen
// An example program in which the
// user can draw boxes on the screen.
//
#include <cv.h>
#include <highgui.h>

// Define our callback which we will install for
// mouse events.
//
void my_mouse_callback(
   int event, int x, int y, int flags, void* param
);

CvRect box;
bool drawing_box = false;

// A litte subroutine to draw a box onto an image
//
void draw_box( IplImage* img, CvRect rect ) {
  cvRectangle (
    img,
    cvPoint(rect.x,rect.y),
    cvPoint(rect.x+rect.width,rect.y+rect.height),
    CV_RGB(0xff,0x00,0x00) /* red */
 );
}

int main( int argc, char* argv[] ) {

  box = cvRect(-1,-1,0,0);

  IplImage* image = cvCreateImage(
    cvSize(200,200),
    IPL_DEPTH_8U,
    3
  );
  cvZero( image );
  IplImage* temp = cvCloneImage( image );

  cvNamedWindow( "Box Example" );

  // Here is the crucial moment that we actually install
  // the callback. Note that we set the value 'param' to
  // be the image we are working with so that the callback
  // will have the image to edit.
  //

  cvSetMouseCallback(
    "Box Example",
    my_mouse_callback,
    (void*) image
 );

 // The main program loop. Here we copy the working image
 // to the 'temp' image, and if the user is drawing, then
 // put the currently contemplated box onto that temp image.
 // display the temp image, and wait 15ms for a keystroke,
 // then repeat...
 //
 while( 1 ) {

   cvCopyImage( image, temp );
   if( drawing_box ) draw_box( temp, box );
   cvShowImage( "Box Example", temp );

   if( cvWaitKey( 15 )==27 ) break;
 }

 // Be tidy
 //
 cvReleaseImage( &image );
 cvReleaseImage( &temp );
 cvDestroyWindow( "Box Example" );
}

// This is our mouse callback. If the user
// presses the left button, we start a box.
// when the user releases that button, then we
// add the box to the current image. When the
// mouse is dragged (with the button down) we
// resize the box.
//
void my_mouse_callback(
  int event, int x, int y, int flags, void* param
) {

  IplImage* image = (IplImage*) param;

  switch( event ) {
    case CV_EVENT_MOUSEMOVE: {
      if( drawing_box ) {
        box.width = x-box.x;
        box.height = y-box.y;
      }
    }
    break;
    case CV_EVENT_LBUTTONDOWN: {
      drawing_box = true;
      box = cvRect(x, y, 0, 0);
    }
    break;
    case CV_EVENT_LBUTTONUP: {
      drawing_box = false;
      if(box.width<0) {
        box.x+=box.width;
        box.width *=-1;
      }
      if(box.height<0) {
        box.y+=box.height;
        box.height*=-1;
      }
      draw_box(image, box);
    }
    break;
  }
}HighGUI provides a convenient slider element. In HighGUI, sliders are called trackbars. This is because their original (historical) intent was for selecting a particular frame in the playback of a video. Of course, once added to HighGUI, people began to use trackbars for all of the usual things one might do with a slider as well as many unusual ones (see the next section, "No Buttons")!
As with the parent window, the slider is given a unique name (in the form of a character string) and is thereafter always referred to by that name. The HighGUI routine for creating a trackbar is:
int cvCreateTrackbar(
  const char*        trackbar_name,
  const char*        window_name,
  int*               value,
  int                count,
  CvTrackbarCallback on_change
);
The first two arguments are the name for the trackbar itself and the name of the parent window to which the trackbar will be attached. When the trackbar is created it is added to either the top or the bottom of the parent window;[43] it will not occlude any image that is already in the window.
The next two arguments are value, a pointer to an
integer that will be set automatically to the value to which the slider has been moved,
and count, a numerical value for the maximum value of
the slider.
The last argument is a pointer to a callback function that will be automatically
called whenever the slider is moved. This is exactly analogous to the callback for mouse
events. If used, the callback function must have the form CvTrackbarCallback, which is defined as:
void (*callback)( int position )
This callback is not actually required, so if you don't want a callback then you can
simply set this value to NULL. Without a callback, the
only effect of the user moving the slider will be the value of *value being changed.
Finally, here are two more routines that will allow you to programmatically set or read the value of a trackbar if you know its name:
int cvGetTrackbarPos(
  const char* trackbar_name,
  const char* window_name
);

void cvSetTrackbarPos(
  const char* trackbar_name,
  const char* window_name,
  int         pos
);
These functions allow you to set or read the value of a trackbar from anywhere in your program.
Unfortunately, HighGUI does not provide any explicit support for buttons. It is thus common practice, among the particularly lazy,[44] to instead use sliders with only two positions. Another option that occurs often in the OpenCV samples in â¦/opencv/samples/c/ is to use keyboard shortcuts instead of buttons (see, e.g., the floodfill demo in the OpenCV source-code bundle).
Switches are just sliders (trackbars) that have only two positions, "on" (1) and "off" (0) (i.e.,
count has been set to 1). You can see how this is an easy way to obtain the functionality of a
button using only the available trackbar tools. Depending on exactly how you want the switch to behave, you
can use the trackbar callback to automatically reset the button back to 0 (as in Example 4-2; this is something like the
standard behavior of most GUI "buttons") or to automatically set other switches to 0
(which gives the effect of a "radio button").
Example 4-2. Using a trackbar to create a "switch" that the user can turn on and off
// We make this value global so everyone can see it.
//
int g_switch_value = 0;

// This will be the callback that we give to the
// trackbar.
//
void switch_callback( int position ) {
  if( position == 0 ) {
    switch_off_function();
  } else {
    switch_on_function();
  }
}

int main( int argc, char* argv[] ) {

  // Name the main window
  //
  cvNamedWindow( "Demo Window", 1 );

  // Create the trackbar. We give it a name,
  // and tell it the name of the parent window.
  //
  cvCreateTrackbar(
    "Switch",
    "Demo Window",
    &g_switch_value,
    1,
    switch_callback
 );

 // This will just cause OpenCV to idle until
 // someone hits the "Escape" key.
 //
 while( 1 ) {
   if( cvWaitKey(15)==27 ) break;
 }

}
You can see that this will turn on and off just like a light switch. In our example,
whenever the trackbar "switch" is set to 0, the callback executes the function switch_off_function(), and whenever it is switched on, the
switch_on_function() is called.
[42] The careful reader might legitimately ask exactly what this means. The short
answer is "an ASCII value", but the long answer depends on the operating system. In
Win32 environments, cvWaitKey() is
actually waiting for a message of type WM_CHAR and,
after receiving that message, returns the wParam
field from the message (wParam is not actually type
char at all!). On Unix-like systems, cvWaitKey() is using
GTK; the return value is (event->keyval |
(event->state<<16)), where event is a GdkEventKey structure.
Again, this is not really a char. That state information is essentially the state of
the Shift, Control, etc. keys at the time of the key press. This means that, if you
are expecting (say) a capital Q, then you should either cast the return of cvWaitKey() to type char or AND with 0xff, because the shift key will appear in the upper bits
(e.g., Shift-Q will return 0x10051).
[43] Whether it is added to the top or bottom depends on the operating system, but it will always appear in the same place on any given platform.
[44] For the less lazy, another common practice is to compose the image you are displaying with a "control panel" you have drawn and then use the mouse event callback to test for the mouse's location when the event occurs. When the (x, y) location is within the area of a button you have drawn on your control panel, the callback is set to perform the button action. In this way, all "buttons" are internal to the mouse event callback routine associated with the parent window.
Get Learning OpenCV now with the O’Reilly learning platform.
O’Reilly members experience books, live events, courses curated by job role, and more from O’Reilly and nearly 200 top publishers.

