One reason JavaScript is so popular is that itâs relatively easy to
add JavaScript to a web page. All you need to do, at a minimum, is include
an HTML script element in the page, specify "text/javascript" for the type attribute, and add
whatever JavaScript you want:
<script type="text/javascript">
...some JavaScript
</script>
Installation is not required, nor do you have to torturously work through any odd library path configurations. JavaScript works, straight out of the box and in most web browsers, including the big four: Firefox, Internet Explorer, Opera, and Safari. All you need to do is add a scripting block, and youâre in business.
Traditionally, you add JavaScript blocks to the head element in the document (delimited by opening and closing head tags), but you also can include them in
the body elementâor even in both sections. However,
adding script to the body is not usually considered a good technique, as it
makes it more difficult to find the script when youâre modifying it at a
later time. The exception to this rule is when performance is an issue,
which Iâll cover in Chapter 6. All of the
examples in this book add scripting blocks only to the web page head
section.
Also traditionally, the first example when learning a new programming language is known as âHello, Worldââa simple application that prints out âHello, World!â to the user interface, whatever it may be. In the case of JavaScript, the user interface is the web page. Example 1-1 shows a web page with a JavaScript block that, using only one line of JavaScript, pops open a small window commonly called an alert box with the words âHello, World!â
Example 1-1. The smallest JavaScript application: âHello, World!â
<!DOCTYPE html PUBLIC "-//W3C//DTD XHTML 1.0
Transitional//EN" "http://www.w3.org/TR/xhtml1/DTD/xhtml1-transitional.dtd">
<html xmlns="http://www.w3.org/1999/xhtml" xml:lang="en" lang="en">
<head>
<title>Hello, World!</title>
<meta http-equiv="Content-Type" content="text/html; charset=utf-8" />

<script type="text/javascript">

alert("Hello, World!");

</script>
</head>
<body>
</body>
</html>
Copying Example 1-1 into a file and opening the file in web browsers that support JavaScript should result in an alert box that reads âHello, World!â If it doesnât, you might want to make sure you have JavaScript enabled.
Note
Older versions of Internet Explorer also disable script if you open the page via the File Open menu rather than by using a web page address such as http://<somedomain.com>/index.html.
This application, although very limited in functionality, more or
less demonstrates the minimum components of a JavaScript application: you
have a web page, you have a script
element, and you have a line of JavaScript. Try it yourself, except edit
the string by replacing âWorldâ with your first name.
Of course, if you want to move beyond just outputting a static message to the browser, youâll need to extend the example somewhat.
Another variation of the âHello, World!â application actually writes
the message to the web page rather than in an alert box. To do so, it
makes use of four important JavaScript application components: the
built-in browser document object,
JavaScript variables, a JavaScript function, and an event handler. As
impressive as this may sound, you can still code the application in seven
lines of JavaScript, as shown in Example 1-2.
Example 1-2. âHello, World!â printed out to the web page
<!DOCTYPE html PUBLIC "-//W3C//DTD XHTML 1.1//EN"
"http://www.w3.org/TR/xhtml11/DTD/xhtml11.dtd">
<html xmlns="http://www.w3.org/1999/xhtml" xml:lang="en">
<head>
<title>Hello, World!</title>
<meta http-equiv="Content-Type" content="text/html; charset=utf-8" />

<script type="text/javascript">
function hello() {

   // say hello to the world
   var msg = "Hello, World!";
   document.open();
   document.write(msg);
   document.close();
}
</script>
</head>
<body onload="hello()">
<p>Hi</p>
</body>
</html>
Though Example 1-2 is a very small application, it does expose several of the basic components of most JavaScript applications in use today, each of which deserves a closer look. In the rest of this chapter, weâll take that closer look, one component at a time.
Note
Not covered in this chapter is the Document Type Declaration (DOCTYPE) used in Examples 1-1 and 1-2, which can have an influence on how different browsers process the JavaScript. Iâll cover the impact of a DOCTYPE in Chapter 6.
JavaScript is frequently used within the context of another language, such as markup languages like HTML and XHTML. However, you canât just plop JavaScript into the markup wherever and however you want.
In Example 1-2,
the script element encloses the
JavaScript. This lets the browser know that when it encounters the
script elementâs opening tag, it shouldnât process the elementâs
contents as HTML or XHTML. At this point, control over the content is
turned over to the browserâs scripting engine.
Not all script embedded in web pages is JavaScript, and the
script element opening tag contains
an attribute defining the type of script. In the example, this is given
as text/javascript. Among other
allowable values for the type attribute
are:
text/ecmascripttext/jscripttext/vbscripttext/vbs
The first type value listed
specifies that the script is interpreted as ECMAScript, based on the
ECMA-262 scripting standard. The next value causes the script to be interpreted as
JScript, a variation of ECMAScript that Microsoft implements in Internet
Explorer. The last two values are for Microsoftâs VBScript, a completely different scripting
language.
All of these type values
describe the MIME type of the content. MIME, or Multipurpose
Internet Mail Extension, is a way to identify how the content is encoded
(i.e., text), and its specific format
(javascript). By providing a MIME
type, those browsers capable of processing the type do so, whereas other
browsers skip over the section. This ensures that only applications that
can process the script actually access the script.
Earlier versions of the script
tag took a language attribute,
which was used to designate the version of the language,
as well as the type: javascript1.2 as
compared to javascript1.1. However, the use of
language was deprecated in HTML 4.01,
though it still appears in many JavaScript examples. And therein lies
one of the earliest cross-browser techniques.
Note
I use the term cross-browser to denote JavaScript that works across all target browsers, or uses functionality to manage any browser differences so that the application works âcross-browser.â
Years ago, when working with cross-browser compatibility issues, it wasnât uncommon to create a
specific script for each browser in a separate section or file and then
use the language attribute to ensure
that only a compatible browser could access the code. Looking through
some of my old examples (circa 1997), I found the following:
<script src="ns4_obj.js" language="javascript1.2">
</script>
<script src="ie4_obj.js" language="jscript">
</script>
The philosophy of this approach was that only a browser capable of processing JavaScript 1.2 would pick up the first file (primarily Netscape Navigator 4.x at that time) and only a browser capable of processing JScript would pick up the second file (Internet Explorer 4). Kludgey? Sure, but it also worked through the early years of trying to deal with frequently broken cross-browser dynamic page effects.
Other valid script attributes are src, defer, and
charset. The charset attribute defines the character
encoding used with the script. It usually isnât set unless you need a
different character encoding than whatâs defined for the
document.
One attribute that can be quite useful is defer. If you set defer to a value of "defer", it indicates to the browser that the
script is not going to generate any document content, and the browser
can continue processing the rest of the pageâs content, returning to the
script when the page has been processed and displayed:
<script type="text/javascript" defer="defer">
...no content being generated
</script>
The defer attribute can help
speed up page loading when you have a larger JavaScript block or include
a larger JavaScript library.
The last attribute, src, has to
do with loading external JavaScript files, which weâll explore a little
later. First, though, weâll take a closer look at the text/javascript type attribute, and what this
means for each browser.
Example 1-2
used the text/javascript type with the script element, and the application works
with Firefox, IE, Opera, and Safari. However, not all browsers
implement JavaScript.
Although the name âJavaScriptâ has become ubiquitous for client-side browser-based scripting, only Mozilla and the popular Mozilla browser, Firefox, implement JavaScript, which is the actual name of an instance of a broader-based scripting specification, ECMAScript. ECMAScript is actually the industry-wide client-side scripting specification. The latest released version of ECMAScript is ECMA-262, Edition 3.
However, most browsers honor the text/javascript type, in addition to the more
appropriate (though far less
common) text/ecmascript, though there
can be differences, even significant differences, in exactly what each
browser or other application supports.
Note
ECMAScript isnât restricted to just browsers: Adobeâs ActionScript support in Flash is based on ECMA-262, Edition 3.
All of the browsers used to test the applications in the
bookâFirefox 3.x, Safari 3.x, Opera 9.x, and IE8âsupport most, if not
all, of ECMA-262, Edition 3, and even some of the next generation of
ECMAScript, ECMAScript 3.1 (and beyond). In this book, Iâll note
whenever there are browser differences or provide cross-browser
workarounds. Iâll also be using the more familiar text/javascript for the script elementâs type attribute, as shown in Example 1-2.
In Example 1-2,
the part of the JavaScript that actually creates the âHello,
World!â message exists within a function named hello. Functions are ways of enclosing one or
more lines of script so that they can be executed one or more times. You
also use functions to control when the enclosed script is executed. For
instance, in Example 1-2, the function is
called only after the web page is loaded.
Here is the typical syntax for creating a function:
function functionname(params) {
    ...
}
The keyword function is
followed by the function name and parentheses containing zero or more
parameters (function arguments). In Example 1-2, there are no
parameters, but weâll see plenty of examples with parameters throughout
the book. The script that makes up the function is then enclosed in
curly braces.
I say âtypicalâ when providing the function syntax because this isnât the only syntax that you can use to create a function. However, weâll get into other variations starting in Chapter 5, which covers JavaScript functions in detail.
Of course, once you have a function, you have to invoke it to run the script it contains, which leads us to event handlers.
In the opening body tag of Example 1-2, an HTML attribute
named onload is assigned the hello function. The onload attribute is whatâs known as an
event handler. This event handler,
and others, is part of the underlying object model that each browser
provides.
You use event handlers to map a function to a specific event so
that when the event occurs, the functionâs script is processed. One of
the more commonly used event handlers is the one just demonstrated,
the onload event attached
to the body element. When the web
page has finished loading, the event is fired, and the handler calls the
mapped function.
Here are some commonly used event handlers:
These are only a few of the event handlers, and not all elements
support all event handlers. The onload event handler is supported for only a
few elements, such as the body and
img elementsânot surprising, as the event is associated with
loading something.
Adding an event handler directly to the opening element tag is one way to attach an event handler. A second technique occurs directly within JavaScript using syntax such as the following:
<script type="text/javascript">
window.onload=hello;

function hello(??) {

   // say hello to the world
   var msg = "Hello, World!";
   document.open();
   document.writeln(msg);
   document.close();
}
</script>
The onload event handler is a
property of another built-in browser object, the window. The first line of the script then assigns the function,
hello, directly to the windowâs
onload event handler.
Note
JavaScript functions are also objects in JavaScript, so you can assign a function, by name or directly, to a variable or another objectâs property.
Using the object property approach, you donât have to add event
handlers as attributes into element tags, but instead can add them into
the JavaScript itself. Weâll get into more details on event handlers and
more advanced forms of event handling beginning in Chapter 7. In the meantime, letâs take a closer look
at the document object.
Example 1-2,
as small as it is, used one of the most powerful objects
available in your browser: the document object. The document object is, for all intents and
purposes, a representation of the page, including all of the elements
within it. Itâs through the document
that we can access the page contents, and as youâve just seen, itâs
through the document that we can also
modify the page contents.
The document has collections
mapped to page elements, such as all the images or form elements in the
page. It also has methods that you can use to both access and alter the
web page, including the open, writeln, and
close methods used in Example 1-2.
The open method opens the
document for writing. In Example 1-2, the document
opened was the same document with which the script is contained. The
writeln method is a variation of the
write method, which outputs a string of text to the document. The only
difference between write and writeln is that writeln also appends a newline character
following the text. The close method
closes the document, and also forces the immediate rendering of the
document contents.
An unfortunate consequence of writing to the existing document after the page is loaded is that the existing contents of the document are erased. Thatâs why when you open the page youâll see the âHello, World!â message but you wonât see the âHiâ thatâs already in the page.
Warning
Another consequence of writing over the existing document is that with IE, at least with the beta of IE8, youâll lose your back button functionality.
The open and close methods arenât required for Example 1-2, as browsers will
automatically open and close the document when the writeln method is called after the document is
already loaded. If you used the script in the body of the page, you
would need to explicitly call the open method.
The document, as well as the
window mentioned earlier, is part of
a hierarchy of objects known as the Browser Object Model (BOM). The BOM is a basic set
of objects implemented in most modern browsers. I cover the document and other BOM objects in Chapter 9.
In Example 1-2,
you accessed the methods from the document object through one of the many
operators supported in JavaScript: the property operator, represented by a single dot
(.).
Several operators are available in JavaScript: those for arithmetic (+, â),
those for conditional expressions (<,
>), and others that I detail more fully later in
the book. One of the most important, though, is the property operator. Data elements, event
handlers, and object methods are all considered properties of objects
within JavaScript, and you access all of them via the property operator.
You also use the property
operator in a process called method chaining,
or sometimes just chaining, whereby you
can apply calls to multiple methods, one after another, all within the
same statement. Weâll see the following example in the book:
var tstValue = document.getElementById("test").style.backgroundColor="#ffffff";In this example, a page element
is accessed using the document method getElementById,
and its style object is accessed to
set the background color for that element. The backgroundColor is a property of the style object, which is a property of the
page element, which is accessed
through the method getElementById,
which is a property of the document
object.
I cover all of these methods and objects in future chapters, but I wanted to introduce you to method chaining now, as youâll see it frequently. You cannot chain all properties of all objectsâonly those that return an object.
Note
One of the more popular Ajax libraries, JQuery, makes extensive use of method chaining. Iâll cover JQuery briefly in Chapter 14.
The âHello, World!â string I used in Example 1-2 is assigned to an
object named msg, which is an example
of a JavaScript variable. A variable is nothing
more than a named reference to a piece of data. The data can be a
string, as in Example 1-2, a number, or the
boolean value of true or false. It can also be a function reference, an
array, or another object.
In the example, I defined the variable with the var keyword. When you use var with a variable, youâre defining the
variable with local scope, which means you can access them only within
the function in which youâve defined them. If I didnât use var, the variable msg would be global and would have scope
inside and outside the function. Using a global variable in a local
context isnât a bad thingâand it may be necessary at timesâbut it isnât
a good practice, and you should avoid it if possible.
The reason why you want to avoid global variables is because if
the application is part of a larger JavaScript application, msg may be in use in another part of the code
in another file, and you will have overridden whatever data it
originally contained. Or, if you create a global variable called
msg, some other libraryâs script
could override it by not correctly using the var keyword, and the data you were tracking
will be lost.
Setting the scope of a variable is important if you have global and local variables with the same name. Example 1-2 doesnât have global variables of any name, but itâs important to develop good JavaScript coding practices from the beginning.
Here are the rules regarding scope:
If you declare a variable with the
varkeyword in a function or block of code, its use is local to that function.If you use a variable without declaring it with the
varkeyword, and a global variable of the same name exists, the local variable is assumed to be the already existing global variable.If you declare a variable locally with a
varkeyword, but you do not initialize it (i.e., assign it a value), it is local and accessible but not defined.If you declare a variable locally without the
varkeyword, or explicitly declare it globally but do not initialize it, it is accessible globally, but again, it is not defined.
By using var within a function,
you can prevent problems when using global and local variables of the
same name. This is especially critical when using JavaScript
librariesâsuch as Dojo, jQuery, and Prototypeâbecause youâre not
going to know what variable names the other JavaScript code is
using.
JavaScript also supports different types of processing instruction types, known as
statements. Example 1-2 demonstrated a
basic type of JavaScript statement: the assignment,
whereby a value is assigned to a variable. Other types of statements
are for
loops, which process a script block a given number
of iterations; the ifâ¦else conditional statement, which checks a
condition to see whether the script block is executed; the switch statement, which checks for a value in a given set and then executes
the script block associated with that value; and so on.
Each type of statement has certain syntax requirements. In Example 1-2, the assignment statement ended with a semicolon. Using a semicolon to terminate a statement isnât a requirement in JavaScript unless you want to type many statements on the same line. If you do, youâll have to insert a semicolon to separate the individual statements.
When you type a complete statement on one line, you use a line
break to terminate the statement. However, just as with the use of
var, itâs good practice to use
semicolons to terminate all statements, if for no other reason than it makes the
code easier to read. More on the semicolon, other operators, and
statements in Chapter 3.
As this chapter hopefully demonstrates, thereâs quite a lot to the JavaScript in even a small application such as Example 1-2. Hold on, though, as weâre not quite finished. Last, but certainly not least, a word on JavaScript comments.
Comments provide a summary or explanation of the code that follows. Comments in JavaScript are an extremely useful way of quickly noting what a block of code is doing and whatever dependencies it has. It makes the code more readable and more maintainable.
You can use two different types of comments in your own
applications. The first, using the double slash (//), comments out whatever follows in the
line:
// This line is commented out in the code
var i = 1; // this is a comment in the line
The second makes use of opening and closing JavaScript comment
delimiters, /* and */, to mark a block of comments that can extend one or more
lines:
/* This is a multiline comment
that extends through three lines.
Multiline comments are particularly useful for commenting on a function */
Single-line comments are relatively safe to use, but multiline comments can generate problems if the beginning or ending bracket character is accidentally deleted.
Typically, you use single-line comments before a block of script performing a specific process or creating a specific object; you use multiline comment blocks in the beginning of a JavaScript file. A good practice to get into with JavaScript is to begin every JavaScript block, function, or object definition with at least one line of comments. In addition, provide a more detailed comment block at the beginning of all JavaScript library files; include information about author, date, and dependencies, as well as a detailed purpose of the script.
Weâve explored what you saw in Example 1-2. Now letâs take a look at what you didnât see.
Ten years ago, when most browsers were in their first or second version, JavaScript support was sketchy, with
each browser implementing a different version. When browsers, such as
the text-based Lynx, encountered the script
tag, they usually just printed the output to the page.
To prevent this, the script contents were enclosed in HTML
comments: <!-- and -->. When HTML comments were used, non-JavaScript-enabled browsers
ignored the commented-out script, but newer browsers knew to execute the
script.
It was a kludge, but it was a very widespread kludge. Most web pages with JavaScript nowadays feature the added HTML comments because the script is copied more often than not. Unfortunately, some new browsers today may process the web page as XHTML, and as strictly XML, which means the commented code is discarded. In these situations, the JavaScript is ignored. As a consequence, using HTML comments to âhideâ the script is actively discouraged.
Another way to âhideâ the script, however, is encouraged, and
thatâs the use of the XML CDATA
section, particularly if the script is going to be used in XHTML. Example 1-3 is a modification
of Example 1-2 with the
addition of a CDATA section, shown in
bold.
Example 1-3. Modification of Example 1-2 to add a CDATA section to âhideâ the script
<!DOCTYPE html PUBLIC "-//W3C//DTD XHTML 1.1//EN" "http://www.w3.org/TR/xhtml11/DTD/xhtml11.dtd"> <html xmlns="http://www.w3.org/1999/xhtml" xml:lang="en"> <head> <title>Hello, World!</title> <meta http-equiv="Content-Type" content="text/html; charset=utf-8" /> <script type="text/javascript">//<![CDATA[function hello() { // say hello to the world var msg = "Hello, <em>World!</em>"; document.open(); document.write(msg); document.close(); }//]]></script> </head> <body onload="hello()"> <p>Hi</p> </body> </html>
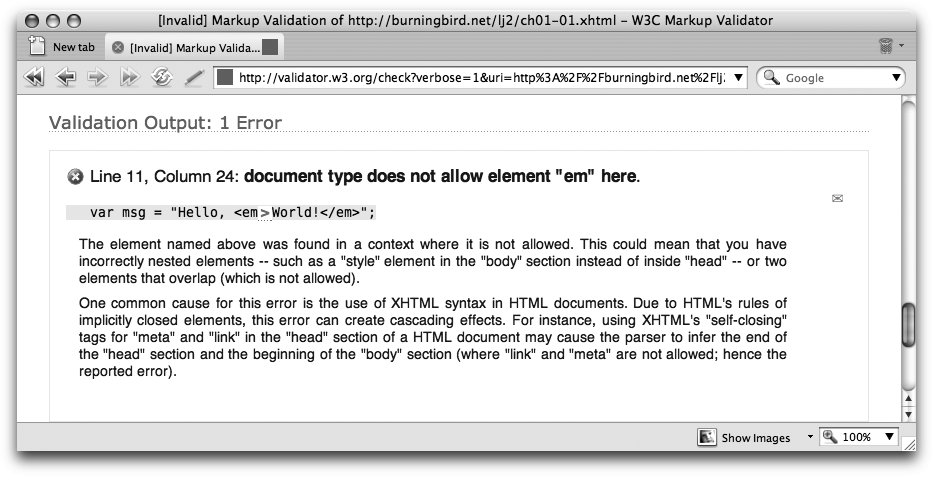
The reason for the CDATA
section is that XHTML processors interpret markup, such as the em element opening and closing tags in this
new example, even when theyâre contained within JavaScript strings.
Though the script may process correctly and may display the page
correctly, if you try to validate it without the CDATA section, youâll get validation errors,
as shown in Figure 1-1.
JavaScript that is imported into the page using the script elementâs src attribute is assumed to be compatible with
XHTML and doesnât require the CDATA
section. You should delimit inline or embedded JavaScript with CDATA though, particularly if itâs included
within the body element. For most
browsers, youâll also need to hide the CDATA section opening and closing tags with
JavaScript comments (//),
as shown previously in Example 1-3, or youâll get a
JavaScript error.
Of course, the best way to keep your web pages uncluttered is to remove the JavaScript from the page entirely, through the use of JavaScript files.
Most of this bookâs examples are embedded into the page primarily to make them easier to read and follow. However, the Mozilla Foundation recommends (and I agree) that all inline or embedded JavaScript be removed from a page and placed in separate JavaScript files. Using a separate file, covered in the next section, prevents problems with validation and incorrect interpretation of text, regardless of whether the page is processed as HTML or XHTML.
JavaScript usage is becoming more object-oriented and complex. To simplify their work, as well as share it, JavaScript developers are creating reusable JavaScript objects that they can incorporate into many applications, including those created by other developers. The only efficient way to share these objects is to create them in separate files and provide a link to each file in the web page. With the code now in files, all the developer needs to do is link the code into the web pages. If the code needs to change later, itâs changed in only one place.
Nowadays, all but the simplest JavaScript is created in separate script files. Whatever overhead is incurred by using multiple files is more than offset by the benefits. To include a JavaScript library or script file in your web page, use this syntax:
<script type="text/javascript" src="somejavascript.js"></script>The script element contains no content, but the closing tag is still
required.
The browser loads script files into the page in the order in which
they occur in the page and processes them in order unless defer is used. A script file should be treated
as though the code is actually included in the page; the behavior is no
different between script files and embedded JavaScript blocks.
Example 1-4 is yet another modification of our âHello, World!â application, except this time the script is moved to a separate file, named helloworld.js. The .js file extension is required, unless you direct the web server to use some other extension to represent the JavaScript MIME type. However, because the .js has been used as the default for years, itâs best not to get creative.
Note
Every rule always has exceptions, and the use of .js is one of them. If the JavaScript is being dynamically generated using a server-side application built in a language such as PHP, the file will have a different extension.
Example 1-4 contains the script, and Example 1-5 shows the now altered web page.
Example 1-4. The Hello World script, in a separate file
/*
   function: hello
   author: Shelley
   hello prints out the message, "Hello, World!"
*/

function hello() {

   // say hello to the world
   var msg = "Hello, <em>World!</em>";
   document.open();
   document.write(msg);
   document.close();
}
Example 1-5. The web page, now calling an external script file
<!DOCTYPE html PUBLIC "-//W3C//DTD XHTML 1.1//EN" "http://www.w3.org/TR/xhtml11/DTD/xhtml11.dtd"> <html xmlns="http://www.w3.org/1999/xhtml" xml:lang="en"> <head> <title>Hello, World!</title> <meta http-equiv="Content-Type" content="text/html; charset=utf-8" /><script type="text/javascript" src="helloworld.js"></script></head> <body onload="hello()"> <p>Hi</p> </body> </html>
As you can see, the page is much cleaner, and the application is more efficient from a maintenance perspective. Also, other applications can now reuse the code. Though itâs unlikely that youâd reuse something as simple as the âHello, World!â script, youâll be creating examples later in the book in which reuse becomes more important.
We have one last section of material to cover in this chapter before moving on to variables and data types in Chapter 2.
In an ideal world, everyone who visits your website would use the same type of operating system and browser and would have JavaScript enabled. Your site would never be accessed via a mobile phone or some other oddly sized device, vision-impaired people wouldnât need screen readers, and the paralyzed wouldnât need voice-enabled navigation.
This isnât an ideal world, but too many JavaScript developers code as though it is. We get so caught up in the wonders of what we can create that we forget that not everyone can share them.
Many best practices are associated with JavaScript, but if thereâs one to take away from this book, itâs the following: whatever JavaScript functionality you create, it must not come between your site and your siteâs visitors.
What do I mean by âcome between your site and your siteâs visitorsâ? I mean that you should avoid using JavaScript in such a way that those who cannot, or will not, enable JavaScript are prevented from accessing essential site resources. If you create a drop-down menu using JavaScript, you also need to provide a script-free alternative. If your visitors are vision-impaired, JavaScript must not interfere with audio browsers, which happens when instructions are added to a page dynamically.
Many developers donât follow these practices because they assume the practices require extra work, and for the most part, they do. However, the work doesnât have to be a burdenânot when the results can increase the accessibility of your site. In addition, many companies now require that their websites meet a certain level of accessibility. Itâs better to get into the habit of creating accessible pages in the beginning than to try to fix the pages, or your habits, later.
The WebAIM site (http://www.webaim.org) has a wonderful tutorial on creating accessible JavaScript (available at http://www.webaim.org/techniques/javascript/). It covers the ways you shouldnât use JavaScript, such as using JavaScript for menus and other navigation. However, the site also provides ways you can use JavaScript to make a site more accessible.
One suggestion is to base feedback on events that can be triggered
whether you use a mouse or not. For instance, rather than capture mouse
clicks, you should capture events that are triggered if you use a
keyboard or a mouse, such as onfocus
and onblur. If you have a drop-down
menu, add a link to a separate page, and then provide a static menu on
the second page.
After reviewing the tutorial at WebAIM, you might want to spend some time at the World Wide Web Consortiumâs (W3Câs) Web Accessibility Initiative (at http://www.w3.org/WAI/). From there, you can also access the U.S. governmentâs Section 508 website (http://www.section508.gov/), which discusses what is known as â508 compliance.â Sites that comply with Section 508 are accessible regardless of physical constraints. At that website, you can access various tools that evaluate your site for accessibility, such as Cynthia Says (at http://www.cynthiasays.com/).
Whether your site is located within the United States or elsewhere, you want it to be accessible; therefore, a visit to Section 508 is useful regardless of your locale.
Of course, not all accessibility issues are related to those
browsers in which JavaScript is limited or disabled by default, such as
with screen readers. Many people donât trust JavaScript, or donât care
for it and choose to disable it. For both groups of peopleâthose who
prefer not to use JavaScript, and those who have no choiceâitâs
important to provide alternatives when no script is present. One
alternative is noscript.
Some browsers or other applications are not equipped to process JavaScript, or are limited in how they interpret the script. If the JavaScript is not essential to navigation or interaction, and the browser ignores the script, no harm. However, if the JavaScript is essential to access the siteâs resources and you donât provide alternatives, youâre basically telling these folks to go away.
Years ago, when JavaScript was fairly new, one popular approach was to provide a plain or text-only page accessible through a link, usually placed at the top of the page. However, the amount of work to maintain the two sites could be prohibitive, and developers had to constantly worry about keeping the sites synchronized.
A better technique is to provide static alternatives to dynamic,
script-generated content. When you use JavaScript to create a drop-down
menu, also provide a standard hierarchical linked menu; when you use
script to expose form elements for
editing based on user interaction, provide the more traditional links to
a second page to do the same.
The element that enables all of this is noscript. Wherever you need static content,
add a noscript element with the
content contained within the opening and closing tags. Then, if a
browser or other application canât process the script (because
JavaScript is not enabled for some reason), the noscript content is processed; otherwise, itâs
ignored.
Example 1-6 is one
last variation of âHello, World!â showing the CDATA-protected example modified with the addition of
noscript. Accessing the page with a
JavaScript-enabled browser should display a page with âHello, World!â
printed out. However, if you access the page with a script-disabled
browser, a different message results.
Example 1-6. The use of noscript for non-JavaScript-enabled browsers
<!DOCTYPE html PUBLIC "-//W3C//DTD XHTML 1.1//EN"
"http://www.w3.org/TR/xhtml11/DTD/xhtml11.dtd">
<html xmlns="http://www.w3.org/1999/xhtml" xml:lang="en">
<head>
<title>Hello, World!</title>
<meta http-equiv="Content-Type" content="text/html; charset=utf-8" />

<script type="text/javascript">
//<![CDATA[

function hello() {
   // say hello to the world
   var msg = "Hello, <em>World!</em>";
   document.open();
   document.write(msg);
   document.close();
}

//]]>
</script>
</head>
<body onload="hello()">
<noscript>
  <p>I'm still here, World!</p>
</noscript>
</body>
</html>
Of course, Example 1-6 is just a
simplified use of noscript; youâll
see more sophisticated uses later in the book, as well as alternative
script-safe methods.
To test Example 1-6, I used a Firefox
extension called the Web Developer Toolbar. On this bar is an option to
disable JavaScript support. When JavaScript is active, the original
âHello, World!â message displays. However, when I use the tool to
deactivate JavaScript support, another message displays: I'm still here, World! Though you can turn
scripting off directly in the browser, Iâve found that development tools
such as the Web Developer Toolbar make testing a whole lot
easier.
Which tools you use depends on the browser with which you prefer to develop. I prefer developing with Firefox, and make extensive use of the Web Developer Toolbar and Firebug, a sophisticated debugging tool. Later, in Chapter 6, which covers troubleshooting and debugging, weâll take a closer look at these, as well as tools and options available for other browsers.
Get Learning JavaScript, 2nd Edition now with the O’Reilly learning platform.
O’Reilly members experience books, live events, courses curated by job role, and more from O’Reilly and nearly 200 top publishers.

