An image filter is an object that performs
transformations on image data. The Java 2D API supports image filtering
through the BufferedImageOp
interface. An image filter takes a BufferedImage as input (the source
image) and performs some processing on the image data,
producing another BufferedImage (the
destination image).
The 2D API comes with a handy toolbox of BufferedImageOp implementations, as summarized
in Table 21-1.
Table 21-1. Image operators in the 2D API
Name | Description |
|---|---|
Transforms an image geometrically | |
Converts from one color space to another | |
Performs a convolution, a mathematical operation that can be used to blur, sharpen, or otherwise process an image | |
Uses one or more lookup tables to process image values | |
Uses multiplication to process image values |
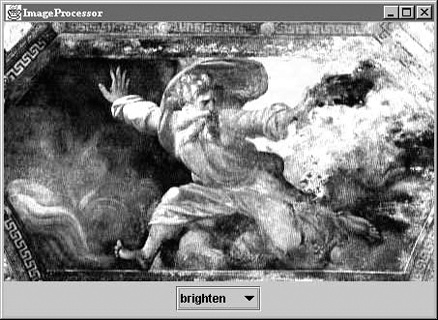
Let’s take a look at two of the simpler image operators. First, try the following application. It loads an image (the first command-line argument is the filename) and processes it in different ways as you select items from the combo box. The application is shown in Figure 21-6.
Here’s the source code:
//file: ImageProcessor.javaimportjava.awt.*;importjava.awt.event.*;importjava.awt.geom.*;importjava.awt.image.*;importjavax.swing.*;publicclassImageProcessorextendsJComponent{privateBufferedImagesource,destination;privateJComboBoxoptions;publicImageProcessor(BufferedImageimage){source=destination=image;setBackground(Color.white);setLayout(newBorderLayout());// create a panel to hold the combo boxJPanelcontrols=newJPanel();// create the combo box with the names of the area operatorsoptions=newJComboBox(newString[]{"[source]","brighten","darken","rotate","scale"});// perform some processing when the selection changesoptions.addItemListener(newItemListener(){publicvoiditemStateChanged(ItemEventie){// retrieve the selection option from the combo boxStringoption=(String)options.getSelectedItem();// process the image according to the selected optionBufferedImageOpop=null;if(option.equals("[source]"))destination=source;elseif(option.equals("brighten"))op=newRescaleOp(1.5f,0,null);elseif(option.equals("darken"))op=newRescaleOp(.5f,0,null);elseif(option.equals("rotate"))op=newAffineTransformOp(AffineTransform.getRotateInstance(Math.PI/6),null);elseif(option.equals("scale"))op=newAffineTransformOp(AffineTransform.getScaleInstance(.5,.5),null);if(op!=null)destination=op.filter(source,null);repaint();}});controls.add(options);add(controls,BorderLayout.SOUTH);}publicvoidpaintComponent(Graphicsg){intimageWidth=destination.getWidth();intimageHeight=destination.getHeight();intwidth=getSize().width;intheight=getSize().height;g.drawImage(destination,(width-imageWidth)/2,(height-imageHeight)/2,null);}publicstaticvoidmain(String[]args){Stringfilename=args[0];ImageIconicon=newImageIcon(filename);Imagei=icon.getImage();// draw the Image into a BufferedImageintw=i.getWidth(null),h=i.getHeight(null);BufferedImagebuffImage=newBufferedImage(w,h,BufferedImage.TYPE_INT_RGB);Graphics2DimageGraphics=buffImage.createGraphics();imageGraphics.drawImage(i,0,0,null);JFrameframe=newJFrame("ImageProcessor");frame.add(newImageProcessor(buffImage));frame.setSize(buffImage.getWidth(),buffImage.getHeight());frame.setDefaultCloseOperation(JFrame.EXIT_ON_CLOSE);frame.setVisible(true);}}
There’s quite a bit packed into the ImageProcessor application. After you’ve played
around with it, come back and read about the details.
The basic operation of ImageProcessor is very
straightforward. It loads a source image, specified with a command-line
argument in its main() method. The
image is displayed along with a combo box. When you select different
items from the combo box, ImageProcessor performs some image-processing
operation on the source image and displays the result (the destination
image). Most of this work occurs in the ItemListener event handler that is created in
ImageProcessor’s constructor (a
dubious design because we don’t want to tie up event-handling threads
for too long, but we’ll let it slide here). Depending on the option that
is selected, a BufferedImageOp
(called op) is instantiated and used
to process the source image, like this:
destination=op.filter(source,null);
The destination image is returned from the filter() method. If we already had a
destination image of the right size to hold the output, we could have
passed it as the second argument to filter(), which would improve the performance
of the application a bit. If you just pass null, as we have here, an appropriate
destination image is created and returned to you. Once the destination
image is created, paint()’s job is
very simple; it just draws the destination image, centered on the
component.
Image processing can be performed only on BufferedImages, not Images. Remember that the core AWT tools all
work with Image and that only if you
are loading images using the ImageIO
package will you get BufferedImages.
Our ImageProcessor example
demonstrates an important technique: how to convert a plain AWT Image to a BufferedImage. You do it by painting into the
buffer, effectively copying the data. The main() method loads an Image from a file using Toolkit’s getImage() method:
Imagei=Toolkit.getDefaultToolkit().getImage(filename);
Next, main() uses a MediaTracker to make sure the image data is
fully loaded.
Finally, the trick of converting an Image to a BufferedImage is to draw the Image into the drawing surface of the BufferedImage. Because we know the Image is fully loaded, we just need to create
a BufferedImage, get its graphics
context, and draw the Image into
it:
BufferedImagebi=newBufferedImage(w,h,BufferedImage.TYPE_INT_RGB);Graphics2DimageGraphics=bi.createGraphics();imageGraphics.drawImage(i,0,0,null);
Rescaling is an image operation that
multiplies all the pixel values in the image by some constant. It
doesn’t affect the size of the image in any way (in case you thought
rescaling meant scaling), but
it does affect the brightness of its pixel’s colors. In an RGB image,
for example, each of the red, green, and blue values for each pixel
would be multiplied by the rescaling multiplier. If you want, you can
also adjust the results by adding an offset. In the 2D API, rescaling is
performed by the java.awt.image.RescaleOp class. To create such
an operator, specify the multiplier, offset, and a set of hints that
control the quality of the conversion. In this case, we’ll use a zero
offset and not bother with the hints (by passing null):
op=newRescaleOp(1.5f,0,null);
Here, we’ve specified a multiplier of 1.5 and an offset of 0. All
values in the destination image will be 1.5 times the values in the
source image, which has the net result of making the image brighter. To
perform the operation, we call the filter() method from the BufferedImageOp interface.
An affine transformation is a kind of 2D transformation
that preserves parallel lines; this includes operations like scaling,
rotating, and shearing. The java.awt.image.AffineTransformOp image
operator geometrically transforms a source image to produce the
destination image. To create an AffineTransformOp, specify the transformation
you want in the form of an java.awt.geom.AffineTransform. The ImageProcessor application includes two
examples of this operator, one for rotation and one for scaling. As
before, the AffineTransformOp
constructor accepts a set of hints; we’ll just pass null to keep things simple:
elseif(option.equals("rotate"))op=newAffineTransformOp(AffineTransform.getRotateInstance(Math.PI/6),null);elseif(option.equals("scale"))op=newAffineTransformOp(AffineTransform.getScaleInstance(.5,.5),null);
In both cases, we obtain an AffineTransform by calling one of its static
methods. In the first case, we get a rotational transformation by
supplying an angle. This transformation is wrapped in an AffineTransformOp. This operator has the
effect of rotating the source image around its origin to create the
destination image. In the second case, a scaling transformation is
wrapped in an AffineTransformOp. The
two scaling values, .5 and .5,
specify that the image should be reduced to half its original size in
both the x and y axes.
When using an AffineTransformOp
to scale images, it’s important to note two things. Scaling an image up
will always result in poor quality. When scaling an image down, and more
generally with any affine transform, you can choose between speed and
quality. Using AffineTransformOp.TYPE_NEAREST_NEIGHBOR as the
second argument in your AffineTransformOp constructor will give you
speed. For the best quality use AffineTransformOp.TYPE_BICUBIC. AffineTransformOp.TYPE_BILINEAR
balances speed and quality.
One interesting aspect of AffineTransformOp is that you may “lose” part
of your image when it’s transformed. For example, when using the rotate
image operator in the ImageProcessor
application, the destination image will have clipped some of the
original image out. Both the source and destination images have the same
origin, so if any part of the image gets transformed into negative x or
y space, it is lost. To work around this problem, you can structure your
transformations such that the entire destination image is in positive
coordinate space.
Get Learning Java, 4th Edition now with the O’Reilly learning platform.
O’Reilly members experience books, live events, courses curated by job role, and more from O’Reilly and nearly 200 top publishers.

