Moon Travel Planner: Creating a Project
Let’s get some practice with Project Builder by creating a project from a Carbon application template, then building and running it. You’ll create a new project for the Moon Travel Planner application we specified in Chapter 2. When you’re done, you’ll have an application that displays an empty window and lets you quit.
To create the Moon Travel Planner project, do the following:
Double-click the Project Builder icon located in Mac OS X in the directory
/Developer/Applications. The first time you open Project Builder, the Project Builder Assistant opens. You’ll need to complete the setup process before you can proceed with the next step.Choose New Project from the File menu. A dialog opens with a list of template objects, as shown in Figure 3.12.
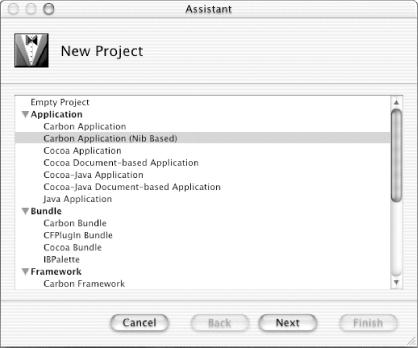
Figure 3-12. Choosing the type of project
Select Carbon Application (Nib Based), then click Next. Nib refers to a project that uses Interface Builder to create user interface resources. You’ll use Interface Builder later to modify the default interface you get with the project.
Type
Moon Travel Planneras the project name (as shown in Figure 3.13) and click Set to choose a location to store the project. A sheet appears that lets you navigate to the location you want to store the project.Click Finish. The main window for Project Builder opens, with files for our new application in the Groups & Files list. ...
Get Learning Carbon now with the O’Reilly learning platform.
O’Reilly members experience books, live events, courses curated by job role, and more from O’Reilly and nearly 200 top publishers.

