Chapter 1. Boot Knoppix
Hacks 1–11
Throughout this book, Knoppix is described as the Swiss Army knife for system troubleshooting and repair. Like a Swiss Army knife, Knoppix has many handy tools, both general-purpose (like a knife or a screwdriver) and special-purpose (like a corkscrew). Some of these tools are used for specific repairs, while others are used for routine maintenance.
You should not use a Swiss Army knife for the first time when you are locked in a room with a bomb that is just seconds away from exploding—we can’t all be MacGyver. Likewise, you should familiarize yourself with Knoppix before you use it to attempt to rescue your sick notebook that you never backed up or the company’s failed accounting server. This chapter starts you on the path to Knoppix mastery by beginning at the beginning: booting Knoppix. By using the cheat codes and boot time options covered in this chapter, you should be able to get Knoppix to boot on almost any x86 computer.
The first hacks in this chapter highlight the basics for obtaining the latest version of Knoppix and getting to the boot: prompt. All new computers support booting from an optical (CD or DVD) drive, and many computers attempt to boot directly from a CD rather than from the hard drives on the system. In case your computer doesn’t support booting directly from a CD, I have included instructions for booting Knoppix from a floppy disk and from the network.
The second part of this chapter covers cheat codes—options you pass at the boot: prompt in Knoppix to change its behavior. When talking about cheat codes, I’m really talking about ways in which Knoppix’s hardware detection and support might fail and how to work around such failures. By the end of this chapter, you should be comfortable with booting Knoppix on a variety of computers and be ready to use the desktop environment.
I remember introducing a friend of mine to Knoppix on a laptop. We were at the university library, and he couldn’t get his wireless card to connect to the library’s wireless network with his current Linux distribution. We decided to give Knoppix a chance. Without using any cheat codes, we found that Knoppix booted with full video and sound support, and his wireless card was not only detected, but Knoppix automatically connected it to the wireless network!
I certainly hope your experience with Knoppix is as straightforward as my friend’s experience. If not, it will be good to know that these cheat codes are at your disposal. They are quite like the can opener on a Swiss Army knife—something you don’t usually reach for day to day, but when you do need it, you really need it!
Boot Knoppix on a Desktop
The common PC desktop is a great place to begin experimenting with Knoppix.
For a long time, Knoppix was released only on CD-ROM. Over time, however, the space restrictions on a CD-ROM made it more difficult for new releases to come out since Klaus Knopper had to figure out which software to keep and what to take out. Starting with Knoppix 4.0, Klaus split up Knoppix into a CD and a DVD release. The CD still had the same software that it always had for the most part, but the DVD included all sorts of new software such as the complete Gnome desktop environment, which had to be removed from the CD for space reasons.
For some computers, booting Knoppix is as simple as putting the CD in the CD-ROM drive or the DVD in the DVD-ROM drive and restarting the computer. For some computers, however, booting Knoppix might require changing the boot order in the BIOS. The BIOS is the screen that appears when you first boot a machine, and it usually lists the amount of RAM and the hard drives it detects. Older systems that don’t support booting from a CD require that you boot from a floppy.
Change the BIOS Boot Order
If your computer supports booting from a CD-ROM or DVD-ROM, [Boot Knoppix on a Desktop] but won’t boot Knoppix by default, your problem is probably the system boot order setting in the BIOS. To change the boot order and save it, you must enter the BIOS setup, which you can do at boot time by pressing a special key. Some BIOSes tell you at boot time the key to press to change BIOS settings; the common ones are Esc, F2, and Del.
Once in the BIOS, find the section that changes boot device order. On some BIOSes, this setting is changed by selecting a tab along the top labeled Boot, while on others the option may be named “Boot device order” or something similar. Once you have found this setting, move the CD-ROM or DVD-ROM device so that it is listed before any hard drives. If you can’t find or change this option, or you need other information specific to you system, refer to the BIOS manual that should have come with your computer or motherboard (you can often find out the BIOS key by searching Google for your computer model and the word “BIOS”). Once you have changed the boot device order, save your settings (doing this should also reboot the computer), and after your system boots and detects the Knoppix disk, you will be placed at the Knoppix boot prompt.
Boot Knoppix from a Floppy
Some older computers do not support booting directly from a CD-ROM. For these computers, you must first create a boot floppy that enables the system to boot from the Knoppix disk. With older versions of Knoppix there were tools available to allow you to create a boot floppy but unfortunately the Linux kernel has gotten so large that it won’t fit on a single floppy anymore. While there are still ways to split the kernel across floppy disks, an easier approach is to use the Smart Boot Manager (http://btmgr.sf.net), a tool that creates a boot floppy that can boot just about any optical disk. To create an SBM boot floppy, go to their download page at http://btmgr.sf.net/download.html and download either the Binary Linux sbminst file to create the floppy from a Linux system, or the Binary DOS sbminst.exe file to create it from Windows.
To create an SBM floppy under Linux, insert a blank floppy into the drive and then run the following commands:
$chmod a+x/path/to/sbminst $ /path/to/sbminst–d/dev/fd0
Change /path/to/smbinst and /dev/fb0 to reflect where you downloaded sbminst and your floppy device, respectively. Note that you may have to run sbminst as the root user if your regular user does not have permission to write to the floppy device.
To create an SBM floppy under Windows, insert a blank floppy into the drive, click Start → Run and run cmd.exe (under Vista, you can type cmd.exe into the search field and press Return), and then in the Command Prompt window that opens, type:
sbminst–d 0With the floppy disk created and still inserted into the floppy drive, reboot the machine and boot off of the floppy. In the GUI that appears, you will see a number of options and devices listed. Use the arrow keys to move down to the CDROM device and hit Enter to boot the Knoppix CD.
The Knoppix Boot Prompt
Once you have booted from either a CD, DVD, or a floppy, you are presented with the Knoppix boot screen, as shown in Figure 1-1.
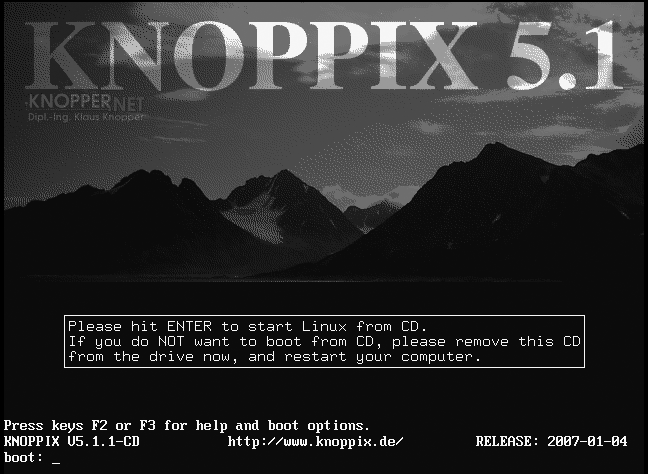
To boot directly into Knoppix, either hit Enter or wait a few seconds, and Knoppix will start the boot process. At this boot prompt, you can enter special Knoppix cheat codes [Use Knoppix Cheat Codes] to control the boot process. Press F2 and F3 at this prompt to display some of the cheat codes.
As Knoppix boots, it displays colorful output while it detects your hardware. Once it has detected and set up your hardware, it automatically launches into the desktop environment and finishes by opening a web browser showing Knoppix documentation. At this point, you can launch programs, browse the Web, and play games. When you log out of the desktop environment, Knoppix shuts down and ejects the disk for you. If you use a floppy to boot Knoppix, remember to eject it, or the next time you start your computer, it will try to boot into Knoppix again.
Tip
If Knoppix doesn’t boot, refer to the different cheat code hacks, starting with [Use Knoppix Cheat Codes], which provide Knoppix hardware-detection hints. “Solve Knoppix Booting Problems” of [Use Advanced Knoppix Cheat Codes] offers specific tips.
Boot Virtualized Knoppix
Try out the Knoppix DVD in a self-contained virtualized environment on Windows without rebooting your computer.
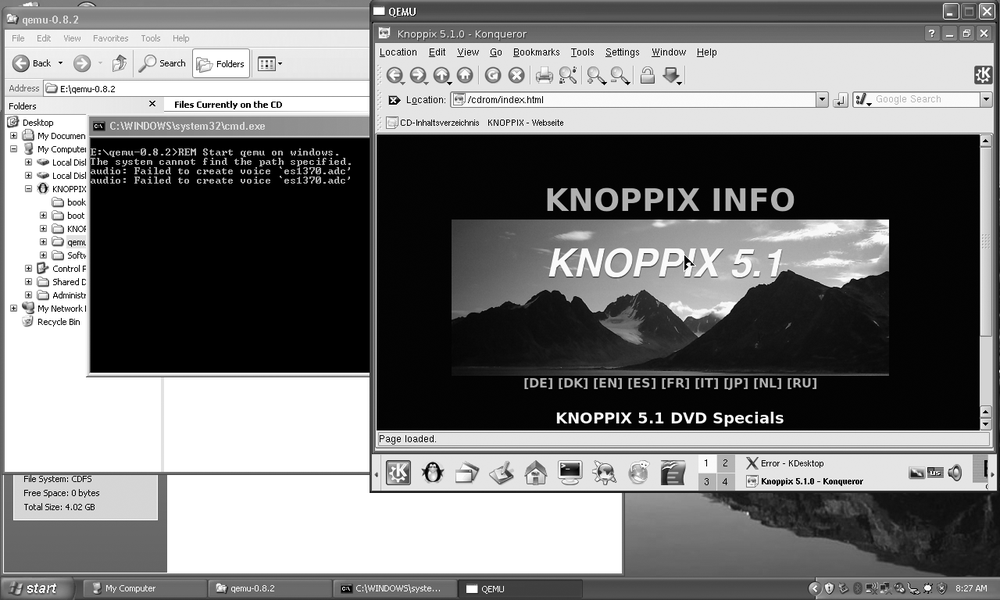
While it’s certainly very easy to boot a Knoppix disk to try it out, you may want to show Knoppix to a friend or try it out without rebooting the computer and closing any windows you currently have open. If you have the Knoppix DVD, there is a solution for you. Added to the regular Knoppix software on the disk is a Qemu virtual machine environment (http://fabrice.bellard.free.fr/qemu/) that is already set up so that you can boot the Knoppix machine completely within Qemu and try it out without rebooting or even closing any other windows on your desktop.
To try this out under Windows, insert your Knoppix DVD. The autorun is configured to open the Knoppix page within a web browser, but close that and then open My Computer, find the DVD drive, and right-click on it and select Explore. Open the qemu directory that is the root of the DVD filesystem and then click on the start.bat file you see within. That’s it! Qemu will automatically start and you will be greeted with the Knoppix boot screen (Figure 1-2). Click within the window if you want to enter any cheat codes, or otherwise just wait and it will boot automatically. Hit Ctrl-Alt at any point if you want your mouse and keyboard focus to leave the Qemu environment and go back to your desktop.
When you are finished using Knoppix, shut down the virtualized Knoppix as you normally would, or just close the window in which it is running.
Get Knoppix
Knoppix can be downloaded from the Knoppix mirrors or purchased from an online site.
This book includes a copy of Knoppix 5.1.1 DVD from 2007-01-04 (KNOPPIX_V5.1.1DVD-2007-01-04-EN), which was the last release in the 5.1 series. All of the hacks have been tested and written in terms of this release, but most hacks should work fine across newer releases.
Get the Latest Version
Even though new, major versions of Knoppix are released every year or so, new, incremental releases occur very frequently. These incremental versions have the latest updates to all the software on the disk, the latest Linux kernels, and sometimes, new features. New software updates offer bug fixes and new-and-improved features. New kernel updates often mean better hardware support; if an older version of Knoppix doesn’t boot on your computer, the latest release of Knoppix might give you better results. Sometimes new features are added in incremental releases in the form of improved hardware detection, extra Knoppix configuration tools, or new cheat codes [Use Knoppix Cheat Codes]. In general, if you need to address a problem with your Knoppix disk, the latest release might fix it.
Download Knoppix
To obtain the latest version of Knoppix, download the CD or DVD image from one of Knoppix’s mirrors or send away for a copy. If you have an unmetered broadband Internet connection and a CD-R/RW or DVD-R/RW drive, simply download the CD or DVD image; it’s the best way to get Knoppix. A collection of mirrors listed at http://www.knopper.net/knoppixmirrors/index-en.html provides images in ISO format over http, ftp, or rsync. (I’ve found the kernel.org mirror to be consistently fast.) If you use Bittorrent (a peer-to-peer file sharing application designed for sharing large files), you can use the Knoppix torrent link on this page. When you click on a mirror, you are taken to a licensing agreement page. Have your lawyer read through the software license (your lawyer reviews all of your software licenses before you accept, right?), click Accept to proceed, and then choose a file from the list that is presented. In addition to the latest version of Knoppix, most mirrors host a few past images with their MD5sum, which you can use to verify that the file downloaded correctly.
When trying to decide which CD to choose, it helps to understand the scheme Knoppix uses for naming CD images. Here is an example ISO filename:
KNOPPIX_V5.1.1CD-2007-01-04-EN.iso
Deciphering the filename isn’t tricky and can be quite informative. In the aforementioned example, KNOPPIX is followed by the current version, in this case 5.1.1. After that is CD or DVD, denoting whether this is the CD or DVD release. Following the version and type is a date stamp, which indicates the CD image’s release date; in this example, the CD was released on January 04, 2007. These date stamps indicate the incremental version mentioned earlier. After the date stamp, there is a language code, in this case EN for English. Knoppix is a German project, and while the default language can be changed with cheat codes [Speak Different Languages] at boot time, the Knoppix project releases both German and English CDs to save English-speaking users from having to enter a language cheat code at every boot. English-speaking users should download images with the EN language code, and German-speaking users should download images with the DE language code. Everyone else can choose either image and use a language cheat code at boot time.
Select the latest version of Knoppix by clicking on the filename. The 700 MB file can take anywhere from a few hours to a day to download, depending on the speed of your broadband Internet connection and the current load of your mirror. The 4 GB DVD image will obviously take substantially longer and is recommended only for high-speed Internet connections.
Once the image is downloaded, you might want to confirm that the full file has been downloaded correctly and is an exact copy of the original file. An MD5sum is a checksum created from a large stream of data using the MD5 algorithm and is often used to verify that large files downloaded correctly. Practically speaking, an MD5sum-generating program takes your Knoppix ISO file and creates a fingerprint that only that one file is capable of making. Changing even a single bit affects the MD5sum; therefore, if any error occurs during the download process, the generated sum is different from the one listed on the mirror. If both MD5sums match, the file you have is exactly like the file on the mirror.
There are a number of utilities to create an MD5sum under Windows. One such tool can be found at http://www.md5summer.org. Once you install this program, run it, click on Verify Sums, and navigate to the Knoppix ISO you wish to verify, and click OK. On your Linux machine, you will probably find that the md5sum utility is already installed. (Mac OS X has a similar utility, md5, which will print out the MD5sum so you can compare it to what’s in the .md5 file.) You’ll need to install it if it is not. Once md5sum is installed, make sure the .md5.asc file from the mirror is in the same directory as the image, and then type:
$md5sum -cvKNOPPIX_V5.1.1CD-2007-01-04-EN.iso.md5.ascKNOPPIX_V5.1.1CD-2007-01-04-EN.iso OK $
If the md5sums match, you are dropped back to a prompt; otherwise, you receive the following error:
$md5sum -cvKNOPPIX_ V5.1.1CD-2007-01-04-EN.iso.md5.ascKNOPPIX_V5.1.1CD-2007-01-04-EN.iso FAILED md5sum: 1 of 1 file(s) failed MD5 check $
You can also generate an MD5sum from the command line by typing:
$md5sumKNOPPIX_V5.1.1CD-2007-01-04-EN.iso379e2f9712834c8cef3efa6912f30755 KNOPPIX_V5.1.1CD-2007-01-04-EN.iso
Compare the MD5sum you generate to the corresponding .md5.asc file from the mirror. If both match, you have a complete ISO and are ready to create a CD.
You can burn the Knoppix ISO to a CD or DVD using your favorite disk burning software. It is important that you select the Burn Image or an equivalent option on your diskburning software. Do not select the option to burn a data CD or DVD; you will end up with a CD or DVD containing a single ISO file, which will not boot.
Buy a Knoppix Disk
If you don’t have an unmetered broadband Internet connection, or you don’t have a CD or DVD writer, or you simply don’t want to bother with downloading and burning a disk, you can receive a Knoppix CD or DVD through the mail from a number of third-party vendors. There is a list of vendors to choose from at http://www.knopper.net/knoppix-vendors/index-en.html. These vendors are unaffiliated with the Knoppix project itself and also offer other Linux distributions on CD and DVD. When ordering, make sure that the version the vendor is offering is the latest version by comparing its release date with the latest release on one of the Knoppix mirrors. You can purchase a Knoppix CD for $1.50 or a DVD for $5 plus shipping, which is a small price to pay if you want to avoid the hassle of downloading and burning a disk.
Use Knoppix Cheat Codes
Cheat codes are extra instructions you type at boot time that change many of Knoppix’s settings. On some hardware, these codes may be necessary to get the most out of Knoppix.
Knoppix is good at automating many of the tasks that Linux users often conduct manually, such as hardware configuration, setting up the network, and logging into a desktop. If you want to customize options or change what Knoppix automatically runs, you can enter special commands at the boot prompt, which Knoppix refers to as cheat codes. Cheat codes are a reference to the secret passwords or key sequences entered in video games to get unlimited lives or other special items. Fortunately, cheat codes in Knoppix are simple words you type at the boot prompt, and not complicated joystick sequences like up, down, up, down, left, right, left, right, B, A. The cheat codes aren’t secret either. Open the Knoppix disk under your current OS and browse to the KNOPPIX directory. The cheat codes file is called knoppix-cheatcodex.txt. You can also reference a list of the most frequently used cheat codes by pressing F2 at the boot prompt.
To use cheat codes at the boot prompt, type knoppix to select the default kernel, followed by the cheat codes you wish to use. For example, if your Knoppix disk doesn’t work the way you expect, you can test it for any physical errors on the disk; at the boot: prompt, type the following command:
knoppix testcdTable 1-1 lists many of the settings and options you can change from the boot: prompt using cheat codes.
|
Cheat Code |
Purpose |
|
|
Check CD/DVD data integrity and MD5sums |
|
|
Use specified window manager |
|
|
Runlevel 2, Textmode only |
|
|
Do NOT eject CD after halt |
|
|
Do NOT prompt to remove the CD |
|
|
Boot with fancy background splashscreen |
For example, if you want to use the fluxbox window manager instead of the default KDE desktop, type the following at the boot: prompt:
knoppix desktop=fluxboxLook at the list of cheat codes to see a number of other window managers, including kde, icewm, twm, and fluxbox if you are using the CD, plus gnome, larswm, openbox, ratpoison, wmaker, xfce, and xfce4 if you are using the DVD. Each of these window managers offers different features, and most of them offer a completely different environment from what a Windows user might be used to. In addition, many of these other desktop environments load faster and use less memory than the default KDE desktop.
A new feature for Knoppix is the addition of beryl, the hardware-accelerated window manager. Use of this window manager requires that Knoppix support hardware acceleration for your video card. Compatibility with beryl can be a matter of trial and error. For example, even though Nvidia cards have 3d support under Linux, their drivers aren’t automatically included with Knoppix. If your card does work, type knoppix desktop=beryl at the boot prompt.
The text mode cheat code (type knoppix 2 at the boot: prompt) is useful in circumstances when you don’t need a full graphical environment or your graphical environment does not work. This cheat code goes through the full hardware detection but leaves you at a simple prompt instead of launching a desktop environment. On machines with less than 64 MB of RAM (less than 82 MB if using KDE), this mode lets you boot into Knoppix and take advantage of all of Knoppix’s command-line utilities—just without the desktop environment. This mode is also useful because it quickly boots into a full shell without the wait for X and a desktop environment to load. After you boot into text mode, you can switch into a full desktop environment by changing your runlevel; at a prompt, type the following command, and Knoppix will start up the default desktop environment:
root@tty1[/]# init 5The splash cheat code adds some extra eye candy to the boot process. This cheat code replaces the colorized text output with a fancier graphical background as the system is booting, reminiscent of loading Windows. Hit the Esc key to drop back to the default text output.
The noeject and noprompt cheat codes are useful when, the next time you boot, you plan to use the Knoppix CD in the same system. By default, when Knoppix shuts down, it ejects the CD and prompts you to hit Enter to complete the shutdown. Use these cheat codes to disable these two convenience features, and when Knoppix shuts down, it leaves the CD in the drive for the next boot.
Experiment! Try out new desktops. Test different cheat code combinations. Remember that changes you make with cheat codes do not persist across reboots, and desired changes must be entered at the boot: prompt each time. To make settings persistent, save them on media, such as a USB drive, a floppy diskette, or an existing hard drive. (Saving persistent settings is covered in detail in “Create Persistent Knoppix Settings” [Create Persistent Knoppix Settings].)
Speak Different Languages
One of the advantages of Linux is its native language support. Knoppix is provided in English and German versions, but other languages are supported.
Knoppix’s popularity has spanned the globe, and as a result, it comes bundled with support for many different languages. Although versions exist that default to German or English, Knoppix can easily boot into many different languages through the use of cheat codes. This hack covers the language cheat codes shown in Table 1-2.
When changing language options, the lang cheat code is the main cheat code to use. To change the default language to Spanish, for instance, simply pass the cheat code at the boot: prompt:
lang=esThis cheat code takes care of all of the locale options, so that all menus, prompts, the desktop environment, and the keyboard are set to the specified language.
Tip
Many beta Knoppix CDs come only in German versions. The differences in the German and English keyboard layouts make themselves apparent when you try to enter the lang=us cheat code. The = key on the German keyboard can be entered with Shift-0, the / key is located at Shift-7, and the _ key can be typed with Shift-/. If you want to enter the keyboard or xkeyboard cheat code, keep in mind that the Z and Y keys on the German keyboard are swapped compared to their English counterparts.
To change the keyboard mapping separately from the default locale, use the keyboard and xkeyboard cheat codes. These options change the keyboard language used on the console and graphical desktop respectively.
If Knoppix doesn’t choose your correct time zone, you can either wait for the desktop to boot and right-click on the clock in the bottom right-hand corner to change it, or you can use the tz cheat code to specify a particular time zone to use. You can get the proper name for a particular time zone within Knoppix—just open a terminal and run the tzselect program.
If you have forgotten to set the lang cheat code before booting up and find that your German is a bit rusty, you can change the language settings from the desktop without rebooting. The first step is to change KDE’s language settings:
Click on the German flag at the bottom right of the desktop to the left of the clock. Each click will cycle through a list of flags corresponding to languages.
Click K Menu → Kontrollzentrum to launch the KDE Control Center.
From the KDE Control Center, click on Regionaleinstellungen & Zugangshilfen → Land/Region & Sprache.
Pick out the appropriate country from the drop-down menu at the top, choose your language from the Languages list, and click Anwenden at the bottom to apply the changes.
While the Control Center is open, follow these steps to change your keyboard layout:
Click on Tastaturlayout in the Control Center sidebar.
Pick the appropriate language from the drop-down menu labeled Verfugbare Belegungen.
Click Hinzufugen to move that language to the list of active languages.
Select your language under the menu labeled Aktive Belegungen.
Click Anwenden to apply the changes. Changes to the language settings apply only to new programs, so anything that is currently open must be restarted if you want the menus to change.
This still does not change the language of any icons on the desktop. To do this, you must completely restart the desktop environment, so either click K Menu → KNOPPIX → Utilities → Choose/Restart KNOPPIX Desktop, or type this command in a shell to drop down to text mode:
knoppix@ttyp0[knoppix]$ sudo init 2Then bring the desktop back up by typing this command:
root@tty1[/]# init 5Keep in mind that this will only change the settings for KDE programs. You may still need to navigate within the settings of non-KDE programs to change their language settings. If you need to change many programs, it is simpler and faster to just reboot and use the correct cheat code.
Free Your CD to Make Knoppix Run Faster
Make Knoppix run faster by loading the Knoppix image to RAM or saving it to the hard drive. This also frees your CD-ROM drive for other uses.
Compared to other live-CD distributions, Knoppix runs surprisingly quickly, considering that it downloads data from a compressed image on the disk. If you want to speed things up, but aren’t ready to install Knoppix on your hard drive just yet, there are cheat codes that allow you to copy the complete Knoppix disk image to either RAM or a partition on your hard drive, and run it from there. (If you are ready to install it on your hard drive, see Chapter 4.) These cheat codes give you the added benefit of freeing up the disk drive for other uses—particularly handy if you have only a single disk drive in a system; you can play music or burn CDs/DVDs while using Knoppix.
The toram cheat code instructs Knoppix, before it does anything else, to create a large ramdisk and copy the complete CD there. A ramdisk is a virtual hard disk that your operating system creates by setting aside a certain amount of your RAM. When you boot with this cheat code, Knoppix warns you that it might take some time to copy the full image and provides a progress bar while the image is copying. The Knoppix CD image is approximately 700 MB by itself, so this option is only for those of you with 1 GB or more RAM in your system: even after copying the CD to RAM, Knoppix still needs a good portion of the RAM for loading applications and writing temporary files. To load the entire DVD to RAM, you will need at least 4.4 GB available. Knoppix will detect whether you have enough RAM for this cheat code as it boots, and if you don’t have enough, it alerts you that it ran out of space and cannot complete the copy and drops back to loading directly from the CD-ROM.
If you don’t happen to have large amounts of RAM in your system, you can still free up your CD-ROM drive by using the tohd cheat code. Similar to the toram cheat code, this cheat code copies the complete CD image to a partition on your hard drive. This partition can be almost any filesystem that the Knoppix supports, including Windows filesystems such as FAT, FAT32, and NTFS. Keep in mind that FAT filesystems don’t support DVD-sized files, so if you use the DVD you can only use the tohd cheat code on NTFS and Linux filesystems. This cheat code expects you to pick the partition using Linux device names, so if you want to use the first partition on your Primary IDE hard drive, type:
tohd=/dev/hda1If you are unsure which device name to use, simply boot Knoppix from the CD and make note of the names on the hard-drive icons on your desktop. You can use any one of these devices that has enough available space. As with the toram cheat code, tohd requires you to have over 700 MB free on your partition for the CD, and over 4.4 GB free for the DVD. Knoppix copies its disk image into a directory called knoppix at the root of the partition that you specify.
One advantage to using the tohd cheat code is that the knoppix directory it copies is not deleted when you reboot. In subsequent boots, you can reference the already copied image by using the fromhd cheat code. So, if you have previously used the cheat code tohd=/dev/hda1 on a computer, type this command to use the same image again:
fromhd=/dev/hda1
You can even just type fromhd without any arguments, and Knoppix scans the hard-drive partitions for you.
Boot from a CD Image
Another feature in Knoppix is the bootfrom cheat code. With this option, instead of a CD or DVD, you can choose an ISO image you currently have on your hard drive for Knoppix to run from. While similar to the fromhd cheat code, bootfrom uses an actual Knoppix ISO that you must already have on your hard drive. One stipulation for this cheat code is that the ISO you choose must have the same kernel version as the disk you are using to boot. There are different ways to check the kernel version, but probably one of the best ways is to go to a Knoppix mirror and download the KNOPPIX-CHANGELOG.txt file. This file lists all of the major changes in each Knoppix release and usually lists the kernel versions for each release. Otherwise, to quickly check the kernel version from within Knoppix itself, run the following command in a terminal:
	knoppix@Knoppix$ uname -r
	2.6.19
To boot from an ISO, type bootfrom followed by the full path to the ISO file. The bootfrom cheat code expects the same Linux paths as tohd and fromhd, so if you have Knoppix.iso in the root directory on your Primary IDE hard drive, type:
bootfrom=/dev/hda1/Knoppix.isoThis cheat code also accepts wildcards, so if you specified K*.iso instead of Knoppix.iso, it would look for any file starting with K and ending in .iso. The bootfrom cheat code is particularly useful if you are customizing Knoppix [Create a Customized Knoppix], as you can have multiple ISOs in a single directory and choose between any of them at boot time. This cheat loads from an ISO and not directly from a CD, so you aren’t restricted by the 700 MB capacity limit of a CD-ROM. If you are modifying your own Knoppix-based distribution and are having a difficult time squeezing it all within 700 MB, test your images directly from the ISO without having to worry about the CD size requirements.
After you boot off of the stored image, the Knoppix disk no longer needs to be mounted, so you can eject it and use the drive for other tasks. You can also use these cheat codes as an intermediate step before fully installing Knoppix to your hard drive.
Straighten Out Your X Settings
Finely tune X Windows to get the most out of your video hardware, and work around hardware detection mistakes.
Knoppix detects video card and monitor settings pretty well. If it can’t detect any better settings, it tries to at least set up a generic environment for X. Even with its excellent hardware detection, sometimes Knoppix is unable to detect everything it needs to set up X the way you would like. If X won’t start up correctly or at all, you might be able to get things working with the variety of cheat codes Knoppix provides for X, as shown in Table 1-3.
|
Cheat Code |
Purpose |
|
| |
|
|
Use specified color depth for X |
|
|
Use 60 Hz vertical refresh rate for X |
|
|
Use 80 kHz horizontal refresh rate for X |
|
|
Use specified Xorg module |
|
|
Enable IMPS/2 protocol for wheel mice |
|
|
Force plain PS/2 protocol for PS/2 mouse |
|
|
No-frame-buffer mode, but X |
|
|
Use fixed frame-buffer graphics (1) |
|
|
Use fixed frame-buffer graphics (2) |
|
|
Use fixed frame-buffer graphics (3) |
Tweak the Monitor Settings
Knoppix attempts to automatically detect the highest resolution at the highest color depth your computer supports, and starts X at that resolution and depth. For some computers, these maximum settings might be hard on the eyes: Screen flicker may occur when refresh rates are too low, or tiny icons may occur when a resolution is too high. In these circumstances, you can usually fix the problem by using a few cheat codes to change your X server settings.
The screen cheat code lets you specify exactly at which resolution to run X. For instance, if your 15-inch monitor can support 1024 by 768, but 800 by 600 is more comfortable on your eyes, type the following at the boot: prompt:
screen=800x600
Similarly, the depth cheat code lets you configure how many bits per pixel for X to use to display color (for instance, the cheat code depth=16 starts X with support for 65,536 colors). Set depth to 24, 16, 15, or 8 (256 colors). Use this cheat code when you want to use high resolutions with high refresh rates, but your video card can display them only at lower color depths.
If Knoppix can’t automatically detect the appropriate horizontal and vertical refresh rates for your monitor, it might cause X to start up at a much lower resolution and refresh rate than your monitor is capable of. Alternatively, X might try to display the highest resolution possible, leaving you with screen flicker from the low refresh rate. In either case, you can force Knoppix to try X at a vertical and horizontal refresh rate of your choice with the xvrefresh and xhrefresh cheat codes. The documentation that came with your monitor should list in the technical specifications what range of vertical and horizontal refresh rates it supports. If you don’t have your monitor documentation, you can usually find technical specifications by searching for your monitor’s model number on the Internet. Also, some monitors actually list the horizontal and vertical refresh rates on a label on the back. Once you have a list of valid refresh rates your monitor supports, you can experiment with different values in the range until you find the optimal resolution, color depth, and vertical and horizontal refresh rates for your computer.
Video Card Cheats
Knoppix may not always detect the exact video card that is installed in your system. If you have two different video cards installed, it might detect one while you want to use the other, or you may have a cutting-edge video card that isn’t yet supported fully in X. Whatever the problem is, you can tell Knoppix which video card module to try by using the xmodule cheat code.
The xmodule cheat code specifies video card settings for the Xorg server. To tell Knoppix to use a specific video card module instead of what it autodetects, pass the name of the module as an argument to the xmodule cheat code. For example, to have Knoppix use the radeon module, you would type:
xmodule=radeonThree of the Xorg modules—svga, vesa, and fbdev—are particularly useful when X doesn’t support your chipset yet or X’s support for it is buggy. These modules access the lower-level generic video support many cards provide. This lower-level support means you do not get hardware acceleration for your video card, but you should be able to get basic functionality. The svga and vesa modules should work with any SVGA- or VESA-compliant video card. The fbdev module works a bit differently, as it accesses the low-level framebuffer support in the Linux kernel; its operation level depends on the level of support the Linux kernel has for the framebuffer mode of your particular video card hardware.
Help, My Mouse Is Crazy!
You can also configure mouse settings with cheat codes. If the mouse is moving wildly around the screen or moving down to the bottom-left corner, no matter where you try to point it, Knoppix might be trying the wrong protocol for the mouse. The nowheelmouse cheat code forces X to use the generic PS/2 protocol for the mouse. Alternatively, if it’s your wheel mouse that isn’t being detected, the wheelmouse cheat code forces the IMPS/2 protocol, which provides support for the scrollwheel, to be used.
Console Cheats
Just as you can tell Knoppix to run X directly through the framebuffer with the xmodule=fbdev cheat code, you can tell the Linux console to run through the framebuffer by passing fb along with the resolution you want to use. The fb cheat code is a bit different from most of the cheat codes in that it actually is specifying a special set of predefined kernel parameters to run the console specific resolution. To boot Knoppix into a 1280 by 1024 framebuffer console, type fb1280x1024 (not knoppix fb1280x1024).
The fb parameters change the vga= setting for the kernel and set xmodule=fbdev, so if there is a different resolution you want to use, you can look up the correct vga= line to use in /usr/src/linux/Documentation/fb/vesafb.txt.
Knoppix defaults to using a high-resolution console framebuffer when it boots. If it picks a resolution that’s too high, or there is some other problem with framebuffer support on your machine, you will see a blank screen and are not able to read any console output.
If you want to disable the framebuffer console completely, and use a regular 25 by 80 character mode console instead, add the following to the boot: prompt (it will still start up X after the system boots):
vga=normalUse Advanced Knoppix Cheat Codes
Choose advanced options for system tweaking and booting on exotic systems.
Knoppix’s cheat codes let you change many of its default behaviors. These range from which desktop environment to use to whether or not to eject the CD at shutdown. While many of the cheat codes are merely enhancements to the defaults, there is also a full set of advanced options. Many of these advanced cheat codes can help you work around bugs in your hardware or in Linux’s support of your hardware, or disable default options that could prevent Knoppix from booting. Some of the more advanced cheat codes for Knoppix are listed in Table 1-4.
|
Cheat Code |
Purpose |
|
|
Skip parts of hardware |
|
|
Boot with (almost) no hardware detection |
|
|
Workaround for bad PCI controllers |
|
|
Specify memory size in megabytes |
|
|
Enable DMA for all IDE drives |
|
|
Disable IDE RAID detection |
Solve Knoppix Booting Problems
Sometimes you might need to skip parts or full sections of Knoppix’s hardware detection so that it will boot on a particular system. On some hardware, certain parts of Knoppix’s hardware detection are known to freeze a system. On other systems, you might want to disable certain pieces of hardware you know are unstable. Knoppix allows you to use all of the standard Linux kernel parameters to disable as much of the hardware as you want. To disable a particular part of the hardware, just type no followed by the type of hardware to disable, such as noaudio to disable sound card detection. If you aren’t sure which phase of hardware detection is failing, the expert mode [Explore Expert Mode] walks you through each phase step by step so you can see how far along Knoppix gets before running into trouble.
Tip
The complete list of kernel parameters is listed along with every kernel’s documentation in the Documentation/kernel-parameters.txt file, which can be found at /usr/src/linux/Documentation/kernel-parameters.txt on the Knoppix CD.
There are many different kernel parameters you can use to disable hardware, but a few of these are well-known for booting Linux on problematic machines. A commonly suggested fix for many Linux boot problems is to disable APIC support (used for interrupt control in some multi-processor systems), which can be done with the noapic cheat code. Disable power management with noapm or acpi=off to help stabilize systems with buggy power management. Pass pci=bios to the kernel to work around problems with bad PCI controllers. Experiment with disabling different options or multiple options at once, as sometimes it is more than one piece of hardware that prevents Linux from booting. If all else fails, boot with failsafe to disable almost all of the hardware detection. The failsafe mode serves as a good sanity check to see if the Knoppix hardware detection is even the problem.
Enable Hardware
Knoppix by default makes heavy use of ramdisks for temporary file storage while it is booted. Because of this, it is important that Knoppix actually detects all of your available RAM; otherwise, you might not be able to start X or load many programs once X is started. Some BIOSes have been known to be problematic and fail to accurately report the available RAM to Linux, but you can bypass these problems and tell Linux how much RAM is in the system by using the mem boot parameter. For example, if Knoppix isn’t detecting all 256 MB of your RAM, tell the Linux kernel to use 256 MB of RAM, despite what the BIOS might claim, by typing:
mem=256MLinux typically detects the proper DMA settings for any IDE devices in your system, and Knoppix enables DMA by default. DMA on hard drives gives a noticeable performance boost, and on DVD drives, DMA prevents movies from skipping. Sometimes you must force Knoppix to enable DMA on devices that you know support it. Use the dma boot parameter to enable DMA.
As you can see, there are many advanced cheat codes to pass to Knoppix at boot time. To get Knoppix to boot on a difficult system, the best combination of cheat codes depends heavily on the hardware involved. Hardware forums and newsgroups are great resources to search when trying to get Linux working with a particular chipset. Often other people have already done much of the guesswork for you. Pay particular attention to threads involving Linux installation even if the thread isn’t about Knoppix, as those threads often list kernel parameters that work around or fix problematic hardware.
Run Knoppix on a Laptop
With laptop sales on the rise, it is increasingly common that your desktop machine is actually a laptop. Knoppix provides cheat codes and other options so it can boot on laptop hardware.
If any type of hardware will make you resort to cheat codes and kernel-parameter voodoo to boot Knoppix, laptops will. Laptop manufacturers often resort to using special proprietary hardware that often has little to no support in the Linux kernel. Some laptops don’t even include an internal IDE CD-ROM drive, and instead have an external PCMCIA, USB, or IEEE1394 CD-ROM. On Knoppix, support for the CD-ROM after the BIOS boots is pretty important! Laptops also rely on power management features that can be iffy at times. None of these issues should scare you away from trying Knoppix on a laptop. Many of these problems can be solved or at least worked around using cheat codes.
Tip
Knoppix is one of the best distributions when it comes to getting laptops working out of the box. I recommend taking a Knoppix disk with you when shopping for laptops; it is one of the best ways to see how well Linux will run on that machine. Convincing the clerk at Best Buy to let you boot with Knoppix will be your real challenge.
Laptop Display Tweaks
The specifics of tweaking display settings have been covered already in [Straighten Out Your X Settings]. Some of those cheat codes are particularly useful when setting up a laptop or desktop LCD display. Laptops use LCDs that have an ideal resolution even if they can display other resolutions. The fb cheat code is useful in these cases, because on some displays, running the console below the maximum resolution results in the desktop still being displayed with black bands around it (if not, text and images may appear jagged because your LCD panel scales up from the lower resolution to its maximum). To display a framebuffer console on a laptop that has an ideal resolution of 1024 x 768, boot Knoppix with:
fb1024x768In some cases, Knoppix may not detect the laptop’s video card or may detect it incorrectly. If forcing Knoppix to use a particular module with the xmodule cheat code doesn’t work, but the console displays fine, boot with xmodule=fbdev to use the same framebuffer support for X that you use in the console.
Special-Purpose Cheat Codes
There are many other special-purpose cheat codes to boot Knoppix on difficult hardware. Here are some bits of voodoo that have worked for other laptops. For some notebooks that use proprietary PCMCIA CD-ROM drives, the cheat code ide2=0x180 nopcmcia has been known to work by bypassing PCMCIA support in favor of direct BIOS support for the drive. If the PS/2 mouse on the laptop does not work, boot with pci=irqmask=0x0e98 to specify a specific PCI address.
For the worst cases, you might have to disable parts of the hardware to get the laptop to at least be partially usable. The cheat codes outlined in [Use Advanced Knoppix Cheat Codes] can help, particularly noapic, nofirewire,or noscsi. On some lines of Dell laptops, passing nosmp has made the difference in being able to boot. For a time on my Fujitsu laptop, I needed to boot Knoppix with ide0=ata66 ide1=ata66 to work around a bug in my IDE chipset. If the power management support for your laptop is unstable—for instance, the laptop goes to sleep, but you can’t wake it back up—you might want to disable power management completely with noapm and acpi=off.
Explore Expert Mode
Do-it-yourself types may not like all of the automatic configuration and hardware detection that Knoppix does. For people trying to troubleshoot and for the just plain curious, Knoppix provides an expert mode.
The goal of the Knoppix expert mode is to provide the user with complete control over the different steps that Knoppix performs when booting a system. Each step that Knoppix normally performs automatically behind the scenes is presented to the user with a prompt allowing you to configure exactly what Knoppix will do or won’t do. This can be particularly useful if you have a system that gets halfway through the boot process, and then mysteriously restarts. With the expert mode, you can see exactly which step in the Knoppix boot process has caused the boot to fail so you can bypass that step next time.
Step Through the Expert Mode
To start into the Knoppix expert mode, simply type this cheat code at the boot: prompt, followed by any other cheat codes you might want to use:
expertKnoppix starts by listing all of the SCSI modules available on the system followed by the question: “Load SCSI Modules?” At the prompt, you have the option of typing in the names of any SCSI modules you wish to load, or n for none. If you just hit Enter, Knoppix probes for which SCSI modules to load just like it does by default. After making your choice, you should notice that, in expert mode, Knoppix gives much more output, telling you which particular devices it is probing for and if the modules load successfully or not.
Next, Knoppix asks, “Do you want to load additional modules from floppy disk? [Y/N].” This option gives added flexibility to Knoppix in the case that the default Knoppix kernel doesn’t have a third-party module that you need for your hardware. After you answer this question, Knoppix enables DMA acceleration for IDE devices, creates the ramdisk, and starts the init process. Knoppix then notifies you that you have entered the interactive configuration’s second stage.
The interactive second stage gives you the opportunity to reconfigure many of your hardware settings through a series of questions. The first question is: “Do you want to (re) configure your console keyboard? [Y/N].” If you forgot to set the console keyboard to match your locale, you can now configure it. Following that is an option to configure your sound card. Select “yes” to launch the sndconfig program, which tries to detect your current sound card and loads the appropriate module for it. After you configure the sound card, you can set up your mouse. Select “yes” to start a mouse configuration program that asks you questions, such as how your mouse is connected and which protocol it uses.
After the mouse is configured, Knoppix detects your graphics settings and displays which default X configurations it will use and gives you the option to change them. Select “yes” to launch a full ncurses-based X configuration tool with options to configure your mouse, keyboard, monitor, video card, screen, and layout. This option is great for systems needing some extra tweaking to get X working correctly as you get a finer level of control over options than cheat codes can provide. After X is configured, Knoppix finishes its configuration and launches into the graphical desktop environment.
Check RAM for Errors with Memtest86+
Memtest86+ is a stand alone, BIOS-based memory test designed for x86 computers. It’s an updated version of the original Memtest86 software that adds more updated hardware compatibility. The official project page is at http://www.memtest.org and lists detailed information about the program.
This software is included with Knoppix and can be launched with the memtest kernel mode option. Instead of booting into Knoppix, you boot directly into the Memtest86+ software and start the scan. Memtest86+ runs a number of different types of memory tests in an indefinite loop, but a single pass should be sufficient to determine whether a system has bad memory and should be replaced. RAM errors can lead to frustrating system instability and random lockups. Memtest86+ runs several relatively quick tests that include writing different patterns of data to RAM and checking that the patterns were written correctly, and checking that neighboring blocks of RAM weren’t influenced by what was written. Even if you have bad RAM, you might pass many—if not most—of the tests Memtest86+ performs, so by default Knoppix will have Memtest86+ perform all of its tests, each designed to highlight different potential RAM problems.
As Memtest86+ runs, it reports errors it finds at each phase of the test directly on the screen along with a running tally. You also have the option of outputting a BadRAM pattern instead. BadRAM is a Linux kernel patch created by Rick van Rein and hosted at http://rick.vanrein.org. This patch allows you to tell the Linux kernel to ignore bad sections of memory so it can continue with what is left. By doing this, you don’t necessarily have to throw away RAM that has errors. To tell Memtest86+ to output BadRAM patterns, type c to pause the test and enter the configuration menu, 6 to enter the “Error Report Mode,” and 2 to select BadRAM patterns, then hit 8 to restart the test.
Tip
By default, Memtest86+ will launch directly into the test, but if you are an advanced user, you can press c to enter the configuration menu and change test settings.
If you are interested in what Memtest86+ is doing (on a basic level), here are the different test descriptions from the Memtest86+ documentation:
- Test 0 [Address test, walking ones, no cache]
Tests all address bits in all memory banks by using a walking ones address pattern. A walking pattern initializes the RAM to zero, then writes a one (or other pattern) to a location and reads all other locations to make sure that they are still zero. Then it verifies the first location, reinitializes all of the RAM to zero, and repeats the pattern at the next location until all of the RAM has been tested.
- Test 1 [Address test, own address]
Each address is written with its own address and then is checked for consistency. In theory, previous tests should have caught any memory addressing problems. This test should catch any addressing errors that somehow were not previously detected.
- Test 2 [Moving inversions, ones and zeros]
This test uses the moving inversions algorithm with patterns of all ones and zeros. Cache is enabled even though it interferes to some degree with the test algorithm. With cache enabled, this test does not take long and should quickly find all “hard” errors (errors that always occur) and some more subtle errors. This test is only a quick check.
- Test 3 [Moving inversions, eight-bit pattern]
This is the same as Test 1 but uses an eight-bit wide pattern of “walking” ones and zeros. This test will better detect subtle errors in "wide” memory chips (chips that store data more than one bit wide). A total of twenty data patterns are used.
- Test 4 [Moving inversions, random pattern]
Test 4 uses the same algorithm as Test 1 but the data pattern is a random number and its binary complement. This test is particularly effective in finding difficult-to-detect errors that vary depending on what data is written to RAM. A total of sixty patterns are used. The random number sequence is different with each pass, so multiple passes increase effectiveness.
- Test 5 [Block move, sixty-four moves]
This test stresses memory by using block move (movsl) instructions and is based on Robert Redelmeier’s burnBX test. Memory is initialized with shifting patterns that are inverted every eight bytes. Then 4 MB blocks of memory are moved around using the movsl instruction. After the moves are completed, the data patterns are checked. Because the data is checked only after the memory moves are completed, it is not possible to know where the error occurred. The addresses reported are only for where the bad pattern was found. Since the moves are constrained to an 8 MB segment of memory, the failing address will always be less than 8 MB away from the reported address. Errors from this test are not used to calculate BadRAM patterns.
- Test 6 [Moving inversions, thirty-two bit pat]
This is a variation of the moving inversions algorithm that shifts the data pattern left one bit for each successive address. The starting bit position is shifted left for each pass. To use all possible data patterns, thirty-two passes are required. This test is quite effective at detecting data-sensitive errors but the execution time is long.
- Test 7 [Random number sequence]
This test writes a series of random numbers into memory. By resetting the seed for the random number, the same sequence of numbers can be created for a reference. The initial pattern is checked and then complemented and checked again on the next pass. However, unlike the moving inversions test, writing and checking can only be done in the forward direction.
- Test 8 [Modulo 20, ones and zeros]
Using the Modulo-X algorithm should uncover errors that are not detected by moving inversions due to cache and buffering interference with the algorithm. As with Test 1, only ones and zeros are used for data patterns.
- Test 9 [Bit fade test, ninety minutes, two patterns]
The bit fade test initializes all of memory with a pattern and then sleeps for ninety minutes. Then memory is examined to see if any memory bits have changed. All ones and all zero patterns are used. This test takes three hours to complete. The Bit Fade test is not included in the normal test sequence and must be run manually via the runtime configuration menu.
As the test runs, you can keep track of which test phase is currently running, how many errors have been detected, which test caused the errors, and how many passes have been performed. The test will cycle indefinitely; one or two passes are generally enough to identify any major problems with your RAM. When you are satisfied with the number of passes, hit Esc to exit. If you have errors, there are a number of ways to proceed. If you have multiple memory modules, you may try removing all but one at a time so that you can isolate which one is problematic. Sometimes memory only shows errors on a particular machine, so move the module to a new machine and run Memtest86+ on it again.
Tip
There have been a number of reports of errors for Tests 5 and 8 on Athlon systems, even with name-brand memory and a quality motherboard. The creator of Memtest86+ insists that these errors are in fact legitimate and even if the RAM isn’t necessarily bad, it still does not seem to be able to run at Athlon speeds. His suggested remedy is to either choose more conservative memory timings on the mother-board, or replace the memory with higher-quality memory that can sustain those speeds.
Get Knoppix Hacks, 2nd Edition now with the O’Reilly learning platform.
O’Reilly members experience books, live events, courses curated by job role, and more from O’Reilly and nearly 200 top publishers.

