As discussed in the introduction to Chapter 1, one of JRubyâs great strengths is its ability to seamlessly interact with the wide variety of available Java libraries. One of the areas where this is most relevant is in the so-called enterprise domain, where Java has become well entrenched. Much of Javaâs success has come from the Java Enterprise Edition (Java EE, formerly known as J2EE) platform standards. But platforms that are not Java standards have been just as critical. Two will be covered in this chapter: Spring Framework and Hibernate.[8] Regardless of whether a particular technology is a standard or not, all enterprise Java platforms are designed to enable developers to focus on developing business and presentation logic rather than infrastructure and integration.
This chapter starts with a recipe about using Java Naming and Directory Interface (JNDI) objects from Ruby. As its name implies, JNDI is an API for accessing directory services. JNDI presents application developers with a unified interface that can span various services and service types. Within a Java EE application server, JNDI is used by application code to discover resources managed by the server. These could be data sources (a subject discussed throughout Chapter 2), Enterprise JavaBeans (EJBs), Java Messaging Service (JMS) objects, and a variety of other resources. Your Java EE application server documentation should provide complete details on what resources are available and how you can add additional resources to the server. JNDI can also be used to access external services. In the second and third recipes, we use JNDI to connect to a remote JMS broker using the Apache ActiveMQ server so that we can send and receive JMS messages. In a later recipe, we use JNDI to connect to a Lightweight Directory Access Protocol (LDAP) server and use JRuby to simplify the JNDI API.
Following JMS, we will look at implementing an Enterprise JavaBean (EJB). Thanks to the support for annotation-based configuration that arrived with EJB 3, EJB development has become much simpler, yet the lack of annotation support in JRuby means that you still have to write a small amount of bridge code to implement EJBs. Although JRuby and EJB may seem like an odd match at first, the EJB model can provide some significant benefits when being used with JRuby because of the instance pooling provided by Java EE containers. These containers all perform instance pooling for EJBs and only allow one consumer per EJB instance at a time. This means that when writing an EJB, whether using Java or Ruby, you do not need to worry about concurrency: the container does it for you. Many Ruby libraries, most notably ActiveRecord and Rails, have known concurrency problems; using EJBs eliminates the need to create custom instance pools as described in Creating a Pool of JRuby Runtimes and in the discussion of Rails in Chapter 2.
There are several recipes in this chapter that discuss JRuby integration with the Spring Framework, sometimes referred to as just Spring. Spring is, at the core, a platform for creating applications by defining application components (in the form of Java classes) and the relationships between them. This is known as Dependency Injection (DI) and/or Inversion of Control (IoC).[9] Leveraging this core platform, Spring also provides support for Aspect-Orientated Programming (AOP), transactions, authentication and authorization, remoting, model-view-controller (MVC) web development, and much more. Since version 2.0, Spring has provided support for dynamic languages, including JRuby. This support, the focus of several recipes, allows for objects defined in JRuby to be transparently integrated with objects defined in Java (or other dynamic languages).
This chapter also covers the Object-Relational Mapping (ORM) framework Hibernate as well as the Java Persistence API (JPA).[10] Due to JRubyâs Java integration, using these frameworks from JRuby isnât terribly complicated; mostly Hibernate and JPA just work. As a result, the recipes are about using JRuby as a productivity booster for these APIs.
Create a Ruby hash with the properties you want to use as the
environment and then pass this hash to the constructor of javax.naming.InitialContext, wrapping it in a
java.util.Hashtable object. For
example, the code in Example 4-1
creates a JNDI Context using the
University of Michiganâs public LDAP server.
Example 4-1. Creating a custom JNDI Context
include Java

import java.util.Hashtable
import javax.naming.InitialContext
import javax.naming.Context

env = {Context::INITIAL_CONTEXT_FACTORY => "com.sun.jndi.ldap.LdapCtxFactory",
       Context::PROVIDER_URL => "ldap://ldap.itd.umich.edu:389" }

ctx = InitialContext.new(Hashtable.new(env))Although JRuby will coerce Ruby hashes into Java objects that
implement the java.util.Map
interface, InitialContext objects are
configured using a Hashtable. As a
result, the hash must be wrapped by a Hashtable.
The properties used to instantiate the InitialContext object can also be stored in a
file called jndi.properties in the
Java classpath. In the case of Example 4-1, the following would be the
contents of jndi.properties:
java.naming.factory.initial = com.sun.jndi.ldap.LdapCtxFactory
java.naming.provider.url = ldap://ldap.itd.umich.edu:389
With this configuration in place, the InitialContext can be easily created using the
no-argument constructor:
ctx = InitialContext.new
Regardless of how it is configured, the value of the java.naming.factory.initial property must be a
class available on the classpath. As discussed in Adding JAR Files to the Classpath, JRuby has the ability to
add JAR files to the classpath dynamically. However, that capability
does not apply to classes used in this type of factory class. This is
because JAR files added dynamically to the classpath by JRuby are only
visible from Ruby code. Throughout the next recipe, for example, the
java.naming.factory.initial property
is set to org.apache.activemq.jndi.ActiveMQInitialContextFactory. If you tried to add this class (and its dependencies) to
the classpath in JRuby, a javax.naming.NoInitialContextException
will be thrown:
$jirbirb(main):001:0>include Javairb(main):002:0> irb(main):003:0*require '/opt/java/libs/geronimo-j2ee-management_1.0_spec-1.0.jar'irb(main):004:0>require '/opt/java/libs/geronimo-jms_1.1_spec-1.1.1.jar'irb(main):005:0>require '/opt/java/libs/activemq-core-5.1.0.jar'irb(main):006:0> irb(main):007:0*import java.util.Hashtableirb(main):008:0>import javax.naming.InitialContextirb(main):009:0>import javax.naming.Contextirb(main):010:0> irb(main):011:0*env = { Context::INITIAL_CONTEXT_FACTORY =>irb(main):012:1*"org.apache.activemq.jndi.ActiveMQInitialContextFactory",irb(main):013:1*Context::PROVIDER_URL =>irb(main):014:1*"tcp://localhost:61616" }irb(main):015:0>ctx = InitialContext.new(Hashtable.new(env))NativeException: javax.naming.NoInitialContextException: Cannot instantiate class:\ org.apache.activemq.jndi.ActiveMQInitialContextFactory
There is a solution to the problemâinstantiate the class directly:
import org.apache.activemq.jndi.ActiveMQInitialContextFactory

env = { Context::PROVIDER_URL => "tcp://localhost:61616" }
ctx = ActiveMQInitialContextFactory.new.get_initial_context(Hashtable.new(env))The JNDI website, http://java.sun.com/products/jndi/
Add any necessary JAR files to the classpath. Create a javax.naming.InitialContext object as
described in Creating a JNDI Context. The environment
settings will be documented by the JMS broker vendor. For example, to
connect to an instance of Apache ActiveMQ, you would use these
properties:
env = { Context::INITIAL_CONTEXT_FACTORY =>
        "org.apache.activemq.jndi.ActiveMQInitialContextFactory",
        Context::PROVIDER_URL =>
        "tcp://localhost:61616" }
Once the InitialContext has
been properly created, look up the JMS ConnectionFactory and Destination objects:
connection_factory = ctx.lookup("ConnectionFactory")
destination = ctx.lookup("dynamicQueues/output.queue")
The rest is simply JMS boilerplate, which we can encapsulate into a Ruby class as seen in Example 4-2.
Example 4-2. Sending a JMS message from Ruby
include Java
import java.util.Hashtable
import javax.naming.InitialContext
import javax.naming.Context
import javax.jms.Session
class JmsSender
def initialize(environment)
@context = InitialContext.new(Hashtable.new(environment))
@connection_factory = @context.lookup("ConnectionFactory")
end
def send_text_message(destination_name, message_text)
destination = @context.lookup(destination_name)
connection = @connection_factory.create_connection()
session = connection.create_session(false, Session::AUTO_ACKNOWLEDGE)
producer = session.create_producer(destination)
message = session.create_text_message
message.text = message_text
producer.send(message)
session.close
end
end
env = { Context::INITIAL_CONTEXT_FACTORY =>
"org.apache.activemq.jndi.ActiveMQInitialContextFactory",
Context::PROVIDER_URL =>
"tcp://localhost:61616" }
sender = JmsSender.new(env)
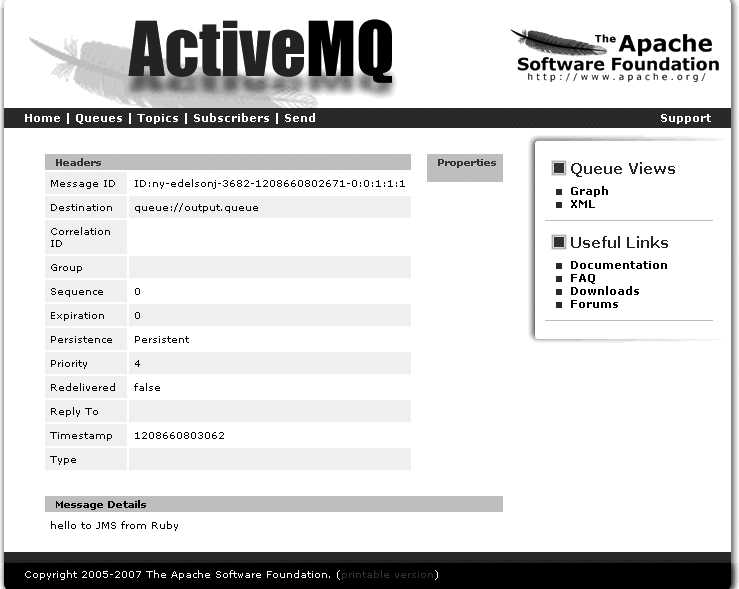
sender.send_text_message("dynamicQueues/output.queue", "hello to JMS from Ruby")This message can then be seen in the ActiveMQ administrative web client, as in Figure 4-1.
As discussed in Creating a JNDI Context, to
create a javax.naming.InitialContext
object using org.apache.activemq.jndi.ActiveMQInitialContextFactory,
the ActiveMQ JAR files must be on the classpath when the application
startsânot added dynamically by JRuby.
The JMS API defines five different types of messages:
- Stream
Defined by the
javax.jms.StreamMessageinterface, messages of this type contain one or more Java primitives or objects in sequential order.- Map
Defined by the
javax.jms.MapMessageinterface, messages of this type contain one or more name-value pairs. The names are JavaStringobjects and the values can be primitives or objects.- Text
Defined by the
javax.jms.TextMessageinterface, messages of this type contain a singleStringobject.- Object
Defined by the
javax.jms.ObjectMessageinterface, these messages contain a Java object that implements theSerializableinterface.- Bytes
Defined by the
javax.jms.BytesMessageinterface, this message type is largely to support existing (i.e., non-JMS) messaging systems.
All of these message types can be used from JRuby, but special
care must be taken when sending objects as JRuby objects are not
correctly handled using Java serialization. This is true even if the
message receiver is a JRuby application. For example, letâs add a
send_object_message method to the
class from Example 4-2:
def send_object_message(destination_name, message_object)
  destination = @context.lookup(destination_name)
  connection = @connection_factory.create_connection()
  session = connection.create_session(false, Session::AUTO_ACKNOWLEDGE)
  producer = session.create_producer(destination)
  message = session.create_object_message message_object
  producer.send(message)
  session.close
end
If you were to call this message with a Ruby array:
arr = ["one", "two", "three"]
send_object_message("dynamicQueues/output.queue, arr)
An exception would be thrown when this message was received
because the array is serialized as an org.jruby.RubyArray object. Instead, you
should create a java.util.ArrayList
object from this Ruby array:
arr = ["one", "two", "three"]
send_object_message("dynamicQueues/output.queue, java.util.ArrayList.new(arr))The initial setup is similar to sending JMS messages: create a
JNDI InitialContext object and look
up the ConnectionFactory and
destination from the JNDI context. Using the ConnectionFactory, create a Connection object and from the Connection, create a Session object. The Session object can be used to create a
MessageConsumer for a destination. The MessageConsumer object has two methods for
receiving messages, both named receive. If receive is called with no arguments, then the
method blocks until a message is available. If receive is called with an argument (which must
be numeric), the method blocks until a message is available or the
specific number of milliseconds passes.
Example 4-3 contains some basic code for receiving a message. Once the message is received, it is inspected to see if it is a text message and, if so, the text is output.
Example 4-3. Receiving a JMS message
include Java

import java.util.Hashtable
import javax.naming.InitialContext
import javax.naming.Context
import javax.jms.Session

env = { Context::INITIAL_CONTEXT_FACTORY =>
        "org.apache.activemq.jndi.ActiveMQInitialContextFactory",
       Context::PROVIDER_URL =>
       "tcp://localhost:61616" }

context = InitialContext.new(Hashtable.new(env))
connection_factory = context.lookup("ConnectionFactory")

destination = context.lookup("dynamicQueues/output.queue")
connection = connection_factory.create_connection()
session = connection.create_session(false, Session::AUTO_ACKNOWLEDGE)
consumer = session.create_consumer(destination)

connection.start

message = consumer.receive
if (message.respond_to? 'text')
 p "message = #{message.text}"
else
 p "message isn't a text message"
end

connection.stop
session.closeNote that in Example 4-3, we start the connection before receiving a message. A running connection is required before receiving messages whereas it is not for sending messages.
You want to encapsulate some Ruby code into an Enterprise JavaBean (EJB) in order to easily integrate it with other EJBs and servlets as well as take advantage of EJB container-provided services such as instance pooling, security, and transactions.
Create an interface and implementation class for your EJB. A
simple EJB interface, annotated with @Local is in Example 4-4.
Example 4-4. EJB local interface
package org.jrubycookbook.j2ee.ejb;

import javax.ejb.Local;

@Local
public interface Reverser {
    public String reverse(String string);
}
In the implementation class, create an initialization method and
use it to create an instance of the JRuby runtime. This could be done
with any of the techniques discussed in Chapter 3. Annotate this initialization method with
the @PostConstruct annotation. Then
in each business method (i.e., those defined by the EJB interface), wrap
the method arguments in Ruby objects, add them to the runtime, and
finally execute the appropriate block of Ruby code. Example 4-5 includes a JRuby-based EJB class. In this
example, the code is inline, but it could just as easily be in an
external file.
Example 4-5. JRuby EJB
package org.jrubycookbook.j2ee.ejb;

import javax.annotation.PostConstruct;
import javax.ejb.Stateless;

import org.jruby.Ruby;
import org.jruby.RubyString;
import org.jruby.javasupport.JavaEmbedUtils;

@Stateless
public class ReverserBean implements Reverser {

    private Ruby ruby;

    @PostConstruct
    public void init() {
        ruby = JavaEmbedUtils.initialize(Collections.EMPTY_LIST);
    }

    public String reverse(String string) {
        ruby.getGlobalVariables().set("$message", ruby.newString(string));
        return ruby.evalScriptlet("$message.reverse").asJavaString();
    }

}
This EJB can then be accessed by servlets and other EJBs in the same container. Example 4-6 includes a servlet that uses this EJB.
Example 4-6. Servlet accessing the JRuby EJB
package org.jrubycookbook.j2ee.servlet;

import java.io.IOException;

import javax.ejb.EJB;
import javax.servlet.ServletException;
import javax.servlet.http.HttpServlet;
import javax.servlet.http.HttpServletRequest;
import javax.servlet.http.HttpServletResponse;

import org.jrubycookbook.j2ee.ejb.Reverser;

public class ReverseServlet extends HttpServlet {

    @EJB
    private Reverser reverser;

    protected void doGet(HttpServletRequest req, HttpServletResponse resp)
            throws ServletException, IOException {
        String result = reverser.reverse(req.getParameter("word"));
        resp.getWriter().println(result);
    }

}
A remote interface could also be defined and annotated with
@Remote, which would make this EJB
accessible remotely using Remote Method Invocation (RMI).
As you can see, the class in Example 4-5 is just a bridge between the EJB container and the JRuby runtime. In large part, this is necessary because JRuby does not yet support Java annotations. If annotation support is added to JRuby in the future, it may be possible to eliminate the class (and perhaps the interface as well). It seems also likely that Java EE container vendors will add direct support for JRuby-based EJBs if there is demand for it.
The class in Example 4-5 is a stateless session bean (SLSB), but this same technique would hold true for stateful session beans (SFSBs) and message-driven beans (MDBs). You can also easily expose this EJB through a web service interface by adding some additional annotations, seen in Example 4-7.
Example 4-7. JRuby EJB with web service annotations
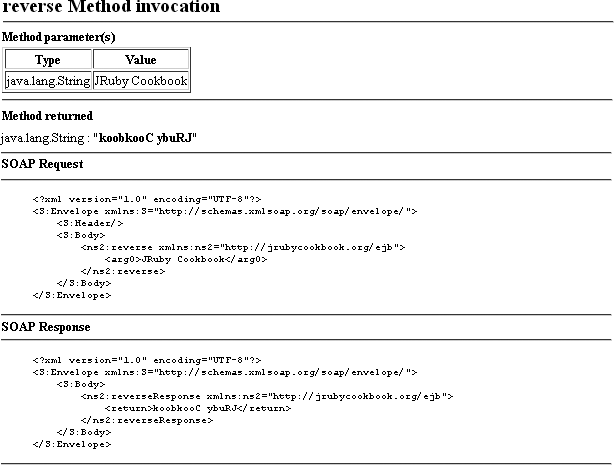
package org.jrubycookbook.j2ee.ejb;

import javax.jws.WebMethod;
import javax.jws.WebService;

// Other imports from Recipe 4-5

@WebService(targetNamespace = "http://jrubycookbook.org/ejb")
@Stateless
public class ReverserBean implements Reverser {

    private Ruby ruby;

// init() method from Example 4-5

    @WebMethod
    public String reverse(String string) {
        RubyString message = ruby.newString(string);
        ruby.getGlobalVariables().set("$message", message);
        return ruby.evalScriptlet("$message.reverse").asJavaString();
    }

}
Figure 4-2 shows this web service being tested through the web service testing interface included with the Sun Java System Application Server.
You use the Spring Framework as a Dependency Injection (DI) container and wish to define some of your beans with JRuby.
Create a Java interface that defines the methods you will be
implementing in your Ruby class. Use jruby element within the lang namespace in the Spring XML configuration
to define a bean using both the interface and the location of the Ruby
script. JRuby beans can also be configured using the lang:property element. A simple JRuby bean
definition can be seen in Example 4-8.
Example 4-8. Simple Spring JRuby bean definition
1 <?xml version="1.0" encoding="UTF-8"?>
2 <beans xmlns="http://www.springframework.org/schema/beans"
3     xmlns:xsi="http://www.w3.org/2001/XMLSchema-instance"
4     xmlns:lang="http://www.springframework.org/schema/lang"
5     xsi:schemaLocation="http://www.springframework.org/schema/beans
6         http://www.springframework.org/schema/beans/spring-beans.xsd
7         http://www.springframework.org/schema/lang
8         http://www.springframework.org/schema/lang/spring-lang.xsd">
9
10    <lang:jruby id="rubyListener"
11        script-interfaces="org.jrubycookbook.ch04.Listener"
12        script-source="classpath:org/jrubycookbook/ch04/ruby_listener.rb">
13        <lang:property name="prefix" value="(from Ruby) " />
14    </lang:jruby>
15
16 </beans>
In this example, lines 2 through 8 are the boilerplate Spring
configuration needed to set up both the default and lang namespaces. Lines 10 through 14 contain
the actual bean definition including the setting of a property named
prefix. The interface is defined in
Example 4-9 and the Ruby
implementation is in Example 4-10.
Example 4-9. Simple interface for Spring bean
package org.jrubycookbook.ch04;

public interface Listener {
    public void receiveMessage(String message);
}
Example 4-10. Ruby script referenced from Spring configuration
class RubyListener
    # setter for prefix property
    def setPrefix(p)
        @prefix = p
    end

    # implementation of Listener interface
    def receiveMessage(s)
        puts "#{@prefix}Got Message: #{s}"
    end
end

RubyListener.new
Note that for Spring to set the prefix property, a setPrefix() method must be defined. If we were
writing traditional Ruby code, this method would likely be called
prefix= and you would have generated
the method with attr_accessor or
attr_writer. But because Spring is
based on the JavaBean standard, it expects a method named setPrefix().
To use JRuby with Spring, your classpath must include the following JAR files, all of which are included in the Spring distribution:[11]
spring.jar
asm-2.2.3.jar
backport-util-concurrent.jar
cglib-nodep-2.1_3.jar
commons-logging.jar
jruby.jar
Warning
At the time of writing, Springâs support for JRuby was not compatible with the 1.1; only JRuby 1.0 is supported.
Springâs dynamic language support, which currently also includes
support for Groovy and BeanShell in addition to JRuby, works by creating
a dynamic proxy object that implements the interfaces listed in the
script-interfaces attribute. This
proxy receives the actual method calls and delegates to the object
created by the script file referenced in the script-source attribute. The syntax of the
script-source attribute is the standard Spring syntax for accessing
resources. In Example 4-8, we
are referencing a Ruby source file in the classpath, but this could just
have easily used a filesystem resource, a URL resource, or, if
appropriate, a servlet context resource.
Spring beans written in a dynamic language require some features
from the ApplicationContext interface, so a plain
BeanFactory implementation such as
that used in Example 4-11
wonât work.
Example 4-11. Using JRuby within a BeanFactory wonât work
package org.jrubycookbook.ch04;

import org.springframework.beans.factory.xml.XmlBeanFactory;
import org.springframework.core.io.ClassPathResource;

public class ListenerBootstrap {
    public static void main(String[] args) {
        ClassPathResource config =
            new ClassPathResource("org/jrubycookbook/ch04/listener_beans.xml");
        XmlBeanFactory ctx = new XmlBeanFactory(config);

        Listener listener = (Listener) ctx.getBean("rubyListener");
        listener.receiveMessage("Hello");
    }
}
Instead, we have to use an ApplicationContext implementation, such as the
ClassPathXmlApplicationContext class
used in Example 4-12.
Example 4-12. Using JRuby within an ApplicationContext
package org.jrubycookbook.ch04;

import org.springframework.context.support.ClassPathXmlApplicationContext;

public class ListenerBootstrap {
    public static void main(String[] args) {
        String config = "org/jrubycookbook/ch04/listener_beans.xml";
        ClassPathXmlApplicationContext ctx =
            new ClassPathXmlApplicationContext(config);

        Listener listener = (Listener) ctx.getBean("rubyListener");
        listener.receiveMessage("Hello");
    }
}
Looking back at Example 4-10, you can see that
this script both defines a Ruby class named RubyListener and returns
a new instance of that class. This wasnât actually necessary in this case; Spring would
be capable of recognizing that the script had created a class and would
generate a new instance of that class if one had not been provided.
However, it is good practice to include this command because Spring may
not always create a new instance of the correct class. The best example
of this is when the reference Ruby file contains multiple class
definitions, as in Example 4-13.
Example 4-13. Ruby script that will confuse Spring
class RubyListener
    def setPrefix(p)
        @prefix = p
    end

    # implementation of Listener interface
    def receiveMessage(s)
        puts "#{@prefix}Got Message: #{s}"
    end
end

class OtherRubyListener < RubyListener
    # implementation of Listener interface
    def receiveMessage(s)
        puts "#{@prefix}Got A Message: #{s}"
    end
end
As a result, itâs simpler to always use the new command on the last line of your Ruby
script to ensure that Spring has access to the correct object.
The Spring Framework website, http://www.springframework.org/
Your Spring container includes beans that you want to reload when their underlying definitions change.
Add a refresh-check-delay
attribute to the lang:jruby element
in your Spring XML configuration file. The use of this attribute tells
Spring to watch the resource referenced in the script-source attribute. The value indicates
how many milliseconds will pass between scans of the resource for
changes.
Alternatively, you can apply a default value for the
refresh-check-delay attribute by using the defaults element in the lang namespace. For example, to apply a one
second delay to all dynamic-language beans in the ApplicationContext, include this element in
your XML configuration file:
<lang:defaults refresh-check-delay="1000"/>
One simple way to demonstrate this refreshable bean functionality
is to use Springâs support for Java Timer objects. The Spring
configuration XML in Example 4-14 includes the same rubyListener bean defined in Example 4-10 and adds an
implementation of java.util.TimerTask
to output the current time. It also includes the Spring plumbing
necessary to invoke this task every five seconds.
Example 4-14. Refreshable JRuby Spring bean called by a TimerTask
<?xml version="1.0" encoding="UTF-8"?>
<beans xmlns="http://www.springframework.org/schema/beans"
    xmlns:xsi="http://www.w3.org/2001/XMLSchema-instance"
    xmlns:lang="http://www.springframework.org/schema/lang"
    xsi:schemaLocation="http://www.springframework.org/schema/beans
        http://www.springframework.org/schema/beans/spring-beans.xsd
        http://www.springframework.org/schema/lang
        http://www.springframework.org/schema/lang/spring-lang.xsd">

    <lang:defaults refresh-check-delay="1000" />

    <lang:jruby id="rubyListener"
        script-interfaces="org.jrubycookbook.ch04.Listener "
        script-source="classpath:org/jrubycookbook/ch04/ruby_listener.rb">
        <lang:property name="prefix" value="(from Timer) " />
    </lang:jruby>

    <bean id="sendDateTask" class="org.jrubycookbook.ch04.SendDateTask">
        <property name="listener" ref="rubyListener"/>
    </bean>

    <bean id="scheduledTask"
        class="org.springframework.scheduling.timer.ScheduledTimerTask">
        <property name="period" value="5000" />
        <property name="timerTask" ref="sendDateTask" />
    </bean>

    <bean id="timerFactory"
        class="org.springframework.scheduling.timer.TimerFactoryBean">
        <property name="scheduledTimerTasks">
            <list>
                <ref bean="scheduledTask" />
            </list>
        </property>
    </bean>
</beans>
The SendDateTask class, seen in
Example 4-15, simply formats the current
date and passes it to the injected implementation of the Listener interface.
Example 4-15. The SendDateTask class
package org.jrubycookbook.ch04;

import java.util.Date;
import java.util.TimerTask;

public class SendDateTask extends TimerTask {

    private Listener listener;

    public void setListener(Listener listener) {
        this.listener = listener;
    }

    public void run() {
        listener.receiveMessage(String.format("%tT", new Date()));
    }
}
With these classes in place, we can start up the ApplicationContext with the code in Example 4-16. Once it is
running, changes to the ruby_listener.rb file can be seen with each
execution of SendDateTask.
Example 4-16. Starting an ApplicationContext with Timer support
package org.jrubycookbook.ch04;

import org.springframework.context.support.ClassPathXmlApplicationContext;

public class TimedBootstrap {
    public static void main(String[] args) {
        String config = "org/jrubycookbook/ch04/timer_beans.xml";
        ClassPathXmlApplicationContext ctx =
            new ClassPathXmlApplicationContext(config);
    }
}
For example, we could change the RubyListener class to reverse the
messages:
class RubyListener
    def setPrefix(p)
        @prefix = p
    end

    # implementation of Listener interface
    def receiveMessage(s)
        puts "#{@prefix}Got Message: #{s}".reverse
    end
end

RubyListener.new
Making this change while the ApplicationContext is running can produce
output like this:
(from Timer) Got Message: 21:21:48
(from Timer) Got Message: 21:21:53
85:12:12 :egasseM toG )remiT morf(
Youâre using Spring and want to define beans in JRuby directly inside your Spring XML configuration file instead of in an external file.
Instead of providing a resource location with a script-source attribute, you can include JRuby
script inside an inline-script
element in the lang namespace as seen
in Example 4-17.
Example 4-17. JRuby script inside an inline-script element
<?xml version="1.0" encoding="UTF-8"?>
<beans xmlns="http://www.springframework.org/schema/beans"
    xmlns:xsi="http://www.w3.org/2001/XMLSchema-instance"
    xmlns:lang="http://www.springframework.org/schema/lang"
    xsi:schemaLocation="http://www.springframework.org/schema/beans
        http://www.springframework.org/schema/beans/spring-beans.xsd
        http://www.springframework.org/schema/lang
        http://www.springframework.org/schema/lang/spring-lang.xsd">

    <lang:jruby id="rubyListener"
        script-interfaces="org.jrubycookbook.ch04.Listener">
        <lang:inline-script><![CDATA[
class RubyListener
    def setPrefix(p)
        @prefix = p
    end

    # implementation of Listener interface
    def receiveMessage(s)
        puts "#{@prefix}Got Message: #{s}"
    end
end

RubyListener.new
        ]]></lang:inline-script>
        <lang:property name="prefix" value="(from Ruby) " />
    </lang:jruby>

</beans>Your Spring ApplicationContext
contains JRuby-based beans that need to implement one of the
Aware interfaces, such as org.springframework.context.ApplicationContextAware.
Include implementations of the methods defined in the interface in
your JRuby class and add the appropriate interface name to the script-interfaces attribute.
The Spring Framework includes a number of interfaces that can be used to make a bean aware of its surroundings. Generally, these interfaces define a single method that is called by the container during initialization. Here is a sampling of these interfaces:
org.springframework.context.ApplicationContextAwareThe
ApplicationContextinstance that contains this bean is passed to thesetApplicationContext()method.org.springframework.beans.factory.BeanFactoryAwareThe
BeanFactoryinstance that contains this bean is passed to thesetBeanFactory()method.org.springframework.beans.factory.BeanNameAwareThe name of this bean in the containing
BeanFactoryis passed to thesetBeanName()method.org.springframework.context.ResourceLoaderAwareA
ResourceLoader, which can resolve aStringidentifier to aResourceobject, is passed to thesetResourceLoader()method.org.springframework.context.MessageSourceAwareA
MessageSource, which can resolve a message code and parameters to an appropriately internationalized message, is passed to thesetMessageSource()method.org.springframework.web.context.ServletContextAwareA
javax.servlet.ServletContextobject is passed to thesetServletContext()method.
Example 4-18 shows
an inline implementation of the BeanNameAware interface.
Example 4-18. Inline JRuby Spring bean that implements the BeanNameAware interface
<lang:jruby id="rubyListener"
    script-interfaces="org.jrubycookbook.ch04.Listener,
               org.springframework.beans.factory.BeanNameAware">
    <lang:inline-script><![CDATA[
class RubyListener
    # implementation of BeanNameAware interface
    def setBeanName(beanName)
        @beanName = beanName
    end

    # implementation of Listener interface
    def receiveMessage(s)
        puts "Hello, I'm named #{@beanName}"
        puts "#{@prefix}Got Message: #{s}"
    end
end

RubyListener.new
    ]]></lang:inline-script>
</lang:jruby>
As implementations of these interfaces are generally the sameâjust
save the injected object into an instance variableâthey are a good case
for using Ruby modules. Example 4-19 contains a Ruby
module named Spring that includes
boilerplate implementations of the interfaces listed earlier in this
recipe.
Example 4-19. Ruby module implementing Spring aware interfaces
module Spring
    # implementation of ApplicationContextAware interface
    module ApplicationContextAware
        def setApplicationContext(ctx)
            @applicationContext = ctx
        end
    end

    # implementation of BeanFactoryAware interface
    module BeanFactoryAware
        def setBeanFactory(bf)
            @beanFactory = bf
        end
    end

    # implementation of BeanNameAware interface
    module BeanNameAware
        def setBeanName(beanName)
            @beanName = beanName
        end
    end

    # implementation of ResourceLoaderAware interface
    module ResourceLoaderAware
        def setResourceLoader(loader)
            @resourceLoader = loader
        end
    end

    # implementation of MessageSourceAware interface
    module MessageSourceAware
        def setMessageSource(source)
            @messageSource = source
        end
    end

    # implementation of ServletContextAware interface
    module ServletContextAware
        def setServletContext(ctx)
            @servletContext = ctx
        end
    end
end
Using this module in a Ruby class is simply a matter of including the appropriate module, as in Example 4-20.
Redeploying a Java controller in Spring MVC can be time-consuming and disruptive to development. This is especially the case for web applications with many modules and/or large amounts of data loaded on startup. You would like to modify your controller code without reloading the running web application.
Springâs dynamic language support can speed up the development of
Spring MVC applications by
allowing you to define the controllers as JRuby objects. Not only can
you eliminate the compilation step needed for Java development, but with
Springâs refreshable bean feature
(see Defining Spring Beans in JRuby), controller
classes can be updated and redefined at runtime without a redeployment
of the full web application. Open the Spring configuration file and
create a JRuby controller by defining a Spring bean using the dynamic
language elements as described in Implementing an Enterprise JavaBean with JRuby and Defining Spring Beans in JRuby. Set the value of script-interfaces to org.springframework.web.servlet.mvc.Controller
and script-source to the location of
a Ruby file that will define and instantiate the controller class. Note
that the scripts-source value is
relative to the web application folder. Example 4-21 shows a Spring
configuration file with a JRuby controller named hellocontroller that
renders a JSP page.
Example 4-21. Spring configuration file with simple JRuby controller
<beans xmlns="http://www.springframework.org/schema/beans"
  xmlns:xsi="http://www.w3.org/2001/XMLSchema-instance"
  xmlns:lang="http://www.springframework.org/schema/lang"
  xsi:schemaLocation="http://www.springframework.org/schema/beans
http://www.springframework.org/schema/beans/spring-beans-2.5.xsd
http://www.springframework.org/schema/lang
http://www.springframework.org/schema/lang/spring-lang-2.5.xsd">

  <lang:jruby id="hellocontroller" refresh-check-delay="3000"
    script-source="/WEB-INF/ruby/hello.rb"
    script-interfaces="org.springframework.web.servlet.mvc.Controller">
  </lang:jruby>

  <bean id="viewResolver"
    class="org.springframework.web.servlet.view.InternalResourceViewResolver">
    <property name="viewClass"
      value="org.springframework.web.servlet.view.JstlView"/>
    <property name="prefix" value="/WEB-INF/jsp/"/>
    <property name="suffix" value=".jsp"/>
  </bean>

  <bean id="urlMapping"
    class="org.springframework.web.servlet.handler.SimpleUrlHandlerMapping">
    <property name="mappings">
      <props>
        <prop key="/hello.htm">hellocontroller</prop>
      </props>
    </property>
  </bean>
</beans>
Open the Ruby file specified by the script-source value and create a JRuby class
with a handleRequest method that
takes two arguments, the HttpServletRequest and HttpServletResponse objects. The handleRequest method is called on each web
request and returns a Java ModelAndView object that contains the view
name and model map. The last statement in your Ruby file must
instantiate the new controller class. Example 4-22 shows a JRuby
controller that adds a few values to the model and renders the hello.jsp template.
Example 4-22. JRuby class as a Spring MVC controller
include Java

import org.springframework.web.servlet.ModelAndView

class HelloController
   def handleRequest(request, response)
      mav = ModelAndView.new "hello"
      mav.add_object("example","hello!")
      mav.add_object("example_hash",{"foo"=>"bar","alpha"=>"beta"})
      return mav
   end
end

HelloController.new
The JSP page in Example 4-23 uses the
standard syntax to access the model data and works independently from
the controllerâs choice of implementation language. The Ruby hash that
was added to the model, example_hash,
is conveniently converted into a Java map and accessed using the JSP
shorthand for outputting maps.
Example 4-23. Simple JSP template
<%@ page contentType="text/html;charset=UTF-8" language="java" %>

<!DOCTYPE html PUBLIC "-//W3C//DTD HTML 4.01 Transitional//EN"
  "http://www.w3.org/TR/html4/loose.dtd">
<html>
  <head>
    <meta http-equiv="Content-Type" content="text/html; charset=ISO-8859-1">
    <title>My Sample JSP</title>
  </head>
  <body>
    String val: ${example}<br/>
    Hash val foo: ${example_hash.foo}<br/>
    Hash val moo: ${example_hash.alpha}<br/>
  </body>
</html>
Redeploy your controller by overwriting the existing Ruby file in your web application. Update the file in the web application folder if you are deploying an expanded WAR. Otherwise, locate the temporary folder where the container has exploded your WAR or EAR file and update the controller. Consult the documentation of your application server because this location differs for each server and platform; it is usually found in a temporary file area or in the same folder as the WAR. The location of the expanded WAR is often written to the console on startup and can be found in the application serverâs logs.
JRuby controllers can also be defined in your Spring configuration
file using the inline bean support (see Defining Spring Beans in JRuby). The inlinecontroller bean in Example 4-24 contains the same code
that would normally be in the Ruby file specified by the script-source value. Itâs not advised to build
your entire web application using this technique for code management
reasons and the loss of the redeployment feature, but this feature may
be useful for the quick prototyping of controllers or adding some simple
redirection logic, which is demonstrated in Example 4-24.
Example 4-24. Inline JRuby controller definition
<lang:jruby id="inlinecontroller"
  script-interfaces="org.springframework.web.servlet.mvc.Controller">
  <lang:inline-script>
include Java
import org.springframework.web.servlet.ModelAndView
class MySecController
   def handleRequest(request, response)
      ModelAndView.new "redirect:/hello.htm"
   end
end
MySecController.new
  </lang:inline-script>
</lang:jruby>Ideally, working with a Hibernate Data Access Object (DAO) should
be no different from any other Java class. The main concern for JRuby
developers is the use of Java Generics and JRubyâs inability to create
classes or call methods with input arguments that use the Generics
feature. Hibernate gives Java developers a lot of flexibility in the
implementation of the DAO and many leverage Java Generics to reduce the
size of classes and method counts. However, the typical pattern for
creating DAOs in the most popular online tutorials do not expose the
Generics as part of the DAOsâ public API, even though they are used
internally. They are commonly created through a factory interface or by
instantiating wrapper DAOs for classes. The JRuby program in Example 4-25 accesses the
PersonDao through a factory while the
EventDao is directly instantiated.
Example 4-25. Accessing Hibernate Data Access Objects
include Java

import example.dao.PersonDao
import example.dao.DaoFactory
import example.dao.EventDao
import example.model.Person
import example.model.Event
import util.HibernateUtil

event_dao = EventDao.new
event_dao.set_session HibernateUtil::get_session_factory.get_current_session
dao.create(Event.new("JRuby Meeting",java.util.Date.new))
dao.find_all.each do |e| puts "#{e.get_title } #{e.get_date}"; end

person_dao = DaoFactory.instantiate(PersonDao.class)
dao.create(Person.new("Justin","Wood"))
dao.create(Person.new("Brian","Henry"))
dao.find_all.each do |p| puts "#{p.get_firstname} #{p.get_lastname}"; endThe Hibernate session is obtained through a static method in the
HibernateUtil class and manually
injected into the EventDao class.
Itâs a common Hibernate design pattern to provide access to the
Hibernate session factory through a static method in a global utility
class. The HibernateUtil class
becomes the common point of configuration and management and can hide
many of the mapping details from your DAOs.
Database transactions can be nicely expressed using a Ruby
function that yields to an inputted block. The block contains the
database interaction code and is evaluated between the enclosing parent functionâs
call to initialize and end the transaction. Errors can be detected and
handled in the transaction function and kept out of the business code.
The result is clean API that eliminates the verbose and repetitive
transaction calls and an enhanced clarity of the transactional code,
which is now identified through a function metaphor rather than explicit
API calls to begin and end the transaction. Example 4-26 defines a TransactionHelper module that contains
functions to initiate a standard JDBC transaction and the more universal
Java Transaction API (JTA) transaction. The example also includes a
controller that demonstrates the use of the module and how to easily add
either transaction mechanism to your database access code.
Example 4-26. Using blocks to define transactions
include Java

import util.HibernateUtil
import javax.naming.InitialContext

module TransactionHelper

  def with_transaction
    begin
      tx = HibernateUtil.session_factory.current_session.beginTransaction
      yield
      tx.commit
      HibernateUtil.session_factory.current_session.close
    rescue
      tx.rollback
    end
  end

  def with_jta_transaction
    begin
      ctx = InitialContext.new
      utx = ctx.lookup("java:comp/UserTransaction");
      utx.begin();
      yield
      utx.commit
    rescue
      utx.rollback
    end
  end
end

class UserController
    extend TransactionHelper
  def create
    with_transaction do
       @id = User.create("Tom")
    end

    with_jta_transaction do
      tom = User.find_by_id(@id)
    end
  end
endUse the static JPA method Persistence.createEntityManagerFactory() to
generate a factory for your persistence unit. A call to the factoryâs
createEntityManager() method
generates a new EntityManager class,
which is your primary tool for accessing the Persistence API. The EntityManager is
analogous to Hibernateâs Session or
Toplinkâs ClientSession object and contains the
methods to interact with the database and your model objects. The
EntityManager object is not
threadsafe and shouldnât be used with multiple concurrent requests. It
is designed to be used and discarded in a relatively short amount of
time and not as a long-running software component. Example 4-27 shows a JRuby application
that creates a few User objects and
then queries the database to confirm that they were successfully
added.
Example 4-27. Example JPA access from JRuby
include Java

import javax.persistence.Persistence
import cookbook.User

def with_trans(em)
 t = em.getTransaction();
 begin
   t.begin()
   yield
   t.commit
 ensure
   t.rollback if t.isActive
 end
end

emf = Persistence.createEntityManagerFactory("hello-world")
em = emf.createEntityManager

with_trans(em) do
      u = User.new("stephen","lee","slee","password","stephen@ora.com")
      u2 = User.new("stephen","smith","ssmith","password","ssmith@ora.com")
      em.persist(u)
      em.persist(u2)
end
query = em.createQuery("select u from User u where u.firstname = :firstname").
query.set_parameter("firstname", "stephen").
hu = query.get_result_list

hu.each do |u|
  puts "found #{u.firstname} #{u.lastname}"
end

em.close
emf.closeThe example demonstrates the use of a block once again (see Creating Spring MVC Controllers with JRuby) to express a JPA transaction. This helper method also automatically rolls back the transaction if the commit should fail.
Credit: Steven Shingler
Use the Mule client module, available from http://mule.mulesource.org, and a Ruby XML parsing library such as REXML or Hpricot. Example 4-28 uses Mule to make a request to one of the web services provided by the National Oceanic and Atmospheric Administration (NOAA).
Example 4-28. Making a SOAP request with the Mule client module
include Java

require "rexml/document"
import org.mule.module.client.MuleClient

url = "axis:http://www.weather.gov/forecasts/xml/SOAP_server/ndfdXMLserver.php"
method = "method=LatLonListZipCode"
client = MuleClient.new
message = client.send("#{url}?#{method}", "10036", nil)
doc = REXML::Document.new message.payload
puts doc.root.elements[1].text
exit
To run this script, Mule and several dependencies need to be added
to the classpath. Because of classloader requirements, these
dependencies must be on the system classpath (e.g., through the use of
the CLASSPATH environment variable); they cannot be
added to the classpath by using JRubyâs extension of the require method as described in Adding JAR Files to the Classpath. For this particular
script, the dependencies can be added to the classpath using these
commands:
export MULE_LIB=/opt/mule/lib
export CLASSPATH=$CLASSPATH:$MULE_LIB/opt/activation-1.1.jar
export CLASSPATH=$CLASSPATH:$MULE_LIB/opt/axis-1.4.jar
export CLASSPATH=$CLASSPATH:$MULE_LIB/opt/axis-jaxrpc-1.4.jar
export CLASSPATH=$CLASSPATH:$MULE_LIB/opt/backport-util-concurrent-3.1.jar
export CLASSPATH=$CLASSPATH:$MULE_LIB/opt/commons-beanutils-1.7.0.jar
export CLASSPATH=$CLASSPATH:$MULE_LIB/opt/commons-codec-1.3.jar
export CLASSPATH=$CLASSPATH:$MULE_LIB/opt/commons-collections-3.2.jar
export CLASSPATH=$CLASSPATH:$MULE_LIB/opt/commons-discovery-0.2.jar
export CLASSPATH=$CLASSPATH:$MULE_LIB/opt/commons-httpclient-3.1.jar
export CLASSPATH=$CLASSPATH:$MULE_LIB/opt/commons-io-1.3.1.jar
export CLASSPATH=$CLASSPATH:$MULE_LIB/opt/commons-lang-2.3.jar
export CLASSPATH=$CLASSPATH:$MULE_LIB/opt/commons-logging-1.1.1.jar
export CLASSPATH=$CLASSPATH:$MULE_LIB/opt/commons-pool-1.4.jar
export CLASSPATH=$CLASSPATH:$MULE_LIB/opt/dom4j-1.6.1.jar
export CLASSPATH=$CLASSPATH:$MULE_LIB/opt/geronimo-j2ee-connector_1.5_spec-1.1.jar
export CLASSPATH=$CLASSPATH:$MULE_LIB/opt/geronimo-servlet_2.5_spec-1.1.jar
export CLASSPATH=$CLASSPATH:$MULE_LIB/opt/jaxen-1.1.1.jar
export CLASSPATH=$CLASSPATH:$MULE_LIB/opt/jug-2.0.0-asl.jar
export CLASSPATH=$CLASSPATH:$MULE_LIB/mule/mule-core-2.0.2.jar
export CLASSPATH=$CLASSPATH:$MULE_LIB/mule/mule-module-client-2.0.2.jar
export CLASSPATH=$CLASSPATH:$MULE_LIB/mule/mule-transport-axis-2.0.2.jar
export CLASSPATH=$CLASSPATH:$MULE_LIB/opt/saaj-api-1.3.jar
export CLASSPATH=$CLASSPATH:$MULE_LIB/opt/stax-api-1.0.1.jar
export CLASSPATH=$CLASSPATH:$MULE_LIB/opt/wsdl4j-1.6.1.jar
export CLASSPATH=$CLASSPATH:$MULE_LIB/opt/wstx-asl-3.2.6.jar
Note
The âFull Distributionâ Mule download includes all third-party dependencies except for Jakarta Commons Logging, which can be downloaded from http://commons.apache.org/logging/.
The send method of the MuleClient class will accept any object as the
message payload. However, care must be taken when passing objects other
than Java primitives or their Ruby equivalents. For these other types,
use the Axis WSDL2Java tool to generate Java classes from the web
serviceâs descriptor:
$ java org.apache.axis.wsdl.WSDL2Java\
http://www.weather.gov/forecasts/xml/SOAP_server/ndfdXMLserver.php?wsdl
In Example 4-28, the
URL for the NOAA web service endpoint is prefixed with axis, indicating to the Mule engine that we
wish to use the Axis library to invoke the web service. By including
different and/or additional dependencies on the classpath, different
libraries and different transport mechanisms can be used.
Mule website, http://mule.mulesource.org/
Apache Axis website, http://ws.apache.org/axis/
REXML website, http://www.germane-software.com/software/rexml/
Hpricot website, http://code.whytheluckystiff.net/hpricot/
You are looking up entries and attributes in an LDAP directory through JNDI and are looking to simplify the API.
Use JRubyâs open class feature (described in Implementing a Java Interface in Ruby) to add helper methods
to the com.sun.jndi.ldap.LdapCtx
class.
Although powerful, the JNDI API can frequently feel unnecessarily verbose. For example, the Java code required to access a single attribute value is awkward:
// Lookup the entry
LdapContext entry = ctx.lookup("uid=mts,ou=People,dc=umich,dc=edu");
// First, get all of the Attributes associated with this entry.
Attributes attributes = entry.getAttributes("");
// Then get a single named Attribute.
Attribute attribute = attributes.get("mail");
// Then actually get the value.
String value = (String) attribute.get();
For an attribute with multiple values, itâs even worse:
// Lookup the entry
LdapContext entry = ctx.lookup("uid=mts,ou=People,dc=umich,dc=edu");
// First, get all of the Attributes associated with this entry.
Attributes attributes = entry.getAttributes("");
// Then get a single named Attribute.
Attribute attribute = attributes.get("mail");
// Then get a NamingEnumeration of the attribute values.
NamingEnumeration ne = attribute.getAll();
// Create a list, loop through the NamingEnumeration,
// and add each value to the list
List<String> values = new ArrayList<String>();
while (ne.hasMore()) {
    values.add(ne.next());
}
Example 4-29 shows two
methods being added to the LdapCtx
class, which simplify this API significantly.
Example 4-29. Adding methods to the LdapCtx class
include Java

import com.sun.jndi.ldap.LdapCtx

class LdapCtx
    def get_attribute_value(key)
        get_attributes("", [key].to_java(:string)).get(key).get
    end
    def get_attribute_values(key)
        values = []
        enum = get_attributes("", [key].to_java(:string)).get(key).get_all
        while enum.has_more
            values << enum.next
        end
        return values
    end
end
Adding these methods makes the following code to access the LDAP attributes:
entry = ctx.lookup("uid=mts,ou=People,dc=umich,dc=edu")

p "Email = #{entry.get_attribute_value("mail")}"
entry.get_attribute_values("cn").each do |name|
    p "Name = #{name}"
end
For Example 4-29 to
work, you must use Sunâs LDAP JNDI support from the package com.sun.ldap.jndi. Typically, this is done by creating a JNDI Context, as shown in Creating a JNDI Context. If you are using a different LDAP
library, you can easily adapt the listing in Example 4-29 to the library. All you
need to do is discover the name of the class that implements javax.naming.directory.DirContext. You can
easily use jirb for this:
$ jirb
irb(main):001:0> include Java
irb(main):002:0> import java.util.Hashtable
irb(main):003:0> import javax.naming.InitialContext
irb(main):004:0> import javax.naming.Context
irb(main):005:0> env = {
irb(main):006:1*     Context::INITIAL_CONTEXT_FACTORY,
irb(main):007:1*     "com.sun.jndi.ldap.LdapCtxFactory",
irb(main):008:1* Context::PROVIDER_URL,
irb(main):009:1* "ldap://ldap.itd.umich.edu:389"
irb(main):010:1> }
irb(main):011:0> ctx = InitialContext.new(Hashtable.new(env))
irb(main):012:0> ctx.lookup("uid=mts,ou=People,dc=umich,dc=edu").java_class
=> com.sun.jndi.ldap.LdapCtx[8] For some time, the combination of Spring and Hibernate was being referred to as J3EE, but this term seems to have disappeared in recent years.
[9] Strictly speaking, Dependency Injection is a particular application of the Inversion of Control pattern, but in practice the terms are frequently used interchangeably.
[10] Which is, in many ways, a standardized version of Hibernate.
[11] This is for Spring 2.5.1. Check the documentation for other versions.
Get JRuby Cookbook now with the O’Reilly learning platform.
O’Reilly members experience books, live events, courses curated by job role, and more from O’Reilly and nearly 200 top publishers.

