Chapter 15. Creating Media Rich and Interactive Applications
15.0. Introduction
Pretty pictures. Cool videos. Sound!
The Web of the future will be a richer place, indeed, with the new and improved innovations ready to use. Our old friends SVG and Canvas are getting new life and generating new interest. Added to them are the new video and audio elements included in HTML5, and the near-future potential of 3D graphics.
JavaScript and CSS provide a malleable palette in which to paint web
pages, but SVG and the canvas element
provide the capability to take those pages into new and exciting
territory.
SVG, or Scalable Vector Graphics, is an XML-based vector graphics
language that can be used to create scalable vector graphics within web
pages. You can insert the SVG into object elements, or in certain
circumstances embed the SVG directly in the web page. New advances also
allow you to include SVG using the img
element, and CSS.
SVG is normally a static XML markup, and not dependent on JavaScript. However, as will be demonstrated later in the chapter, SVG and JavaScript can be used to create any number of dynamic graphics.
The canvas element originated with Apple, and is now becoming
standardized as part of the HTML5/Web Applications 1.0 effort. Unlike SVG,
the canvas element is totally dependent
on JavaScript. We add canvas elements
into our page and then use a 2D context API in order to draw into these
elements.
SVG and Canvas are implemented in varying degrees in all of this bookâs target browsers, except for Internet Explorer (though recently we learned that IE9 will support SVG, at least). However, recipes in this chapter provide how-tos for enabling support for both, in all browsers and in most environments.
Newcomers joining the media environment are the audio and video elements
included in HTML5, and already implemented, albeit with some differences,
in our target browsers. Where before we depended on Flash to play video,
now we can embed videos natively and manipulate the videos using
JavaScript.
The last newcomer introduced in this chapter isnât really a newcomer, but an old friend with a new face: WebGL (Web Graphics Library), and via plug-ins, the newer X3D. Years ago, I used to work with VRML (Virtual Reality Modeling Language), which was the earliest version of 3D on the Web. These 3D technologies pick up where VRML left off, providing a new three-dimensional world to explore.
Since this is only one chapter, and Iâm not the most artistic person in the world, Iâm focusing primarily on introducing all of these wonderful new tools and providing some basic how-tos, such as how can you get SVG to work in IE. Once you have a good idea of how these media technologies work, you can explore the Web and examine the already rich set of demos and uses in order to find inspiration for your own adventures.
See Also
See the current working draft for the Canvas 2D API at http://dev.w3.org/html5/canvas-api/canvas-2d-api.html, though note that this URL is likely to change. Keep up with current work on SVG at http://www.w3.org/Graphics/SVG/.
15.1. Creating Basic Shapes in Canvas (Using the canvas Element)
Solution
Insert a canvas element into
the web page:
<canvas width="600" height="500">
<p>Two overlapping squares</p>
</canvas>
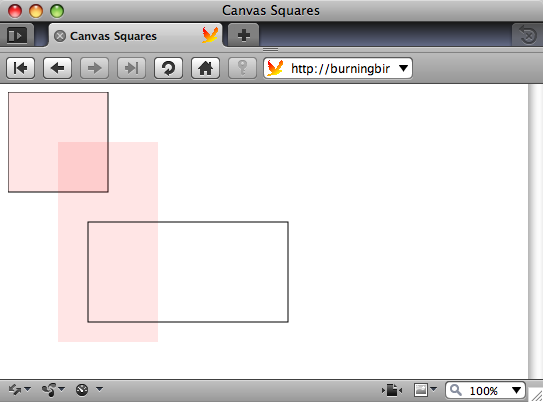
Then use the Canvas 2D API to create the shapes. The following creates three overlapping rectangles:
var imgcanvas = document.getElementById("imgcanvas");
if (imgcanvas.getContext) {
   var ctx = imgcanvas.getContext('2d');
   ctx.fillStyle="rgba(255,0,0,.1)";
   ctx.strokeStyle="#000000";

   // rect one
   ctx.fillRect(0,0,100,100);
   ctx.strokeRect(0,0,100,100);

   // rect two
   ctx.fillRect(50,50,100,200);

   // rect three
   ctx.strokeRect(80,130,200,100);

 }
Discussion
The canvas element is inserted
into the web page in the location you want the canvas drawing to exist.
You can provide a styling for the element, but itâs not going to impact
on the actual canvas drawing, which is managed via the Canvas 2D
API.
You can set the width and height of the canvas element using
the width and height attributes. You can also, as shown in
the solution, provide fallback contentâin this case, a paragraph
describing whatâs being drawn within the canvas
element.
In JavaScript, you have to get the canvas elementâs context first. Though most
implementations of the canvas element only support a
2D context, youâll still need to specify 2d when accessing the context. When support
for 3D is added, youâd pass in a value of 3d.
Before you begin drawing, test to see if the canvas element is supported:
if (imgcanvas.getContent) {
   var ctx = imgcanvas.getContext('2d');
...
}
Once you have the canvas context, all the API calls from that
point go to that specific canvas
element. The solution demonstrates creating three rectangles, as shown
in Figure 15-1. There
are three different rectangle methods:
The last method, clearRect,
wasnât demonstrated in the solution; it actually removes the pixels
within the rectangle area. Since the canvas element is transparent by default, this
would expose the document content underneath the canvas element.
All three methods take an origin, a width, and a height, in the following order: x, y, width,
height. The origin increases from top
to bottom, and from left to right, so an x,y value of 0,0 would place
the upper-left corner of the rectangle at the upper-left corner of the
canvas.
The canvas element is supported
in all major browsers except Internet Explorer. Recipe 15.2 provides a solution
that allows the canvas element to
work with IE.
See Also
Itâs important to provide fallback content not only for accessibility purposes, but in those cases where JavaScript is not enabled.
Current work is underway with the W3C to provide more in-depth
accessibility information with the canvas element. Until implemented, though, you
shouldnât use the canvas element for
important information (unless you provide a fallback), or for site
navigation or other critical site use.
15.2. Implementing Canvas Applications in IE
Solution
Use a Canvas emulation library, such as explorercanvas, created by Erik Arvidsson:
<!--[if IE]><script src="excanvas.js"></script><![endif]-->
Discussion
The explorercanvas library works by emulating
the canvas element using Microsoftâs
Virtual Markup Language (VML)âthe companyâs own version of a vector
graphics language.
Example 15-1 is a
web page that contains a link to the explorercanvas
library, and the canvas example from Recipe 15.1. The example
creates three rectangles in a canvas
element. The difference between the two applications is that this
version works with IE.
<!DOCTYPE html>
<head>
<title>Canvas Squares</title>
<meta charset="utf-8" />
<!--[if IE]><script src="excanvas.js"></script><![endif]-->

<script type="text/javascript">
//<![CDATA[

window.onload=function() {

 var imgcanvas = document.getElementById("imgcanvas");
 if (imgcanvas.getContext) {
   var ctx = imgcanvas.getContext('2d');
   ctx.fillStyle="rgba(255,0,0,.1)";
   ctx.strokeStyle="#000000";

   // rect one
   ctx.fillRect(0,0,100,100);
   ctx.strokeRect(0,0,100,100);

   // rect two
   ctx.fillRect(50,50,100,200);

   // rect three
   ctx.strokeRect(80,130,200,100);

 }
}

//]]>
</script>
</head>
<body>
<canvas id="imgcanvas" width="400" height="250">
<p>Three rectangles, overlapping</p>
</canvas>
</body>
There is an additional constraint to using
explorercanvas: if you create the canvas element
dynamically using the document.createElement method, you need to
include the following code so that the library can map the getContext method to the new canvas element:
var newcanvas = document.createElement("canvas");
G_vmlCanvasManager.initElement(newcanvas);
var ctx = newcanvas.getContext('2d');
Download explorercanvas from http://code.google.com/p/explorercanvas/.
15.3. Creating a Dynamic Line Chart in Canvas
Problem
You want to display a line chart in your web page, but the data changes over time, and you want to dynamically update it.
Solution
Use the canvas element and the
path method to create the chart. When the data changes, update
the chart:
 var array1 = [[100,100], [150, 50], [200,185],
               [250, 185], [300,250], [350,100], [400,250],
               [450, 100], [500,20], [550,80], [600, 120]];

 var imgcanvas = document.getElementById("imgcanvas");

 if (imgcanvas.getContext) {
   var ctx = imgcanvas.getContext('2d');


   // rect one
   ctx.strokeRect(0,0,600,300);

   // line path
   ctx.beginPath();
   ctx.moveTo(0,100);
   for (var i = 0; i < array1.length; i++) {
     ctx.lineTo(array1[i][0], array1[i][1]);
   }
   ctx.stroke();
}
Discussion
Canvas paths are the way to create arbitrary shapes in Canvas.
After getting the canvas context, ctx, the path is begun with a call to ctx.beginPath(). This marks the beginning of the path, and calling the
method again starts a new path. The next line of code is ctx.moveTo, which moves the drawing âpenâ to a
beginning location without drawing. From that point, several calls are
made to lineTo, using an array of
paired values representing the x,y location for each line
endpoint.
After all of the line points have been defined, the path is drawn.
Weâre not creating a closed path, so Iâm not using ctx.closePath(), which
would attempt to draw a line from the ending point to the beginning
point. Instead, Iâm drawing the line given the points that have been
defined, using ctx.stroke().
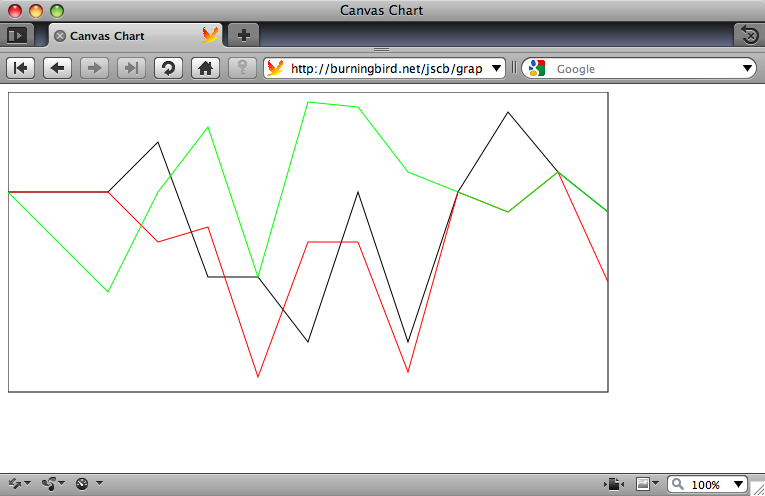
This creates a single path. To dynamically update the chart, you can incorporate timers, and either replace the path (by creating an entirely new context, which would erase the old), or add the new line chart to the same chart. Example 15-2 shows a web page that creates the line in the solution and then creates two others, each drawn after a short period of time using timers. The colors for the stroke path are changed between lines.
<!DOCTYPE html>
<head>
<title>Canvas Chart</title>
<meta charset="utf-8" />
<!--[if IE]><script src="excanvas.js"></script><![endif]-->

<script type="text/javascript">

window.onload=function() {

 var array1 = [[100,100], [150, 50], [200,185],
               [250, 185], [300,250], [350,100], [400,250],
               [450, 100], [500,20], [550,80], [600, 120]];

 var array2 = [[100,100], [150, 150], [200,135],
               [250, 285], [300,150], [350,150], [400,280],
               [450, 100], [500,120], [550,80], [600, 190]];

 var array3 = [[100,200], [150, 100], [200,35],
               [250, 185], [300,10], [350,15], [400,80],
               [450, 100], [500,120], [550,80], [600, 120]];

 var imgcanvas = document.getElementById("imgcanvas");

 if (imgcanvas.getContext) {
   var ctx = imgcanvas.getContext('2d');


   // rectangle wrapping line chart
   ctx.strokeRect(0,0,600,300);

   // first line
   ctx.beginPath();
   ctx.moveTo(0,100);
   for (var i = 0; i < array1.length; i++) {
     ctx.lineTo(array1[i][0], array1[i][1]);
   }
   ctx.stroke();

   setTimeout(function() {

       ctx.strokeStyle="#ff0000";

       // second line
       ctx.beginPath();
       ctx.moveTo(0,100);
       for (var i = 0; i < array2.length; i++) {
         ctx.lineTo(array2[i][0], array2[i][1]);
       }

       ctx.stroke();

       // second time out
       setTimeout(function() {
          ctx.strokeStyle="#00ff00";
          ctx.fillStyle="rgba(255,255,0,.1)";

          // third line
          ctx.beginPath();
          ctx.moveTo(0,100);
          for (var i = 0; i < array3.length; i++) {
             ctx.lineTo(array3[i][0],array3[i][1]);
          }

          ctx.stroke();
       }, 5000);
   }, 5000);

 }
}

</script>
</head>
<body>
<canvas id="imgcanvas" width="650" height="350">
<p>Include an image that has a static representation of the chart</p>
</canvas>
</body>
Figure 15-2 shows the line chart after all three lines have been drawn. Notice that the web page makes use of the explorercanvas library, excanvas.js, to ensure the chart also draws in Internet Explorer.
There are other path methods: arc, to draw curves, and quadraticCurveTo and bezierCurveTo, to draw quadratic and bezier
curves. All of these methods can be combined in one path to create
complex images.
See Also
See Recipe 15.2 for how to incorporate explorercanvas into your applications. A good Canvas tutorial can be found at Mozilla.
15.4. Adding JavaScript to an SVG File
Solution
JavaScript in SVG is included in script elements, just
as with XHTML. The DOM methods are also available for working with the
SVG elements. One restriction for SVG that you donât have with HTML is
that SVG is XML, so script blocks in an SVG file or element must have
CDATA sections surrounding the actual script, as shown in the SVG file
in Example 15-3.
<?xml version="1.0" encoding="UTF-8" standalone="no"?>
<svg xmlns="http://www.w3.org/2000/svg"
xmlns:xlink="http://www.w3.org/1999/xlink" width="600" height="600">
  <script type="text/ecmascript">
    <![CDATA[

      // set element onclick event handler
      window.onload=function () {

         var square = document.getElementById("square");

         // onclick event handler, change circle radius
         square.onclick = function() {
            var color = this.getAttribute("fill");
            if (color == "#ff0000") {
               this.setAttribute("fill", "#0000ff");
            } else {
               this.setAttribute("fill","#ff0000");
            }
         }
      }
    ]]>
  </script>
  <rect id="square" width="400" height="400" fill="#ff0000"
   x="10" y="10" />
</svg>
Discussion
As the solution demonstrates, SVG is XML, and the rules for
embedding script into XML must be adhered to. This means providing the
script type within the script tag, as well as wrapping the script
contents in a CDATA block.
The DOM methods document.getElementById, getAttribute, and setAttribute are the methods weâve come to
know so well in the rest of the book. The DOM methods arenât just
HTML-specific; theyâre usable with any XML document, including SVG.
Whatâs new is the SVG-specific fill
attribute, which is one of the color attributes that are standard for
the SVG shape elements such as rect.
The solution is a standalone SVG file, with a .svg extension. But if we were to embed the SVG within an
XHTML file served as application/xhtml+xml, such as that shown in
Example 15-4, the
color-changing animation would work the same.
<!DOCTYPE html PUBLIC
    "-//W3C//DTD XHTML 1.1 plus MathML 2.0 plus SVG 1.1//EN"
    "http://www.w3.org/2002/04/xhtml-math-svg/xhtml-math-svg.dtd">
<html xmlns="http://www.w3.org/1999/xhtml"
      xmlns:svg="http://www.w3.org/2000/svg"
      xmlns:xlink="http://www.w3.org/1999/xlink" xml:lang="en">
<head>
<title>Accessing Inline SVG</title>
<meta http-equiv="Content-Type"
content="application/xhtml+xml; charset=utf-8" />
</head>
<body>
<svg:svg width="600" height="600">
  <script type="text/ecmascript">
    <![CDATA[

      // set element onclick event handler
      window.onload=function () {

         var square = document.getElementById("square");

         // onclick event handler, change circle radius
         square.onclick = function() {
            var color = this.getAttribute("fill");
            if (color == "#ff0000") {
               this.setAttribute("fill","#0000ff");
            } else {
               this.setAttribute("fill","#ff0000");
            }
         }
      }
    ]]>
  </script>
  <svg:rect id="square" width="400" height="400" fill="#ff0000"
 x="10" y="10" />
</svg:svg>
</body>
</html>
Chrome, Safari, Opera, and Firefox all support SVG. IE8 doesnât, but IE9 will. Recipe 15.6 covers how you can enable SVG graphics in IE8.
15.5. Accessing SVG from Web Page Script
Solution
If the SVG is embedded directly in the web page, access the element and its attributes using the same functionality you would use with any other web page element:
var square = document.getElementById("ssquare");
square.setAttributeNS(null, "width", "500");
However, if the SVG is in an external SVG file embedded into the
page via an object element, you have
to get the document for the external SVG file in order to access the SVG
elements. The technique requires object detection because the process
differs by browser:
// set element onclick event handler
window.onload=function () {

   var object = document.getElementById("object");
   var svgdoc;

   try {

      svgdoc = object.contentDocument;
   } catch(e) {
      try {

         svgdoc = object.getSVGDocument();

       } catch (e) {
          alert("SVG in object not supported in your environment");
       }
   }

   if (!svgdoc) return;

   var square = svgdoc.getElementById('square');
   square.setAttributeNS(null, "width", "500");
Discussion
The first option listed in the solution accesses SVG embedded in an XHTML file. You can access SVG elements using the same methods youâve used to access HTML elements. Because SVG in XHTML does incorporate support for namespaces, I use the namespace version of the DOM methods, even when no namespace is used (itâs set to null).
The second option is a little more involved, and depends on
retrieving the document object for the SVG document. The first approach
tries to access the contentDocument
property on the object. If this fails, the application then tries to
access the SVG document using the
getSVGDocument object method. Once you have access to the SVG document
object, you can use the same DOM methods you would use with elements
native to the web page. The code works with all the browsers supported
in this book except IE, which Iâll cover in a later recipe.
Example 15-4 in
Recipe 15.4, showed one way to
embed SVG into the web page. This approach currently only works with
XHTML pages, served as application/xml+xhtml. HTML5 adds native
support to SVG in HTML, so in the future youâll also be able to embed
SVG directly into HTML files, though currently only Firefox 3.6 supports
this, and only with HTML5 enabled.
Note
You can enable HTML5 support in Firefox 3.6 (and up, until itâs
the default) by typing about:config
into the address bar, and setting the html5.enable preference to true. Note, though, that this is very
cutting-edge and unstable.
Example 15-5 shows a second way to add SVG to a web page, and how to access the SVG element(s) from script in HTML.
<!DOCTYPE html>
<head>
<title>SVG in Object</title>
<meta charset="utf-8" />
</head>
<body>
<object id="object" data="rect.svg"
style="padding: 20px; width: 600px; height: 600px">
<p>No SVG support</p>
</object>
<script type="text/javascript">

  var object = document.getElementById("object");
  object.onload=function() {
      var svgdoc;

      // get access to the SVG document object
      try {

         svgdoc = object.contentDocument;
      } catch(e) {
         try {

            svgdoc = object.getSVGDocument();

          } catch (e) {
            alert("SVG in object not supported in your environment");
          }
      }

      if (!svgdoc) return;
      var r = svgdoc.rootElement;

      // get SVG element and modify
      var square = svgdoc.getElementById('square');
      square.onclick = function() {

         //SVG supports namespaces
         var width = parseFloat(square.getAttributeNS(null,"width"));
         width-=50;
         square.setAttributeNS(null,"width",width);
         var color = square.getAttributeNS(null,"fill");
         if (color == "blue") {
             square.setAttributeNS(null,"fill","yellow");
             square.setAttributeNS(null,"stroke","green");
         } else {
             square.setAttributeNS(null,"fill","blue");
             square.setAttributeNS(null,"stroke","red");
         }
      }
  }
</script>

</body>
In addition to the different approaches to get the SVG document,
you also have to handle browser differences in how the onload event handler works. Firefox and Opera
fire the onload event handler for the
window after all the document contents have loaded, including the SVG in
the object element. However, Safari
and Chrome, probably because of the shared WebKit core, fire the
window.onload event handler before
the SVG has finished loading.
In the example code, the object is accessed in script after it has
loaded, and the object.onload event
handler is then accessed to get the SVG document and assigned the
function to the onclick event
handler.
15.6. Emulating SVG in Internet Explorer
Problem
You want the SVG in your object
element, or embedded in the page, to be visible to Internet
Explorer users.
Solution
Use a library, such as SVGWeb, to facilitate the display of SVG.
If the SVG is incorporated into the page via an object element, use the following
syntax:
<!--[if IE]>
<object src="graphic.svg" classid="image/svg+xml"
width="200" height="200"
id="svgObject">
<![endif]-->
<!--[if !IE>-->
<object data="graphic.svg" type="image/svg+xml width="200"
height="200"
id="svgObject">
<!--<![endif]-->
</object>
The conditional comments are necessary in order for SVGWeb to do
its magic correctly. Embedded SVG is much simpler. Just add the SVGWeb
library, and enclose the SVG within a script element:
<script type="image/svg+xml">
   <svg...>
      ...
   </svg>
</script>
Discussion
Currently, there is no support for SVG in Internet Explorer. Microsoft has committed to supporting SVG and XHTML in IE9, due out sometime in 2011. Until then, we can use a library such as SVGWeb.
SVGWeb works by emulating the SVG in Flash. Since Flash is more or less ubiquitous on most peopleâs sites, most folks wonât have to install any additional plug-in.
To incorporate SVGWeb into your web pages and applications, once youâve downloaded the source and unzipped it, load the src directory to your web, and include a link to the SVGWeb JavaScript in your web pages:
<script src="src/svg.js" data-path="src/"></script>
This tag assumes that the SVGWeb code is still in the
src directory, and that the libraries are not in
the same directory as your web pages. If the libraries are in a
different location, you need to provide the data-path custom data attribute and point to
the relative location of the libraries.
Note
Download SVGWeb and view manuals and other help at http://code.google.com/p/svgweb/. Ample SDK is another excellent library that provides SVG support for IE, originally created by Sergey Ilinsky.
See Also
Recipe 15.7 discusses how SVGWeb works across browsers and in HTML.
15.7. Enable Interactive SVG Embedded in HTML
Solution
You have two options: you can use HTML5 to create the web page and wait until SVG in HTML is supported in all of your targeted browsers. Or you can use a JavaScript library, such as SVGWeb, to wrap your SVG:
<script type="image/svg+xml">
   <svg...>
      ...
   </svg>
</script>
Discussion
Previously, to embed SVG directly into a web page, you had to use XHTML rather than HTML. With HTML5, SVG is now supported in HTML, but the support for this change is still limited.
I introduced SVGWeb in Recipe 15.6 to enable SVG support in Internet Explorer. The library also provides support for embedding SVG directly into HTML pages. Until thereâs more widespread support for SVG in HTML5 documents (currently only supported by Firefox 3.6 and up), you should use a library such as SVGWeb.
If you are embedding SVG directly in HTML5, there is one major
difference you need to be aware of: there is no namespace support in HTML5. The SVG namespace
is bound to the svg element, as the
MathML namespace is bound to the math
element, but support for these and other SVG and MathML elements is
hardcoded into the HTML5 specification rather than gracefully integrated
because of namespace support.
This can affect your JavaScript application. If the SVG you embed in the page contains other namespaced elements, you canât use namespace functions in order to access the elements. Example 15-6 more fully demonstrates these concerns.
<!DOCTYPE html>
<head>
<title>SVG</title>
<meta charset="utf-8" />

<script>

      // set element onclick event handler
      window.onload=function () {
         var circle = document.getElementById('redcircle');

         // onclick event handler, change circle radius
         circle.onclick = function() {
            var r = parseInt(this.getAttributeNS(null,"r"));
            r-=10;
            circle.setAttributeNS("","r",r);
            var  dc =
  document.getElementsByTagNameNS("http://purl.org/dc/elements/1.1/",
                 "title");
            for (var i = 0; i < dc.length; i++) {
               var str = dc.item(i).namespaceURI + " " +
               dc.item(i).prefix + " " + dc.item(i).localName + " " +
                              dc.item(i).textContent;
               alert(str);
            }
        }
      }
</script>
</head>
<body>
<h1>SVG</h1>
<p>This is <code>text/html</code>!</p>
<h2>SVG</h2>
<svg id="svgelem"
     height="800" xmlns="http://www.w3.org/2000/svg">
       <circle id="redcircle" cx="300" cy="300" r="300" fill="red" />
  <metadata>
    <rdf:RDF xmlns:cc="http://web.resource.org/cc/"
xmlns:dc="http://purl.org/dc/elements/1.1/"
xmlns:rdf="http://www.w3.org/1999/02/22-rdf-syntax-ns#
">
      <cc:Work rdf:about="">
        <dc:title>Sizing Red Circle</dc:title>
        <dc:description></dc:description>
        <dc:subject>
          <rdf:Bag>
            <rdf:li>circle</rdf:li>
            <rdf:li>red</rdf:li>
            <rdf:li>graphic</rdf:li>
          </rdf:Bag>
        </dc:subject>
        <dc:publisher>
          <cc:Agent rdf:about="http://www.openclipart.org">
            <dc:title>Testing RDF in SVG</dc:title>
          </cc:Agent>
        </dc:publisher>
        <dc:creator>
          <cc:Agent>
            <dc:title id="title">Testing</dc:title>
          </cc:Agent>
          </dc:creator>
        <dc:rights>
          <cc:Agent>
            <dc:title>testing</dc:title>
          </cc:Agent>
          </dc:rights>
        <dc:date></dc:date>
        <dc:format>image/svg+xml</dc:format>
     <dc:type rdf:resource="http://purl.org/dc/dcmitype/StillImage"/>
 <cc:license rdf:resource="http://web.resource.org/cc/PublicDomain"/>
        <dc:language>en</dc:language>
      </cc:Work>
     <cc:License rdf:about="http://web.resource.org/cc/PublicDomain">
 <cc:permits rdf:resource="http://web.resource.org/cc/Reproduction"/>
 <cc:permits rdf:resource="http://web.resource.org/cc/Distribution"/>
<cc:permits
rdf:resource="http://web.resource.org/cc/DerivativeWorks"/>
      </cc:License>
    </rdf:RDF>
  </metadata>
  </svg>
</body>
In the example, an SVG element is embedded into an HTML5 web page
that is served as text/html. Clicking
the red circle changes the circle dimensions, using the namespace
versions of document.getElementsByTagName, passing in
null as the namespace. The script
also accesses all Dublin Core namespaced (dc) titles in the SVG, and displays them in
alerts.
When the circle is clicked, it resizes, but nothing is printed out. How can this be? The JavaScript doesnât have any errors, and thereâs obviously Dublin Core namespaced titles in the page.
The big disconnect is the page is served as HTML, and the namespaces only work correctly in an XML-based format, like XHTML. If I were to make one seemingly small change in the code, from:
var  dc =
document.getElementsByTagNameNS("http://purl.org/dc/elements/1.1/",
"title");
to:
var dc = document.getElementsByTagName("dc:title");I would get a reference to all four dc:title elements in the SVG metadata section.
However, there are still problems.
If I were to convert the example into XHTML by adding an html element with the default namespace before
the head element:
<html xmlns="http://www.w3.org/1999/xhtml" lang="en" xml:lang="en">
Then add an ending HTML tag,
and wrap the scripting block in a CDATA section:
<script>
//<![CDATA[
...
//]]>
</script>
And then run the application, I would get the dc:title values using the original document.getElementsByTagNS, but the
alert message is different than for the HTML result. Hereâs an example,
from the XHTML application:
http://purl.org/dc/elements/1.1/dc title Sizing Red Circle
The equivalent from the HTML application is:
http://www.w3.org/2000/svg null dc:title Sizing Red Circle
Returning to the code, these values are printed out via the following two lines of code:
var str = dc.item(i).namespaceURI + " " +  dc.item(i).prefix + " " +
dc.item(i).localName + " " + dc.item(i).textContent;
alert(str);
Where the two environments differ, drastically, is that all of the
elements within the SVG element are included within the SVG namespace
when the page is loaded as HTML. In the XHTML version, theyâre included
in the proper namespace. So, the very first property printed, the
elementâs namespaceURI, contains
different values because of the different namespace support.
The next property, the itemâs prefix, is null in the HTML version. Thatâs expected,
because if the application doesnât understand namespaces, it doesnât
understand that dc:title is both
prefix and element name. The localName property is also different. In the
XHTML version, this is the element name minus the prefix, which is
title. In the HTML version, the
localName is dc:titleâthe prefix becomes just another part
of the local name.
The only property where both applications return the same value is
the textContent of the title.
For the most part, the namespace issue shouldnât be a problem if youâre using pure SVG in your web page, without any elements from other namespaces. Of course, a lot of SVG we find âin the wildâ have namespaced elements, including license information that we need to keep with the image. Still, we shouldnât have too many problems, because weâre mainly going to want to access the SVG elements from client-side JavaScript, rather than the licenses or other namespaced elements.
There is another option, and this is where SVGWeb steps in and solves more than one problem. Not only does SVGWeb enable the support of embedded SVG within an HTML document (and not just HTML5 documents), but it corrects the namespace problems.
I added the SVGWeb library into Example 15-6, the HTML
document, and wrapped the SVG element in a script tag, with the SVG MIME type:
<script src="svgweb/src/svg.js" data-path="svgweb/src/"></script>
...
<script type="image/svg+xml">
   <svg id="svgelem"
     height="800" xmlns="http://www.w3.org/2000/svg">
      ...
   </svg>
</script>
Now when I try the same application, the results I get from the
SVGWeb-assisted HTML page are identical to the results I get for the
XHTML page. I can use the namespace version of DOM methods, such as
document.getElementsByTagNameNS, and
get the same results.
However, the application doesnât work with IE8. The reason is that when using SVGWeb with an SVG-enabled browser, such as Safari or Opera, SVGWeb creates the SVG within a XML context, but it is still SVG. However, with IE8, SVGWeb creates the graphic as Flash, not SVG.
Because SVGWeb is creating the SVG as Flash, we also have to move the namespace definitions to the outer SVG element:
<svg id="svgelem"
     height="800"
     xmlns="http://www.w3.org/2000/svg"
     xmlns:cc="http://web.resource.org/cc/"
     xmlns:dc="http://purl.org/dc/elements/1.1/"
     xmlns:rdf="http://www.w3.org/1999/02/22-rdf-syntax-ns#">
 ...
</svg>
Event handling is also managed through SVGWeb, which means weâre going to get unexpected results when using the older DOM Level 0 event handling:
circle.onclick=function() {
...
}
Instead, SVGWeb provides cross-browser addEventListener functionality, both for the window object and for all SVG elements. And,
instead of capturing the load event for the window, youâll capture a
specialized event, SVGLoad:
window.addEventListener("SVGLoad",functionName,false);Because the SVGWeb-enabled addEventListener function is implemented using
IEâs attachEvent for IE8, the
application also doesnât have access to this, for object context. The external element
reference is used instead.
Hereâs the finished scripting block, which encompasses all of these changes and works in IE8 as well as Safari, Chrome, Opera, and Firefox:
<script>

  // set element onclick event handler
  window.addEventListener('SVGLoad', function () {
     var circle = document.getElementById("redcircle");

     // onclick event handler, change circle radius
     circle.addEventListener('click', function(evt) {

     // reference circle, rather than this
        var r = parseInt(circle.getAttribute("r"));
        r-=10;
        circle.setAttribute("r",r);

        var  dc = document.getElementsByTagNameNS("http://purl.org/dc/elements/1.1/",
                                                    "title");

        for (var i = 0; i < dc.length; i++) {
          var str = dc.item(i).namespaceURI + " " +
dc.item(i).prefix + " " +
                 dc.item(i).localName + " " + dc.item(i).textContent;
          alert(str);
        }
      }, false);
   }, false);
</script>
Now the application works in all target browsers, including correct handling of the namespaces.
See Also
See where to get SVGWeb and how to install it in Recipe 15.6. Youâll want to read the Issues section of the documentation before beginning your project.
See Recipe 11.2 for
more on using document.getElementsByTagNameNS() and
namespaces. The issues associated with attachEvent and this are covered in Recipe 7.5.
15.8. Using the Math Functions to Create a Realistic, Ticking Analog Clock in SVG
Solution
Use SVG to create the clock, utilizing both the Date object and the Math
objects, in addition to a timer to manage the clock hands. The
JavaScript to manage the hands is a derivative of other applications
that also implement analog clocks, such as Java applets from long
ago:
  <script>
    var seconds = document.getElementById("seconds");
    var minutes = document.getElementById("minutes");
    var hours   = document.getElementById("hours");

    function setClock(date) {
      var s = (date.getSeconds() + date.getMilliseconds() / 1000) *
      Math.PI / 30;
      var m = date.getMinutes() * Math.PI / 30 + s / 60;
      var h = date.getHours() * Math.PI / 6 + m / 12;

      seconds.setAttribute("x2", 0.90 * Math.cos(s));
      seconds.setAttribute("y2", 0.90 * Math.sin(s));
      minutes.setAttribute("x2", 0.65 * Math.cos(m));
      minutes.setAttribute("y2", 0.65 * Math.sin(m));
      hours  .setAttribute("x2", 0.40 * Math.cos(h));
      hours  .setAttribute("y2", 0.40 * Math.sin(h));
    }

    setInterval("setClock(new Date())", 1000);
  </script>
Discussion
The animated analog clock is my own version of âHello, Worldâ in
SVG. (Mine and several other people, because if you search on âSVG
analog clock,â youâll find several very attractive and interesting
variations.) I like that it makes use of many unique aspects of SVG, as
well as other JavaScript objects, such as Date and Math. Depending on how fancy you make it, the
amount of code is small enough to not strain bandwidth, and the
animation is simple enough not to task the CPU.
You donât have to implement the second hand for the clock, though
I think it adds more realism. The hands are straight lines that are the
same length. With each iteration of the timer, the orientation of the
lines changes, using the Math.cos and Math.sin methods.
The values for these methods are derived from a formula that makes use
of values accessed from the Date
object, and modified using Math.PI.
Once you have the clock orientation and the hands, you can go to town on decorating the clock. Figure 15-3 shows one of my favorite clock designs. A basic clock can be found in Example 15-7. All it does is create a clock with tick marks and handsâconsider it a drawing board.
<?xml version="1.0"?>
<svg version="1.1" xmlns="http://www.w3.org/2000/svg"
viewBox="0 0 3 3">
 <defs>
    <style type="text/css">
      path {
        stroke: black;
        stroke-width: 0.02;
        fill: none;
      }
      line {
        stroke-linecap: round;
      }

      #seconds {
        stroke: red;
        stroke-width: 0.01;
      }
      #minutes {
        stroke: black;
        stroke-width: 0.03;
      }
      #hours {
        stroke: black;
        stroke-width: 0.03;
      }
    </style>
  </defs>
        <g transform="rotate(-90) translate(-1.3,1.3) ">

                <circle cx="0" cy="0" r="1.0" fill="white" />

                <!-- decorative border -->
                <circle cx="0" cy="0" r="1.0" fill-opacity="0"
                stroke-width="0.02" stroke="black" />


        <!-- clock hands -->
 <line id="hours"   x1="0" y1="0" x2="0.70" y2="0" stroke-width="1"/>
  <line id="minutes" x1="0" y1="0" x2="0.85" y2="0"/>
  <line id="seconds" x1="0" y1="0" x2="0.90" y2="0"/>
  </g>
  <script>
    var seconds = document.getElementById("seconds");
    var minutes = document.getElementById("minutes");
    var hours   = document.getElementById("hours");

    function setClock(date) {
      var s = (date.getSeconds() + date.getMilliseconds() / 1000) *
      Math.PI / 30;
      var m = date.getMinutes() * Math.PI / 30 + s / 60;
      var h = date.getHours() * Math.PI / 6 + m / 12;

      seconds.setAttribute("x2", 0.90 * Math.cos(s));
      seconds.setAttribute("y2", 0.90 * Math.sin(s));
      minutes.setAttribute("x2", 0.65 * Math.cos(m));
      minutes.setAttribute("y2", 0.65 * Math.sin(m));
      hours  .setAttribute("x2", 0.40 * Math.cos(h));
      hours  .setAttribute("y2", 0.40 * Math.sin(h));
    }

    setInterval("setClock(new Date())", 1000);
  </script>
</svg>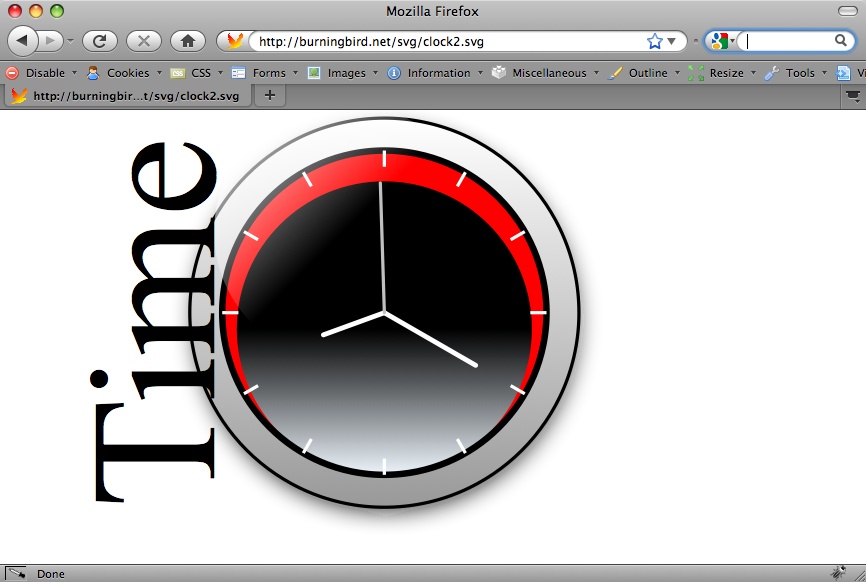
15.9. Integrating SVG and the Canvas Element in HTML
Solution
One option is to embed both the SVG and the canvas element directly into the X/HTML page
(weâll stick with XHTML for now), and then access the canvas element from script within SVG:
 <canvas id="myCanvas" width="400px" height="100px">
     <p>canvas item alternative content</p>
 </canvas>

 <svg id="svgelem"
     height="400" xmlns="http://www.w3.org/2000/svg">
     <title>SVG Circle</title>

        <script type="text/javascript">
          <![CDATA[
          window.onload = function () {
             var context =
document.getElementById("myCanvas").getContext('2d');

             context.fillStyle = 'rgba(0,200,0,0.7)';
             context.fillRect(0,0,100,100);

          };
          ]]>
        </script>
        <circle id="redcircle" cx="300" cy="100" r="100" fill="red" stroke="#000" />
  </svg>
Or you can embed the canvas
element as a foreign object directly in the SVG:
 <svg id="svgelem"
     height="400" xmlns="http://www.w3.org/2000/svg"
xmlns:xhtml="http://www.w3.org/1999/xhtml">
     <title>SVG Circle with metadata</title>

        <script type="text/javascript">
          <![CDATA[
          window.onload = function () {
             var context2 = document.getElementById("thisCanvas").getContext('2d');
             context2.fillStyle = "#ff0000";
             context2.fillRect(0,0,200,200);
          };
          ]]>
        </script>

        <foreignObject width="300" height="150">
           <xhtml:canvas width="300" height="150" id="thisCanvas">
            alternate content for browsers that do not support Canvas
           </xhtml:canvas>
        </foreignObject>
        <circle id="redcircle" cx="300" cy="100" r="100" fill="red" stroke="#000" />
  </svg>
Discussion
When the SVG element is embedded into the current web page, you
can access HTML elements from within the SVG. However, you can also
embed elements directly in SVG, using the SVG foreignObject element. This element allows us to embed XHTML, MathML,
RDF, or any other XML-based syntax.
In both solutions, I was able to use document.getElementById. However, if I wanted
to manipulate the elements using other methods, such as document.getElementsByTagName, I had to be
careful about which version of the method I use. For instance, I can use
getElementsByTagName for the outer
canvas element, but I would need to
use the namespace version of the method, getElementsByTagNameNS, for the contained
canvas element, passing in the XHTML
namespace included in the SVG element:
var xhtmlnx = "http://www.w3.org/1999/xhtml";
var context = document.getElementsByTagNameNS( xhtmlns,
                      'canvas')[0].getContext('2d');
context.fillStyle = '#0f0';
context.fillRect(0,0,100,100);
Once you have the canvas context, you use the element like you would from script within HTML: add rectangles, draw paths, create arcs, and so on.
Why would you use both at the same time? Each has its own
advantages. One use of SVG and Canvas together is to provide a fallback
for the canvas element, since the SVG writes to the DOM and persists
even if JavaScript is turned off, while the canvas
element does not.
The canvas element is also
faster in frame-type animations. However, the performance advantages you
get with the canvas element lessen as
you increase the size of the display. SVG scales beautifully.
15.10. Turning on WebGL Support in Firefox and WebKit/Safari
Solution
Both Firefox nightly (Minefield) and the WebKit nightly have
support for WebGL, a cross-platform 3D graphics system derived from the
OpenGL effort, and making use of the canvas element. You will have to turn on
support for both.
For Firefox, access the configuration options page by typing
about:config into the address bar.
Once past the warning page, find the webgl.enabled_for_all_sites option, and change
the value to true.
For WebKit, open a Terminal window and type this at the command line:
defaults write com.apple.Safari WebKitWebGLEnabled -bool YES
Discussion
The world of 3D development in browsers is both old and new. Years ago, we had support for various forms of 3D development, such as VRML. However, most implementations required a plug-in, and they werenât the best-performing functionalities.
Today, thereâs two different 3D approaches: WebGL, which is an effort being developed and promoted by the Khronos Group, a consortium of media companies; X3D, developed by the Web3D group, which is a descendant of the older VRML effort.
The differences between the two is that WebGL is JavaScript-based,
with the image developed on the canvas element, while X3D is based in
XML:
<Transform>
  <Shape>
    <Appearance>
      <Material diffuseColor="0 1 0"/>
    </Appearance>
    <Cylinder height="0.1" radius="0.5"/>
  </Shape>
</Transform>
The Khronos Group is working on creating a browser-based runtime that will enable X3D to run on WebGL, and there is discussion ongoing about some form of integration between X3D and HTML5. However, from a scripterâs point of view, weâre primarily interested in WebGL.
See Also
Mozilla has a nice WebGL support page, with tutorials and demos at https://developer.mozilla.org/en/WebGL. The WebKit blog also has a nice introduction to WebGL in WebKit at http://webkit.org/blog/603/webgl-now-available-in-webkit-nightlies/. Thereâs also a website devoted to WebGL at http://learningwebgl.com/blog/. The Khronos Group website is at http://www.khronos.org/webgl/. The X3D for Developers site is at http://www.web3d.org/x3d/.
15.11. Running a Routine When an Audio File Begins Playing
Problem
You want to provide an audio file and then pop up a question or other information when the audio file begins or ends playing.
Solution
Use the new HTML5 audio
element:
<audio id="meadow" controls>
   <source src="meadow.mp3" type="audio/mpeg3"/>
   <source src="meadow.ogg" type="audio/ogg" />
   <source src="meadow.wav" type="audio/wav" />
<p><a href="meadow.wav">Meadow sounds</a></p>
</audio>
and capture its end or play event:
function manageEvent(eventObj, event, eventHandler) {
   if (eventObj.addEventListener) {
      eventObj.addEventListener(event, eventHandler,false);
   } else if (eventObj.attachEvent) {
      event = "on" + event;
      eventObj.attachEvent(event, eventHandler);
   }
}

window.onload=function() {
  var meadow = document.getElementById("meadow");
  manageEvent(meadow,"play",aboutAudio);
}
then display the information:
function aboutAudio() {
  var txt = document.createTextNode("This audio file was a recording
  from the Shaw Nature Reserve in Missouri");
  var div = document.createElement("div");
  div.appendChild(txt);
  div.setAttribute("role","alert");
  document.body.appendChild(div);
}
Discussion
HTML5 added two new media elements: audio and video. These simple-to-use controls provide a
way to play audio and video files without having to use Flash.
In the solution, the audio
elementâs controls Boolean attribute is provided, so the controls are
displayed. The element has three source children elements, providing support
for three different types of audio files: WAV, MP3, and Ogg Vorbis. The
use of the source element allows different browsers
to find the format (codec) that they support. For the
audio element, the browser support is:
Firefox (3.5 and up) only supports WAV and Ogg Vorbis
Opera (10.5) only supports WAV (at this time)
Chrome supports MP3 and Ogg Vorbis
Safari supports MP3 and WAV
IE8 does not support the audio
element, but IE9 will, and will most likely only support MP3 and WAV.
However, a link to the WAV file is provided as a fallback, which means
people using a browser that doesnât support audio can still access the sound file. I could
have also provided an object element,
or other fallback content.
The new media elements come with a set of methods to control the
playback, as well as events that can be triggered when the event occurs.
In the solution, the ended event is
captured and assigned the event handler aboutAudio, which displays a message about the
file after the playback is finished. Notice that though Iâm using a DOM
Level 0 event handler with the window load event, Iâm using DOM Level 2
event handling with the audio
element. The reason is that at the time I wrote this, making an
assignment to the elementâs onplay
(or onended) event did not work.
However, I could use the DOM Level 2 event handler and the inline event
handler without a problem:
<audio id="meadow" src="meadow.wav" controls
onended="alert('All done')">
<p><a href="meadow.wav">Meadow sounds</a></p>
</audio>Itâs interesting seeing the appearance of the elements in all of the browsers that currently support them. There is no standard look, so each browser provides its own interpretation. You can control the appearance by providing your own playback controls and using your own elements/CSS/SVG/Canvas to supply the decoration.
See Also
See Recipe 15.12 for a demonstration of using the playback methods and providing alternative visual representations for the new media elements, as well as providing a different form of fallback.
15.12. Controlling Video from JavaScript with the video Element
Problem
You want to embed video in your web page, and not use Flash. You also want a consistent look for the video control, regardless of browser and operating system.
Solution
Use the new HTML5 video
element:
<video id="meadow" poster="purples.jpg" >
   <source src="meadow.m4v" type="video/mp4"/>
   <source src="meadow.ogv" type="video/ogg" />
   <object width="425" height="344">
   <param name="movie"
value="http://www.youtube.com/v/CNRTeSoSbgg&hl=en_US&fs=1&"></param>
   <embed src="http://www.youtube.com/v/CNRTeSoSbgg&hl=en_US&fs=1&"
type="application/x-shockwave-flash"
   allowscriptaccess="always" allowfullscreen="true" width="425"
height="344">
   <p>Audio slideshow from Shaw Nature Center</embed></object>
</video>
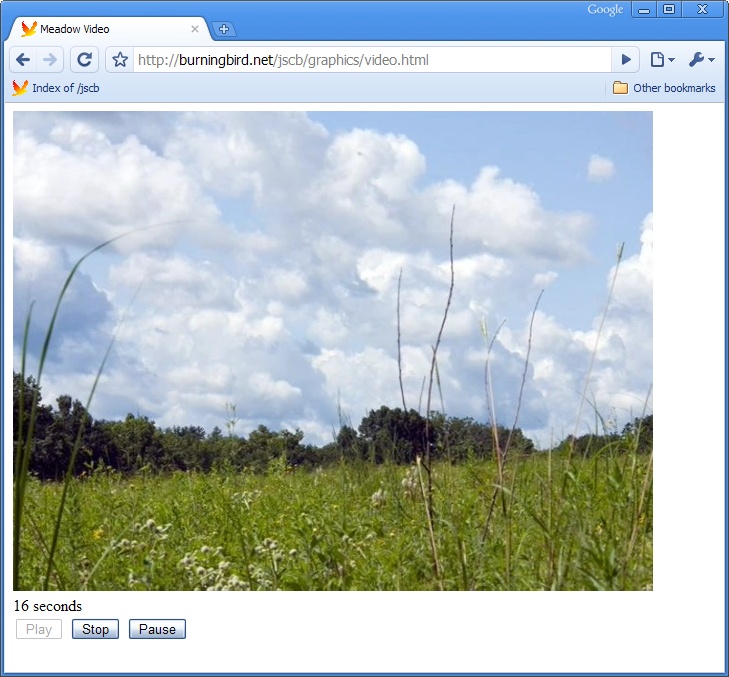
And provide controls for it via JavaScript, as shown in Example 15-8. Buttons are used
to provide the video control, and text in a div element is used to provide feedback on
time during the playback.
<!DOCTYPE html>
<head>
<title>Meadow Video</title>
<script>

function manageEvent(eventObj, event, eventHandler) {
   if (eventObj.addEventListener) {
      eventObj.addEventListener(event, eventHandler,false);
   } else if (eventObj.attachEvent) {
      event = "on" + event;
      eventObj.attachEvent(event, eventHandler);
   }
}

window.onload=function() {

  // events for buttons
  manageEvent(document.getElementById("start"),"click",startPlayback);
  manageEvent(document.getElementById("stop"),"click",stopPlayback);
  manageEvent(document.getElementById("pause"),"click",pausePlayback);

  // setup for video playback
  var meadow = document.getElementById("meadow");
  manageEvent(meadow,"timeupdate",reportProgress);

  // video fallback
  var detect = document.createElement("video");
  if (!detect.canPlayType) {
    document.getElementById("controls").style.display="none";
  }
}

// start video, enable stop and pause
// disable play
function startPlayback() {
  var meadow = document.getElementById("meadow");
  meadow.play();
  document.getElementById("pause").disabled=false;
  document.getElementById("stop").disabled=false;
  this.disabled=true;
}

// pause video, enable start, disable stop
// disable pause
function pausePlayback() {
  document.getElementById("meadow").pause();
  this.disabled=true;
  document.getElementById("start").disabled=false;
  document.getElementById("stop").disabled=true;
}

// stop video, return to zero time
// enable play, disable pause and stop
function stopPlayback() {
  var meadow = document.getElementById("meadow");
  meadow.pause();
  meadow.currentTime=0;
  document.getElementById("start").disabled=false;
  document.getElementById("pause").disabled=true;
  this.disabled=true;
}

// for every time divisible by 5, output feedback
function reportProgress() {
  var time = Math.round(this.currentTime);
  var div = document.getElementById("feedback");
  div.innerHTML = time + " seconds";
}

</script>

</head>
<body>
<video id="meadow" poster="purples.jpg" >
   <source src="meadow.m4v" type="video/mp4"/>
   <source src="meadow.ogv" type="video/ogg" />
   <object width="425" height="344">
   <param name="movie"
value="http://www.youtube.com/v/CNRTeSoSbgg&hl=en_US&fs=1&"></param>
   <embed src="http://www.youtube.com/v/CNRTeSoSbgg&hl=en_US&fs=1&"
type="application/x-shockwave-flash"
   allowscriptaccess="always" allowfullscreen="true" width="425"
height="344">
   <p>Audio slideshow from Shaw Nature Center</embed></object>
</video>
<div id="feedback"></div>
<div id="controls">
<button id="start">Play</button>
<button id="stop">Stop</button>
<button id="pause">Pause</button>
</controls>
</body>
Discussion
The new HTML5 video element, as
with the HTML5 audio element, can be
controlled with its own built-in controls, or you can provide your own,
as shown in Example 15-8.
The media elements support the following methods:
The media elements donât support a stop method, so I emulated one
by pausing video play and then setting the videoâs currentTime attribute to 0, which basically resets the play start
time. The only browser this didnât work in was Chrome. It worked in
Opera 10.5, Firefox 3.5, and WebKit/Safari.
I also used currentTime to
print out the video time, using Math.round to round the time to the nearest
second, as shown in Figure 15-4.
The video control is providing two different video codecs: H.264
(.mp4), and Ogg Theora (.ogv).
Firefox, Opera, and Chrome support Ogg Theora, but Safari/WebKit only
supports the H.264 formatted video. However, by providing both types,
the video works in all of the browsers that support the video element. For the browsers that currently
donât support video, such as IE, the
fallback YouTube video is provided, and if that doesnât work, then
thereâs text. In addition, if the video element is not supported, the video
controls are hidden.
The video and audio controls are inherently keyboard-accessible. If you do replace the controls, youâll want to provide accessibility information with your replacements. The video control doesnât have built-in captioning, but work is underway to provide the API for captioning.
See Also
For more on the new video/audio
elements, see Operaâs
introduction, Safari/WebKitâs,
and Mozillaâs.
A good place for more information on Ogg Theora is the Theora Cookbook.
At the time this book entered production, Google had released another video codec, WebM, for royalty free access. Several browsers have promised to support this codec. For more information, see the WebM Project site.
Get JavaScript Cookbook now with the O’Reilly learning platform.
O’Reilly members experience books, live events, courses curated by job role, and more from O’Reilly and nearly 200 top publishers.

