Chapter 4. Contacts
The Contacts framework is for those who want to import, show, select, modify, and save contacts on a user’s iOS device. This framework is fully compatible with Swift’s lingo and is very easy to work with. At the heart of the Contacts framework we have the CNContact object that represents a contact. You get access to the contacts’ database using the CNContactStore class.
Every time you want to access the address book, whether you are trying to create a new contact or fetch an existing one, you need to ensure that you have sufficient access to the address book. You can check your access privileges using the authorizationStatusForEntityType(_:) class method of your contact store. This method takes in one parameter of type CNEntityType. You can pass the value of Contacts to this method, for instance, to ask for access to the user’s contacts. If you do not have access, you can use the requestAccessForEntityType(_:completionHandler:) method of your contact store to request access.
The concept of a partial contact is important enough to cover now as well. A partial contact is a contact whose properties have not all been fetched from the store yet. For instance, perhaps you can fetch only a contact’s first and last name, not her profile photo or email addresses. This is a partial contact. A partial contact’s other information—such as email addresses—that have not been fetched yet can later be fetched from the store using her identifier (part of the CNContact object).
Some of the classes that are part of the Contacts framework have immutable and mutable flavors. An example is the CNContact and the CNMutableContact classes. The former is a contact that you have fetched from the store and just use in your app, while the latter is a contact that you have created in your app and want to save into the store.
Contact objects on iOS are thread-safe. I suggest that you do all your fetch operations on a background thread. Fetch the contacts in the background and safely display your contacts on your UI by accessing the same contact object on the main thread.
Note
In this chapter, it’s best to always reset the contents of your address book on the simulator by resetting the simulator before testing the code in each recipe, unless I’ve explicitly specified not to. This is just to make sure that every recipe is working with a clear state of the address book database. You can find the Contacts app on your simulator. It should look like Figure 4-1 in a clear state.
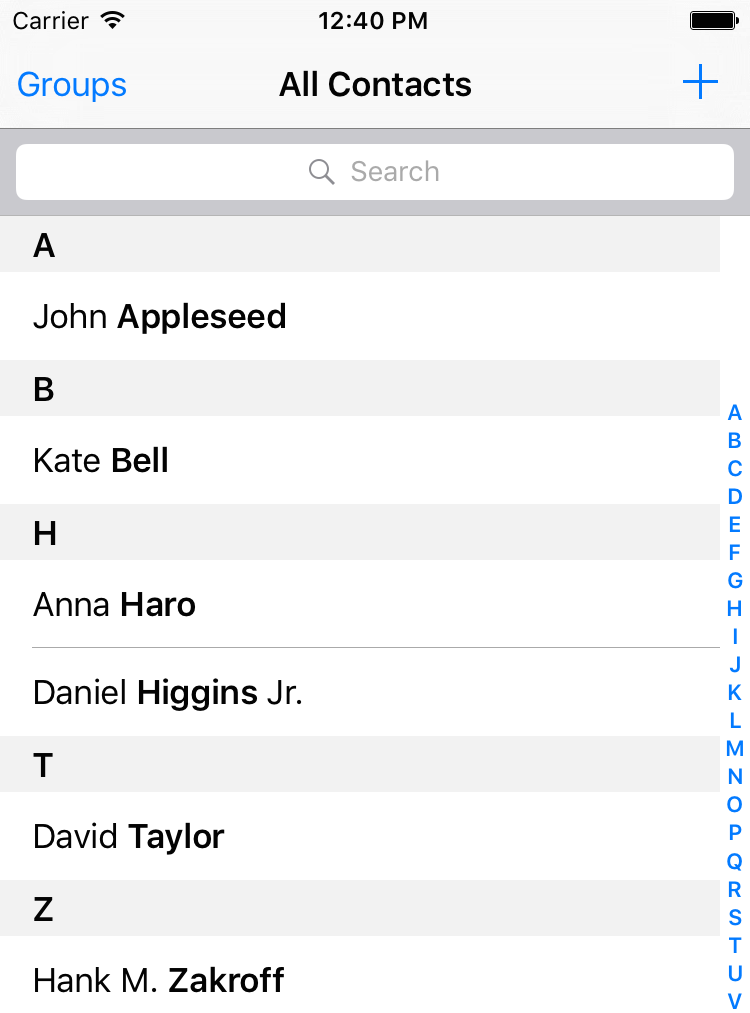
Figure 4-1. Clean state of the Contacts app on the simulator
4.1 Creating Contacts
Solution
- Request access to the database if you don’t already have it.
- Create an instance of the
CNMutableContactclass. - Set its various properties, such as
givenName,middleName, andfamilyName. - Instantiate
CNSaveRequest, call theaddContact(_:toContainerWithIdentifier:)method on it, and pass your contact to it. Set the container ID to nil. - Once you have the request, execute it on your store instance using
executeSaveRequest(_:).
Discussion
Create a single-view app and first ask for permission to access contacts on the user’s device:
    switch CNContactStore.authorizationStatusForEntityType(.Contacts){
    case .Authorized:
      createContact()
    case .NotDetermined:
      store.requestAccessForEntityType(.Contacts){succeeded, err in
        guard err == nil && succeeded else{
          return
        }
        self.createContact()
      }
    default:
      print("Not handled")
    }
After I get the permission here, I am calling the createContact() method that we are just about to code. Also, I am using a property on my class that is my instance of the contact store:
varstore=CNContactStore()
In the createContact() method, first let’s create the basics of the contact object with the basic name and such:
    let fooBar = CNMutableContact()
    fooBar.givenName = "Foo"
    fooBar.middleName = "A."
    fooBar.familyName = "Bar"
    fooBar.nickname = "Fooboo"
Then we set the profile photo:
    //profile photo
    if let img = UIImage(named: "apple"),
      let data = UIImagePNGRepresentation(img){
      fooBar.imageData = data
    }
Note
I’ve included a profile photo that I can use in the app. You don’t have to do that if you don’t want to. This code will work even if you don’t have a profile photo by jumping over this section if the image cannot be found.
Now I am going to set the user’s phone numbers. This can be done by setting an array of CNLabeledValue on the phoneNumbers property of the contact object. Labeled values are instances of the aforementioned class and can have a label and a value. The label is a string such as CNLabelHome or CNLabelWork and the value, in case of a phone number, is an instance of the CNPhoneNumber class:
    //set the phone numbers
    let homePhone = CNLabeledValue(label: CNLabelHome,
      value: CNPhoneNumber(stringValue: "123"))
    let workPhone = CNLabeledValue(label: CNLabelWork,
      value: CNPhoneNumber(stringValue: "567"))
    fooBar.phoneNumbers = [homePhone, workPhone]
I am then going to set the email addresses for this person by manipulating the emailAddresses property of the contact. This property also accepts an array of CNLabeledValue and the values of this labeled object are the email addresses, as string objects:
    //set the email addresses
    let homeEmail = CNLabeledValue(label: CNLabelHome,
      value: "foo@home")
    let workEmail = CNLabeledValue(label: CNLabelWork,
      value: "bar@home")
    fooBar.emailAddresses = [homeEmail, workEmail]
Next up, I am going to write some information in this contact about her job using the jobTitle, organizationName, and departmentName properties:
    //job info
    fooBar.jobTitle = "Chief Awesomeness Manager (CAM)"
    fooBar.organizationName = "Pixolity"
    fooBar.departmentName = "IT"
After that, I want to set the Facebook and Twitter profiles of this user. I do that by setting the value of the socialProfiles array on the contact. This array takes items of type CNLabeledValue and the value of each one of these labeled objects should be of type CNSocialProfile. You can set the service for each of the profiles using constants such as the following:
CNSocialProfileServiceFacebookCNSocialProfileServiceTwitterCNSocialProfileServiceLinkedInCNSocialProfileServiceFlickr
    //social media
    let facebookProfile = CNLabeledValue(label: "FaceBook", value:
      CNSocialProfile(urlString: nil, username: "foobar",
      userIdentifier: nil, service: CNSocialProfileServiceFacebook))
    let twitterProfile = CNLabeledValue(label: "Twitter", value:
      CNSocialProfile(urlString: nil, username: "foobar",
        userIdentifier: nil, service: CNSocialProfileServiceTwitter))
    fooBar.socialProfiles = [facebookProfile, twitterProfile]
I am also going to set some instant messaging information for my contact, such as her Skype and AIM information. I can do that by setting the value of the instantMessageAddresses property that takes in an array of, you guessed it, CNLabeledValue. Each of these values should be of type CNInstantMessageAddress and service inside each message address object can be a string such as:
CNInstantMessageServiceSkypeCNInstantMessageServiceAIMCNInstantMessageServiceMSNCNInstantMessageServiceYahoo
    //instant messaging
    let skypeAddress = CNLabeledValue(label: "Skype", value:
    CNInstantMessageAddress(username: "foobar",
      service: CNInstantMessageServiceSkype))
    let aimAddress = CNLabeledValue(label: "AIM", value:
    CNInstantMessageAddress(username: "foobar",
      service: CNInstantMessageServiceAIM))
    fooBar.instantMessageAddresses = [skypeAddress, aimAddress]
I can also set some notes on my contact using the note property that is just a string:
    //some additional notes
    fooBar.note = "Some additional notes"
Next step is to set the birthday property. This is a property of type NSDateComponents:
    //birthday
    let birthday = NSDateComponents()
    birthday.year = 1980
    birthday.month = 9
    birthday.day = 27
    fooBar.birthday = birthday
Every contact also has a property named dates that can contain dates such as the user’s anniversary. This is an array of CNLabeledValue objects. Here I am going to set the anniversary for this user:
    //anniversary
    let anniversaryDate = NSDateComponents()
    anniversaryDate.month = 6
    anniversaryDate.day = 13
    let anniversary = CNLabeledValue(label: "Anniversary",
      value: anniversaryDate)
    fooBar.dates = [anniversary]
Note
I did not set the year for the anniversary because an anniversary is a repeating event.
I am finally done with my contact and will save her into the contact store:
    //finally save
    let request = CNSaveRequest()
    request.addContact(fooBar, toContainerWithIdentifier: nil)
    do{
      try storeo.executeSaveRequest(request)
      print("Successfully stored the contact")
    } catch let err{
      print("Failed to save the contact. \(err)")
    }
Note
If you run this code n times on the same device, you will get n of the same contacts. The Contacts database does not prevent multiple saves on the same contact. They become different contacts eventually. It is our responsibility to avoid this.
And now my contact appears in the list (Figure 4-2).
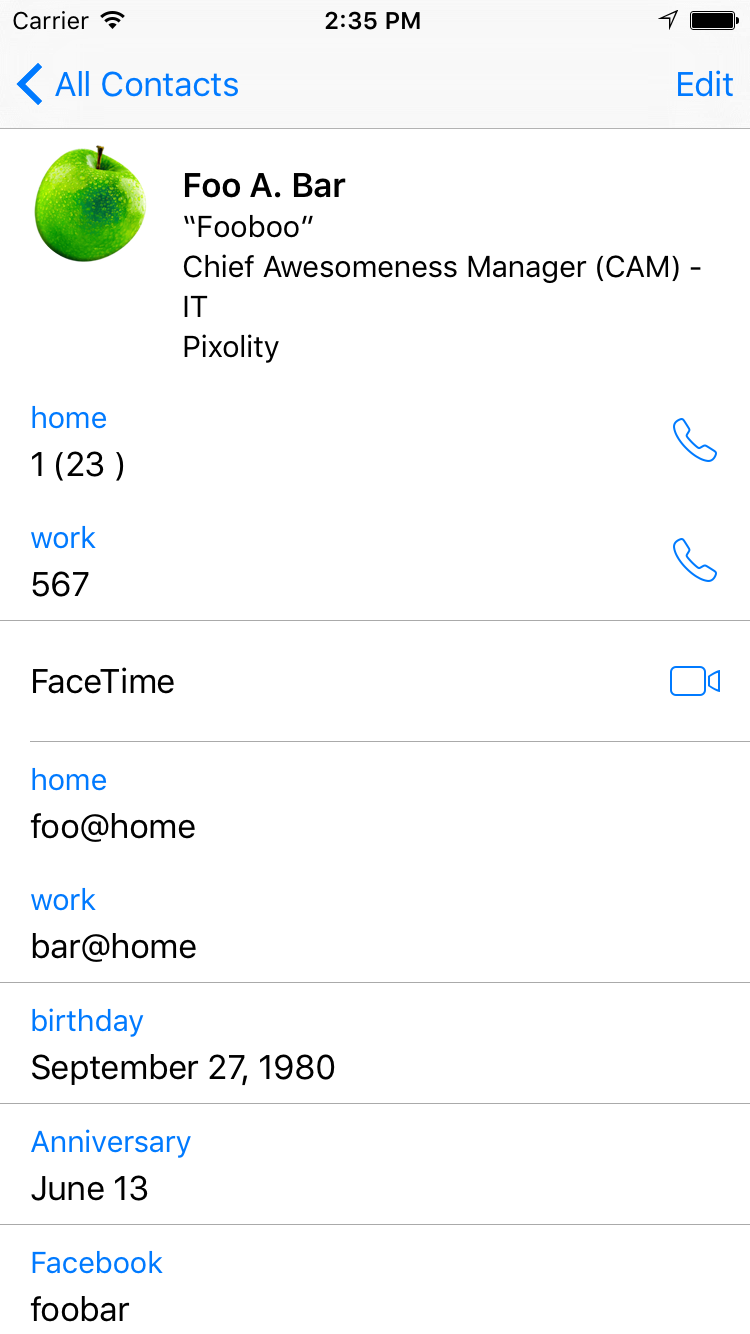
Figure 4-2. The new contact in all its glory
4.2 Searching for Contacts
Solution
There are various ways of fetching contacts from a store. Here are some of them, in no particular order:
unifiedContactsMatchingPredicate(_:keysToFetch:)method ofCNContactStore-
This allows you to fetch all contacts that match a certain predicate.
enumerateContactsWithFetchRequest(_:usingBlock:)method ofCNContactStore-
This allows you to enumerate through all contacts that match a fetch request. The fetch request can have a predicate if you want it to. Otherwise, you can use this method with a request object that does not have a predicate, in order to fetch all contacts.
unifiedContactWithIdentifier(_:keysToFetch:)method ofCNContactStore-
This fetches only a single contact with a given identifier, if it can find one. Use this method to fetch properties for a partially fetched contact.
Note
The term “unified contacts” is iOS’s way of showing that the contact objects that we get are intelligently merged from different sources, if available. If you have “Foo bar” in your contacts and then you sign into Facebook with its iOS app and bring your Facebook contacts into your phone, and you have “Foo bar” on Facebook as well, iOS will merge that contact for you into one contact. Foo bar is now a unified contact.
Discussion
Let’s have a look at a few examples. First, let’s write some code that will find anybody in our address book whose name matches “John”. We start off by creating a predicate using the predicateForContactsMatchingName(_:) class method of the CNContact class:
let predicate = CNContact.predicateForContactsMatchingName("john")
Then we are going to specify that we need the first and the last name of the contacts that match that name:
let toFetch = [CNContactGivenNameKey, CNContactFamilyNameKey]
Once that is done, use the unifiedContactsMatchingPredicate(_:keysToFetch:) method of the contact store to fetch the contacts matching our predicate. Go through all matching contacts and print their first and last name alongside their identifier property:
      do{
        let contacts = try store.unifiedContactsMatchingPredicate(
          predicate, keysToFetch: toFetch)

        for contact in contacts{
          print(contact.givenName)
          print(contact.familyName)
          print(contact.identifier)
        }

      } catch let err{
        print(err)
      }
Note
I’ve wrapped this whole code inside NSOperationQueue().addOperationWithBlock(_:) to make sure that I am doing the search on a background thread. I suggest that you do that too.
Every contact object has a handy property called identifier. This identifier usually looks like a UUID. If you keep an identifier to a contact, you can always refetch that contact using the unifiedContactWithIdentifier(_:keysToFetch:) method of CNContactStore. You do not have to explicitly fetch the identifier property of a contact. This identifier is fetched whether you want it or not, for every contact that you get from a store. So you can omit that in your keysToFetch.
Let’s look at another example. This time we are going to do the same thing that we did in the previous example, but instead, use the CNContactFetchRequest class mixed with the enumerateContactsWithFetchRequest(_:usingBlock:) method of CNContactStore to achieve the same results.
First, again I am going to specify what properties in the contacts I am interested in reading:
let toFetch = [CNContactGivenNameKey, CNContactFamilyNameKey]
I will now construct my fetch request using these properties:
letrequest=CNContactFetchRequest(keysToFetch:toFetch)
Then I will fetch the contacts with the aforementioned method:
      do{
        try store.enumerateContactsWithFetchRequest(request) {
          contact, stop in
          print(contact.givenName)
          print(contact.familyName)
          print(contact.identifier)
        }
      } catch let err{
        print(err)
      }
The block that you pass to this method has two parameters. The first is the contact. The second is a Boolean pointer that you can set to true whenever you want to exit this enumeration. You can do that like this:
stop.memory=true
How about looking at another example. Let’s say that you want to fetch all contacts whose name is similar to “Foo”. You then want to find out whether they have a profile photo. If they do, we will refetch those contacts and get their profile photo. The purpose of this exercise is to show you that if you are interested in contacts with photos, it is best to first see whether they have photos and only if they do, fetch their profile photos. I’ll start off by defining the keys that I want to fetch and I ask for a key that tells me whether a contact has a photo:
var toFetch = [CNContactImageDataAvailableKey]
Then I will define my predicate:
let predicate = CNContact.predicateForContactsMatchingName("foo")
Next, I will find all contacts that match my predicate:
        let contacts = try store.unifiedContactsMatchingPredicate(predicate,
          keysToFetch: toFetch)
Note
The previous statement must be wrapped inside a do{}catch{} block, otherwise it won’t compile. I am not writing that statement here in the book because I want to explain the code step by step. If I paste the do{}catch{}, I’ll have to paste the whole code in a gigantic block and that’s not very good.
Now that we have our contacts, let’s go through them and only find the ones that do have an image:
        for contact in contacts{
          guard contact.imageDataAvailable else{
            continue
          }

          ...
The CNContact class offers an isKeyAvailable(_:) method that returns true or false depending on whether or not a given key is available for access on a contact. So here I am going to ask whether my contacts have images (the CNContactImageDataKey key) and if they do, I am going to read the image:
          //have we fetched image data?
          if contact.isKeyAvailable(CNContactImageDataKey){
            print(contact.givenName)
            print(contact.identifier)
            print(UIImage(data: contact.imageData!))
          } else {

            ...
Note
None of our contacts at this point will have images because we have not fetched the images yet in our original fetch request. This is for demonstration purposes really and to teach you how to use the isKeyAvailable(_:) method.
If the contacts don’t have their image data available at this point (which they won’t!), we will use the identifier of each one of them and re-fetch them, but this time by specifying that we need the image data as well:
          else {
            toFetch += [CNContactImageDataKey, CNContactGivenNameKey]
            do{
              let contact = try store.unifiedContactWithIdentifier(
                contact.identifier, keysToFetch: toFetch)
              print(contact.givenName)
              print(UIImage(data: contact.imageData!))
              print(contact.identifier)
            } catch let err{
              print(err)
            }
          }
And that was it, really. If you have the identifier of a contact, you can fetch that contact quite easily, as we saw. Now let’s say that you do have this identifier saved somewhere inside your app and you want to directly fetch that contact. You do that using the unifiedContactWithIdentifier(_:keysToFetch:) method of the contact store:
    NSOperationQueue().addOperationWithBlock{[unowned store] in
      let id = "AECF6A0E-6BCB-4A46-834F-1D8374E6FE0A:ABPerson"
      let toFetch = [CNContactGivenNameKey, CNContactFamilyNameKey]

      do{

        let contact = try store.unifiedContactWithIdentifier(id,
          keysToFetch: toFetch)

        print(contact.givenName)
        print(contact.familyName)
        print(contact.identifier)

      } catch let err{
        print(err)
      }
    }
See Also
4.3 Updating Contacts
Solution
Call the mutableCopy() method of your CNContact class. This will give you an instance of the CNMutableContact. Once you have a mutable contact, you can change her properties as you would with a contact of type CNContact. Once done editing, instantiate CNSaveRequest, issue the updateContact(_:) method on it, and pass your mutable contact to that method. Now that you have the request object, pass it to the executeSaveRequest(_:) method of your store to update the contact.
Discussion
Let’s check an example. Let’s say that we want to find a contact named “John” and then add a new email address to it, if it doesn’t already have it. I am not going to explain the things that we learned in Recipe 4.2, so let’s dive in. Figure 4-3 shows the contact we will change. The contact comes prefilled in your iOS simulator, with only one work email address. We are going to add another work email to this list:
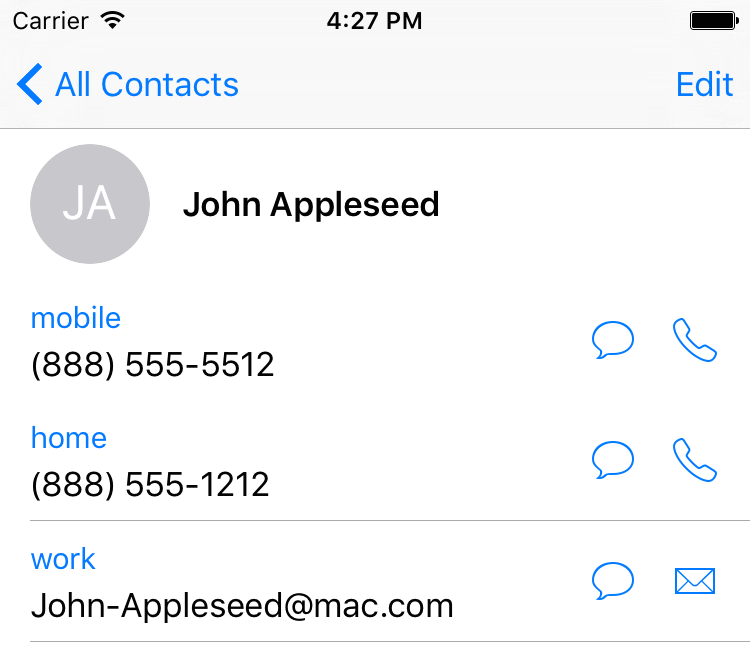
Figure 4-3. Current state of the contact
    NSOperationQueue().addOperationWithBlock{[unowned store] in
      let predicate = CNContact.predicateForContactsMatchingName("john")
      let toFetch = [CNContactEmailAddressesKey]

      do{
        let contacts = try store.unifiedContactsMatchingPredicate(predicate,
          keysToFetch: toFetch)

        guard contacts.count > 0 else{
          print("No contacts found")
          return
        }

        //only do this to the first contact matching our criteria
        guard let contact = contacts.first else{
          return
        }

        ...
Note
We are only adding this new email to the first contact that matches our criteria.
Now we have a contact object that matches our criteria. Let’s see whether he already has this email address, and bail out if he does:
        let newEmail = "newemail@work.com"

        for email in contact.emailAddresses{
          if email.value as! String == newEmail{
            print("This contact already has this email")
            return
          }
        }
Now that we are sure he didn’t have this email address already in the list, we will add it:
        let john = contact.mutableCopy() as! CNMutableContact

        let emailAddress = CNLabeledValue(label: CNLabelWork,
          value: "newemail@work.com")

        john.emailAddresses.append(emailAddress)

        let req = CNSaveRequest()
        req.updateContact(john)

        try store.executeSaveRequest(req)

        print("Successfully added an email")
Now if we look at our contact in the list, we can see the new email address added (see Figure 4-4).

Figure 4-4. The new email address is added to our contact
See Also
4.4 Deleting Contacts
Solution
- Find your contact using what you learned in Recipe 4.2.
- Instantiate an object of type
CNSaveRequest. - Issue the
deleteContact(_:)function on the request and pass your mutable contact to it. - Execute your request using the
executeSaveRequest(_:)method of your contact store.
Discussion
Note
Deleting a contact from a store is irreversible. I suggest that you test your code on the simulator first and as much as possible, ask the user first whether they allow a contact to be deleted.
Let’s have a look at an example. We want to find all contacts named John and then delete the first one that we find. I am not showing an alert asking the user whether this is okay or not, because that’s not the focus of this recipe. I suggest that you do so, though.
    NSOperationQueue().addOperationWithBlock{[unowned store] in
      let predicate = CNContact.predicateForContactsMatchingName("john")
      let toFetch = [CNContactEmailAddressesKey]

      do{

        let contacts = try store.unifiedContactsMatchingPredicate(predicate,
          keysToFetch: toFetch)

        guard contacts.count > 0 else{
          print("No contacts found")
          return
        }

        //only do this to the first contact matching our criteria
        guard let contact = contacts.first else{
          return
        }

        let req = CNSaveRequest()
        let mutableContact = contact.mutableCopy() as! CNMutableContact
        req.deleteContact(mutableContact)

        do{
          try store.executeSaveRequest(req)
          print("Successfully deleted the user")

        } catch let e{
          print("Error = \(e)")
        }

      } catch let err{
        print(err)
      }
    }
See Also
4.5 Formatting Contact Data
Discussion
The CNContactFormatter class allows you to format the name of any contact, according to the localization settings of the current device. For instance, in some languages, the last name of a person may be mentioned first. You can use the stringFromContact(_:) function of this method to get the full name.
Note
You must fetch the full name of a contact from the store for this method to work at all. Otherwise, you might get an exception.
Because we have already talked about Recipe 4.2, I have written a simple extension on CNContactStore that allows me to fetch the first contact that it finds with a given name. I’ve named this method firstUnifiedContactMatchingName(_:toFetch:output:) and it calls my output block when it finds the contact or if an error occurs. You don’t have to know the full implementation of this method because you already know how you can fetch a contact with a given name.
So let’s look at an example where we fetch a contact from the store and print his full name to the console:
    let toFetch =
    CNContactFormatter.descriptorForRequiredKeysForStyle(.FullName)

    store.firstUnifiedContactMatchingName("john", toFetch: [toFetch]){
      guard let contact = $0 else{
        return
      }

      guard let name = CNContactFormatter().stringFromContact(contact) else{
        return
      }

      print("The name of the contact is \(name)")

    }
Note that I am using the descriptorForRequiredKeysForStyle(_:) class method of the CNContactFormatter class to get an object of type CNKeyDescriptor and then pass the results to firstUnifiedContactMatchingName(_:toFetch:output:) when fetching the contact. The aforementioned method on CNContactFormatter tells the system what properties of the contact to fetch; in this case, all the properties that are required for the full name, including the first, middle, and last names.
Now imagine that we want to find a contact’s localized phonetic name. A phonetic name is the name of a person, written as it is pronounced, rather than how the name is spelled. For instance, a person’s name might be Julian, but in Swedish, because the J is pronounced as “you,"this name will eventually be pronounced as “you-lian.” So “you-lian” is the phonetic equivalent of the name “Julian” in Swedish. These phonetic names are very useful for Siri. So a Swedish speaker will ask Siri to phone up “you-lian” and Siri will have no idea who that is unless the phonetic name has been set for that user.
Create a contact in your list. Set his first name to “Julian” and last name to “Julianson.” Then tap the “add field” button at the bottom of the create-contact screen and add the phonetic first and last name fields to the contact (see Figure 4-5).
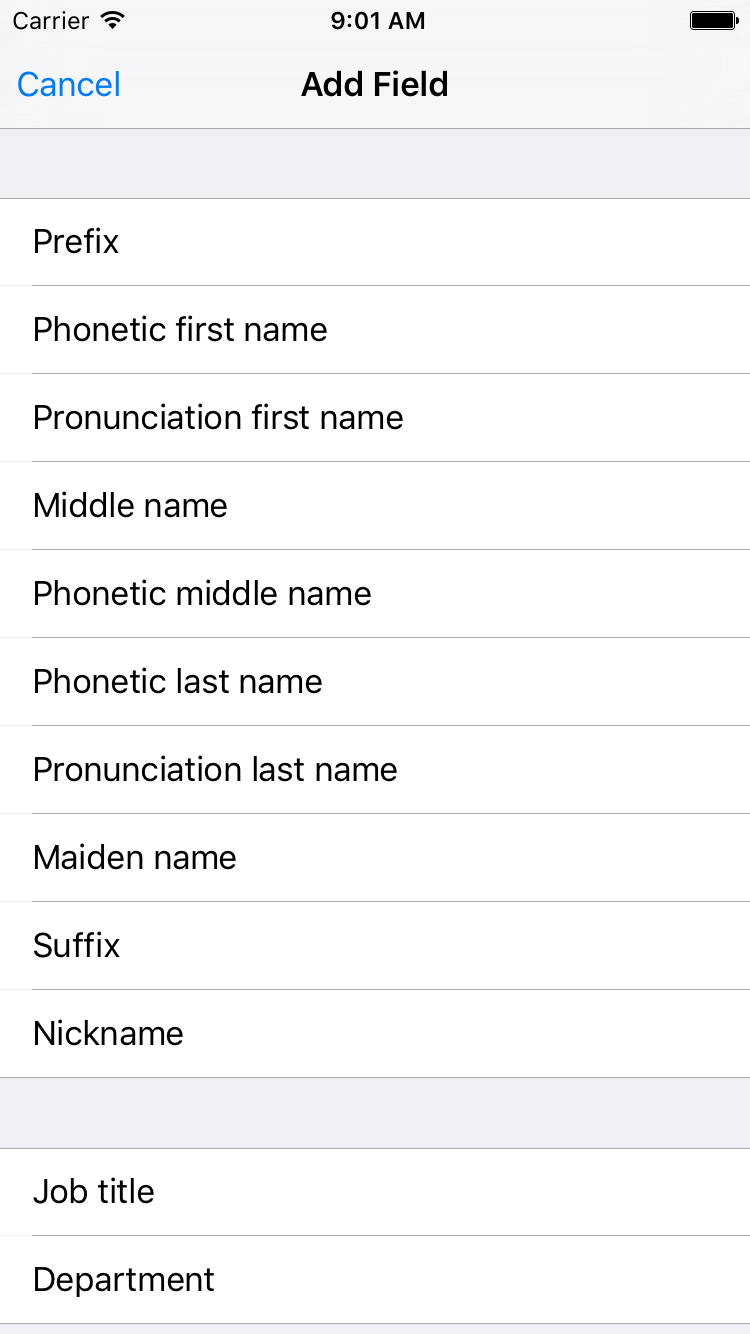
Figure 4-5. Add the phonetic first name and last name fields to your new contact
Set the phonetic first name to “Youlian” and the phonetic last name to “Youlianson” until your contact looks like Figure 4-6.

Figure 4-6. Your contact’s phonetic name is also displayed, if set
Let’s now look at an example where we fetch the phonetic name of a contact and then format it according to the localization on the current device. First, we need to find the fields in the contact store for phonetic name. We do that using the descriptorForRequiredKeysForStyle(_:) class method of CNContactFormatter and this time pass the value of PhoneticFullName to it. Because the stringFromContact(_:) class method of the CNContactFormatter class by default reads the full name, and not the phonetic full name, we will have to start using the stringFromContact(_:style:) instance method of this class instead. The last parameter to this function allows us to pass a style of type CNContactFormatterStyle that can be set to FullName or PhoneticFullName:
    let style = CNContactFormatterStyle.PhoneticFullName

    let toFetch =
    CNContactFormatter.descriptorForRequiredKeysForStyle(style)

    store.firstUnifiedContactMatchingName("julian", toFetch: [toFetch]){

      guard let contact = $0 else{
        return
      }

      guard let name = CNContactFormatter
        .stringFromContact(contact, style: style) else{
        return
      }

      print("The phonetic name of the contact is \(name)")

    }
Aside from getting the localized full name of a contact, you can also get her address information, again, properly localized, using the CNPostalAddressFormatter class. Follow these steps:
- Fetch your contact and make sure you include the
CNContactPostalAddressesKeykey. - Get the address from the contact using the
postalAddressesproperty ofCNContact. This will give you a value of typeCNLabeledValue. Get thevalueof this labeled value and cast it toCNPostalAddress. - Instantiate
CNPostalAddressFormatter. - Pass the postal address to the
stringFromPostalAddress(_:)method of your postal address formatter to get the formatted address:
    let toFetch = [CNContactPostalAddressesKey]

    store.firstUnifiedContactMatchingName("john", toFetch: toFetch){
      guard let contact = $0 else{
        return
      }

      guard let firstAddress = contact.postalAddresses.first else{
        print("no postal address could be found")
        return
      }

      guard let address = firstAddress.value as? CNPostalAddress
        where firstAddress.value is CNPostalAddress else{
        return
      }

      let formatter = CNPostalAddressFormatter()
      let formattedAddress = formatter.stringFromPostalAddress(address)

      print("The address is \(formattedAddress)")

    }
See Also
4.6 Picking Contacts with the Prebuilt System UI
Discussion
Let’s say that you want to allow the user to pick a contact. You will then attempt to read the phone numbers from that contact. Instances of the CNContactPickerViewController class have a property called delegate that is of type CNContactPickerDelegate. Some of the interesting methods in this delegate are:
contactPickerDidCancel(_:)-
This gets called when the user cancels his request to pick a contact.
contactPicker(_:didSelectContact:)-
This gets called when the user picks a contact from the list.
In this example, I want to allow the user to pick a contact, whereupon I will read all the phone numbers from that contact. I have placed a button in my storyboard and hooked that button to a method in my code called pickaContact(). In that code, I present a simple contact picker:
    let controller = CNContactPickerViewController()

    controller.delegate = self

    navigationController?.presentViewController(controller,
      animated: true, completion: nil)
Note
I’m doing all this code inside a view controller and I’ve made my view controller conform to CNContactPickerDelegate.
Then, when the user picks a contact, I just print out all the phone numbers of that contact, if any, to the console:
funccontactPickerDidCancel(picker:CNContactPickerViewController){("Cancelled picking a contact")}funccontactPicker(picker:CNContactPickerViewController,didSelectContactcontact:CNContact){("Selected a contact")ifcontact.isKeyAvailable(CNContactPhoneNumbersKey){//this is an extension I've written on CNContactcontact.printPhoneNumbers()}else{/*TOOD: partially fetched, use what you've learnt in this chapter tofetch the rest of this contact*/("No phone numbers are available")}}
Note
The printPhoneNumbers() function is a custom extension on CNContact that I’ve written. You don’t have to know the implementation of that as it’s not relevant to this recipe. You already know how to do that using what you learned in Recipe 4.2.
In this example, we are looking for contacts with phone numbers, but the user is allowed to pick any contact, even if that contact has no phone numbers. How do we remedy this? A property called predicateForEnablingContact of type NSPredicate, on instances of CNContactPickerViewController, allows us to specify which contacts should be enabled and which ones should be disabled. Here we can create a predicate that checks the @count of the phoneNumbers property. Also, for fun, let’s say that we only want to allow contacts whose names starts with “John” to be selectable (see Figure 4-7).
    let controller = CNContactPickerViewController()

    controller.delegate = self

    controller.predicateForEnablingContact =
      NSPredicate(format:
        "phoneNumbers.@count > 0 && givenName BEGINSWITH 'John'",
        argumentArray: nil)

    navigationController?.presentViewController(controller,
      animated: true, completion: nil)
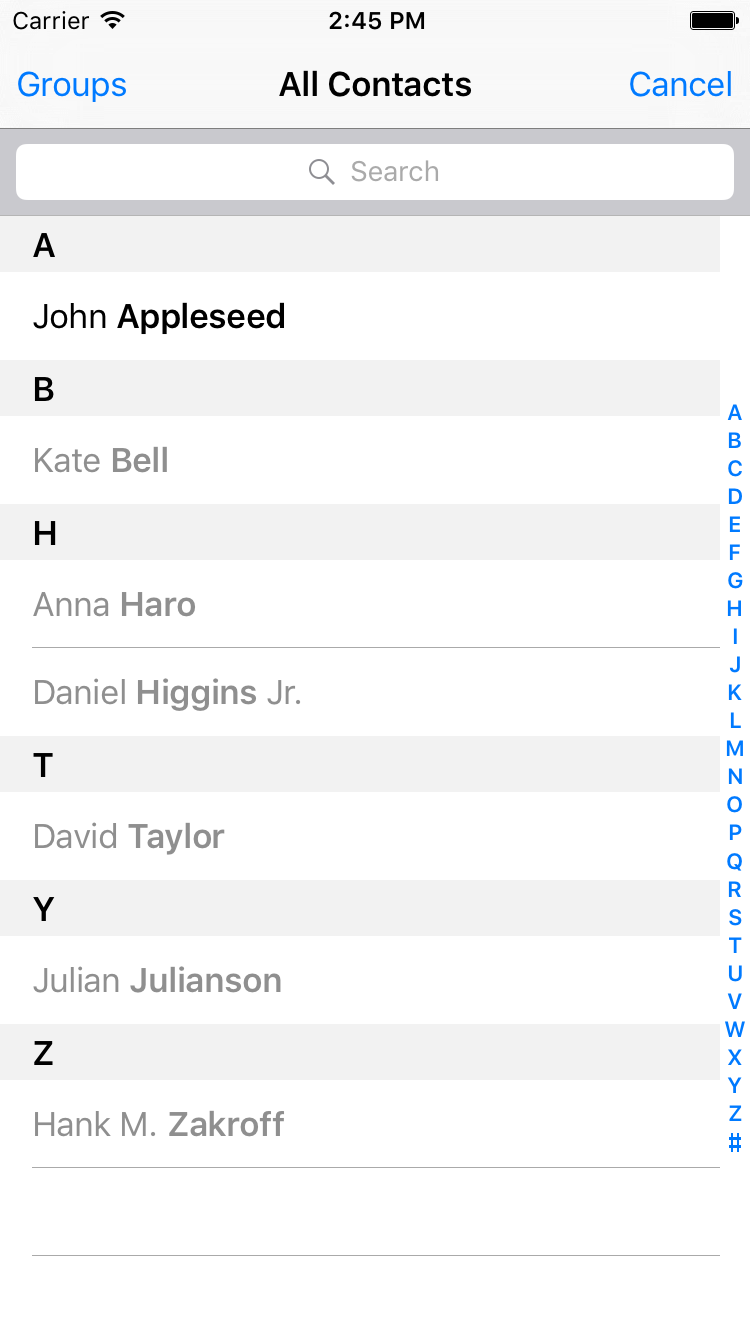
Figure 4-7. Only people whose names start with “John” and who have at least one phone number are retrieved
The predicateForEnablingContact property disables all contacts who do not pass the predicate so that the user won’t even be able to select those contacts. There is another property on CNContactPickerViewController that does something more interesting: predicateForSelectionOfContact. The contacts that pass this predicate will be selectable by the user so that when the user taps that contact, the controller is dismissed and we get access to the contact object. The contacts that do not pass this predicate will still be selectable, but upon selection, their details will be shown to the user using the system UI. They won’t be returned to our app:
    let controller = CNContactPickerViewController()

    controller.delegate = self

    controller.predicateForSelectionOfContact =
      NSPredicate(format:
        "phoneNumbers.@count > 0",
        argumentArray: nil)

    navigationController?.presentViewController(controller,
      animated: true, completion: nil)
There is another funky property on CNContactPickerViewController named predicateForSelectionOfProperty. This is a predicate that dictates which property for any contact the user should be able to pick. If you want to allow the user to pick a specific property—say the first phone number—of any contact to be passed to your app, you also have to implement the contactPicker(_:didSelectContactProperty:) method of the CNContactPickerDelegate protocol. Let’s write sample code that allows the user to pick any contact as long as that contact has at least one phone number, and then be able to pick the first phone number of that contact to be returned to our app:
    let controller = CNContactPickerViewController()

    controller.delegate = self

    controller.predicateForEnablingContact =
      NSPredicate(format:
        "phoneNumbers.@count > 0",
        argumentArray: nil)

    controller.predicateForSelectionOfProperty =
      NSPredicate(format: "key == 'phoneNumbers'", argumentArray: nil)

    navigationController?.presentViewController(controller,
      animated: true, completion: nil)
And then we provide an implementation of the contactPicker(_:didSelectContactProperty:) method:
funccontactPicker(picker:CNContactPickerViewController,didSelectContactPropertycontactProperty:CNContactProperty){("Selected a property")}
In addition to all of this, you can also allow the user to pick multiple contacts. Do that by implementing the contactPicker(_:didSelectContacts:) method of the CNContactPickerDelegate protocol (see Figure 4-8):
funccontactPicker(picker:CNContactPickerViewController,didSelectContactscontacts:[CNContact]){("Selected \(contacts.count) contacts")}//allows multiple selection mixed with contactPicker:didSelectContacts:funcexample5(){letcontroller=CNContactPickerViewController()controller.delegate=selfnavigationController?.presentViewController(controller,animated:true,completion:nil)}
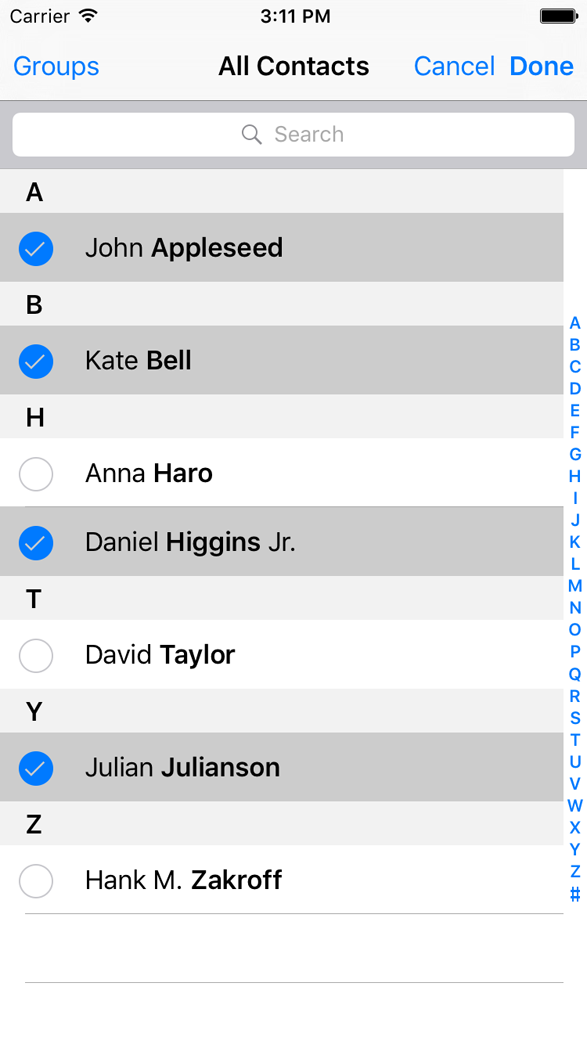
Figure 4-8. The user is able to select multiple contacts at the same time and return to our app at the end
See Also
4.7 Creating Contacts with a Prebuilt System UI
Solution
- Create an instance of
CNContactStoreand ask for permission to use the store (see Recipe 4.1). - Create a contact of type
CNMutableContactand put your default values in it. This is an optional step. You might want the user to create a whole new contact on her own, with no predefined values from your side. - Instantiate an object of type
CNContactViewControllerusing theforNewContactinitializer and pass your contact to it. - Set the
contactStoreproperty of this view controller to a valid contact store instance. - Optionally, set the
delegateproperty of this view controller to a valid delegate object that conforms to theCNContactViewControllerDelegateprotocol.
Discussion
You have Recipe 4.1 to create a contact programmatically. What if you have some basic information about a contact, or no information at all, and you want your user to supply the rest of the information? Of course you could create a UI to allow the user to do that, but why do so if the SDK already comes with a prebuilt UI called CNContactViewController?
You can simply push an instance of the CNContactViewController class on your navigation controller. When you become the delegate of this view controller, a delegate method named contactViewController(_:didCompleteWithContact:) will get called if the user cancels or accepts the contact creation. Use this method to dismiss (pop) the contact view controller:
funccontactViewController(viewController:CNContactViewController,didCompleteWithContactcontact:CNContact?){//whatever happens, pop back to our view controllerdefer{navigationController?.popViewControllerAnimated(true)}guardletcontact=contactelse{("The contact creation was cancelled")return}("Contact was created successfully \(contact)")}
Let’s look at a simple example now. Create a simple contact with some basic information and then ask the user to complete the creation process:
    let contact = CNContact().mutableCopy() as! CNMutableContact
    contact.givenName = "Anthony"
    contact.familyName = "Appleseed"

    let controller = CNContactViewController(forNewContact: contact)
    controller.contactStore = store
    controller.delegate = self

    navigationController?
      .pushViewController(controller, animated: true)
Then our user will see a UI similar to Figure 4-9.
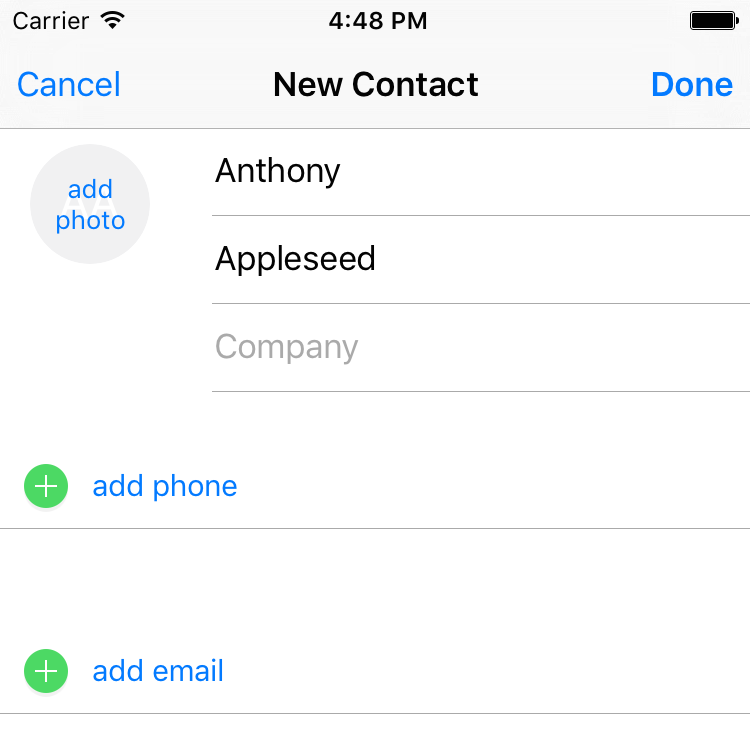
Figure 4-9. The new-contact system UI is displayed, asking the user to finish off or cancel the contact creation
Note
The contact that you pass to the aforementioned initializer of CNContactViewController is optional. If you pass nil, the new-contact dialog that the user will see will be empty and the user will have to fill out every field in the UI.
See Also
4.8 Displaying Contacts with a Prebuilt System UI
Solution
Use the forContact initializer of the CNContactViewController class and pass this method an instance of the CNContact that you want to display.
Discussion
Sometimes, you might want to display information for a particular contact but don’t want to write the whole UI yourself. Why would you? It’s a lot of work to display all the information. That’s where you can use the CNContactViewController class again.
Note
In this example, I am going to use my custom firstUnifiedContactMatchingName(_:toFetch:output:) method to fetch an existing contact. You don’t have to know the implementation of this method because you already learned how to in Recipe 4.2
So this is what we are going to do: we fetch a contact whose name matches “John” and display his information on the screen. Make sure that you fetch all the required keys for your contact. Otherwise, the controller won’t be able to display the contact’s information. You can get the list of required keys by calling the descriptorForRequiredKeys() class function of the CNContactViewController:
    let toFetch = [CNContactViewController.descriptorForRequiredKeys()]
    store.firstUnifiedContactMatchingName("john", toFetch: toFetch){

      guard let contact = $0 else{
        print("No contact was found")
        return
      }

      let controller = CNContactViewController(forContact: contact)
      controller.contactStore = self.store
      controller.allowsEditing = false

      controller.displayedPropertyKeys =
        [CNContactEmailAddressesKey, CNContactPostalAddressesKey]

      self.navigationController?
        .pushViewController(controller, animated: true)

    }
By default, when a contact is displayed, the contact controller allows the user to edit that contact. You can disable that behavior by setting the allowsEditing property of the controller to false. Also bear in mind that you have to set the contactStore property of the controller to the same store from where you fetched your contact.
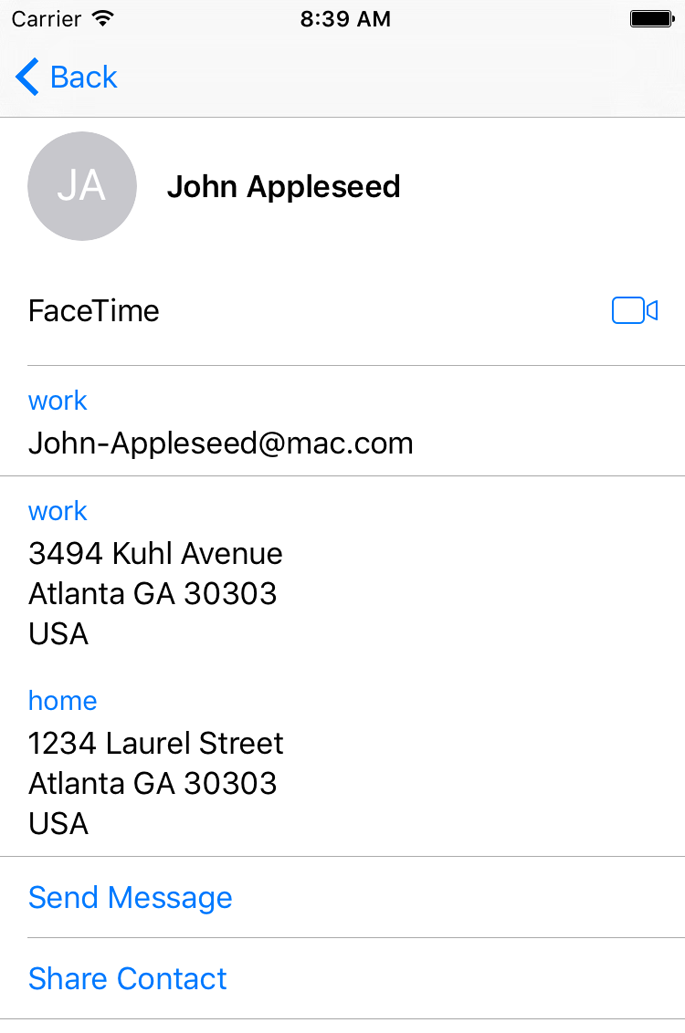
Figure 4-10. Displaying a contact
There is another interesting property on the controller: displayedPropertyKeys. As its name implies, it allows you to pass a series of contact property keys that have to be displayed. Other properties will be hidden. I have, in our code, enabled only email and postal addresses. The results are shown in Figure 4-10. Some other information such as full name are shown by default.
See Also
Get iOS 9 Swift Programming Cookbook now with the O’Reilly learning platform.
O’Reilly members experience books, live events, courses curated by job role, and more from O’Reilly and nearly 200 top publishers.

