The accessories provided to you by the iOS SDK are not sufficient, and you would like to create your own accessories.
Assign an instance of the UIView class to the accessoryView property of any instance
of the UITableViewCell class:
-(UITableViewCell*)tableView:(UITableView*)tableViewcellForRowAtIndexPath:(NSIndexPath*)indexPath{UITableViewCell*result=nil;staticNSString*MyCellIdentifier=@"SimpleCell";/* We will try to retrieve an existing cellwith the given identifier */result=[tableViewdequeueReusableCellWithIdentifier:MyCellIdentifier];if(result==nil){result=[[UITableViewCellalloc]initWithStyle:UITableViewCellStyleDefaultreuseIdentifier:MyCellIdentifier];}result.textLabel.text=[NSStringstringWithFormat:@"Section %ld, Cell %ld",(long)indexPath.section,(long)indexPath.row];UIButton*button=[UIButtonbuttonWithType:UIButtonTypeRoundedRect];button.frame=CGRectMake(0.0f,0.0f,150.0f,25.0f);[buttonsetTitle:@"Expand"forState:UIControlStateNormal];[buttonaddTarget:selfaction:@selector(performExpand:)forControlEvents:UIControlEventTouchUpInside];result.accessoryView=button;returnresult;}
As you can see, this code uses the performExpand: method as the selector for each
button. Here is the definition of this method:
-(void)performExpand:(id)paramSender{/* Take an action here */}
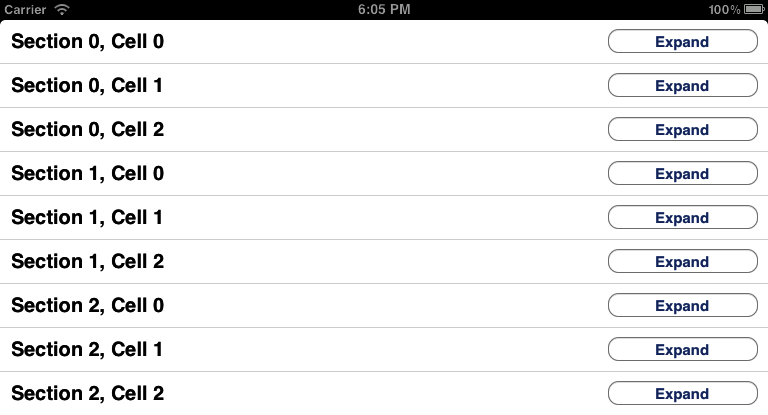
This example code snippet assigns a custom button to the accessory view of every row in the targeted table. The result is shown in Figure 4-4.
An object of type UITableViewCell retains a property named accessoryView. This is the view you can assign
a value to if you are not completely happy with the built-in iOS SDK
table view cell accessories. After this property is set, Cocoa Touch
will ignore the value of the accessoryType property and will use the view
assigned to the accessoryView
property as the accessory assigned to the cell.
The code listed in this recipe’s Solution creates buttons for all the
cells populated into the table view. When a button is
pressed in any cell, the performExpand: method gets called, and if you
are like me, you have probably already started thinking about how you
can determine which cell the sender button belongs to. So, now we have
to somehow link our buttons with the cells to which they belong.
One way to handle this situation is to retrieve the superview of the button that fires the event. Since the accessory view of the cells of a table view adds the cells’ accessory views as their subviews, retrieving the superview of the button will return the table view cell that owns the button as its accessory view:
-(void)performExpand:(UIButton*)paramSender{UITableViewCell*ownerCell=(UITableViewCell*)paramSender.superview;if(ownerCell!=nil){/* Now we will retrieve the index path of the cellwhich contains the section and the row of the cell */NSIndexPath*ownerCellIndexPath=[self.myTableViewindexPathForCell:ownerCell];NSLog(@"Accessory in index path is tapped. Index path = %@",ownerCellIndexPath);/* Now we can use these two values to truly determine thatthe accessory button of which cell was the sender of this event:OwnerCellIndexPath.sectionOwnerCellIndexPath.row*/if(ownerCellIndexPath.section==0&&ownerCellIndexPath.row==1){/* This is the second row in the first section */}/* And so forth with the other checks ... */}}
Get iOS 6 Programming Cookbook now with the O’Reilly learning platform.
O’Reilly members experience books, live events, courses curated by job role, and more from O’Reilly and nearly 200 top publishers.

