Hardware configuration
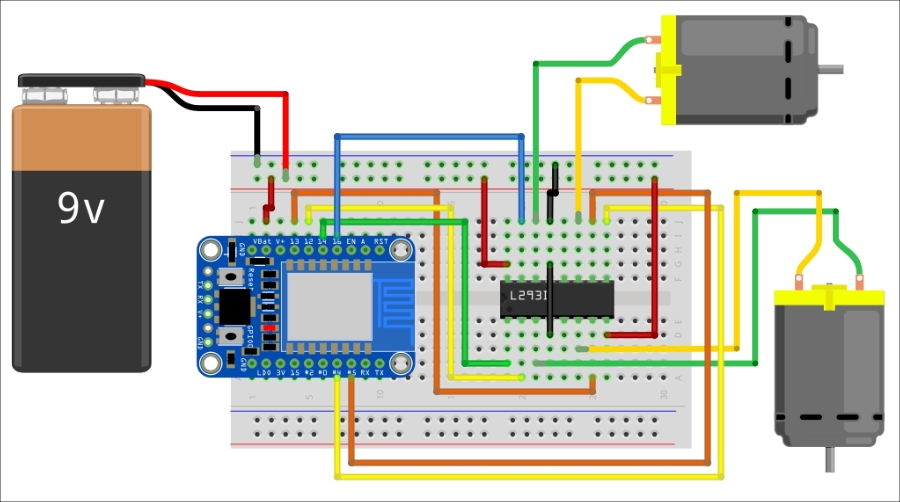
We are now going to assemble the project. As it is quite complicated, I made a detailed diagram for you to understand the different connections:
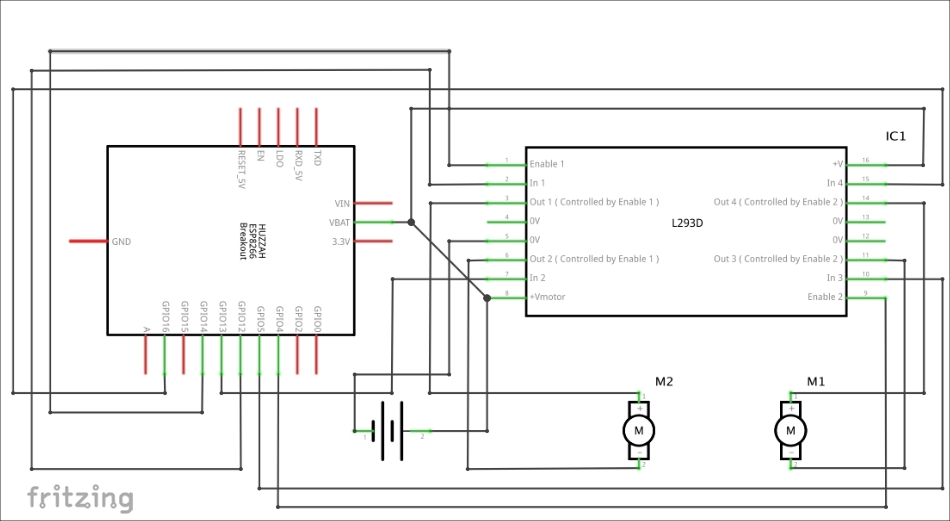
To help you out, I also created a detailed schematic:
The first step is to assemble all the components on the breadboard. Only then place the breadboard on the robot chassis, and then connect it to the motors. At the end, connect the battery to the project.
This is the final result, only showing the breadboard, without all the connections to the motors:
This is the completely assembled ...
Get Internet of Things with ESP8266 now with the O’Reilly learning platform.
O’Reilly members experience books, live events, courses curated by job role, and more from O’Reilly and nearly 200 top publishers.

