186 Implementing WebSphere BI Express for Item Synchronization
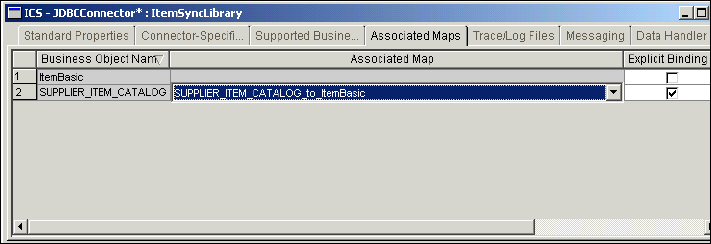
11.Since we have developed only the map from the ASBO to the GBO, we can
only add that map to the connector’s configuration. See the dialog box in
Figure 9-22.
Figure 9-22 Associated maps
12.Save the connector to the project and to the configuration file in the JBDC
folder within the connectors directory.
13.Close the Connector Configurator.
9.6 Deployment of the changed and new objects
Now that we have a JDBC connector, we should update our collaboration object.
1. Open the collaboration object UCCnet_ItemSyncObject and select the tree
view. Right-click the From port and select Bind Port. Select
JDBCConnector in the presented list. See Figure 9-23 on page 187.

Chapter 9. Configuration for integration of back-end system 187
Figure 9-23 Updated collaboration
2. Right-click the user project Deployed_ItemSyncLibrary and select Update
project. Select the new objects to be added to this user project:
– The business object SUPPLIER_ITEM_CATALOG
– The map SUPPLIER_ITEM_CATALOG_to_ItemBasic
– The JDBCConnector
See Figure 9-24 on page 188.

188 Implementing WebSphere BI Express for Item Synchronization
Figure 9-24 Update project
3. Switch to the Component View and stop the UCCnet_ItemSyncObject
collaboration.
4. Right-click the server instance and select Deploy Project.
5. Select
only those objects that are changed or that are new. Then, deploy
them.
6. Restart the InterChange Server.
Note: If you see errors or warnings in the InterChange Server log during this
process, it may be worthwhile to deploy each of the objects individually to
ensure that all dependencies are OK.
Deploy the business object, followed by the map, followed by the connector,
followed by the collaboration.
Get Implementing WebSphere Business Integration Express for Item Synchronization now with the O’Reilly learning platform.
O’Reilly members experience books, live events, courses curated by job role, and more from O’Reilly and nearly 200 top publishers.

