Chapter 1. Fundamental Syntax and Semantics
Introduction
This chapter is designed to get you up and running with HTML5 basics. Covering the fundamental recipes, from declaring the DOCTYPE and character set to dealing with ambiguities of the new HTML5 semantics, it helps lay the groundwork for the rest of the book.
1.1. Specifying the DOCTYPE
Solution
Specify the HTML5 DOCTYPE at the very beginning of your page:
<!DOCTYPE html>
<html>
<head>
<title>HTML5, for Fun & Profit</title>
</head>
<body>
</body>
</html>Note
Note that the DOCTYPE is not case sensitive. Feel free to go CaMeL cAsE with the characters.
Discussion
The Document Type Definition, or DOCTYPE, tells browsers and validators what version of HTML the page is written in. Previous versions of HTML specified the version number, such as the DOCTYPE for XHTML 1.0 Strict:
<!DOCTYPE html PUBLIC "-//W3C//DTD XHTML 1.0 Strict//EN"
    "http://www.w3.org/TR/xhtml1/DTD/xhtml1-strict.dtd">
With HTML5, the version is dropped from the DOCTYPE. This allows HTML5 to be backward compatible in terms of syntax and hopefully makes the transition to HTML5 easier.
Let’s say you have a site that is valid HTML 4.0, but you want to transition it to HTML5. All you have to do to make this a valid HTML5 site is make this DOCTYPE change.
Additionally, all browsers recognize the shortened DOCTYPE and render in strict standards mode.
Note
There are some elements that have changed between HTML4 and
HTML5, so you will need to watch for elements that have been removed
or deprecated. For example, center
might not technically validate as HTML5.
See Also
The W3C Working Draft discussion on differences between HTML4 and HTML5 includes DOCTYPE at http://www.w3.org/TR/html5-diff/#doctype.
1.2. Specifying the Character Set
Solution
In your document head,
add a meta declaration
for the character set:
<meta charset="UTF-8" />
Discussion
The character encoding instructs browsers and validators what set of characters to use when
rendering web pages. If you do not declare the character set in your
HTML, browsers first try to determine the character set from your
server’s HTTP response headers (specifically, the
Content-Type header).
The character set declared in the response headers is generally taken in preference over the character set specified in your document, so the headers are the preferred method of communicating this information. However, if you cannot control what headers your server sends, declaring the character set in your HTML document is the next best option.
If a character set is declared neither in the document nor in the response headers, the browser might choose one for you, and it may be the wrong one for your site’s needs. This not only can cause issues with rendering, but also poses a security risk.
Note
Several years ago, a cross-site scripting vulnerability was discovered at Google that demonstrated the importance of character encoding: http://shiflett.org/blog/2005/dec/googles-xss-vulnerability.
In previous versions of HTML, the character set needed to be declared with additional attributes and values:
<meta http-equiv="Content-Type" content="text/html; charset=UTF-8" />
But, as with the DOCTYPE, HTML5 only needs the minimum information required by browsers. Again, this helps with backward compatibility and makes it easier for authors to implement.
Special characters
Unicode (UTF-8) is a versatile encoding that covers most web builders’ needs. Sometimes, though, you need to include a character that is outside the UTF-8 encoding.
Note
A great resource for character entities is at http://www.digitalmediaminute.com/reference/entity/. It includes the numeric, named, and Unicode references for many of the more common characters allowed in HTML.
You can specify such characters with Numeric Character References (NCRs) or as named entities in order to help browsers render them correctly. If you wanted a copyright symbol, for example, you could include it in your HTML as an NCR:
©
or you could include it as a named entity:
©
See Also
Mark Pilgrim’s “Dive Into HTML5” discussion about character encoding at http://diveintohtml5.info/semantics.html#encoding.
1.3. Specifying the Language
Discussion
Browsers, screen readers, and other user agents use the lang attribute to determine the language in
which the content should be interpreted. The example above specifies
English via the en value.
Declaring a document’s primary language isn’t a requirement for HTML5 (or any of the previous versions, for that matter). It is, however, a good practice for both usability and accessibility.
See Also
Mark Pilgrim’s “Dive Into Accessibility” discussion about identifying your document language at http://diveintoaccessibility.info/day_7_identifying_your_language.html.
1.4. Optimizing <script>s and <link>s
Problem
You want to reference JavaScripts and include links to external CSS files in your web page as simply as possible.
Solution
Include script and link declarations, but
without the type
attribute:
<link rel="stylesheet" href="styles.css" />
<script src="scripts.js"></script>
Discussion
HTML5 requires only the minimum amount of information needed for
user agents. In previous versions of HTML, both CSS links and scripts required the type
attribute to indicate the language. If you forgot to include type, though, most browsers assumed the
correct value.
HTML5 makes type
officially optional, but still validates older
documents that do include the
attribute. This makes sense, as there is really only one standard
scripting language and only one styling language for the Web in use
today.
See Also
The W3C Working Draft discussion on differences between HTML4 and HTML5 includes changed attributes at http://www.w3.org/TR/html5-diff/#changed-attributes.
1.5. Adding Document Structure with HTML5’s New Elements
Problem
You want to define your document structure with the new header, footer, nav, aside,
section, and article elements.
Solution
Examine your content and document structure to determine which of the new elements work with your page:
headerIs used to contain the headline(s) for a page and/or
section. It can also contain supplemental information such as logos and navigational aids.footerContains information about a page and/or
section, such as who wrote it, links to related information, and copyright statements.navContains the major navigation links for a page and, while not a requirement, is often contained by
header.asideContains information that is related to the surrounding content but also exists independently, such as a sidebar or pull-quotes.
sectionIs the most generic of the new structural elements, containing content that can be grouped thematically or is related.
articleIs used for self-contained content that could be consumed independently of the page as a whole, such as a blog entry.
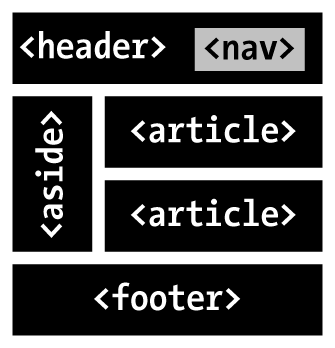
A simple blog structure, with a headline, navigation, a sidebar, blog posts, and a footer, could be marked up in HTML5 as:
<header> <h1><abbr title="Hypertext Markup Language">HTML</abbr>5, for Fun & Profit</h1> <nav> <ul> <li><a href="/Archive/">Archive</a></li> <li><a href="/About/">About</a></li> </ul> </nav> </header> <article> <h2><code>nav</code> Isn't for <em>All</em> Links</h2> <p>Though the <code>nav</code> element often contains links, that doesn't mean that <em>all</em> links on a site need <code>nav</code>.</p> </article> <article> <h2>You've Got the <code>DOCTYPE</code>. Now What?</h2> <p>HTML5 isn't an all or nothing proposition. You can pick and choose what works best for you. So once you have the <code>DOCTYPE</code> in place, you should explore.</p> </article> <aside> <h2>HTML5 Elsewhere</h2> <p>Feed your HTML5 fix with resources from our partners:</p> <ul> <li><a href="http://lovinghtml5.com">Loving HTML5</a></li> <li><a href="http://semanticsally.com">Semantic Sally</a></li> </ul> </aside> <footer> <p>Copyright © 2011 <a href="http://html5funprofit.com">HTM5, for Fun & Profit</a>. All rights reserved.</p> </footer>
And, with the right CSS and supporting HTML, this markup could render on the browser as shown in Figure 1-1.
Discussion
These new structural elements were developed based on actual
practices. A review of over a billion web pages (see http://code.google.com/webstats/) revealed the naming
conventions markup authors were already using to structure and describe
their content via class and id, including:
headerfooternav
The new elements in HTML5 simply attempt to reflect what authors are already doing.
Structural elements
Using these structural elements helps you make your markup more semantic, but they also help define the main landmarks in the document.
Consider how important it is for screen reader users and folks who navigate with the keyboard to be able to skip to different areas of the page, like the navigation. Previously, we’ve tried to provide such functionality via “skip links” and shortcuts (see http://www.vdebolt.com/nmmug/flow.html), but HTML5 establishes formal landmark elements that can be used instead. In fact, the Web Accessibility Initiative’s Accessible Rich Internet Applications (WAI-ARIA) specification already addresses how to use HTML5 with ARIA landmark roles (see Chapter 2) for this very purpose.
That said, this is still a hypothetical. As of this writing, no browsers or assistive technologies reference the structural elements for any navigational purposes.
When to use structural elements
How do you know when to use these new elements? Again, focus on
your content and consider the semantics of each element. For example,
most web pages have an area considered a “header,” composed of a logo,
maybe the company name, and a tagline. And that certainly sounds like
a good case for header. You may also have a section or aside in your document with its own set of
headlines and navigation, which may also be contained in a header.
The same holds true for footer. While most pages have content appropriate for the new
footer element, perhaps regarding
the author, copyright, and related information, sections, articles, and asides can
feature the same information—and, in turn, can also include a footer.
Finally, consider nav. You may have
many groups of links on your site, some of which are for navigation,
while others are external.
Note
nav is only appropriate for
major site navigation, not search results links
or a blogroll.
When to use <div> elements
As you can see from the blog markup example, the new structural
elements can replace many of the non-semantic container divs that you may have grown accustomed to
using. But div still has a place at
the HTML5 party.
If you ever need a containing element strictly for
style purposes, div is
the element to use. You don’t want to use one of the new structural
elements just to serve as a hook for your CSS. That is not what
semantic markup is about.
Just remember to focus on your content and avoid
unnecessary use of div, such as when another element is more
semantic. For example, if you have a paragraph of text, use the
p element, not div. Both give you block-level formatting,
but p is more semantic for that
particular purpose.
Styling structural elements
All of today’s browsers render the content contained by these new elements. However, some browsers don’t recognize them and, as such, treat them like inline elements. This default rendering can cause some serious problems with styling.
Fortunately, it doesn’t take much to fix. The current cast of browsers simply needs to be told to treat the elements as block-level elements:
header, footer, nav, article, aside, section {
    display: block;
}
With that single CSS declaration, you can happily style the
structural elements—well, almost. In versions of Internet Explorer
(IE) prior to IE9 you have to add a bit of JavaScript to your document so IE recognizes the elements and
allows you to style them:
<script>
    document.createElement('header');
    document.createElement('footer');
    document.createElement('nav');
    document.createElement('article');
    document.createElement('aside');
    document.createElement('section');
</script>
If you want cooperation from an earlier version of IE, any time
you add a new HTML5 element to your document you’ll need to add the
corresponding document.createElement. See Chapter 2 for a more detailed
discussion of using JavaScript with IE.
See Also
Script Junkie’s article “Using HTML5’s New Semantic Tags Today” at http://msdn.microsoft.com/en-us/scriptjunkie/gg454786.
1.6. Choosing Between <article> and <section>
Problem
You don’t know whether article or section is the most appropriate element to use
on your web page.
Solution
Focus on your content and the semantic definitions of article and section (refer back to Recipe 1.5).
<article>
article can be considered a
specialized form of section. It is
intended for content that could stand on its own, outside of all
surrounding content, such as “syndicatable” content like blog
posts.
article is suitable for other
types of content, including:
Video and accompanying transcript
News articles
Blog comments
Note
Often the name of an article or a blog post is in the title of
the URI. If that’s the case with a page you are working on, that
content should be wrapped in an article element.
In the code example in Recipe 1.5, we used article to contain the individual blog
posts:
<article>
    <h2><code>nav</code> Isn't for <em>All</em> Links</h2>
    <p>Though the <code>nav</code> element often contains links, that doesn't mean
       that <em>all</em> links on a site need <code>nav</code>.</p>
</article>
<article>
    <h2>You've Got the <code>DOCTYPE</code>. Now What?</h2>
    <p>HTML5 isn't an all or nothing proposition. You can pick and choose what
       works best for you. So once you have the <code>DOCTYPE</code> in place, you
       should explore.</p>
</article>
<section>
section is the most generic
of the new structural elements, intended to simply group related
content. However, it is not a generic container
element like div. The content it
groups must be related.
Applying this definition to Recipe 1.5, we might want to
add section as the parent element
for both instances of article:
<section>
    <article>
        <h2><code>nav</code> Isn't for <em>All</em> Links</h2>
        <p>Though the <code>nav</code> element often contains links, that doesn't
           mean that <em>all</em> links on a site need <code>nav</code>.</p>
    </article>
    <article>
        <h2>You've Got the <code>DOCTYPE</code>. Now What?</h2>
        <p>HTML5 isn't an all or nothing proposition. You can pick and choose what
           works best for you. So once you have the <code>DOCTYPE</code> in place,
           you should explore.</p>
    </article>
</section>
This example meets the core criterion for section: the grouped content is thematically
related.
But wait! The spec (see http://www.w3.org/TR/html5/sections.html#the-section-element) further clarifies:
A general rule is that the
sectionelement is appropriate only if the element’s contents would be listed explicitly in the document’s outline.
The document outline refers to HTML5’s new
sectioning content model, where each of the new
structural elements creates its own self-contained outline. This
outline is generated by the
headings (h1–h6) contained in each element (see Recipe 1.7).
So, if you want to use section, the content
should have a natural heading. Given this
additional clarification, let’s modify the markup from Recipe 1.5, to include a
heading for our section:
<section>
    <h1>Most Recent Blog Posts</h1>
    <article>
        <h2><code>nav</code> Isn't for <em>All</em> Links</h2>
        <p>Though the <code>nav</code> element often contains links, that doesn't
           mean that <em>all</em> links on a site need <code>nav</code>.</p>
    </article>
    <article>
        <h2>You've Got the <code>DOCTYPE</code>. Now What?</h2>
        <p>HTML5 isn't an all or nothing proposition. You can pick and choose what
           works best for you. So once you have the <code>DOCTYPE</code> in place,
           you should explore.</p>
    </article>
</section>
Discussion
The difference between section
and article can be confusing, and as
the spec evolves, the path doesn’t seem to be getting much clearer. For
the majority of use cases, though, considering these guidelines should
help:
Do not use
sectionsimply as a styling hook. Usedivs andspans instead.Do not use
sectionifheader,footer,aside, orarticleis more semantically appropriate for your content (see Recipe 1.5).Do not use
sectionunless the content has a natural heading.
See Also
HTML5 Doctor has a handy flow chart to help you choose the right HTML5 structural elements at http://html5doctor.com/happy-1st-birthday-us/#flowchart.
1.7. Checking Your Document Outline
Solution
Run your page through the HTML5 Outliner tool: http://gsnedders.html5.org/outliner/.
Discussion
HTML5 has an outline algorithm that calculates the structure of a web document. This algorithm is based on sections defined by the new structural elements.
For the main document outline, section and aside each introduce a new section in the
outline, while the heading(s) within each form the outline content. This
is known as explicit sectioning.
Let’s examine the following markup example:
<section>
    <h1>Most Recent Blog Posts</h1>
    <article>
        <h2><code>nav</code> Isn't for <em>All</em> Links</h2>
        <p>Though the <code>nav</code> element often contains links, that doesn't
           mean that <em>all</em> links on a site need <code>nav</code>.</p>
    </article>
    <article>
        <h2>You've Got the <code>DOCTYPE</code>. Now What?</h2>
        <p>HTML5 isn't an all or nothing proposition. You can pick and choose what
           works best for you. So once you have the <code>DOCTYPE</code> in place,
           you should explore.</p>
    </article>
</section>
This markup would generate the following document outline:
| 1. Most Recent Blog Posts |
1.1 nav Isn’t for All Links |
| 1.2 You’ve Got the DOCTYPE. Now What? |
Heading levels
Regardless of version, headings in HTML are ranked, with h1 being the highest and h6 being the lowest.
Before HTML5, this ranking helped structure the document outline. However, with HTML5, the importance of heading rank in determining the outline is trumped by the sectioning elements.
Let’s modify the previous example to reflect h6 as the primary heading of section and h1 as the primary heading of article:
<section>
    <h6>Most Recent Blog Posts</h6>
    <article>
        <h1><code>nav</code> Isn't for <em>All</em> Links</h1>
        <p>Though the <code>nav</code> element often contains links, that doesn't
           mean that <em>all</em> links on a site need <code>nav</code>.</p>
    </article>
    <article>
        <h1>You've Got the <code>DOCTYPE</code>. Now What?</h1>
        <p>HTML5 isn't an all or nothing proposition. You can pick and choose what
           works best for you. So once you have the <code>DOCTYPE</code> in place,
           you should explore.</p>
    </article>
</section>
Because HTML5 uses the structural elements section and aside to know when a new outline section
begins (not the headings), we still get the exact same outline as in
the original example:
| 1. Most Recent Blog Posts |
1.1 nav Isn’t for All Links |
| 1.2 You’ve Got the DOCTYPE. Now What? |
Implicit sectioning
Since structural elements aren’t required in HTML5, heading rank does still affect the document structure if sectioning elements aren’t used. This is known as implicit sectioning. Further, implicit and explicit sectioning can be used together to form the document outline.
An implicit section starts with a new heading and is positioned in the document outline according to that heading’s rank in relation to a previous heading. If a heading is a lower rank than its predecessor, it opens a new subsection in the outline. If a heading is a higher rank, it closes the previous section and opens a new one.
Let’s create a new example to see how heading rank supports implicit sections:
<section>
    <h1>You've Got the <code>DOCTYPE</code>, Now What?</h1>
    <h2>Simplified <code>link</code>s and <code>script</code>s</h2>
    <p>HTML5's more flexible and simplified syntax ...</p>
    <h2>Block-Level Links</h2>
    <p>With HTML5, <code>a</code>s can contain block ...</p>
    <h3>Looking Back</h3>
    <p>In earlier versions of HTML, you had to ...</p>
    <h2>Add Structure</h2>
    <p>HTML5 gives us several new elements to add ...</p>
</section>
This example utilizes heading rank, rather than explicit sectioning elements, to generate the following outline:
| 1. You’ve Got the DOCTYPE, Now What? |
| 1.1 Simplified links and scripts |
| 1.2 Block-level Links |
| 1.2.1 Looking Back |
| 1.3 Add Structure |
Why is this important?
Knowing what your document outline looks like can help you
decide not only which heading levels to use, but also which structural
elements to use. Remember how we said that a section should have a natural heading (Recipe 1.6)? Checking your
document outline will show you if you have neglected to include a
heading, which may prompt you to reconsider whether that element was
the most appropriate one to use for your content. Additionally, a
document outline that accurately reflects your content hierarchy can
help users of assistive devices navigate your site.
Unfortunately, no browsers have implemented this outlining yet, nor do any assistive technologies utilize it for navigation. Still, checking the document outline should be a part of the development process, and it helps significantly when considering which elements and heading levels to use.
See Also
For an extremely detailed look at the outline algorithm and sectioning, the Mozilla Developer Network at https://developer.mozilla.org/en/Sections_and_Outlines_of_an_HTML5_document is an excellent resource.
1.8. Modifying the Document Outline
Problem
You have a primary page title and tagline marked up with headings (h1 and h2,
respectively), but you don’t want the tagline included in your document
outline.
Solution
Contain the both headings with the hgroup element:
<hgroup>
<h1>HTML5, for Fun & Profit</h1>
<h2>Tips, Tricks and Resources</h2>
</hgroup>Discussion
hgroup hides all headings
except the highest ranked from the document outline. In the above
example, the only content that would appear in the document outline is
“HTML5, for Fun & Profit” from the h1.
Even if we reverse the source order of the two headings, only the
highest-ranked (h1) content will be
pulled into the document outline:
<hgroup>
<h2>Tips, Tricks and Resources</h2>
<h1>HTML5, for Fun & Profit</h1>
</hgroup>See Also
Emily Lewis’s in-depth discussion of headings, hgroup, and the HTML5 outline at http://ablognotlimited.com/articles/the-beauty-of-semantic-markup-part-3-headings.
1.9. Emphasizing Text
Solution
Contain the text to be emphasized with the em element:
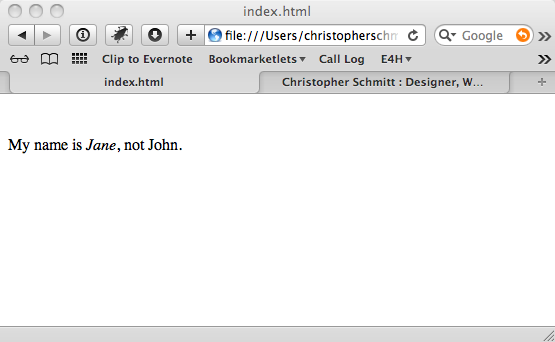
<p>My name is <em>Jane</em>, not John.</p>Discussion
After looking at this example, you may be wondering what is new
here, since em has been around since
HTML4. The difference is that HTML5 slightly redefines em for text with “emphatic stress,” which I
translate as any text that, when spoken, I would verbally
emphasize.
Redefining <i>
Another change in HTML5’s text-level semantics is that
the i element is no
longer considered presentational. You can now use i to indicate text that is in an alternate
voice or mood, or somehow offset from the normal prose; for example, a
taxonomic designation, a technical term, a thought, an idiomatic
phrase, or some other text whose typical typographic presentation is
italicized:
<p>Sally thought to herself, <i>when will IE6 die?</i></p>Despite the new semantic distinction, browsers typically render
both em and i in italics (see Figure 1-2). Of course, you
can change the default styling of either element with CSS.
See Also
HTML5 Doctor’s article “The i, b, em, & strong elements” at http://html5doctor.com/i-b-em-strong-element/.
1.10. Adding Importance to Text
Solution
Contain the important text with the strong element:
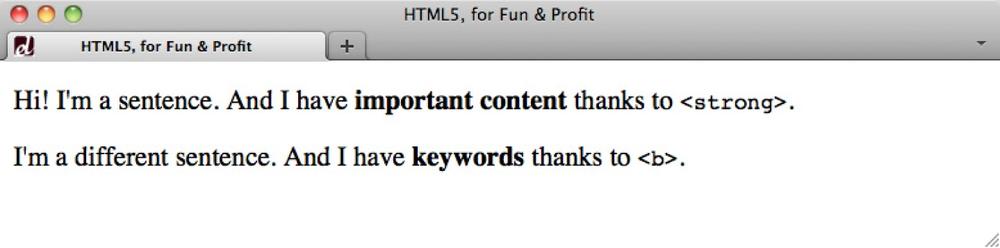
<p><strong>Registration is required</strong> for this event.</p>Discussion
In previous versions of HTML, strong was used to indicate strong emphasis.
In HTML5, strong indicates importance
and is typically used for alerts and warnings.
Redefining <b>
Like its shunned sibling i,
the b element makes a comeback in HTML5. No longer considered a
presentational element, b is used
to stylistically offset text from the normal prose without conveying
any extra importance.
For example, b could be used
for keywords, product names, or other content whose text would
typically be unique compared to surrounding text, such as a paragraph
lead:
<p><b>Once upon a time,</b> there was a man who lost his mind.</p>The difference between strong
and b is now more semantically
clear, but both are typically rendered in browsers with a heavier font
weight (see Figure 1-3). Of course, CSS
lets you change the default styling as needed.
See Also
The author’s article “The Beauty of Semantic Markup, Part 2: <strong>, <b>, <em>, <i>” at http://ablognotlimited.com/articles/the-beauty-of-semantic-markup-part-2-strong-b-em-i.
1.11. Highlighting Text for Reference
Solution
Contain the search term with the mark element:
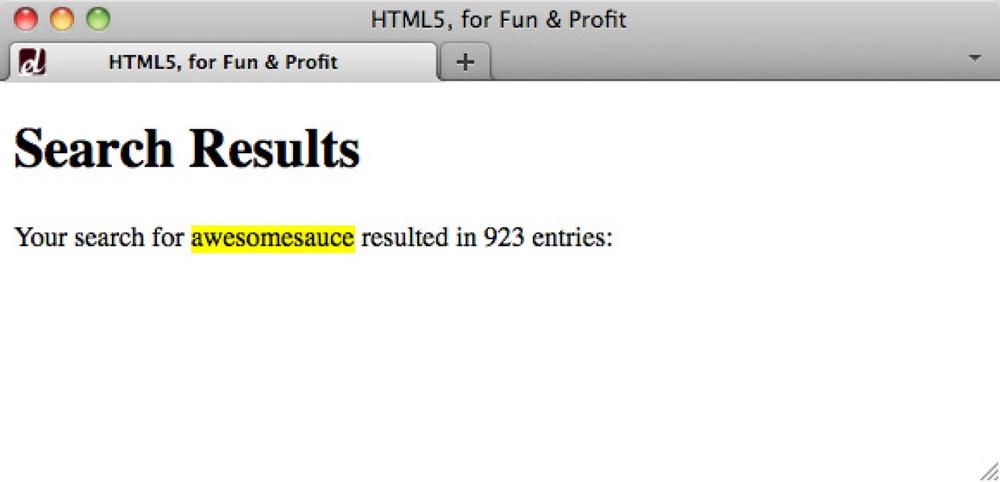
<p>Your search for <mark>awesomesauce</mark> resulted in 923 entries:</p>Discussion
mark is an entirely new element
in HTML5. While the most common scenario for its use is likely for
search terms, according to the spec it can be more broadly used for text
that is “marked or highlighted for reference purposes, due to its
relevance in another text.”
mark adds no additional
semantic importance or emphasis to the text it contains, but current
browsers (that doesn’t include IE before version 9) do display the
content with a yellow background by default (see Figure 1-4), which you
can change with CSS.
See Also
HTML5 Doctor’s article “Draw attention with mark” at http://html5doctor.com/draw-attention-with-mark/.
1.12. Marking Up Small Print
Solution
Contain the small print content with the small element:
<p><small>The owner of this blog is not responsible for mind blowage. Please consume at your own risk.</small></p> <p><small>Copyright © 2011 Awesomest Blog. All rights reserved.</small></p>
Discussion
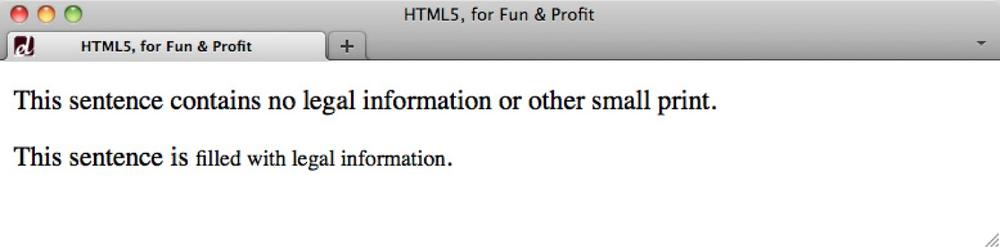
HTML5 redefined the previously presentational small as semantically appropriate for content
typically considered “small print,” such as legalese, disclaimers,
terms, conditions, and copyrights. And though small is supposed to indicate semantics only,
browsers do display this content a bit smaller by default (see Figure 1-5).
See Also
The W3C Working Draft discussion of text-level semantics in HTML5 includes
the small element at http://www.w3.org/TR/html5/text-level-semantics.html#the-small-element.
1.13. Defining Acronyms and Abbreviations
Solution
Contain the abbreviation or acronym with abbr, and include the
definition as the title value:
<abbr title="Accessible Rich Internet Applications">ARIA</abbr>
Discussion
In previous versions of HTML we had both the abbr and the acronym elements. Not
surprisingly in the always-ready-for-a-debate web world, these two
elements caused much controversy.
Part of the issue is that prior to version 7, IE didn’t display
the title value of abbr as a tool tip (see Figure 1-6). To get around
this usability limitation, authors simply started using acronym, regardless of whether the content was
actually an acronym.

Another part of the issue was the argument about what was an acronym versus what constituted an abbreviation.
Today, the debate is over (at least for practical purposes), as
acronym has been dropped completely
from the HTML5 specification. The reasoning is that all acronyms are
shortened forms of words or phrases, which is the very definition of an
abbreviation.
See Also
WHATWG’s Living Standard’s section on text-level semantics includes
abbr at http://www.whatwg.org/specs/web-apps/current-work/multipage/text-level-semantics.html#the-abbr-element.
1.14. Adding Links to Block-Level Content
Solution
Contain both the logo image and the heading with the a element:
<a href="http://html5funprofit.com">
<h1>HTML5, for Fun & Profit</h1>
<img src="logo.png" alt="HTML5 for Fun and Profit" />
</a>Discussion
Previous versions of HTML restricted a to inline content. So, if you had different elements that all needed to be linked to
the same resource, you had to individually specify the a for each:
<h1><a href="http://html5funprofit.com">HTML5, for Fun & Profit</a></h1> <a href="http://html5funprofit.com"><img src="logo.png" alt="HTML5 for Fun and Profit" /></a>
Now, with HTML5, a elements can
contain block-level elements. You can also still use a as in the past, for containing inline
content. The only thing you can’t nest inside an a is another a.
Note
Wrapping links around block-level elements is justification enough for using the HTML5 DOCTYPE.
See Also
HTML5 Doctor’s article “‘Block-level’ links in HTML5” at http://html5doctor.com/block-level-links-in-html-5/.
1.15. Marking Up Figures and Captions
Solution
Contain the illustration image with the figure element, and
include the caption text within figcaption:
<figure>
    <img src="chart.png" alt="Chart of increasing awesomeness" />
    <figcaption>The increasing amount of awesome that this blog
        demonstrates.</figcaption>
</figure>
Discussion
figure and figcaption are two new elements introduced in
HTML5. Though the above example references an illustration (img), figure is not restricted to that type of
content. It can be used to specify code examples, photos, charts, audio,
and data tables, to name just a few of the options.
Why so many different types of content? Because the spec defines
figure (http://www.w3.org/TR/html-markup/figure.html) rather
broadly, as:
a unit of content, optionally with a caption, that is self-contained, that is typically referenced as a single unit from the main flow of the document, and that can be moved away from the main flow of the document without affecting the document’s meaning.
If you’ve been paying attention, it might’ve occurred to you that
this definition sounds quite similar to that for aside (http://www.w3.org/TR/html-markup/aside.html). To know
which element is most appropriate for your content, consider whether the
content is essential for
understanding the surrounding content. If it is not essential, only
related, then use aside. Otherwise,
figure is appropriate.
And keep in mind two things:
figcaptionis optional and can reside anywhere withinfigure, whether before or after thefigurecontent.Just because this recipe’s example uses an image doesn’t mean all images need to be contained by
figure.
See Also
HTML5 Doctor’s “Simplequiz #4” on figures, captions, and alt text at http://html5doctor.com/html5-simplequiz-4-figures-captions-and-alt-text/.
1.16. Marking Up Dates and Times
Solution
Wrap the human-friendly date-time information in the time element, and
specify the machine-readable information via the datetime
attribute:
<p>Published: <time datetime="2011-01-15">January 15, 2011</time></p>Depending on the date and time you are trying to specify, the following approaches are also valid:
- Time only
<p>The class starts at
<time datetime="08:00">8:00 am</time>.</p>- Date and time (requires time zone specification)
<p>Registration opens on
<time datetime="2011-01-15T08:00-07:00">January 15, 2011at 8:00 am, Mountain Time</time>.</p>- Visible machine-readable format (no date-time required)
<p>Published:
<time>2011-01-15</time></p>
Discussion
Before we discuss this new element, let’s first address machine readability. This is simply the notion of enriching your web content with additional, semantic information that machines (search engines, user agents, etc.) can parse to glean more meaning from your content.
Note
We’re not aware of any machines that are currently parsing the
datetime information from time, but we can imagine this soon to be on
the horizon, particularly for search engines that want to accurately
display time-sensitive results for news queries.
Next, let’s talk date-time information on the Web. For machine
readability, date-time information has to be specified in the
international standard format, ISO 8601. For dates,
the format is YYYY-MM-DD. For times of day,
the format is hh:mm:ss. And when
combining dates with times, you join the numeric representations with a
T:
YYYY-MM-DDThh:mm:ss.
Okay, back to the new time
element. As you can see from the examples, you can specify dates, times,
and date-times. What the human user experiences is the content contained
by time. What machines read is the
datetime ISO 8601 value.
Note
One limitation of time that
is worth mentioning is that it can’t be used for imprecise dates, such
as “August 2011.” It does require, minimally, the day, month, and year
for dates.
What about microformats?
By this point, you may be wondering about microformats (http://microformats.org), which are HTML-based design patterns for expressing machine-readable semantics. The hCalendar (http://microformats.org/hCalendar) microformat, for example, is used for indicating date-time information.
Note
Want to learn more about microformats? Check out Emily Lewis’s Microformats Made Simple (New Riders, http://microformatsmadesimple.com) for lots of practical examples and easy-to-understand explanations.
Neither HTML5 generally nor the time element specifically negates the use of
microformats. You can still use them. In fact, the time element would make a great semantic
hook for adding hCalendar. However, current microformats parsers don’t
recognize the time element, so the
two can’t be used together.
This is unfortunate for a POSH and microformats devotee, but it is the reality of this industry. As new technologies evolve, older technologies respond, and we designers and developers have to weigh the pros, the cons, and the future.
Publication dates
Another new date-related feature in HTML5 is the pubdate attribute
for time. Adding this attribute
indicates that the time is the
actual publication date-time for a web page or an article (such as a
blog post) on a page:
<p>Published: <time datetime="2011-01-09" pubdate>January 9, 2011</time></p>This helps differentiate publication dates from other instances
of time on a page or within an
article.
See Also
Mark Pilgrim’s “Dive Into HTML5” discussion on dates and times at http://diveintohtml5.info/semantics.html#time-element.
1.17. Setting the Stage for Native Expanding and Collapsing
Problem
You want to provide content that can expand and collapse with user focus (once browsers support it).
Solution
Contain the full content with the details element and
indicate the content area that is “focusable” with summary:
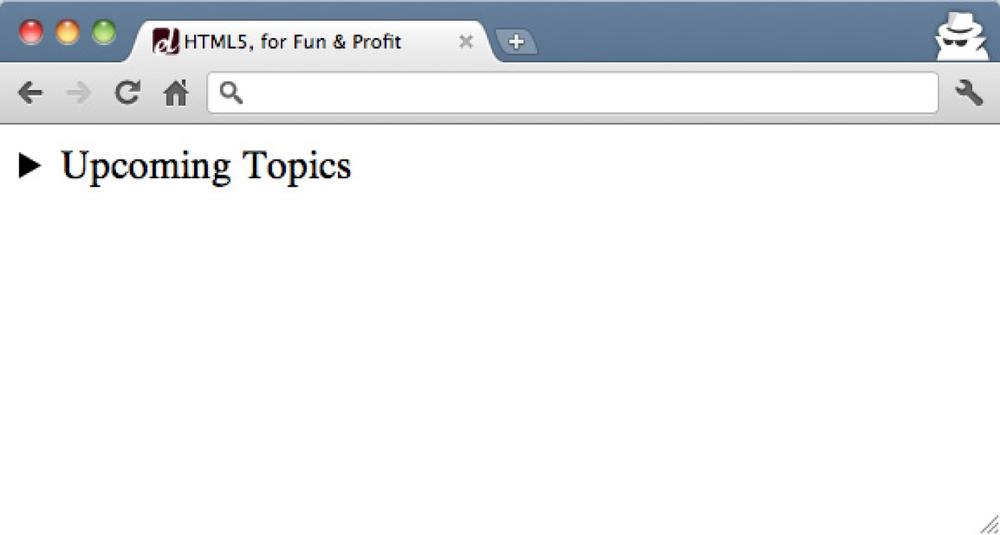
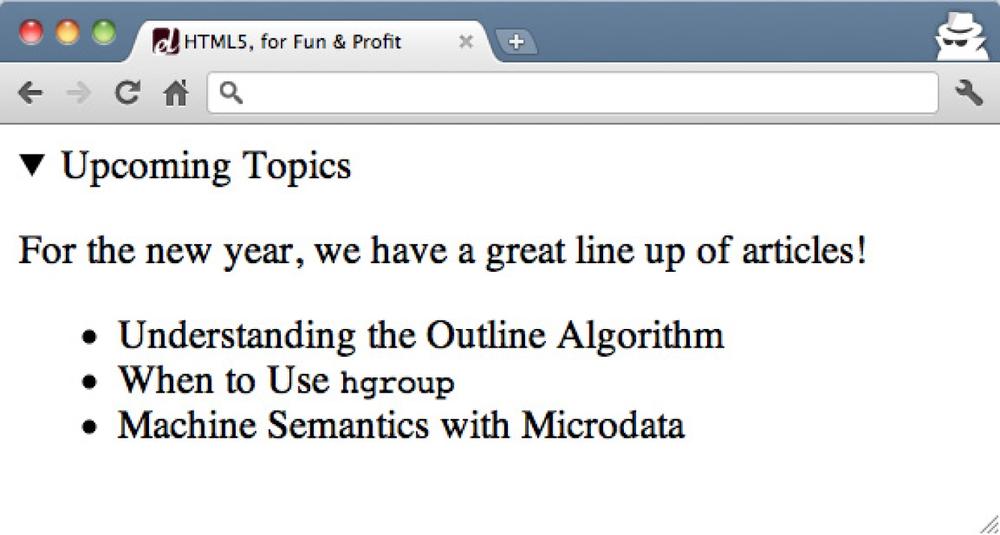
<details>
    <summary>Upcoming Topics</summary>
    <p>For the new year, we have a great line up of articles!</p>
    <ul>
        <li>Understanding the Outline Algorithm</li>
        <li>When to Use <code>hgroup</code></li>
        <li>Machine Semantics with Microdata</li>
    </ul>
</details>
Discussion
This recipe sets up a solid semantic structure for a very common
behavior that we currently have to use JavaScript to achieve. The
summary element indicates which
content is the “control” that expands or collapses the full details content upon user focus (see Figure 1-7). And, if you want
to ensure that details is expanded by
default (see Figure 1-8),
you can add the open attribute:
<details open>Only Chrome currently supports this behavior. For the other browsers
you still have to use JavaScript to create expanding/collapsing content,
because none of today’s browsers support the functionality of details and summary.
See Also
Remy Sharp has put together a nice little script that forces
browsers to apply the expanding
and collapsing behavior to details at https://gist.github.com/370590.
1.18. Controlling the Numbering of Your Lists
Solution
Specify one of the semantic control attributes on the ol or li. For instance, to start a numbered list at
3 (see Figure 1-9),
include the start attribute in
your ol and specify 3 as the value:
<ol start="3">
    <li>Apples</li>
    <li>Oranges</li>
    <li>Bananas</li>
</ol>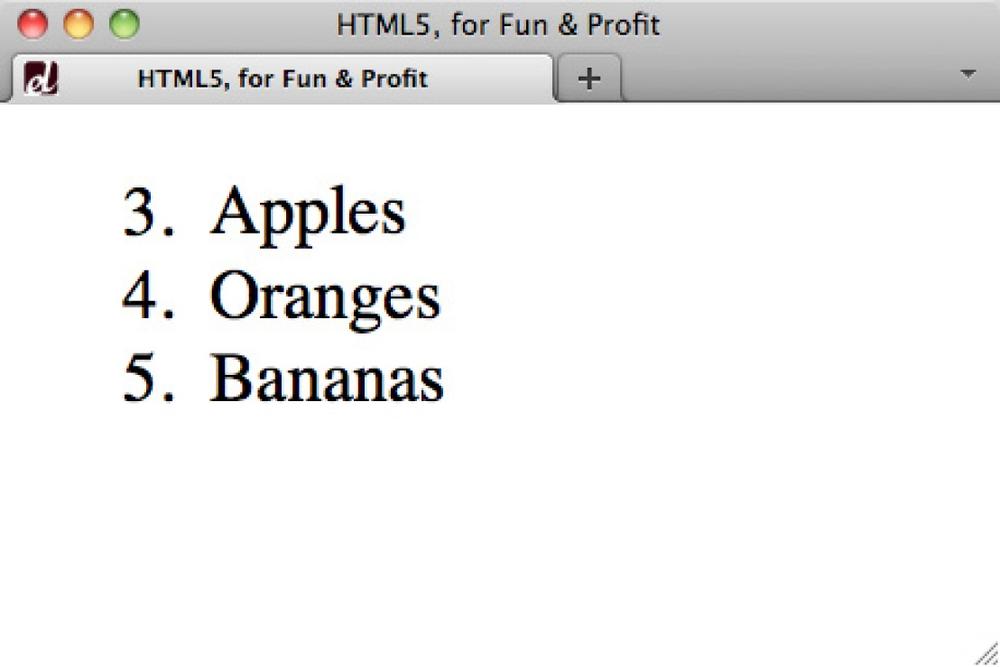
Discussion
start has been around for a
while, but was deprecated as presentational. HTML5 now recognizes the
semantic value of controlled numbering and welcomes it back. This
“reordering” via start works the same
across all browsers, IE6 included.
Reversed attribute
Another attribute for controlling the numbering of an ordered
list is the reversed attribute, which reverses the order of a
list (e.g., for a countdown from 10):
<ol reversed>
    <li>Apples</li>
    <li>Oranges</li>
    <li>Bananas</li>
</ol>
Unfortunately, none of the current browsers support this attribute yet.
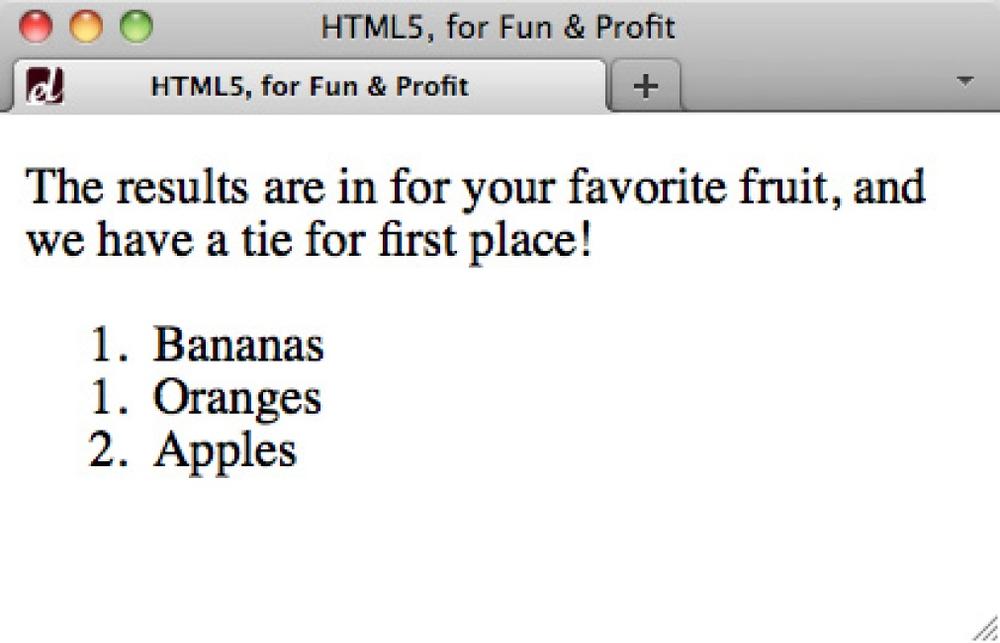
Value Attribute
You can also specify the exact number value for each
li, which can come in handy if you
are ranking something and there is a “tie” (see Figure 1-10):
<p>The results are in for your favorite fruit, and we have a tie for first place!</p>
<ol>
    <li value="1">Bananas</li>
    <li value="1">Oranges</li>
    <li value="2">Apples</li>
</ol>
All current browsers support the value attribute for li.
See Also
The W3C’s Working Draft about grouping content includes the ol element at http://www.w3.org/TR/html5/grouping-content.html#the-ol-element.
1.19. Hiding Content to Show Later
Solution
Add the hidden attribute to the element containing the content to be
temporarily hidden:
<p hidden>As a special deal for members, use discount code AWESOMESAUCE and save
   10% off all purchases from these vendors.</p>
Discussion
The hidden attribute is one of
the more controversial additions to HTML5. As the spec defines it,
hidden should be applied to content
that is not yet or no longer relevant to the
current user view and, as such, should not be rendered by
browsers.
The Document Object Model (DOM) and machines like search engines, though, can still access the content. This means that if the content does become relevant to the user view, it can be targeted via JavaScript, for example, and displayed by removing the attribute.
Where the concerns lie is in the misunderstanding and abuse of
this attribute. It is not to be used for the
temporary show/hide that you may encounter with tabbed content and the
like. Further, we already have CSS solutions that address the display of
content, such as display: none and
visibility: hidden.
There is semantic value in hidden, though, especially compared to the CSS
alternative. If this attribute remains in the specification, over time
the concerns may prove unwarranted.
Note
Just remember: do not use hidden for presentational purposes and don’t
rely on browsers to actually hide the content.
Use it only for semantic purposes and use CSS to control
presentation.
See Also
Peter Beverloo’s article “Thoughts on the HTML5 hidden attribute” at http://peter.sh/2010/06/thoughts-on-the-html5-hidden-attribute/.
1.20. Making Portions of a Page Editable
Solution
Add the contenteditable
attribute to the element containing the content to be edited:
<article contenteditable>
    <h2>Stop <code>section</code> Abuse!</h2>
    <p>As the most generic of the HTML5 structural elements, <code>section</code>
       is often incorrectly used as a styling container, when <code>div</code> is
       more appropriate.</p>
</article>
Discussion
This attribute is well supported by today’s browsers, including
IE6. In fact, contenteditable first appeared in IE 5.5 and
has since been incorporated by other browsers. It was originally
intended to support in-browser editing such as a What You See Is What
You Get (WYSIWYG) editor.
However, on its own, it only allows users to edit content. It does not have any functionality to save those edits, nor does it generate editing controls commonly seen in WYSIWYG editors. For that type of editing, you need to incorporate JavaScript and utilize the local storage Application Programming Interface (API) (see Chapter 8).
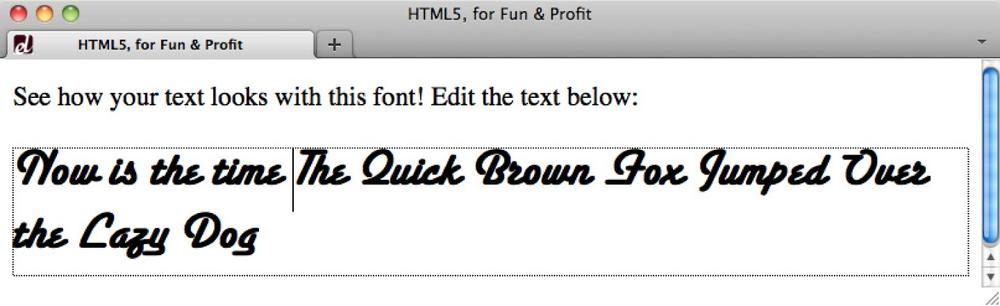
A good example of when to use contenteditable is for demonstrating how text
should look when styled with CSS rules or set with a certain typeface,
while allowing users to edit their own text (see Figure 1-11).
See Also
The W3C Working Draft discussion on user interaction includes the contenteditable attribute at http://www.w3.org/TR/html5/editing.html#contenteditable.
1.21. Setting the Stage for Native Drag-and-Drop
Solution
Add the draggable attribute to the element that should be draggable:
<h2 draggable>Block-Level Links</h2>Discussion
draggable, like contenteditable, has good browser support and
was originally introduced for IE (by default, certain elements are
already draggable: a and img). However, the
simple addition of draggable to your
elements does not create the drag-and-drop functionality on its own.
draggable simply allows you to
specify the elements that can be dragged.
To achieve the desired drag-and-drop functionality, you need JavaScript to:
Tell the browser where the draggable element can be dropped (the drop “zone”).
Tell the browser what to do with the element once it has been dropped.
See Also
WHATWG’s Living Standard addresses the draggable attribute at http://www.whatwg.org/specs/web-apps/current-work/multipage/dnd.html#the-draggable-attribute;
there is a simple, straightforward tutorial on implementing basic
drag-and-drop at http://html5doctor.com/native-drag-and-drop. See Recipe 10.3 in Chapter 10 of this book for more on
implementing drag-and-drop functionality.
Get HTML5 Cookbook now with the O’Reilly learning platform.
O’Reilly members experience books, live events, courses curated by job role, and more from O’Reilly and nearly 200 top publishers.

