Chapter 1. Introduction to HTML5 Canvas
HTML5 is the current iteration of HTML, the HyperText Markup Language. HTML was first standardized in 1993, and it was the fuel that ignited the World Wide Web. HTML is a way to define the contents of a web page using tags that appear within pointy brackets, < >.
HTML5 Canvas is an immediate mode bitmapped area of the screen that can be manipulated with JavaScript. Immediate mode refers to the way the canvas renders pixels on the screen. HTML5 Canvas completely redraws the bitmapped screen on every frame using Canvas API calls from JavaScript. As a programmer, your job is to set up the screen display before each frame is rendered so that the correct pixels will be shown.
This makes HTML5 Canvas very different from Flash, Silverlight, or SVG, which operate in retained mode. In this mode, a display list of objects is kept by the graphics renderer, and objects are displayed on the screen according to attributes set in code (i.e., the x position, y position, and alpha transparency of an object). This keeps the programmer away from low-level operations, but gives her less control over the final rendering of the bitmapped screen.
The basic HTML5 Canvas API includes a 2D context that allows a programmer to draw various shapes, render text, and display images directly onto a defined area of the browser window. You can apply colors; rotations; alpha transparencies; pixel manipulations; and various types of lines, curves, boxes, and fills to augment the shapes, text, and images you place onto the canvas.
In itself, the HTML5 Canvas 2D context is a display API used to render graphics on a bitmapped area, but there is very little in that context to create applications using the technology. By adding cross-browser-compatible JavaScript functionality for keyboard and mouse inputs, timer intervals, events, objects, classes, sound, math functions, etc., you can learn to take HTML5 Canvas and create stunning animations, applications, and games.
Here’s where this book comes in. We are going to break down the Canvas API into digestible parts and then put it back together, demonstrating how to use it to create applications. Many of the techniques you will learn in this book have been tried and used successfully on other platforms, and now we are applying them to this exciting new technology.
The Basic HTML Page
Before we get to Canvas, we need to talk a bit about the HTML5 standards we will be using to create our web pages.
HTML is the standard language used to construct pages on the World
Wide Web. We will not spend much time on HTML, but it does form the basis
of <canvas>, so we cannot skip it
entirely.
A basic HTML page is divided into sections, commonly <head> and <body>. The new HTML5 specification adds a
few new sections, such as <nav>,
<article>, <header>, and <footer>.
The <head> tag usually
contains information that will be used by the HTML <body> tags to create the HTML page. It is
a standard convention to put JavaScript functions in the <head>, as you will see later when we
discuss the <canvas> tag. There
may be reasons to put some JavaScript in the <body>, but we will make every attempt to
keep things simple by having all JavaScript in the <head>.
Basic HTML for a page might look like Example 1-1.
<!doctype html>
<html lang="en">
<head>
<meta charset="UTF-8">
<title>CH1EX1: Basic Hello World HTML Page</title>
</head>
<body>
Hello World!
</body>
</html>
<!doctype html>
This tag informs the web browser to render the page in standards mode. According to the HTML5 spec from W3C, this is required for HTML5 documents. This tag simplifies a long history of oddities when it came to rendering HTML in different browsers. This should always be the first line of HTML in a document.
<html lang="en">
This is the <html> tag
with the language referenced: for example, “en” =
English. Some of the more common language values are:
Chinese – lang = “zh” |
French – lang = “fr” |
German – lang = “de” |
Italian – lang = “it” |
Japanese – lang = “ja” |
Korean – lang = “ko” |
Polish – lang = “pl” |
Russian – lang = “ru” |
Spanish (Castilian) – lang = “es” |
<meta charset="UTF-8">
This tag tells the web browser which character-encoding method to use for the page. Unless you know what you’re doing, there is no need to change it. This is a required element for HTML5 pages.
<title>…</title>
This is the title that will be displayed in the browser window for the HTML page. This is a very important tag, as it is one of the main pieces of information a search engine uses to catalog the content on the HTML page.
A Simple HTML5 Page
Now let’s look at this page in a web browser (this would be a great time to get your tools together to start developing code). Open your chosen text editor, and get ready to use your preferred web browser: Safari, Firefox, Opera, Chrome, or IE.
In your text editor, type in the code from Example 1-1.
Save the code as CH1EX1.html in a directory of your choosing.
Under the File menu in Chrome, Safari, or Firefox, you should find the option Open File. Click that selection. You should then see a box to open a file. (On Windows using Chrome, you might need to press Ctrl+O to open a file.)
Locate the CH1EX1.html that you just created.
Click Open.
You should see something similar to Figure 1-1.
Warning
This is one of only two examples in this entire book that will work with Internet Explorer 8 or earlier.
Basic HTML We Will Use in This Book
Many HTML tags can be used to create an HTML page. In past versions
of HTML, tags that specifically instructed the web browser on how to
render the HTML page (e.g., <font> and <center>) were very popular. However, as
browser standards have become more restrictive in the past decade, those
types of tags have been pushed aside, and the use of CSS (Cascading Style
Sheets) has been adopted as the primary way to style HTML content. Because
this book is not about creating HTML pages (i.e., pages that don’t have
Canvas in them), we are not going to discuss the inner workings of
CSS.
We will focus on only two of the most basic HTML tags: <div> and <canvas>.
<div>
This is the main HTML tag that we will use in this book. We will
use it to position <canvas> on
the HTML page.
Example 1-2 uses a <div> tag to position the words “Hello
World!” on the screen, as shown in Figure 1-2.
<!doctype html>
<html lang="en">
<head>
<meta charset="UTF-8">
<title>CH1EX2: Hello World HTML Page With A DIV </title>
</head>
<body>
<div style="position: absolute; top: 50px; left: 50px;">
Hello World!
</div>
</body>
</html>
The style="position: absolute; top: 50px;
left: 50px;" code is an example of inline CSS in an HTML page.
It tells the browser to render the content at the absolute position of 50 pixels from the top of the page, and
50 pixels from the left of the
page.
The Document Object Model (DOM) and Canvas
The Document Object Model represents all the objects on an HTML page. It is language- and platform-neutral, allowing the content and style of the page to be updated after it is rendered in the web browser. The DOM is accessible through JavaScript, and has been a staple of JavaScript, DHTML, and CSS development since the late 1990s.
The canvas element itself is
accessible through the DOM in a web browser via the Canvas 2D context, but
the individual graphical elements created on Canvas are not accessible to
the DOM. As we stated earlier, this is because Canvas works in immediate
mode and does not have its own objects, only instructions on what to draw
on any single frame.
Our first example will use the DOM to locate the <canvas> tag on the HTML5 page so that we
can manipulate it with JavaScript. There are two specific DOM objects we
will need to understand when we start using <canvas>: window and document.
The window object is the top
level of the DOM. We will need to test this object to make sure all the
assets and code have loaded before we can start our Canvas
applications.
The document object contains all
the HTML tags that are on the HTML page. We will need to look at this
object to find the instance of <canvas> that manipulates with JavaScript.
JavaScript and Canvas
JavaScript, the programming language we will use to create Canvas applications, can be run inside nearly any web browser in existence. If you need a refresher on the topic, read Douglas Crockford’s JavaScript: The Good Parts (O’Reilly), which is a very popular and well-written reference on the subject.
JavaScript Frameworks and Libraries
There are many popular JavaScript frameworks that developers use to help get their JavaScript off the ground, including libraries such as jQuery, Processing.js, and others. We expect these frameworks to add robust support for Canvas in the next 6–12 months. In the meantime, we will focus on straight JavaScript to control the canvas. However, where appropriate, we will introduce you to frameworks and JavaScript libraries that will help augment Canvas development (e.g., Modernizr, JSColor, and WebGL).
Where Does JavaScript Go and Why?
Because we will create the programming logic for the Canvas in JavaScript, a question arises: where does that JavaScript go in the pages we have already created?
It’s a good idea to place your JavaScript in the <head> of your HTML page because it
makes it easy to find. However, placing JavaScript there means that the
entire HTML page needs to load before your JavaScript can work with the
HTML. This also means that the JavaScript code will start to execute
before the entire page loads. As a result, you will need to test to see
whether the HTML page has loaded before you run your JavaScript
program.
There has been a recent move to put JavaScript right before the
</body> at the end of an HTML
document to make sure the whole page loads before the JavaScript runs.
However, because we are going to test to see whether the page has loaded
in JavaScript before we run our <canvas> program, we will put our
JavaScript in the traditional <head> location. If you are not
comfortable with this, you can adapt the style of the code to your
liking.
No matter where you put the code, you can place it inline in the HTML page or load an external .js file. The code for loading an external JavaScript file might look like this:
<script type="text/javascript" src="canvasapp.js"></script>
To make things simple, we will code our JavaScript inline in the HTML page. However, if you know what you are doing, saving an external file and loading it will work just as well.
Note
In HTML5 you no longer have to specify the script type.
HTML5 Canvas “Hello World!”
As we just mentioned, one of the first things we need to do when putting Canvas on an HTML5 page is test to see whether the entire page has loaded and all HTML elements are present before we start performing any operations. This will become essential when we start working with images and sounds in Canvas.
To do this, you need to work with events in JavaScript. Events are dispatched by objects when a defined event occurs. Other objects listen for events so they can do something based on the event. Some common events that an object in JavaScript might listen for are key presses, mouse movements, and when something has finished loading.
The first event we need to listen for is a window object’s load event, which occurs when the HTML page has
finished loading.
To add a listener for an event, use the
addEventListener() method that belongs
to objects that are part of the DOM. Because window represents the HTML page, it is the top
level of the DOM.
The addEventListener() function
accepts three arguments:
- Event:
load This is the named event for which we are adding a listener. Events for existing objects like
windoware already defined.- Event handler function:
eventWindowLoaded() Call this function when the event occurs. In our code, we will then call the
canvasApp()function, which will start our main application execution.useCapture:trueorfalseThis sets the function to capture this type of event before it propagates lower in the DOM tree of objects. We will always set this to
false.
Below is the final code we will use to test to see whether the
window has loaded:
window.addEventListener("load", eventWindowLoaded, false);
function eventWindowLoaded () {
   canvasApp();
}
Alternatively, you can set up an event listener for the load event in a number of other ways:
window.onload = function()
   {
      canvasApp();
   }
or:
window.onload = canvasApp();
We will use the first method throughout this book.
Encapsulating Your JavaScript Code for Canvas
Now that we have created a way to test to see whether the HTML page has loaded, we can start creating our JavaScript application. Because JavaScript runs in an HTML page, it could be running with other JavaScript applications and code simultaneously. Usually, this does not cause any problems. However, there is a chance that your code might have variables or functions that conflict with other JavaScript code on the HTML page.
Canvas applications are a bit different from other apps that run in the web browser. Because Canvas executes its display in a defined region of the screen, its functionality is most likely self-contained, so it should not interfere with the rest of the page, and vice versa. You might also want to put multiple Canvas apps on the same page, so there must be some kind of separation of JavaScript when defining the code.
To avoid this issue, you can encapsulate your variables and functions by placing them inside another function. Functions in JavaScript are objects themselves, and objects in JavaScript can have both properties and methods. By placing a function inside another function, you are making the second function local in scope to the first function.
In our example, we are going to have the canvasApp() function that is called from the
window load event contain our entire
Canvas application. This “Hello World!” example will have one function
named drawScreen(). As soon as
canvasApp() is called, we will call
drawScreen() immediately to draw our
“Hello World!” text.
The drawScreen() function is
now local to canvasApp(). Any
variables or functions we create in canvasApp() will be local to drawScreen(), but not to the rest of the HTML
page or other JavaScript applications that might be running.
Here is the sample code for how we will encapsulate functions and code for our Canvas applications:
function canvasApp() {
   drawScreen();

   ...

   function drawScreen() {

        ...

   }

}
Adding Canvas to the HTML Page
In the <body> section of
the HTML page, add a <canvas>
tag using code such as the following:
<canvas id="canvasOne" width="500" height="300">
 Your browser does not support HTML5 Canvas.
</canvas>
Now, let’s break this down to understand what we are doing. The
<canvas> tag has three main
attributes. In HTML, attributes are set within
pointy brackets of an HTML tag. The three attributes we need to set
are:
Note
HTML5 elements, including canvas, have many more attributes: tabindex, title, class, accesskey, dir, draggable, hidden, etc.
Between the opening <canvas> and closing </canvas> tags, you can put text that
will be displayed if the browser executing the HTML page does not
support Canvas. For our Canvas applications, we will use the text “Your
browser does not support HTML5 Canvas.” However, you can adjust this
text to say anything.
Using document to reference the canvas element in JavaScript
We will now make use of the DOM to reference the <canvas> we defined in HTML. Recall
that the document object represents
every element of an HTML page after it has loaded.
We need a reference to the Canvas object so that we will know where to
display the Canvas API calls we will make from JavaScript.
First, we will define a new variable named theCanvas that will hold the reference to
the Canvas object.
Next, we retrieve a reference to canvasOne by calling the getElementById() function of document,
and passing the name canvasOne, which we defined as the id of the
<canvas>
tag we created in the HTML page:
var theCanvas = document.getElementById("canvasOne");Testing to See Whether the Browser Supports Canvas
Now that we have a reference to the canvas element on the HTML page, we need to
test to see whether it contains a context. The
Canvas context refers to the drawing surface defined by a web browser to
support Canvas. Simply put, if the context does not exist, neither does
the canvas. There are several ways to test this. This first test looks
to see whether the getContext method
exists before we call it using Canvas, as we have already defined it in
the HTML page:
if (!theCanvas || !theCanvas.getContext) {
   return;
}
Actually, this tests two things. First, it tests to see whether
theCanvas does not contain false (the value returned by document.getElementById() if the named
id does not exist). Then, it tests
whether the getContext() function
exists.
The return statement breaks out
and stops execution if the test fails.
Another method—popularized by Mark Pilgrim on his HTML5 website, http://diveintohtml5.org—uses a function with a test of a dummy canvas created for the sole purpose of seeing whether browser support exists:
function canvasSupport () {
    return !!document.createElement('testcanvas').getContext;
}
function canvasApp() {
   if (!canvasSupport) {
      return;
  }

}
Our favorite method is to use the modernizr.js library, which you can find here: http://www.modernizr.com/. Modernizr—an easy-to-use, lightweight library for testing support for various web-based technologies—creates a set of static Booleans that you can test against to see whether Canvas is supported.
To include modernizr.js in your HTML page, download the code from http://www.modernizr.com/ and then include the external .js file in your HTML page:
<script src="modernizr-1.6.min.js"></script>
To test for Canvas, change the canvasSupport() function to look like
this:
function canvasSupport () {
   return Modernizr.canvas;
}
We are going to use the modernizr.js method because we think it offers the best approach for testing whether Canvas is supported in web browsers.
Retrieving the 2D Context
Finally, we need to get a reference to the 2D context so we can manipulate it. HTML5 Canvas is designed to work with multiple contexts, including a proposed 3D context. However, for the purposes of this book, we only need to get the 2D context:
var context = theCanvas.getContext("2d");The drawScreen() Function
It’s time to create actual Canvas API code. Every operation we
perform on Canvas will be through the context object, as it references the object on
the HTML page.
We will delve into writing text, graphics, and images to HTML5
Canvas in later chapters, so for now, we will only spend a very short
time on the code of the drawScreen()
function.
The “screen” here is really the defined drawing area of the canvas, not the whole browser window. We refer to it as such because within the context of the games and applications you will write, it is effectively the “window” or “screen” into the canvas display that you will be manipulating.
The first thing we want to do is clear the drawing area. The
following two lines of code draw a yellow box on the screen that is the
same size as the canvas. fillStyle()
sets the color, and fillRect()
creates a rectangle and puts it on the screen:
context.fillStyle = "#ffffaa";
context.fillRect(0, 0, 500, 300);
Note
Notice that we are calling functions of the context. There are no screen objects, color
objects, or anything else. This is an example of the immediate mode we
described earlier.
Again, we will discuss the text functions of Canvas in the next chapter, but here is a short preview of the code we will use to put the text “Hello World!” on the screen.
First, we set the color of the text in the same way we set the color of the rectangle:
context.fillStyle = "#000000";
Then we set the font size and weight:
context.font = "20px _sans";
Next, we set the vertical alignment of the font:
context.textBaseline = "top";
Finally, we print our test on the screen by calling the fillText() method of the context object. The three
parameters of this method are text string, x position, and y position:
context.fillText ("Hello World!", 195, 80);Let’s add some graphics to our “Hello World!” text. First, let’s
load in an image and display it. We will dive into images and image
manipulation in Chapter 4, but for now,
let’s just get an image on the screen. To display an image on the
canvas, you need to create an instance of the Image() object, and set the Image.src property to the name of the image to
load.
Note
You can also use another canvas or a video as the image to display. We will discuss these topics in Chapters 4 and 6.
Before you display it, you need to wait for the image to load.
Create a callback() function for the Image load event by setting the onload function of the Image object. callback() will be executed when the
onload event occurs. When the image
has loaded, you then call context.drawImage(), passing three parameters
to put it on the canvas: Image
object, x position, and y position:
var helloWorldImage = new Image();
helloWorldImage.src = "helloworld.gif";
helloWorldImage.onload = function () {
   context.drawImage(helloWorldImage, 160, 130);
}
Finally, let’s draw a box around the text and the image. To draw a
box with no fill, use the context.StrokeStyle() method to set a color
for the stroke (the border of the box), and then call the context.strokeRect() method to draw the
rectangle border. The four parameters for the strokeRect() method are the upper left
x and y coordinates, and the lower right x and y
coordinates:
context.strokeStyle = "#000000";
context.strokeRect(5,  5, 490, 290);
The full code for the HTML5 Hello World! application is shown in Example 1-3, and its results are illustrated in Figure 1-3.
<!doctype html>
<html lang="en">
<head>
<meta charset="UTF-8">
<title>CH1EX3: Your First Canvas Application </title>
<script src="modernizr-1.6.min.js"></script>
<script type="text/javascript">
window.addEventListener("load", eventWindowLoaded, false);

var Debugger = function () { };
Debugger.log = function (message) {
   try {
      console.log(message);
   } catch (exception) {
      return;
   }
}

function eventWindowLoaded () {
   canvasApp();
}

function canvasSupport () {
    return Modernizr.canvas;
}

function canvasApp () {

        if (!canvasSupport()) {
          return;
        }

      var theCanvas = document.getElementById("canvasOne");
      var context = theCanvas.getContext("2d");

      Debugger.log("Drawing Canvas");

        function drawScreen() {
         //background
         context.fillStyle = "#ffffaa";
         context.fillRect(0, 0, 500, 300);

         //text
         context.fillStyle  = "#000000";
         context.font = "20px _sans";
         context.textBaseline = "top";
         context.fillText  ("Hello World!", 195, 80 );

         //image
         var helloWorldImage = new Image();
         helloWorldImage.src = "helloworld.gif";
         helloWorldImage.onload = function () {
            context.drawImage(helloWorldImage, 160, 130);
         }

         //box
         context.strokeStyle = "#000000";
         context.strokeRect(5,  5, 490, 290);

      }

      drawScreen();

}

</script>
</head>
<body>
<div style="position: absolute; top: 50px; left: 50px;">
<canvas id="canvasOne" width="500" height="300">
 Your browser does not support HTML5 Canvas.
</canvas>
</div>
</body>
</html>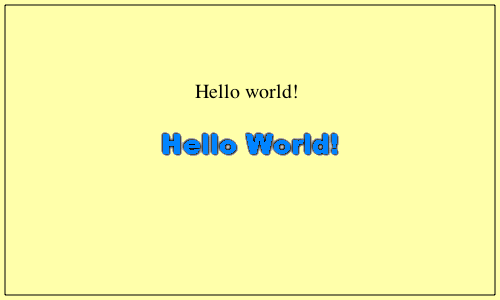
Debugging with Console.log
There is one more thing to discuss before we explore bigger and
better things beyond “Hello World!” In this book, we have implemented a
very simple debugging methodology using the console.log functionality of modern web
browsers. This function lets you log text messages to the JavaScript
console to help find problems (or opportunities!) with your code. Any
browser that has a JavaScript console (Chrome, Opera, Safari, Firefox with
Firebug installed) can make use of console.log. However, browsers without console.log support throw a nasty
error.
To handle this error, we use a wrapper around console.log that only makes the call if the
function is supported. The wrapper creates a class named Debugger, and then creates a static function
named Debugger.log that can be called
from anywhere in your code, like this:
Debugger.log("Drawing Canvas");Here is the code for the console.log() functionality:
var Debugger = function () { };
Debugger.log = function (message) {
   try {
      console.log(message);
   } catch (exception) {
      return;
   }
}
The 2D Context and the Current State
The HTML5 2D context (the CanvasRenderingContext2D object), retrieved by a
call to the getContext() method of the
Canvas object, is where all the action
takes place. The CanvasRenderingContext2D contains all the
methods and properties we need to draw onto the canvas. The CanvasRenderingContext2D (or context, as we will
call it hereafter) uses a Cartesian coordinate system with 0,0 at the
upper left and corner of the canvas, and coordinates increasing in value
to the left and down.
However, all of these properties and methods are used in conjunction with current state, a concept that must be grasped before you can really understand how to work with HTML5 Canvas. The current state is actually a stack of drawing states that apply globally to the entire canvas. You will manipulate these states when drawing on the canvas. These states include:
Don’t worry; these should not look familiar to you just yet. We will discuss these properties in depth in the next three chapters.
Remember earlier in this chapter when we discussed immediate mode versus retained mode? The canvas is an immediate mode drawing surface, which means everything needs to be redrawn every time something changes. There are some advantages to this; for example, global properties make it very easy to apply effects to the entire screen. Once you get your head around it, the act of redrawing the screen every time there is an update makes the process of drawing to the canvas straightforward and simple.
On the other hand, retained mode is when a set of objects is stored by a drawing surface and manipulated with a display list. Flash and Silverlight work in this mode. Retained mode can be very useful for creating applications that rely on multiple objects with their own independent states. Many of the same applications that could make full use of the canvas (games, activities, animations) are often easier to code with a retained mode drawing surface, especially for beginners.
Our challenge is to take advantage of the immediate mode drawing surface, while adding functionality to our code to help it act more like it works in retained mode. Throughout this book we will discuss strategies that will help take this immediate mode operation and make it easier to manipulate through code.
The HTML5 Canvas Object
Recall that the Canvas object is
created by placing the <canvas>
tag in the <body> portion of an
HTML page. You can also create an instance of a canvas in code like
this:
var theCanvas = document.createElement("canvas");The Canvas object has two
associated properties and methods that can be accessed through JavaScript:
width and height. These tell you the current width and
height of the canvas rendered on the HTML page. It is important to note
that they are not read-only; i.e., they can be
updated in code and changed on an HTML page. What does this mean? It means
you can dynamically resize the canvas on the HTML page without
reloading.
Note
You can also use CSS styles to change the scale of the canvas.
Unlike resizing, scaling takes the current canvas bitmapped area and
resamples it to fit into the size specified by the width and height attributes of the CSS style. For
example, to scale the canvas to a 400×400 area, you might use this CSS
style:
style="width: 400px; height:400px"
We include an example of scaling the Canvas with a transformation matrix in Chapter 3.
There are also two public methods for the Canvas object. The first is getContext(), which we used earlier in this
chapter. We will continue to use it throughout this book to retrieve a
reference to the Canvas 2D context so we can draw onto the canvas. The
second property is toDataURL(). This
method will return a string of data that represents the bitmapped image of
the Canvas object as it is currently
rendered. It’s like a snapshot of the screen. By supplying different MIME
types as a parameter, you can retrieve the data in different formats. The
basic format is an image/png, but
image/jpeg and other formats can be retrieved. We
will use the toDataURL() in the next
application to export an image of the canvas into another browser
window.
Another Example: Guess The Letter
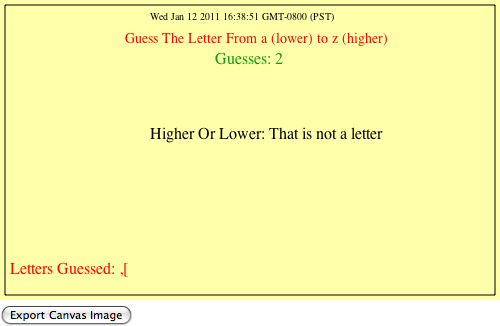
Now we will take a quick look at a more involved example of a “Hello World!”-type application, the game “Guess The Letter.” We’ve included this example to illustrate how much more Canvas programming is done in JavaScript than in the Canvas API.
In this game, shown in Figure 1-4, the player’s job is to guess the letter of the alphabet the computer has chosen randomly. The game keeps track of how many guesses the player has made, lists the letters he has already guessed, and tells the player whether he needs to guess higher (toward Z) or lower (toward A).
How the Game Works
This game is set up with the same basic structure as “Hello
World!” canvasApp() is the main
function, and all other functions are defined as local to canvasApp(). We use a drawScreen() function to render text on the
canvas. However, there are some other functions included as well, which
are described next.
The “Guess The Letter” Game Variables
Here is a rundown of the variables we will use in the game. They
are all defined and initialized in canvasApp(), so they have scope to the
encapsulated functions that we define locally.
guessesThis variable holds the number of times the player has pressed a letter. The lower the number, the better he has done in the game.
messageThe content of this variable is displayed to give the user instructions on how to play.
lettersThis array holds one of each letter of the alphabet. We will use this array to both randomly choose a secret letter for the game, and to figure out the relative position of the letter in the alphabet.
todayThis variable holds the current date. It is displayed on the screen but has no other purpose.
letterToGuessThis variable holds the current game’s secret letter that needs to be guessed.
higherOrLowerThis variable holds the text “Higher” or “Lower” depending on where the last guessed letter is in relation to the secret letter. If the secret letter is closer to “a,” we give the “Lower” instruction. If the letter is closer to “z,” we give the “Higher” instruction.
lettersGuessedThis array holds the current set of letters the player has guessed already. We will print this list on the screen to help the player remember what letters he has already chosen.
gameOverThis variable is set to
falseuntil the player wins. We will use this to know when to put the “You Win” message on the screen, and to keep the player from guessing after he has won.
Here is the code:
   var guesses = 0;
   var message = "Guess The Letter From a (lower) to z (higher)";
   var letters = [
               "a","b","c","d","e","f","g","h","i","j","k","l","m","n","o",
               "p","q","r","s","t","u","v","w","x","y","z"
               ];
   var today = new Date();
   var letterToGuess = "";
   var higherOrLower = "";
   var lettersGuessed;
   var gameOver = false;
The initGame() Function
The initGame() function sets up
the game for the player. The two most important blocks of code are as
follows. This code finds a random letter from the letters array and
stores it in the letterToGuess
variable:
var letterIndex = Math.floor(Math.random() * letters.length);
letterToGuess = letters[letterIndex];
This code adds an event listener to the window object of the DOM to listen for the
keyboard keyup event. When a key is
pressed, the eventKeyPressed event
handler is called to test the letter pressed:
window.addEventListener("keyup",eventKeyPressed,true);Here is the full code for the function:
function initGame() {
   var letterIndex = Math.floor(Math.random() * letters.length);
   letterToGuess = letters[letterIndex];
   guesses = 0;
   lettersGuessed = [];
   gameOver = false;
   window.addEventListener("keyup",eventKeyPressed,true);
   drawScreen();
}
The eventKeyPressed() Function
This function, called when the player presses a key, contains most
of the action in this game. Every event handler function in JavaScript
is passed an event object that has
information about the event that has taken place. We use the e argument to hold that object.
The first test we make is to see whether the gameOver variable is false. If so, we continue to test the key that
was pressed by the player; the next two lines of code are used for that
purpose. The first line of code gets the key-press value from the event,
and converts it to an alphabetic letter that we can test with the letter
stored in letterToGuess:
var letterPressed = String.fromCharCode(e.keyCode);
The next line of code converts the letter to lowercase so that we can test uppercase letters if the player unintentionally has Caps Lock on:
letterPressed = letterPressed.toLowerCase();
Next, we increase the guesses
count to display, and use the Array.push() method to add the letter to the
lettersGuessed array:
guesses++;
lettersGuessed.push(letterPressed);
Now it is time to test the current game state to give feedback to
the player. First, we test to see whether letterPressed is equal to letterToGuess. If so, the player has won the
game:
if (letterPressed == letterToGuess) {
   gameOver = true;
If the player has not won, we need to get the index of letterToGuess and the index of letterPressed in the letters array. We are going to use these
values to figure out whether we should display “Higher,” “Lower,” or
“That is not a letter.” To do this, we use the indexOf() array method to get the relative
index of each letter. Because we alphabetized the letters in the array,
it is very easy to test which message to display:
} else {
   letterIndex = letters.indexOf(letterToGuess);
   guessIndex = letters.indexOf(letterPressed);
Now we make the test. First, if guessIndex is less than zero, it means that
the call to indexOf() returned
-1, and the key press was not a
letter. We then display an error message:
if (guessIndex < 0) {
   higherOrLower = "That is not a letter";
The rest of the tests are simple. If guessIndex is greater than letterIndex, we set the higherOrLower text to “Lower.” Conversely, if
guessIndex is less than letterIndex, we set the higherOrLower test to “Higher”:
   } else if (guessIndex > letterIndex) {
      higherOrLower = "Lower";
   } else {
      higherOrLower = "Higher";
   }

}
Finally, we call drawScreen()
to paint the screen:
drawScreen();
Here is the full code for the function:
function eventKeyPressed(e) {
      if (!gameOver) {
         var letterPressed = String.fromCharCode(e.keyCode);
         letterPressed = letterPressed.toLowerCase();
         guesses++;
         lettersGuessed.push(letterPressed);

         if (letterPressed == letterToGuess) {
            gameOver = true;
         } else {

            letterIndex = letters.indexOf(letterToGuess);
            guessIndex = letters.indexOf(letterPressed);
            Debugger.log(guessIndex);
            if (guessIndex < 0) {
               higherOrLower = "That is not a letter";
            } else if (guessIndex > letterIndex) {
               higherOrLower = "Lower";
            } else {
               higherOrLower = "Higher";
            }

         }
         drawScreen();
        }
   }
The drawScreen() Function
Now we get to drawScreen(). The
good news is that we have seen almost all of this before—there are only
a few differences from “Hello World!” For example, we paint multiple
variables on the screen using the Canvas Text API. We only set context.textBaseline = 'top'; once for all the
text we are going to display. Also, we change the color using context.fillStyle, and the font with context.font.
The most interesting thing we display here is the content of the
lettersGuessed array. On the canvas,
the array is printed as a set of comma-separated values, like
this:
Letters Guessed:
p,h,a,d |
To print this value, all we do is use the toString() method of the lettersGuessed array, which prints out the
values of an array as—you guessed it—comma-separated values:
context.fillText ("Letters Guessed: " + lettersGuessed.toString(), 10, 260);We also test the gameOver
variable. If it is true, we put
You Got It! on the screen in giant
40px text so the user knows he has won.
Here is the full code for the function:
function drawScreen() {
      //Background
      context.fillStyle = "#ffffaa";
      context.fillRect(0, 0, 500, 300);
      //Box
      context.strokeStyle = "#000000";
      context.strokeRect(5,  5, 490, 290);

      context.textBaseline = "top";
      //Date
      context.fillStyle = "#000000";
      context.font = "10px _sans";
      context.fillText  (today, 150 ,10);
      //Message
      context.fillStyle = "#FF0000";
      context.font = "14px _sans";
      context.fillText  (message, 125, 30);
     //Guesses
      context.fillStyle = "#109910";
      context.font = "16px _sans";
      context.fillText  ('Guesses: ' + guesses, 215, 50);
      //Higher Or Lower
      context.fillStyle = "#000000";
      context.font = "16px _sans";
      context.fillText  ("Higher Or Lower: " + higherOrLower, 150,125);
      //Letters Guessed
      context.fillStyle = "#FF0000";
      context.font = "16px _sans";
      context.fillText  ("Letters Guessed: " + lettersGuessed.toString(), 10, 260);
      if (gameOver) {
         context.fillStyle = "#FF0000";
         context.font = "40px _sans";
         context.fillText  ("You Got It!", 150, 180);
      }
   }
Exporting Canvas to an Image
Earlier, we briefly discussed the toDataUrL() property of the Canvas object. We are going to use that
property to let the user create an image of the game screen at any time.
This acts almost like a screen-capture utility for games made on
Canvas.
We need to create a button in the HTML page that the user can
press to get the screen capture. We will add this button to <form> and give it the id createImageData:
<form>
<input type="button" id="createImageData" value="Export Canvas Image">
</form>
In the init() function, we
retrieve a reference to that form element by using the getElementById() method
of the document object. We then set
an event handler for the button “click” event as the function createImageDataPressed():
var formElement = document.getElementById("createImageData");
formElement.addEventListener('click', createImageDataPressed, false);
In canvasApp(), we define the
createImageDataPressed() function as
an event handler. This function calls window.open(), passing the return value of the
Canvas.toDataUrl() method as the
source for the window. Since this data forms a valid
PNG, the image is displayed in the new
window:
function createImageDataPressed(e) {

   window.open(theCanvas.toDataURL(),"canvasImage","left=0,top=0,width=" +
   theCanvas.width + ",height=" + theCanvas.height +",toolbar=0,resizable=0");
   }
Note
We will discuss this process in depth in Chapter 3.
The Final Game Code
Example 1-4 shows the full code for the Guess The Letter game.
<!doctype html>
<html lang="en">
<head>
<meta charset="UTF-8">
<title>CH1EX4: Guesss The Letter Game</title>
<script src="modernizr-1.6.min.js"></script>
<script type="text/javascript">

window.addEventListener('load', eventWindowLoaded, false);

var Debugger = function () { };
Debugger.log = function (message) {
   try {
      console.log(message);
   } catch (exception) {
      return;
   }
}

function eventWindowLoaded() {

   canvasApp();
}

function canvasSupport () {
     return Modernizr.canvas;
}

function eventWindowLoaded() {

   canvasApp();
}

function canvasApp() {
   var guesses = 0;
   var message = "Guess The Letter From a (lower) to z (higher)";
   var letters = [
               "a","b","c","d","e","f","g","h","i","j","k","l","m","n","o",
               "p","q","r","s","t","u","v","w","x","y","z"
               ];
   var today = new Date();
   var letterToGuess = "";
   var higherOrLower = "";
   var lettersGuessed;
   var gameOver = false;

   if (!canvasSupport()) {
          return;
        }

   var theCanvas = document.getElementById("canvasOne");
   var context = theCanvas.getContext("2d");

   initGame();

   function initGame() {
      var letterIndex = Math.floor(Math.random() * letters.length);
      letterToGuess = letters[letterIndex];
      guesses = 0;
      lettersGuessed = [];
      gameOver = false;
      window.addEventListener("keyup",eventKeyPressed,true);
      var formElement = document.getElementById("createImageData");
      formElement.addEventListener('click', createImageDataPressed, false);
      drawScreen();
   }

   function eventKeyPressed(e) {
      if (!gameOver) {
         var letterPressed = String.fromCharCode(e.keyCode);
         letterPressed = letterPressed.toLowerCase();
         guesses++;
         lettersGuessed.push(letterPressed);

         if (letterPressed == letterToGuess) {
            gameOver = true;
         } else {

            letterIndex = letters.indexOf(letterToGuess);
            guessIndex = letters.indexOf(letterPressed);
            Debugger.log(guessIndex);
            if (guessIndex < 0) {
               higherOrLower = "That is not a letter";
            } else if (guessIndex > letterIndex) {
               higherOrLower = "Lower";
            } else {
               higherOrLower = "Higher";
            }

         }
         drawScreen();
        }
   }

   function drawScreen() {
      //Background
      context.fillStyle = "#ffffaa";
      context.fillRect(0, 0, 500, 300);
      //Box
      context.strokeStyle = "#000000";
      context.strokeRect(5,  5, 490, 290);
      context.textBaseline = "top";
      //Date
      context.fillStyle = "#000000";
      context.font = "10px _sans";
      context.fillText  (today, 150 ,10);
      //Message
      context.fillStyle = "#FF0000";
      context.font = "14px _sans";
      context.fillText  (message, 125, 30);
      //Guesses
      context.fillStyle = "#109910";
      context.font = "16px _sans";
      context.fillText  ('Guesses: ' + guesses, 215, 50);
      //Higher Or Lower
      context.fillStyle = "#000000";
      context.font = "16px _sans";
      context.fillText  ("Higher Or Lower: " + higherOrLower, 150,125);
      //Letters Guessed
      context.fillStyle = "#FF0000";
      context.font = "16px _sans";
      context.fillText  ("Letters Guessed: " + lettersGuessed.toString(), 10, 260);
      if (gameOver) {
         context.fillStyle = "#FF0000";
         context.font = "40px _sans";
         context.fillText  ("You Got It!", 150, 180);
      }
   }

   function createImageDataPressed(e) {

      window.open(theCanvas.toDataURL(),"canvasImage","left=0,top=0,width=" +
      theCanvas.width + ",height=" + theCanvas.height +",toolbar=0,resizable=0");
   }

}

</script>
</head>
<body>
<div style="position: absolute; top: 50px; left: 50px;">
<canvas id="canvasOne" width="500" height="300">
 Your browser does not support HTML5 Canvas.
</canvas>
<form>
<input type="button" id="createImageData" value="Export Canvas Image">
</form>
</div>
</body>
</html>
What’s Next
So now you should have a basic understanding of the HTML and JavaScript we will use to render and control HTML5 Canvas on an HTML page. In the next chapter, we will take this information and expand on it to create an interactive application that uses the canvas to render information on the screen.
Get HTML5 Canvas now with the O’Reilly learning platform.
O’Reilly members experience books, live events, courses curated by job role, and more from O’Reilly and nearly 200 top publishers.

