Photomatix Pro workflow
Photomatix Pro 2.3 is available for download at http://www.hdrsoft.com for both Macintosh and Windows operating systems. You can try before you buy with the demo version, but it will watermark your output images.
Photomatix Pro features a large preview window for tonemapping your HDR image, and all of the image adjustment settings are slider-based. Program navigation can be a bit confusing at first, but after a few times, it gets easier.
Photomatix also includes some non-HDR exposure blending methods and a batch processing function, which we'll also take a quick look at.
For our step-by-step below, we are using eight images from a massive manual bracketing series, but you can start with a simple three image series if you prefer. The commands and functions are identical.
HDR Generation in Photomatix Pro
Open the bracketed low dynamic range source images you wish to convert to HDR into Photomatix Pro via the File>Open command path (or by dragging into the program window in Windows, or by dragging onto the Dock icon in Mac OSX). Images may be JPEG, TIFF, or Camera RAW format.
Ensure that all of the opened images are of the same source series. No other image files should be open in Photomatix except for the images you wish to combine. You will get weird results if images from different series are open at the same time.
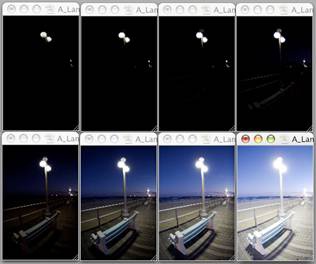
Figure 9. These 8 images from a massive manual bracketing ...
Get HDR: An Introduction to High Dynamic Range Photography now with the O’Reilly learning platform.
O’Reilly members experience books, live events, courses curated by job role, and more from O’Reilly and nearly 200 top publishers.

