9
Introduction
After you have completed building this circuit, con-
nect a 9V battery and test it out. When you press the
button, the LED should turn on. If it doesn’t work,
don’t despair. The next section covers how to use a
multi-meter to troubleshoot your circuits.
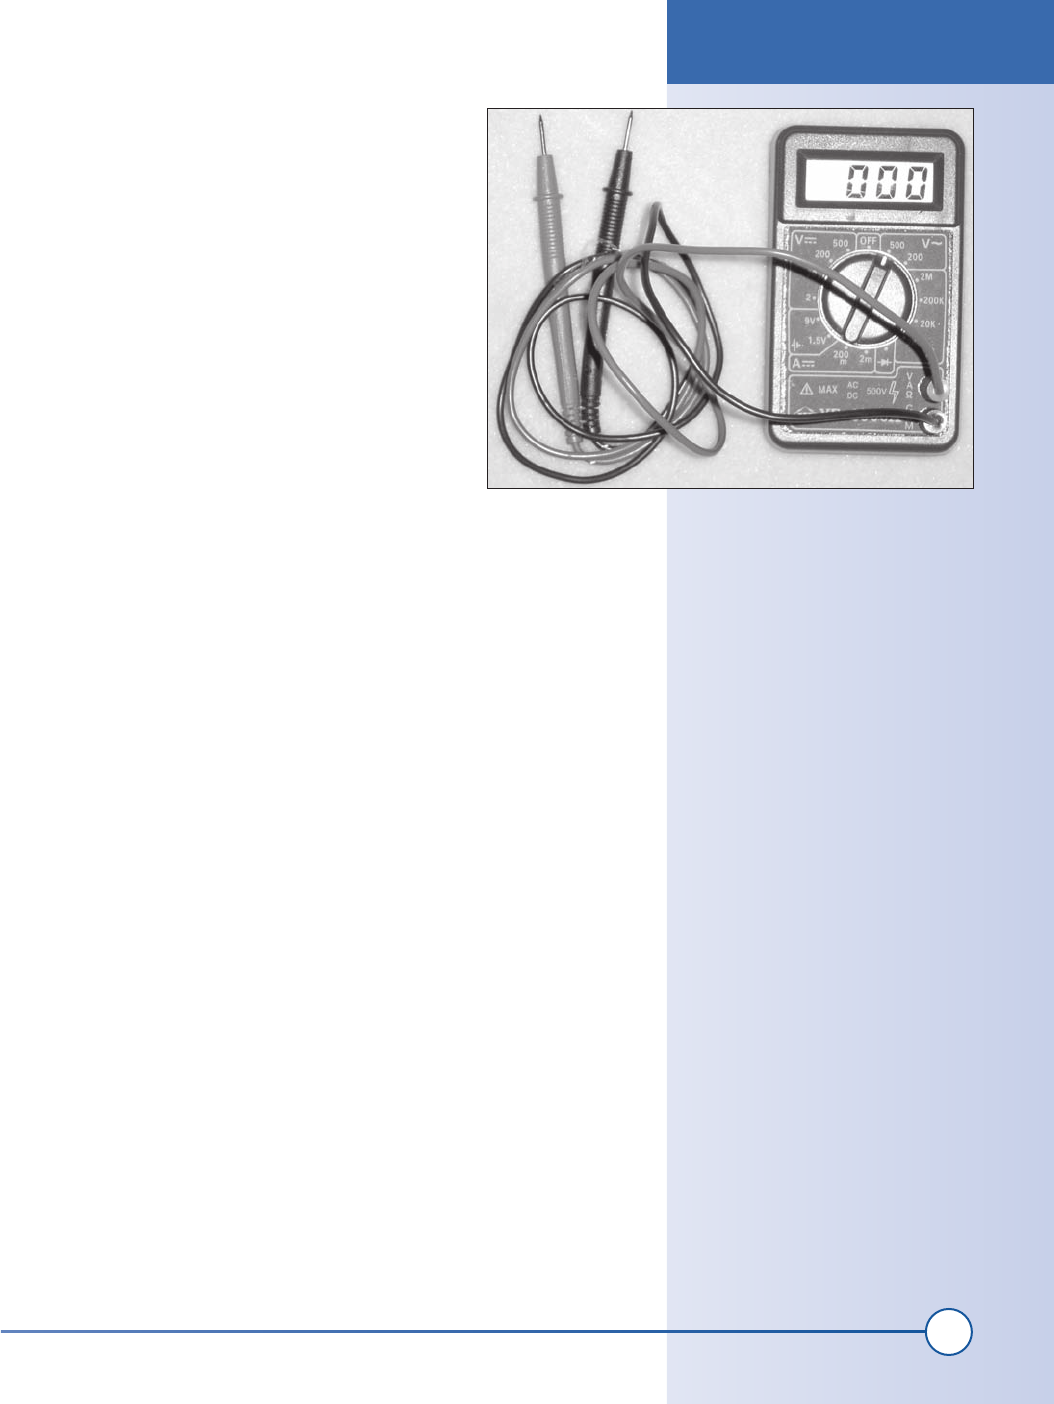
How to use a multi-meter
A multi-meter is often called a Volt-Ohm meter
(VOM), a digital volt meter (DVM), or simply a meter.
A multi-meter measures voltage, resistance, and some-
times current. Advanced models can also measure the
value of capacitors, time, and temperature.
The multi-meter typically has two plastic sticks with
metal tips (called probes) that are attached by flexible
wires connected to two sockets in the body of the
meter. The probe wires are removable. In the center of the instrument is
a dial that selects the electrical characteristic you will be measuring. The
meter shown in Figure I-6 measures resistance, DC voltage, AC voltage,
current, diode forward voltage, and battery voltage.
The multi-meter lets you see what is going on inside an electronic circuit.
Unless you always build every circuit perfectly, you will be using a multi-
meter to find out what is wrong.
We will now use a multi-meter to measure voltage and current in the circuit
you just built.
How to measure voltage in a circuit
The multi-meter’s dial will usually have two areas marked with the letter V.
One will have two straight lines (a solid one above a dashed one), and the
other will have a single wavy line.
Overview
When the dial is rotated to the area with the V with the two straight lines, it
is set to measure a static or slowly changing voltage such as a battery. There
are several different numbers in this area as well, which tell the meter what
range of voltages you want to measure. Select the numeric value closest to
what you think the signal might be. Touch the tip of the black probe to a
point in the circuit that you know to be “ground” (look on your schematic
diagram or select the minus terminal of the batteries in the circuit), and
touch the red probe to where you want to measure the voltage. You do not
always have to touch the black probe to ground in the circuit. The meter
will measure the voltage between any two points in the circuit. If the meter
reads all zeros or single 1, change the range and try again. Some meters will
change the range for you.
Solder Flux
Solder flux is a liquid that makes it
easier for two surfaces to be soldered
together. It is a solvent (slightly acidic)
that helps to clean away oil and resi-
due from the surface of the materials
being soldered. Several types are
typically available: rosin-based, no-
clean, and water-soluble. Rosin-based
is one of the oldest types, and may
leave an orange residue. This residue
should be removed from the circuit
board before testing the circuit. Use a
flux remover (another solvent) to dis-
solve the rosin-based flux. No-clean
type flux leaves a clear residue that
does not need to be removed. Water-
soluble fluxes can be cleaned off with
water.
I recommend using a no-clean flux, as
it requires no action when soldering
is complete.
Figure I-6: Multi-meter
The Basics
part1.indd 9
1/13/2002 2:51:36 PM
Get Hardware Hacking Projects for Geeks now with the O’Reilly learning platform.
O’Reilly members experience books, live events, courses curated by job role, and more from O’Reilly and nearly 200 top publishers.

