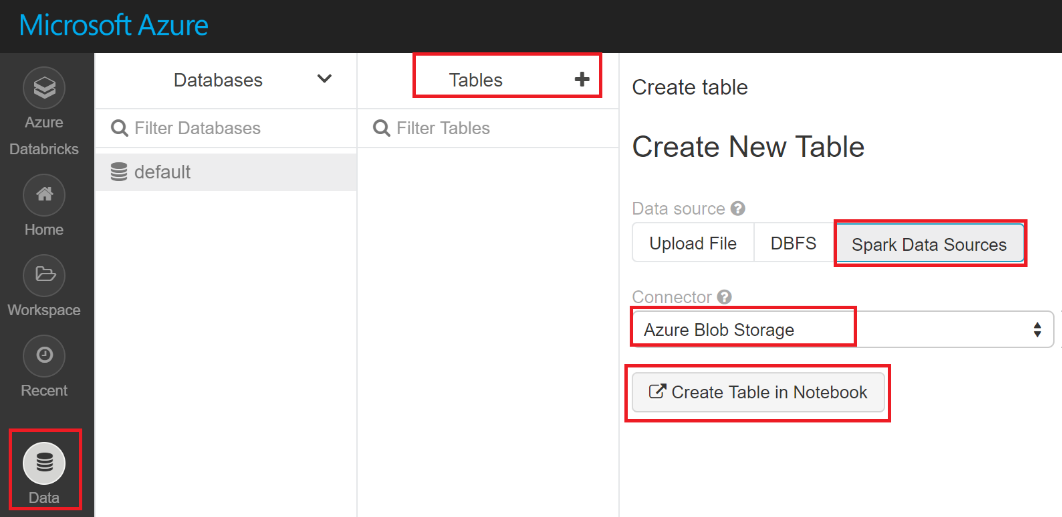
We are now ready to consume and transform data from the Sales.txt file we created in the previous section. We'll go back to the Databricks workspace and create a new notebook. The easiest way to achieve it is to use a template. As shown in the following screenshot, we select the Data icon in the toolbar at the left of our workspace. We go to Tables | Spark Data Sources | Azure Blob Storage. Click on Create Table in Notebook to create the new notebook:
The notebook opens, with lots of sections. We'll first rename it, right-click on the notebook name and select Rename.
Enter ADFV2Notebook and click on Rename to rename it. ...

