Chapter 1. First Steps in Google Apps Script
What is Google Apps Script and why should you use it to build applications? Simply put, Google Apps Script is an easy way to figuratively glue Google and other web services together to form one powerful, interactive web application. Just ahead, you’ll get a more in-depth explanation of Google Apps Script and how to use it to enhance existing Google Apps. You will also learn the basics of building an application. This first chapter should get your feet firmly planted on the ground floor of the Google Apps Script development platform and demystify its usage.
Google Apps Script Is…
Google Apps Script is a coding and application development platform built into Google Apps, enabling you to add functionality to spreadsheets, Gmail, Sites, and other services from Google. For example, if your spreadsheet needs a menu item in the toolbar for creating a pivot table, you can write a Google Apps Script that adds it to the menu and performs the task. Google Apps Scripts can be created as standalone files in Drive, inside a document or spreadsheet (these are known as container-bound), or in a Google Site.
This book will focus extensively on the concept of using Google Apps Script to build applications that present themselves as web services running independently of other interfaces. You will learn how to use Google Apps Script to build apps that run from a spreadsheet, in a browser window, or within a Google Site; from the user’s perspective, they will appear to be complete applications such as you might expect when using a web service like Picasa or Gmail.
There are some real advantages to having your scripts (i.e., applications) stored in one of the Google Apps services. Primarily, security is already built in, meaning you do not need to worry about implementing that component in your application as you would if it were running on a legacy web server needing patches and constant monitoring for malicious attacks. As part of Google Apps, Google Apps Script also offers you the same collaborative development abilities that are part of the Apps suite. What is truly exciting about Google Apps Script is that it is a 100 percent web development environment that requires no transferring of files from computer to computer, backups, revision control, uploads to a production server, updating of development software, or many of the other tedious aspects of development that get in the way of actually writing applications. These parts are all built in, allowing you to focus on creating products for your business, school or club, or anything else that needs to run on the Web.
Tip
If you are an advanced developer coming from Google App Engine, don’t worry; there is a plug-in for Eclipse that will allow you to work on the files locally, and they will automatically be pushed up to Google.
There are three ways to create user interfaces (UIs) in Google Apps Script: with the older UiApp Service, as gadgets for Google Sites, and using the HTML Service. The UiApp Service, which stands for User Interface App, was released in early 2010 as a way to allow developers to collect user input that could be sent back to a script for processing. UiApp uses the Google Web Toolkit (GWT) widget set as the framework for building an interface. Widgets allow you to create things like text boxes and submit buttons, as well as more complex items like flex tables and listboxes. Everything you see in a Google Apps Script UI is a widget cleverly arranged within a frame in the page. The only other elements—panels—are the containers that hold all your widgets…and that is truly all there is to the visual part of a Google Apps Script UI. If you are familiar with GWT, you will be right at home creating UIs in Google Apps Script using UiApp.
At the 2013 Google I/O, Google Apps Script received a major update to the way UIs are presented. The new HTML Service uses standard HTML, Cascading Style Sheets (CSS), and JavaScript to display pages. This means you don’t need to worry about learning the intricacies of GWT, and you can use many existing JavaScript libraries, like jQuery. As of this writing Google is using Caja, which will limit some of the functionality you might get out of an advanced library like Bootstrap, so beware.
Warning
Google has not officially deprecated UiApp, but it will not be receiving much in the way of updates in the future. Google strongly recommends converting to the HTML Service.
What You Will Get from This Book
By the time you get to the back cover of this book, you will have learned all the necessary elements that go into building web applications using Google Apps Script. With this knowledge under your belt, you will be able to create your own applications and take full advantage of your Google-hosted services. Your apps will have the ability to recognize and authenticate users and carry out tasks such as displaying custom data from a spreadsheet, data entry, sending emails, and so much more. Have a look at Part II to see the kinds of applications we will be building and let your imagination flow.
Getting Started
Enough preamble—let’s dig in!
For the most part, we will be building our scripts in the Google Drive Service. To get started with the examples in this chapter load up Google Drive. From here, click the “Create” button and choose “Script.” If you don’t have the Script App, it can be installed by clicking the “Connect more apps” button at the bottom of the “Create” menu and searching for “Apps Script.” You can also get started by simply going to the Google Apps Script start page and clicking the “Start Scripting” button (Figure 1-1).

Figure 1-1. All scripts are saved in your Google Drive
The Google Script Editor will open as a new window. It gives you the option to create your project from a template as well as to access some useful tutorials (see Figure 1-2).
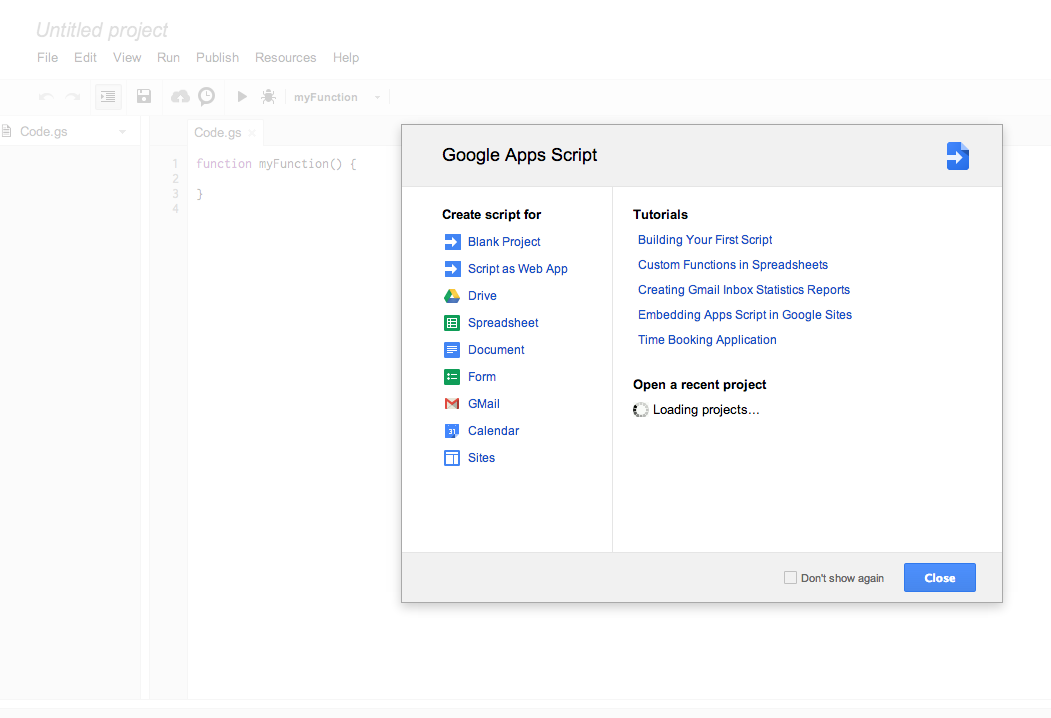
Figure 1-2. Templates are working examples to help you get started
Looking Around the Editor
Before writing your first script, let’s take a look at some of the features in the Google Script Editor. First off you will notice that it looks much like what you already know from Google Docs.
Under the File menu are the typical Save, Delete, Rename, New, etc. (Figure 1-3). And as with many of the other Google Apps services, Google Apps Script has a Manage Versions feature that will allow you to turn back the clock to a point when your code was working. Not that we ever need such features… But seriously, we often go down the wrong road during development, and revisions can save you hours of trying to get back to a known good point. When launched, a pop-up Revisions box will show what the code looked like in the version you selected.
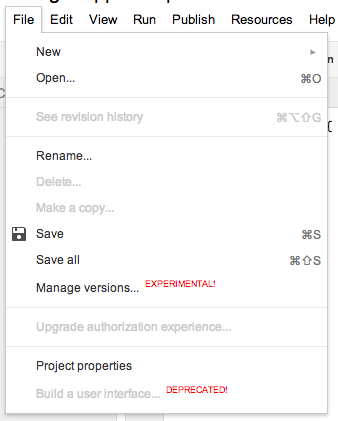
Figure 1-3. Saving is not automatic
Tip
When you have the Revisions box open, you can select and copy parts of the code. This is handy when you may have gone down two different paths and want to roll back one part without losing the other.
In the File menu there are some very important options. Project properties make it possible to store a limited amount of information in key/value pairs for use by your script at runtime. Properties can be edited in the box that pops up after clicking the Properties option in the File menu, or by using the Properties Service right in your code. Many of the apps in this book will need to sign into non-Google services, and Script Properties is a great place to store something like a password.
The “Manage versions” selection is used for applications you deploy as web apps or libraries and gives you a way to control the version your users are accessing. This feature allows you to update your existing production application without disturbing your users. Once you are ready to move everyone to the latest version, you simply change the version.
There’s nothing very exciting in the Edit menu, other than “Find and replace” (Figure 1-4). The replace functionality is a good way to globally change the name of a variable. Figure 1-4
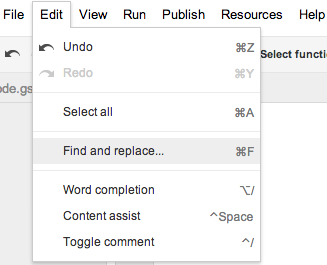
Figure 1-4. The Edit menu
On the View menu, shown in Figure 1-5, there are some important options: “execution,” “transcript,” and “logs.” When a script is run from the editor or by you as the user from a web interface or container, the execution transcript will list each command as it is run. Using the execution transcript, you can see the order that the code is executed in, which is helpful in debugging. Logs are used along with the Logger Service and allow the writing of information and other notes as a way to track information. This was particularly useful before the Debugger was added and is a big help when testing code. I want to reiterate that these features only work from the Script Editor and will not be of much use debugging in the UiApp and HTML Services when your application is run from the browser. Don’t worry, there is a whole section in this book to help you debug like a pro.
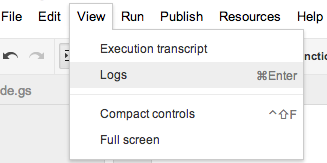
Figure 1-5. The View menu
Learn by doing is how I figure this stuff out, so let’s jump in and give the Logger a try. Add the following line of code into the Script Editor:
function myFunction(){
  Logger.log('A test of the Log');
}
Click Run (you might be asked to name your file), and then check the Logs under the View menu (Figure 1-6).
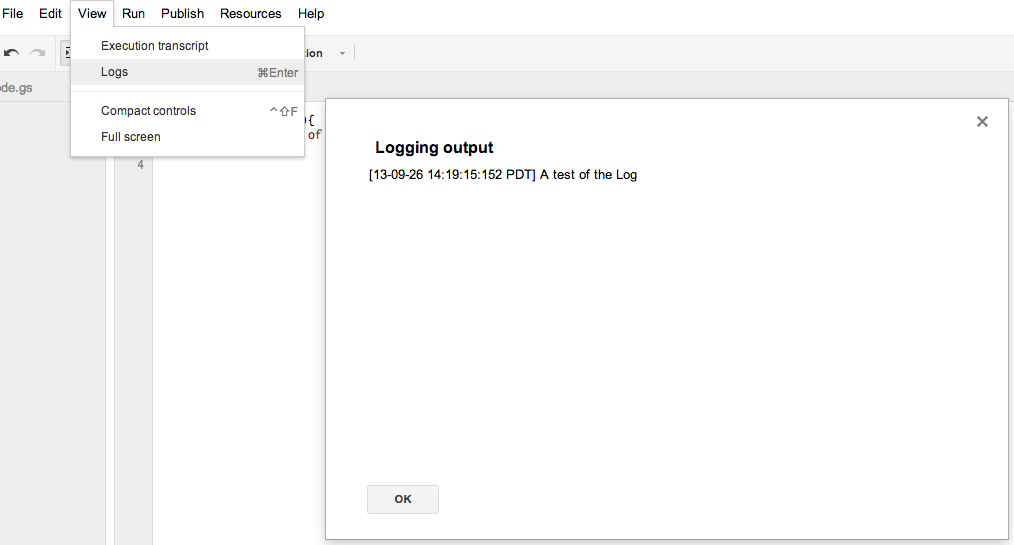
Figure 1-6. Log output
The Publish menu is where you will find the “Deploy as web app” option, which makes displaying a UI possible. This is also the place for distributing your application on the Google Chrome Web Store. We will be covering these features in great detail later in the book.
The Resources menu provides access to triggers (see Figure 1-7), which are the automation component that can run a script at specified times or after certain events, like upon the submission of a form or when the spreadsheet is edited. Triggers are very useful for tasks such as backing up information at 1 a.m., so you get credit for working hard while fast asleep. Also in the Resources menu you will find libraries. These are scripts that are written by other developers and can be added using the script’s special key, found under File→“Project properties.” A library is typically a set of functions that extend or fill gaps in the platform. For example, you may want to access YouTube, but until December 2013, Google Apps Script did not have a YouTube Service. Before the Google connector was available, someone (hint: your author) wrote and offered a YouTube App Library to help developers easily work with the YouTube API, without having to figure out the details of parsing XML necessary when using Google APIs directly.
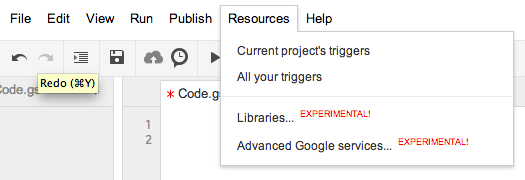
Figure 1-7. The Resources menu
Tip
You don’t need to be an important public official to have your own library in Google Apps Script. In fact, anyone can create a library—and the more developers provide excellent libraries, the better Google Apps Script will be. Have a look at the Google Apps Script Examples page for several helpful libraries.
That’s about it for the menus. Figure 1-8 shows a few buttons that explain themselves and make for easier access to the most commonly used features.

Figure 1-8. Buttons make for easy access to common tasks
The “Debug” button (the bug) next to the “Run” button (the arrow) will bring up a window at the bottom of the code window and show the values of your code as it is executed. It has features for setting breakpoints and stepping in and over parts of code, and it will make developing non-UI parts of your code much easier. The user documentation on the Google Apps Script website goes into detail on using the Debugger.
Three Ways to Create a UI
There are three ways to create and display a user interface (UI) in Google Apps Script. The first way is in a spreadsheet, as a pop-up window or sidebar; the second, as a web page; and the third as a gadget in a Google Sites page.
As you work through this chapter, please note that some of the code in each type of UI is the same and will only be described once, as it is first introduced. It would be a good idea to go through all the different UI types to avoid any confusion and to gain an understanding of when and why a certain UI type would work better for your application.
Hello Container-Bound Apps
Now that you know your way around the Script Editor, it is time to write your first script. The first type of UI is called container-bound because it is going to display as a pop-up window or sidebar in your spreadsheet or document. The term “container-bound” comes from requiring a spreadsheet or document to display the UI, but this does not mean that any certain type of UI is more or less integrated than another. A script contained in a document can display a web page or pop-up, and scripts created in Drive can access spreadsheets. I am simply giving you a reference for what we are discussing because the code to display each type differs slightly.
The UiApp Service
From a spreadsheet, click Tools and select “Script editor.” The Script Editor will open. Dismiss the getting started pop-up, delete all of the example code, and add the following code:
function helloWorldUiApp() {
  var ss = SpreadsheetApp.getActiveSpreadsheet();
  var app = UiApp.createApplication().setTitle(<Your Title>);
  app.add(app.createLabel('Hello World'));
  //TODO add your code here
  ss.show(app);
}
Click “Save,” and name your project “Hello World Container Bound” (see Figure 1-9).
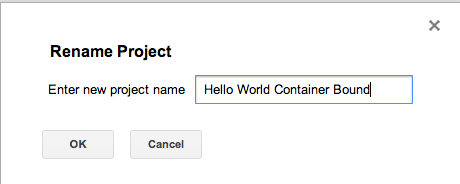
Figure 1-9. Naming your project
Now click “Run.” We are using SpreadsheetApp, so the first thing you will see is a request for you to authorize the app (Figure 1-10).
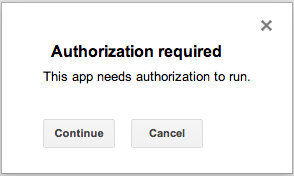
Figure 1-10. Authorization required
Next, you will see another screen telling you which parts of Google your app would like to access. If you agree to let your app access your spreadsheet, click Accept (Figure 1-11). Remember, when you build apps that other people use, they will also see this screen.
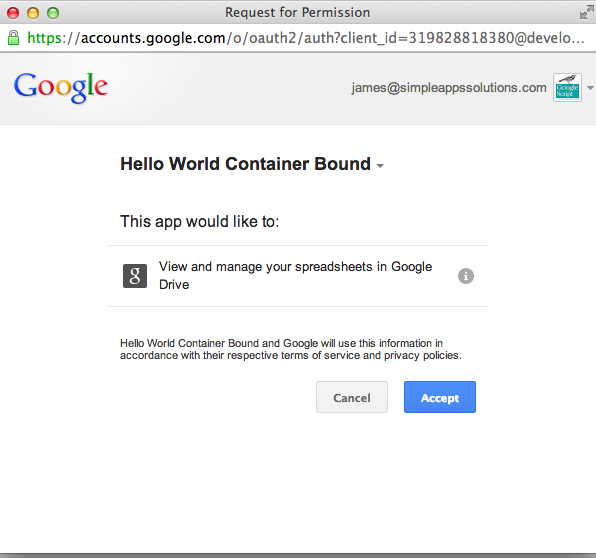
Figure 1-11. Granting access
Tip
Google is always working to make the authorization process better, so in the future you may not need to go through as many screens asking you the same questions.
A status message will appear at the top of the editor letting you know the script is being run (Figure 1-12).

Figure 1-12. Script is running
Once the run operation completes, switch your browser window to the spreadsheet, and you will see a pop-up window that says “Hello World” (Figure 1-13).
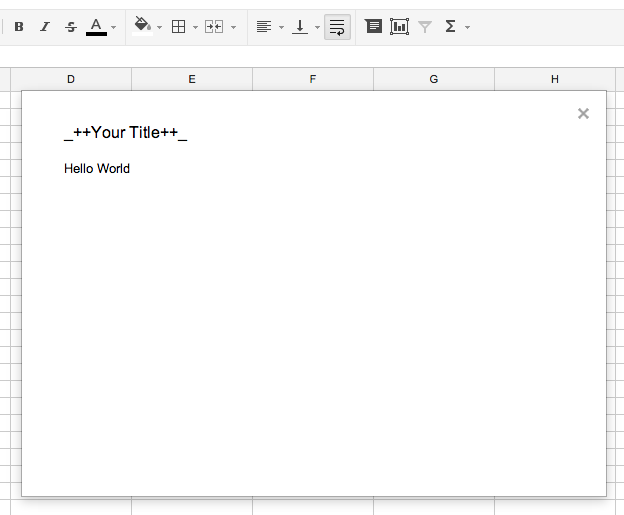
Figure 1-13. “Hello World” spreadsheet
The HTML Service
If you remember, there was a warning a few pages back that said the UiApp Service is not the direction Google is going in. Well, let’s now learn the new way we build UIs in Google Apps Script. The rest of the book will focus mainly on the HTML Service, so please take the time here to understand the components and how they work together.
We could redo the UiApp spreadsheet example from before, but I don’t want you to get bored. I also want to show you one of the other new features: the sidebar in Docs. This example will require a Google Doc, so go ahead and create a new doc in Drive. Next, click “Tools” and select “Script editor.”
Replace the default code with the following:
function helloWorldHtmlService() {
  var ui = DocumentApp.getUi();
  var html = HtmlService.createTemplateFromFile('sideBar').evaluate()
      .setTitle('Sidebar Example').setWidth(300)
      .setSandboxMode(HtmlService.SandboxMode.NATIVE);
  ui.showSidebar(html);
}
The HTML Service is, just as it says, built using HTML. Normally when you are working in Google Apps Script you are using .gs (Google Script) file types to write your code. Now you can also write standard HTML files that use the common things you would find on any modern web page, like jQuery and CSS. To create an HTML file, click File and select New, then “Html file” (see Figure 1-14). You will be asked to name your file. Name it “sideBar,” as this is the file we are referring to in the code.gs file.

Figure 1-14. Creating an HTML file
For this example we will use the basic structure of a web page, including head and body tags. Copy the following code into the new sideBar.html file:
<html>
  <head>
  </head>
  <body>
    <div>Hello World</div>
  </body>
</html>
The result is two files of the types .gs and .html (Figure 1-15).
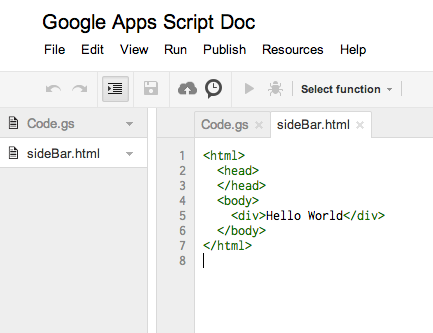
Figure 1-15. Two files
Click the “Save” button and switch back to the code.gs file by clicking its tab. Now run helloWorldHtmlService. Once the script completes, switch to the Document tab in your web browser to see the new sidebar open, as shown in Figure 1-16.
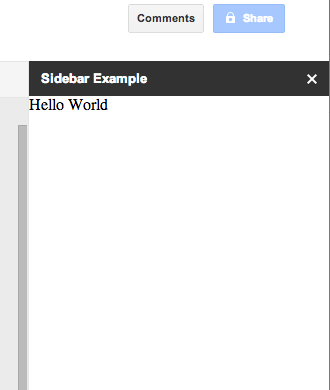
Figure 1-16. The amazing sidebar
Diving into the HTML Service code
Now that you see how it works, let’s break down the components so you can understand them. In the code.gs file we have used the custom function helloWorldHtmlService to wrap the code in; you can name these functions whatever you like within the JavaScript naming rules. Several other functions have names that are specific to Google Apps Script. I want to stop for a second to mention doGet, which is used to load web apps after you publish them. More on that later.
Warning
The function names doGet, doPost, onEdit, onInstall, and onOpen are special, reserved names and should not be used as names of any custom functions of yours that do not perform these specific operations.
Next we will need to get the document, so we can use the DocumentApp Service to work with the sidebar or dialog windows:
var ui = DocumentApp.getUi();+ We use the method +getUi
The DocumentApp UI object is saved in the variable ui so we can add stuff to it.
The next long line is where we load up the HTML file sideBar.html. I have added several methods to set the width, give it a title at the top of the page, and force SandboxMode, which will make the UI load faster:
var html = HtmlService.createTemplateFromFile('sideBar').evaluate()
      .setTitle('Sidebar Example').setWidth(300)
      .setSandboxMode(HtmlService.SandboxMode.NATIVE);
The HTML Service has two different methods of displaying the content from your HTML file, which we cover in “It Starts with doGet”.
The last part is where we add the rendered HTML to the document UI that we stored earlier in the ui variable. The showSidebar method also opens the sidebar in the document:
ui.showSidebar(html);
Hello Web App
The second type of UI application is referred to as a web app because the UI is accessed from a special URL hosted in Google’s cloud. There is no need for a spreadsheet or document container to use the web app, but you can build this type of UI in a container or in any of the Google services where the Script Editor is available. The URL can be made public, allowing DNS mapping to your domain; for example, http://Your_Great_App.domain.com.
Time to build your first web app!
Go to Google Drive and click the “Create” button. In the Create menu click the “Script” icon (Figure 1-17).
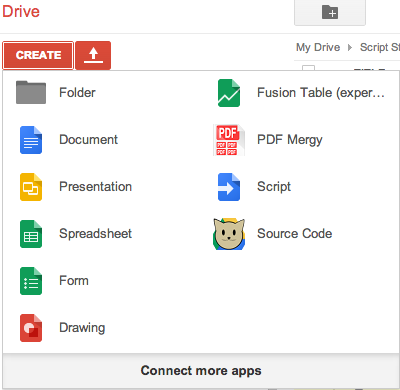
Figure 1-17. The Create menu
Note
You may not see the Script icon in your Create menu. In this case, click the “Connect more apps” button at the bottom of the menu and add it.
After the Script Editor opens, replace the myFunction code with:
function doGet() {
  var html = HtmlService.createTemplateFromFile('index').evaluate()
      .setTitle('Web App').setSandboxMode(HtmlService.SandboxMode.NATIVE);
  return html;
}
The first difference from the container version is that we must have a doGet function for Google to grab when the special Google URL for our app is loaded in a browser. This is analogous to the entry point you might use in GWT. doGet is the starting point for loading visible elements in the web app UI.
Now click “File” and select “New,” then “Html file.” You will be asked to name your file. Call the file “index” and insert the following code:
<html>
  <head>
  </head>
  <body>
    <div>Hello Web App</div>
  </body>
</html>
Now save both files, and let’s get ready to publish.
Publishing options
In the Script Editor, click Publish and select “Deploy as web app.” The “Deploy as web app” dialog opens (Figure 1-18).
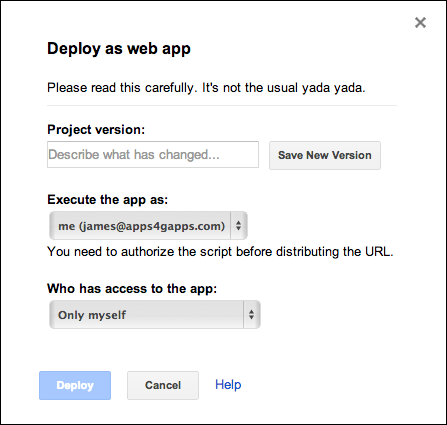
Figure 1-18. The “Deploy as web app” dialog
Because this is the first time you have published this script, you will see a “Product version” box. You don’t need to type anything in the box, but you do need to click the “Save New Version” button to set the first version. The next time you come back to this menu, this section will be a drop-down selection.
Note
The next time you publish this app, you will need to save a new version by going to File and clicking “Manage versions.” Versioning will be covered in Chapter 3.
There are a few important choices here. “Execute the app as” allows you to select how the app runs: as you or as the person running the app. You’ll have to weigh the options to decide which is best. If you’re building apps that you will distribute to others to run for enhancing their Google Apps, then you will want your app to run as them and access their data. On the other hand, you might want the users to do something like enter values on your spreadsheet from a form UI but not have access to the spreadsheet itself. When the app runs as you, it accesses your data. Unforunately, it’s one way or the other, and if your app needs access to both your information and the user’s… well, it gets a bit more complex. Don’t worry—we will cover how to handle this later in the book.
For this example you can leave the execution setting as yourself.
Warning
The “yada yada” Google refers to is a serious warning. When you build a standalone application, it will run as you and it will have access to anything you have given it permission to see. For example, be careful not to publish the contents of your email inbox to everyone on the Web.
Now that you know how the app will run, you will need to set who can use it. These settings are similar to what you expect to see in most Google services. Note that your choice applies to the web app, not the script, which is set from the blue button in the Script Editor. The setting “Anyone, even anonymous” will allow your app to run without the user signing into a Google account. If your app is just showing text or running as you this may be a good choice, but it is not going to go well for the user if your app accesses her Google Drive. Be careful to think through these two settings and what your app needs to do; but don’t worry, you can change them at any time.
Leave the selection set to “Only myself” and click the “Deploy” button. Now for the drumroll: a new window pops up (Figure 1-19).
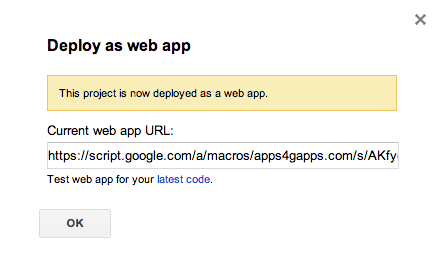
Figure 1-19. Getting the current web app URL
This box contains the current web app URL, which will be where you can send all your friends to see the great things you’re learning. This is what we refer to as the production link, because it will always be running the version you set in the previous window. If you look just below the box you will see a “latest code” link, which opens a URL that ends in /dev. This is the development version and reflects the code as it is in the editor every time you save. You will use this link a lot, because saving a new version and republishing every time you made a change would drive you nuts!
This special URL is for the page where the app is being hosted on Google’s servers. If you forget it, simply open the Publish dialog and copy it again. Click OK and open a new tab in your browser. Paste the URL into the address bar and load the page. You should now see your app displaying the text from the HTML you created earlier (Figure 1-20).
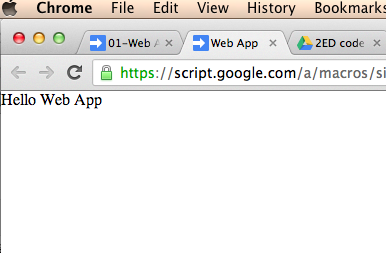
Figure 1-20. First HTML Service UI
Congratulations! You have just created your first Google Apps Script UI web app. Not much of an “app” yet, but as you can see, it takes very little effort to get an application pushed out to a web interface. You might feel tht you have missed a few steps here, which can be a good thing. For starters, you did not need to set up Apache, or figure out how to FTP to a web server somewhere to upload files. For that matter, you didn’t need to purchase and install a Web server or buy a domain name. Google Apps Script lets you write your application entirely on the web and then takes care of the rest of the details. I don’t want to say it gets easier from here, but this is the foundation. After this, the functionality of providing a service has more to do with adding div tags and filling them with data; there is no more that needs to be done to create the UI service or web page. Maintenance, access, and version tracking are integrated, which means you can focus on the code.
Hello, Google Sites
To this point, we’ve been using Google Docs to work with the Script Editor and create UIs. However, the editor is also available in the Google Sites service, allowing UI scripts to be inserted as gadgets appearing on the pages in your sites. This is tremendously exciting for Google Sites users because it means having the ability to create complex interactions that would normally require code hosted on a server somewhere else. For example, a business could feature products with color options that the user can change to see a different look, an HR department application might allow training signup pages that bring back live calendar results, or a school could host an educational game for students. These are just a few examples, but the options are virtually limitless. Chapter 5 is about making gadgets for Google Sites in Google Apps Script; for now let’s focus on the basics.
First you are going to need a Google Site, then go and click that red “Create” button on the left side. Now name your site and click once more on the “Create” button. Voilà, you have a site.
Google Apps Script UIs run as gadgets in Google Sites, and you can even write and manage the code from within the site’s management console. In your site’s page, click on More and select “Manage site.” In the left-side menu, click “Apps Scripts” to open the Script Manager, as seen in Figure 1-21.
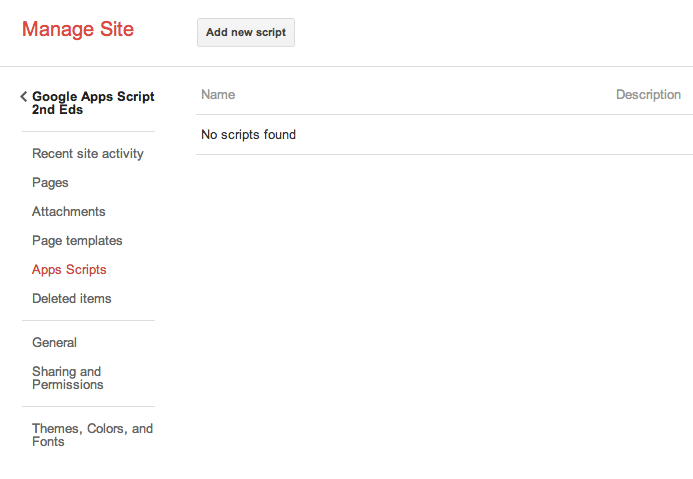
Figure 1-21. Script Manager window in Sites
Clicking the “Add new script” button opens the Script Editor you have seen all along. Go ahead and name your script “Script Gadget,” then paste in the following code:
function doGet() {
  var html = HtmlService.createHtmlOutput('<h2>Hello World</h2>');
  return html;
}
Go through the deployment process described in “Publishing options”, and you’ll be ready to add the gadget to the home page.
Go over to your Sites page and click the “Edit Page” button. Now, from the Insert menu choose “Apps Script” to get the script chooser menu (Figure 1-22).
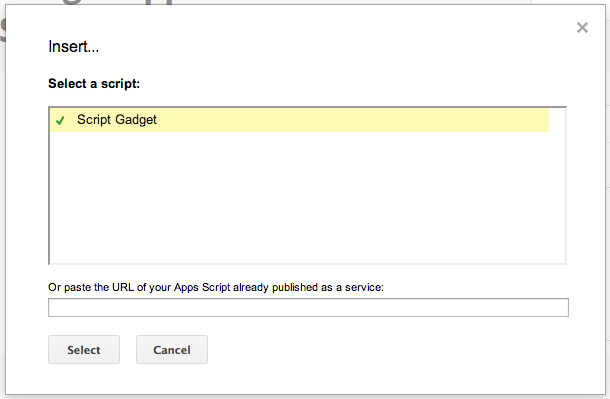
Figure 1-22. Selecting a script
Click your “Script Gadget” file and then the “Select” button. There are some options next, but you can pretty much skip through three “Save” buttons to get back out to your home page. After a few seconds your UI will display.
Note
You can also use any published UI as the URL for the gadget by using the box at the bottom of the Insert window.
Web App Versus Container-Bound
One of the most exciting features of the HTML Service is that it can run all by itself without the need of a container. This is accomplished by publishing the script, which creates an access point through a special Google URL. There are several options when publishing, such as restricting access to just you or opening up the app so anyone visiting the URL can run it. Publishing does not, however, allow visitors access to your code; that is controlled by the sharing settings in the Script Editor or container if publishing from there. This means you can create your application and the code will stay safely secured.
Warning
One important thing to remember is that a script running as a published web service can run as you and will have access to the services to which you have granted access. Therefore, if your script lists all the emails in your Gmail Inbox and you make it public, anyone visiting the URL will see your Inbox. Settings are also available to make your script run as the user of the app. Just make sure you have the right settings before publishing.
Running the script as your account can be a benefit because you can set the spreadsheet sharing to limit access and then control what data a UI viewer sees while still allowing input into the spreadsheet. There will be more on this concept later when we start putting together real-world apps in Part II.
One limitation to having the script run as you, the creator, is that you will not be able to directly access a user’s account from the built-in classes. For example, if your application needs to access the user’s Google Contacts, it will not work that way. You don’t have that user-to-user access in Google Apps, so it does not work in Google Apps Script either. Later in the book we will cover how to handle this problem using multiple scripts that talk to each other.
While I present these differences between the styles as hurdles, there are some very good reasons to have access restricted in this way. Fortunately, these security features don’t limit us in building apps, but they add certain complexities that need to be considered.
Up and Walking
Here we are at the end of Chapter 1, and a lot of ground has been covered. We started with a description of where to find the Google Script Editor and what one might use it for, then progressed on to creating a new script. After that, you learned how to make your UI appear integrated into a Google Sheet, next a sidebar in a Google Doc, and lastly as an independent web page. Wow, that’s a bunch of new stuff, but you should now have your feet under you and be able to find your way around the Google Apps Script service.
In Chapter 2, you will continue mastering Google Apps Script by learning about helpful ways to arrange your development environment and how to debug UI code.
Get Google Apps Script, 2nd Edition now with the O’Reilly learning platform.
O’Reilly members experience books, live events, courses curated by job role, and more from O’Reilly and nearly 200 top publishers.

