Netduino projects consist of up to three types of components—actuators, sensors, and microchips:
Actuators are things that do things (act). Some examples of actuators are LEDs that illuminate, motors that spin, and relay circuits that turn things on and off.
Sensors are things that measure (sense). Some examples of sensors are light sensors (photocells), temperature sensors, and pushbuttons.
Microchips (also known as integrated circuits or ICs) are tiny computer chips that have specialized functions. Some examples of microchips are shift registers (which allow you to hook up even more actuators and sensors), wireless networking chips, GPS chips, and digital temperature sensors.
There are hundreds of thousands of components that can be connected to a Netduino. You can find them online or at an electronics shop. You can even scavenge them from discarded electronics.
But sometimes it is nice to have these components pre-assembled so that you can focus on the logic of your app rather than the details of the components. For this reason, there are a number of expansion shields available for Netduino.
There are hundreds of shields available for Netduino. Some shields provide the circuitry needed to power motors. Some shields provide wireless networking, GPS location data, or sound capabilities. Other shields are project shields, which contain all the components needed to build your own robot, alcohol sensor, video game console, or other specialized project.
Note
There is a large community of artists and microcontroller hackers who use a platform called Arduino. Netduino has been specifically designed to be electrically compatible with both Netduino shields and most Arduino shields. If in doubt, just ask the shield vendor for sample Netduino code.
Some Netduino users build projects by using pre-assembled shields, by plugging electronic components directly into a Netduino, or by connecting a Netduino and components to a breadboard using pre-cut wires. Many Netduino users pick up a soldering iron and assemble shields and projects with wire and solder. Both are fairly easy to do and many users do both.
Note
If you’ve never soldered before, try it. It may take a few attempts to be proud of your solder joints, but it’s not hard and there are plenty of videos and resources online (such as MAKE’s Skill Set: Soldering; http://blog.makezine.com/2011/01/06/skill-set-soldering/) that make it easy to learn how to solder well.
Here are examples of a few expansion shields. Some come pre-assembled. Some require assembly (soldering). Also, check out http://shieldlist.org for a large list of Arduino-compatible shields, most of which are electrically compatible with Netduino.
Several digital pins on the Netduino can generate signals to specify the speed of motors (or the position or an arm moved by a servo). Digital pins can only provide the speed or position signal though; they don’t drive enough current to power the actual motor.
A motor shield takes care of this for you by either amplifying the digital signal with another power source or by providing external power to the motor while letting the Netduino provide a separate digital control signal.
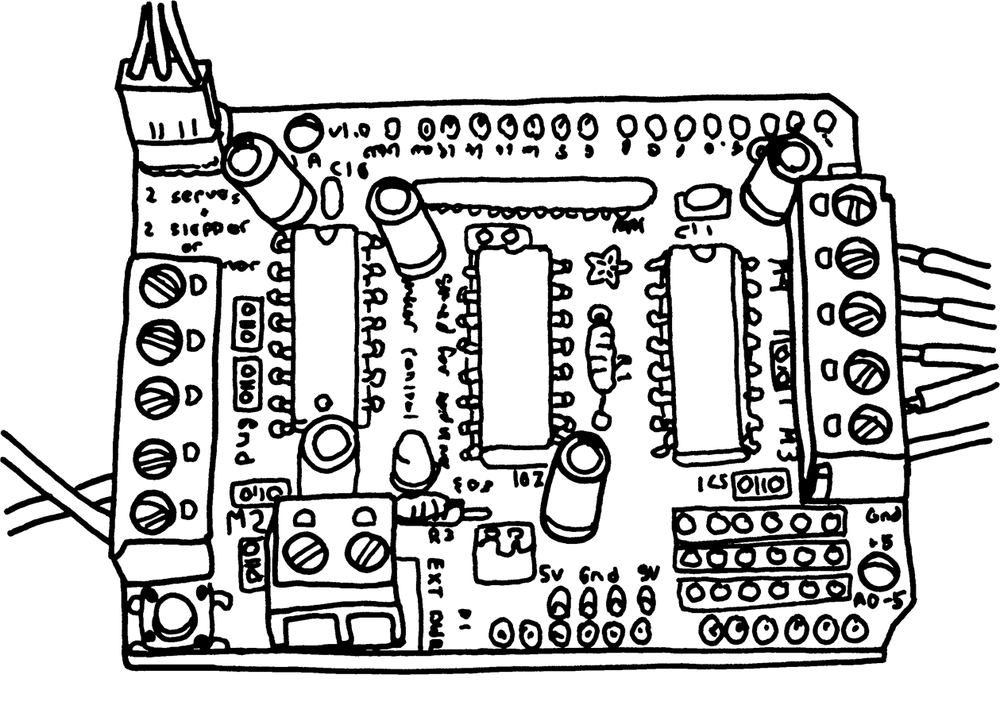
The Adafruit MotorShield, shown in Figure 4-1, requires some assembly (soldering). It’s available from the Maker Shed at http://www.makershed.com/product_p/mkad7.htm. Motor shields are also available pre-assembled from other vendors.
Note
Many servo motors can be operated without a motor shield. That’s because they have built-in circuitry to convert digital signals into angular position (standard servos) or rotational speed (continuous rotation servos). You can connect the Netduino directly to the servo’s control wire, and provide power separately to the servo. You’ll learn all about servos in Chapter 7.
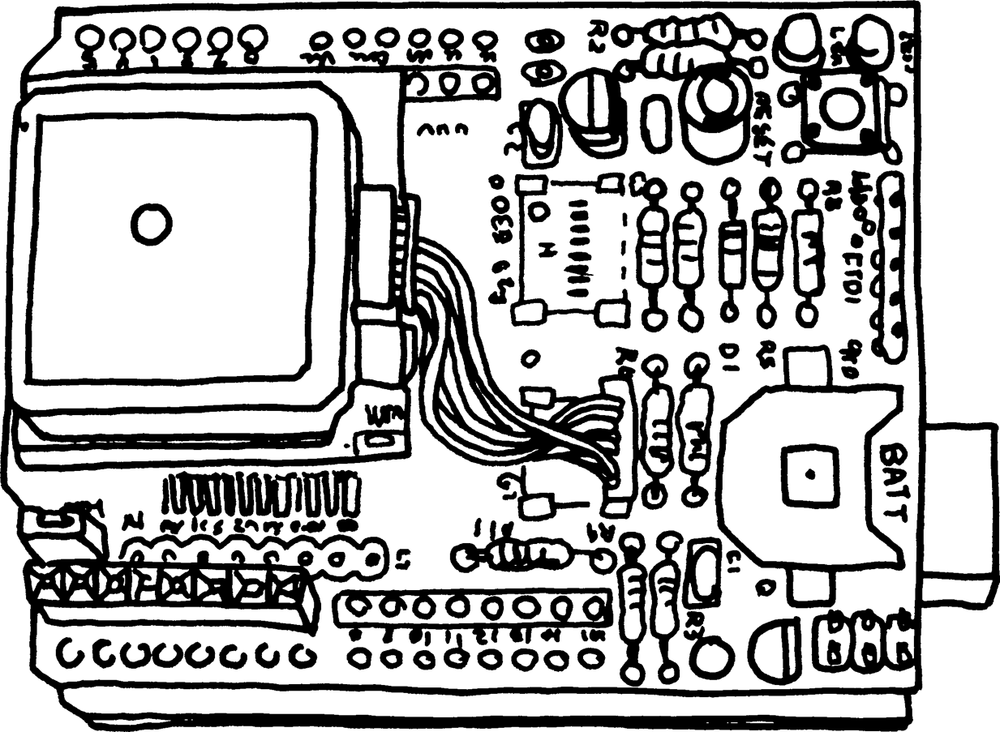
When building a project with wheels or when logging data while you’re in motion, knowing the current location can be very useful. For these scenarios, you can use a GPS shield (Figure 4-2, available from http://www.adafruit.com/products/98) to provide a stream of accurate location data. Netduino community members have built both simple and sophisticated GPS parser code so that you can just focus on the location updates instead of worrying about the particulars of GPS’s NMEA data format. For an example, check out Bob Cravens’s GPS Using the Netduino post at http://blog.bobcravens.com/2010/09/gps-using-the-netduino/.
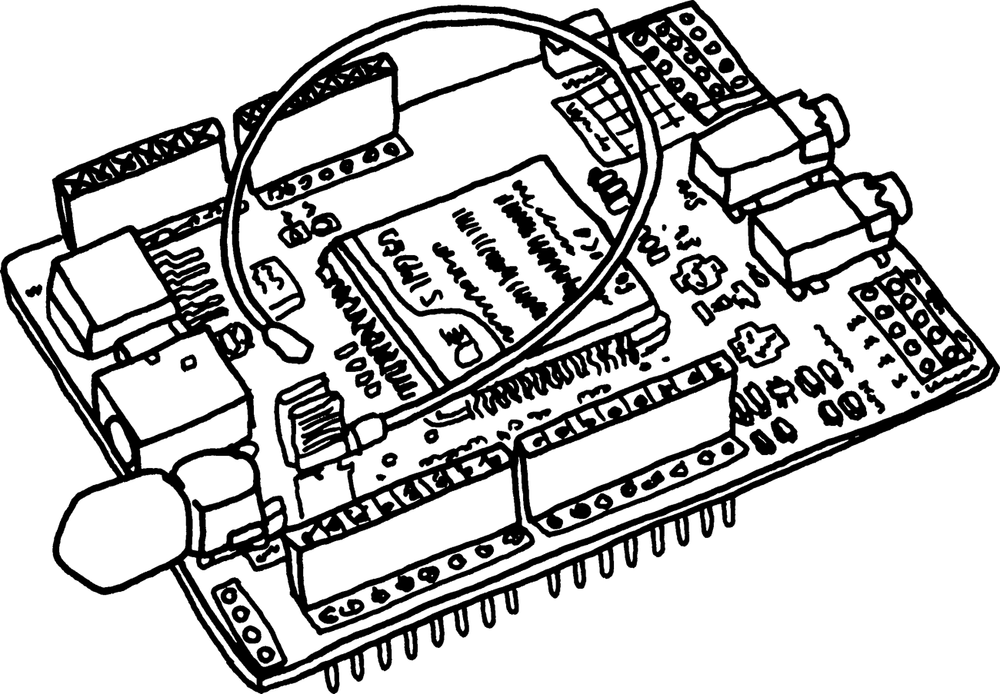
It’s often useful to connect your Netduino to a wireless network. For those times, pick up a WiFi-compatible shield or a cellular shield (such as Seeed Studio’s, shown in Figure 4-3). Sample code for these is available in the Netduino community (for example, see http://forums.netduino.com/index.php?/topic/3247-seeduino-gprs-gsm-shield/).
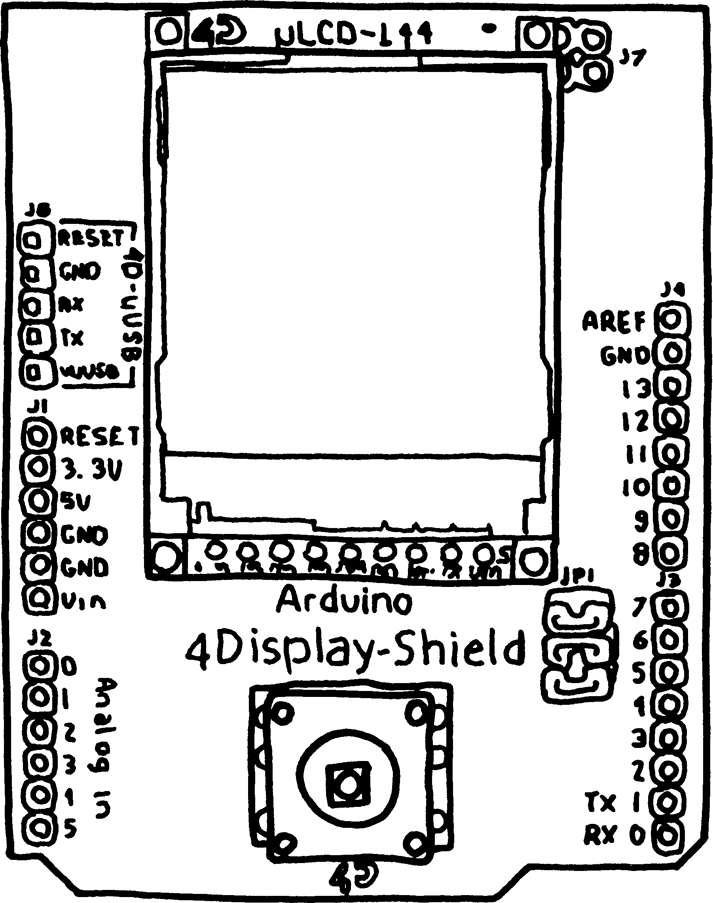
For projects that generate lots of data and deserve a rich graphical display, there are also display shields for Netduino. Figure 4-4 shows a display shield from 4D Systems (http://www.4dsystems.com.au/).
Get Getting Started with Netduino now with the O’Reilly learning platform.
O’Reilly members experience books, live events, courses curated by job role, and more from O’Reilly and nearly 200 top publishers.

