Chapter 1. Firefox Basics
Hacks 1-10
Firefox is a software application for interacting with the Web. This chapter gets you up and running with Firefox. You probably know how to surf the Web already. This chapter is a sort of boot camp for the Firefox user interface. You’ll learn where all the basic knobs and levers are. You’ll also see many interesting nook and crannies. There are no significant programming tasks in this chapter; it’s all just learning to fly.
Get Oriented
Before starting our journey, there are a few things you need to know: how to find Firefox files, how to install an extension, and how to set a preference. You don’t need this information to read a web page, but it’s vital for most of the hacks in this book.
Finding Firefox Files After Installation
After installation, Firefox puts its files in two important directories. The first is the install area , also known as the application area , which gets the general-purpose bits, such as the Firefox programs themselves. The second is the profile area , which gets user-specific information, such as bookmarks. Table 1-1 lists the default locations of these two areas on different operating systems.
Operating system | Default install area | Default profile area |
Single-user Windows 95/98/Me | C:\Program Files\Mozilla Firefox | C:\Windows\Application Data\Mozilla\Firefox |
Multi-user Windows 95/98/Me | C:\Program Files\Mozilla Firefox | C:\Windows\Profiles\
|
Windows NT 4.x | C:\Winnt\Program Files\Mozilla Firefox | C:\Winnt\Profiles\
|
Windows 2000 and XP | C:\Program Files\Mozilla Firefox | C:\Documents and Settings\
|
UNIX and Linux | /usr/bin/firefox, /usr/lib/firefox(or a custom location) | ~/.mozilla/firefox |
Mac OS X | ~/Desktop/Firefox.app/Contents/MacOS/ (if installed on the desktop) | ~/Library/Application Support/Firefox |
Feel free to have a (careful) look around in these directories.
Installing an Extension
Extensions are small enhancements to Firefox that are added optionally and separately to the main browser install. Just as plug-ins, such as Apple’s QuickTime, enhance the display of web pages with special content, extensions enhance the display of Firefox’s user interface with extra commands and extra windows. You install an extension when you need an extra feature.
You can install extensions from the official http://update.mozilla.org web site or from any web site that offers a .xpi file. Such files almost always hold one extension each.
If you choose to install an extension, you are acting like a power user rather than a beginner, so you have to use your judgment to decide what extensions will be useful to you. It’s no use complaining that Firefox is too complicated if you have 10 or 20 extensions installed. Just remove them and resimplify your life.
Installing from update.mozilla.org
The Advanced Search Button extension (found in the Search Tools category at http://update.mozilla.org) is a harmless extension to experiment with. Here’s how to get it.
After browsing to it on the update site, click on the matching install link. Sometimes there’s a brief pause, and then Firefox presents an acknowledgement window. After another brief pause, Firefox enables the buttons in that window, asking you whether to proceed. In this case, go ahead.
Warning
At this point, most extensions are still unsigned, just as the dialog box reports. Although the update site has excellent trust credentials, the extension itself has no signature. Extensions have some credentials, though, because they’ve been through some checks before the update site makes them available. Ultimately, though, it’s up to you to believe whether the update site and the extension provider are persons of goodwill. This is true for any download.
Once the user agrees, Firefox downloads and installs the extension. If you choose Tools→Extensions, you’ll see it there in the list, but disabled and unusable (click on it and everything is grayed out). Shut down Firefox completely and start it up again. Again, look under Tools→Extensions. You’ll see that the extension is now enabled and ready to use.
The sample extension, Advanced Search Button, doesn’t change the Firefox user interface much at all. All it does is offer you a new toolbar icon. Choose View→Toolbars→Customize... to see the list of icons available. Scroll down and you’ll see there’s a new ASB icon there. Drag it to the navigation toolbar with the mouse. Finally, close the icon window. You can now click on the ASB button or the small triangle next to it. If you put a word in the search box and click the ASB button, the Advanced Search Button extension will search for that word in the currently displayed page.
Installing from elsewhere
By default, the Mozilla Update site (update.mozilla.org) is the only trusted web site for extensions. If you attempt to install an extension from another web site, Firefox will complain and ask you to provide extra permission. The complaint appears as a yellow information bar at the top of the page. Figure 1-1 shows this complaint for the version of the EditCSS extension that is available at http://editcss.mozdev.org.

If you click the Edit Options... button, a dialog box appears (shown in Figure 1-2), where you can add the web site to a whitelist of trusted sites. That has to be done at your discretion.
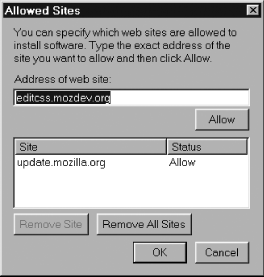
If the web site is added and the dialog box acknowledged, you’re then sent back to the extension installation page. You have to click the extension’s link a second time to restart the installation process, with trust now in place. From here, installation proceeds as explained for the Mozilla Update case.
Setting a Preference with about:config
A preference is a user choice that affects how Firefox runs. Firefox has hundreds of preferences. The Firefox Options Dialog box, under Tools→Options (Windows), Edit→Preferences (Unix/Linux), or Firefox→Preferences (Macintosh) is the way to set common preferences. In general, though, the page shown by the special about:config URL can be used to set any preference. This process is described in detail in [Hack #23] , but you need that information early. Here’s a sneak peek.
All you really need to know is that if you right-click (Command-click on a Mac) in the list of preferences, you can change the preference under the mouse or add a new one. To change an existing preference, choose one of the following items from the context menu:
To add a new preference, choose the New context menu option and follow these guidelines:
Choose the type of information the preference must hold. Use Integer for numbers and Boolean for preferences that are
trueorfalse. Otherwise, use String.Fill in the preference name and value in the small windows that appear. Type carefully, because there is no syntax checking.
After setting the preference, it appears in bold (unless you reset it). The about:config list is sorted alphabetically, so you might have to scroll a bit to see what you’ve added. Preference changes take effect immediately in most cases.
That’s all the warm-up you need. Now, let’s hack.
Ten Ways to Display a Web Page
Displaying a web page is like painting and hanging a picture: there are plenty of options.
Web pages that display only one way are called printouts . Firefox lets you display and view the content of a web page in a number of different ways. You also get to choose decorations for your windows. This hack shows 10 different ways you can display web content in Firefox.
Normal Browser Window
By default, web pages appear inside a frame with a menu bar and toolbars above and a status bar below.
Those bars provide user control and feedback. The whole browser window
is a single XML document written in Mozilla’s XUL dialect of XML. The web page appears inside an XUL
<iframe>. Scripts running
inside the web page can’t reach out into XUL, so those bars are mostly
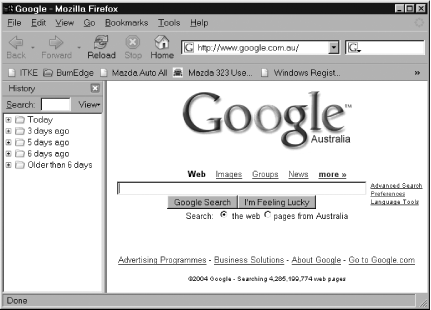
untouchable. Most bars can be disabled from the View menu. Figure 1-3 shows a normal
Firefox window with the sidebar made visible.
Source Code Window
The source code window is for web developers and hackers
only. Choose View→Page
Source or press Ctrl-U to display the source code for the current
page. If the page is a <frameset> page, you see only the
frameset definition. You can change line-wrap and syntax-coloring
options from the View menu in the new window.
window.open( )
Web pages can contain logic that opens other windows (usually
pop ups). Web designers typically do so with the infamous window.open() scripting feature. (Technically, this is a DOM 0
browser feature available from JavaScript only.) These new windows can
be opened with specific menu bars and toolbars disabled. Security
hobbles prevent some uses of this feature.
If you mitigate security restrictions, then everything is
possible. See Rapid Application Development with
Mozilla by Nigel McFarlane (Prentice Hall PTR) for a more
detailed treatment of Mozilla and Firefox’s window.open() options. See
JavaScript: The Definitive Guide by David
Flanagan (O’Reilly) or any good scripting web site, such as Internet
Related Technologies (http://www.irt.org), for the features of
window.open() that are supported by
all browsers.
Full Screen or Kiosk Mode
You can expand a web page window to fill your entire screen.
Tip
Viewing the page in Full Screen mode won’t help with readability. For that, you also need to increase the text size using the View→Text Size→Increase menu option.
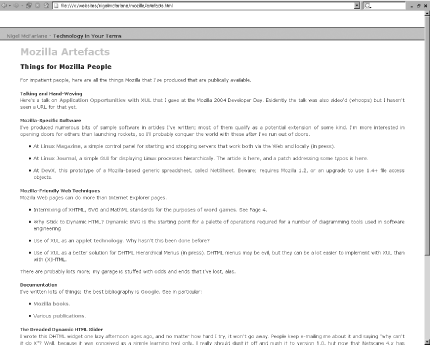
You can take up all the screen real estate several different ways. The simplest is to click the operating system’s Maximize button on the titlebar. This method, however, retains all toolbars and the titlebar. To get more space, press F11 (or choose View→Full Screen) for Full Screen mode, which removes nearly all bars. To get rid of the location toolbar as well, hide it using the View→Toolbars menu before pressing F11. Press F11 again to toggle back to normal. Figure 1-4 shows a web page viewed in Firefox’s Full Screen mode.
For a robust kiosk mode (full screen with no other display options)
that has most Firefox keyboard and mouse commands disabled, you need
to hack the chrome ugly, as described in Chapter 7. You can’t start kiosk
mode from the command line. You can start it with a window.open() call from a secure web page.
The following feature string is suitable for a display that’s 1024x768
pixels in size:
"chrome,modal,resizable=false,alwaysRaised=true,width=1024,height=768"
The alternative to window.open() is intermediate scripting of
Mozilla’s XPCOM components using the chrome system.
Chrome-Free Windows
You can display an HTML or XHTML page free of any browser
baggage. To do so, you need access to a command line, such as a DOS
Box or cmd box under Windows, or a
terminal emulator window (like xterm) under Unix/Linux.
On Windows, you need to follow these preparatory steps. Start a DOS Box from the Start menu, usually via Start→Programs→MS-DOS Prompt. Then move to the Firefox install area with these commands:
               C:
cd "Program Files"
cd Firefox
Next, on all operating systems, just invoke Firefox with the required web page like this:
firefox -chromeURL
The equivalent window.open()
feature string is "chrome“.
Print Preview
Before printing your page, you can see what it will look like. Firefox prepares pages for printing using Cascading Style Sheets (CSS) styles. To see a preview, choose File→ Print Preview and play with the toolbar. Firefox thinks briefly before displaying the preview.
User-Customized
Firefox support for CSS is designed to give the user control of page appearance. If you know CSS, you can exploit the following two files in Firefox:
- userContent.css
For styles that affect the appearance of CSS-styled pages that appear in a normal browser window. These styles work on HTML, XHTML, MathML, and CSS-styled generic XML documents.
- userChrome.css
For styles that affect the appearance of the Firefox chrome. That includes the toolbars, scrollbars, dialog boxes, menu bars, context menus, and other stuff that Firefox drapes around the displayed page. Since these styles are written using Mozilla’s XUL tag set, userChrome.css provides styling for all Firefox XUL content.
For Microsoft Windows, there are some sample files called userChrome-example.css and userContent-example.css included in the Firefox install. They’re buried deep inside the profile area. For all platforms, it’s best to experiment with harmless styling changes (such as color changes) before proceeding to complex modifications of these files.
Once constructed, these files should be put in the
chrome directory of your Firefox profile. Restart Firefox to
see any and all effects. Don’t forget to use the CSS imperative
!important if you want to guarantee
that your styles will override any others at work.
You can make small, generic modifications to suit all of your web browsing, or you can build a custom skin for a web site that you visit frequently. For the latter case, you need Firefox 1.1. You can then write web-site-specific CSS styles using this Firefox-specific syntax:
/* one page */
@-moz-document url(http://www.example.com) { color : red; }

/* all sub-pages with this URL as stem */
@-moz-document url-prefix(http://www.irt.org/articles/) { color : red; }

/* all pages at this domain */
@-moz-document domain(mozilla.org) { color : red; }
DOM Hierarchy
For HTML and all XML dialects supported by Mozilla, you can deconstruct a given web document into its pieces. These pieces appear as a sideways tree of tags and tag content. The resulting display is much like that of the Windows Explorer or the Macintosh Finder. Technically, the contents of the tree are W3C DOM nodes. That means tags and tag content.
To see this tree, you need to start the DOM Inspector by navigating to Tools→DOM Inspector. The DOM Inspector is an extension (an added feature) that comes as a bonus with the standard Firefox install. Initially, the DOM Inspector displays the web page of the window from which you started the Inspector. To view any other page, just type a URL into the top text field and click Inspect at the right. The new page appears below. In all cases, in the main pane on the left, you can drill down through the document, revealing its structure. [Hack #53] and [Hack #76] ellie describe use of that tool.
Debug-Enabled
A web page can be displayed so that it is managed by a script-debugging tool. This is a feature designed for programmers. To use this display, install the JavaScript Debugger extension.
To add the JavaScript Debugger, go to Tools→Extensions. In the resulting dialog box, click Get More Extensions. That opens up a web page at the central Mozilla Update web site (http://update.mozilla.org). In that new web page window, you can shop for free extensions. Click the category Developer Tools, scroll down to JavaScript Debugger and click on the install link. Follow the bouncing prompts, and when that is all done, restart Firefox.
If you want the debugger to appear automatically when a given page loads, just put this tiny bit of JavaScript anywhere in the page content:
<script type="application/x-javascript">
 debugger;
</script>
Chapter 5 provides many techniques for debugging Firefox, including use of this debugger [Hack #56] .
Splash Screens
You can display a web page as a splash
screen , but this is a harder effect to produce than the others
and requires intermediate Web programming. A splash screen appears
when a program first starts up and usually contains brand information.
For example, the Mozilla Application Suite, which preceded Firefox,
has a splash screen. Setup of a splash screen requires some hacking of
the chrome files [Chapter 7]
or of security arrangements [Chapter
2], so explore those subjects first. It also requires
scripting. To make such a splash screen appear, use this feature
string in a window.open() call from
JavaScript:
"chrome,centerscreen=true,height=200,width=150,titlebar=false"
These options are available only if all security is lifted
(e.g., from inside the chrome or from a signed and accepted URL). A
similar hack for ordinary browser windows is to calculate window size
from the window.screen.x and
window.screen.y properties and then
use a feature string like this:
"toolbar=no,location=no,personalbar=no,status=no,menubar=no,scrollbars=no, top=225,
left=300,height=200,width=150"
This alternative does not remove the titlebar or work around the Popup Manager. It is not guaranteed to remove the status bar either. Once you move into the world of Mozilla programming, many other page display options are possible, but that’s a more complex matter than quick hacks. Splash screens provide more than enough complexity for an introductory chapter like this.
Ten Ways to Navigate to a Web Page
There are a million ways to move from the current web page to the next one. This hack describes 10 such ways.
Here’s how to surf, Firefox style. Chapter 4 covers many ways to use extensions to increase the pleasure and convenience of surfing the Web. This hack explains what Firefox can do without modification.
Click on a Link
It’s not rocket science: left-click on a link, and the current page is replaced with the link’s page. If you right-click (Command-click on the Mac), you can open that new page in a new window or a new tab, or you can put the link itself into a bookmark or into the copy-and-paste buffer.
Click on a Bookmark Icon
Click any bookmark or bookmark menu item on the Bookmarks toolbar, and you’re off to the link that bookmark represents. Bookmarks are complex little beasties, though. See [Hack #3] for a way to get through your many bookmarks. See [Hack #33] if you want to become a bookmark power user.
Put Something in the Location Bar
You can type all kinds of things into the Location bar where the URL of the current page is displayed. If you start typing a URL, Firefox will auto-complete it, providing you with a drop-down list of candidates. Firefox can even complete an unknown URL for you if you press the right combination of Control, Shift, and Enter keys. Press Enter or click the Location bar icon to start the page fetch.
Pick Something from Your History
There are many history mechanisms beyond the big Forward and Back buttons. See [Hack #3] for an introduction to Firefox’s history features.
Copy and Paste
The standard Xerox PARC/Apple Macintosh cut, copy, and paste keyboard combinations are available in Firefox. They are Ctrl-X, Ctrl-C, and Ctrl-V, respectively. You can copy a URL from a non-Firefox application and paste it into the Location bar. (You can give that bar’s input field the focus by clicking on it.) You can also copy a link’s URL by calling up the context menu with the mouse. You can copy and paste that URL within Firefox or into another application.
Under Linux, if you use a multislot copy-and-paste buffer tool,
you can stick as many URLs into that set of clipboards as you want. To
copy URLs from a terminal emulator window under Linux, such as
xterm or gnome-terminal, just highlight the text.
There’s no need to explicitly choose Copy in this case. Paste into
Firefox as you normally would.
Caret Browsing
For people with poor sight and for those that prefer a
word-processing interface, a normal Firefox window can be made
caret-enabled. The caret symbol is the blinking vertical bar that suggests
an insertion point: |. Press F7 to
turn it on or off. While it’s on, you can navigate around the document
using the arrow keys or with the assistance of a screen reader that
relies on the caret. Just press Enter when the caret is over a link.
You can’t edit anything at the caret unless it moves into a text
field.
Drag and Drop
Firefox allows you to drag URLs around the main window. You can drag bookmarks from the Bookmarks toolbar to the location bar for opening or drag links in a displayed HTML page to the Bookmark or Location toolbars.
You can also drag plain text to the Location bar. To do so,
first display a web page that has a URL stated in plain text, not just
embedded in a link. The text might literally say http://www.yahoo.com. Highlight the text by
left-clicking and dragging across it until it’s all selected. Release
the mouse button, and then drag the highlighted text onto the input
field in the Location toolbar. The highlighted text appears in that
text field when you release the mouse, ready to be retrieved from the
Web. You can do this trick with non-URL text as well, but that makes
sense only if you have keyword bookmarks set up [Hack
#33] .
Use the Menu Bar
Lots of web pages and web sites are hidden behind Firefox’s menu system. The Go and Bookmarks menus provide immediate access to recent pages. The various File→Open options let you type in something useful. The Help menu options all provide locally stored web pages. The Tools menu leads to a set of dialog boxes and windows that let you interact with Mozilla’s support sites for themes, extensions, and plug-ins. Finally, there are a few hidden Easter eggs to discover. Technically, they’re not Easter eggs, because they’re well documented diagnostics that are important for web developers and other technical people. Try typing these URLs, just for starters:
about:buildconfig
about:cache
about:plugins
Switch Between Windows and Tabs
When you already have many pages displayed, it’s easy to toggle between them. You can cycle between whole windows with standard operating system features, such as Alt-Tab on Windows or panels under X11 on Unix. If you have activated tabbed browsing and several tabs appear in the current window, then just press Ctrl-Tab to cycle between them.
Use Accessibility Devices
Firefox’s accessibility to disabled people is improving all the time. Part of accessibility depends on web pages being correctly designed. If the correct design is in place, then accessibility depends on the features of the browser. Firefox provides basic accessibility options via the Alt and Tab keys (on Microsoft Windows). Once Alt is pressed, it’s possible to navigate the menu system using a simple and limited range of keystrokes (the arrow keys). Once Tab is pressed, it’s possible to navigate all the input widgets on the browser and in the currently displayed page. Both provide such simple access to the menu system and web forms that the disabled surfer doesn’t need to use a complex device like a mouse or even a keyboard.
Find Stuff
Search both the Web and the browser environment with Firefox.
This hack explains how to find the stuff you’ve forgotten, left behind, or yet to discover. It starts with local information in the browser and works its way out to searching the furthest corners of the Web.
Search a Displayed Web Page
You can search the content of a displayed web page. To do so, Firefox provides the Find toolbar. It appears at the bottom of the browser window, above the status bar. Figure 1-5 shows most of the features.
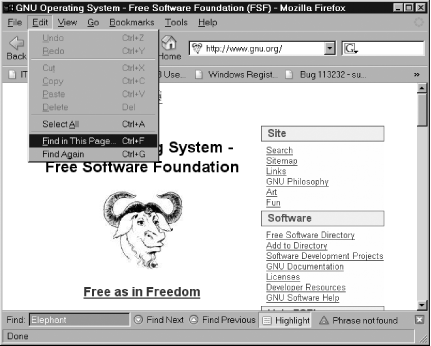
This toolbar is activated by the Edit→Find or Edit→Find Again menu options or by the Ctrl-F (Command-F on the Mac), Ctrl-G (Command-G on the Mac), or Shift-F3 hotkeys. Here’s a rundown of how it works:
The Find toolbar starts out disabled but gains the focus and the caret in the toolbar text field when you click on it.
Type a string and Firefox automatically begins searching the current page, starting from the page’s focused form field, or from the top of the page if no field is selected.
Firefox searches all frames but not all tabs. A security feature terminates searching if the page is too big to search in five seconds.
If nothing is found, the textbox goes red. “Phrase not found” appears, and a sound is issued.
If something is found, you can navigate between items with toolbar arrows or Ctrl-G (Command-G on Mac) and Shift-F3.
You can highlight found items with the Highlight toggle button.
Press Ctrl-F (Command-F on Mac) again and the current search string is selected for replacement. Dismiss the toolbar by clicking the small cross icon located at its right end.
The Find toolbar contains two searches in one. The default
search is the one just described, called Find As You
Type . It can also be activated with the forward slash
(/) key, or if there’s nothing
focused on the current page and you just start typing. The other kind
of search is called Find Links As You Type
. It can be activated with the single quote key (').
This alternate search scans only hyperlink text on the page. Use it to
find specific links on big pages crowded with links.
Search Web Page Source
You can also search the source code of a web page, something that was never possible in old Netscape browsers. View the page’s source by choosing View→Page Source or with the Ctrl-U (Command-U) hotkey. A new window appears. That window has an Edit menu with the options Find (Ctrl-F or Command-F), Find Again (Ctrl-G or Command-G) and Go to Line (Ctrl-L or Command-L). Choose any of these and a small dialog box appears to control your search. Figure 1-6 shows most of the available features.
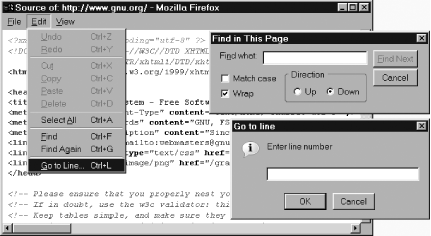
This searching system doesn’t use a Find toolbar, but it’s similar. It supports full content searching only and doesn’t support link searching. It does, however, support case-sensitive searches.
Search Your History
There are several ways to search your surfing history. Figure 1-7 maps out these features.

The most accurate search uses the Back and Forward buttons. Press the small, black down-arrow grippies that sit to the right of these icons. A drop-down list of the web trail for the current window appears. If you ever surfed up a blind alley, then reversed, and went forward in a different direction, the set of blind alley pages is lost from the web trail. Full URLs, form data, and scrolled position are all otherwise preserved.
For another way to search, try the Go menu. It shows the most recently viewed URLs across all windows’ session history . Only remote web pages are shown. Form posts and page scroll positions aren’t preserved. As you view more pages, older items are pushed off this menu. To increase the size of the session history, modify this preference [Hack #23] :
browser.session_history.max_entries /* 50 is default */
The History sidebar, displayed with View→Sidebar→History (Ctrl-H or Command-H), provides the broadest search. It records your global history (all the web pages examined in the last nine days). It searches the titles of those pages only—no title content, no match. Delete the search string to see the day-wise hierarchy of pages again. Hack these preferences to change the defaults:
browser.history_expire_days /* 9 is the default */
browser.history.grouping    /* "none", "day" or "site" */
Finally, the Location bar can be used to search recently visited web sites in your global history. Type any string into the location bar and suggested domain name matches automatically appear in a drop-down list below the text box. This is called auto-complete. You can’t search for path-specific bits of a URL until you’ve got the whole domain name (e.g., http://www.yahoo.com) right.
Search Your Bookmarks
Are you overflowing with bookmarks and can’t remember any of them? Open the Bookmark Manager using Bookmarks→Manage Bookmarks... and type something into the search window. This search examines the full URLs of all bookmarks and their descriptions. The descriptions usually match web page titles, unless you changed the titles when storing the bookmarks. You can also sort the Bookmark Manager’s view of your bookmarks from the View menu, which might be helpful. It’s almost a depth-first tree sort, though, which is a sophisticated sort. It takes a bit of getting used to. Try it.
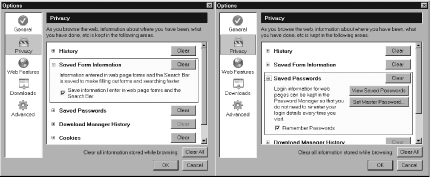
Search for Lost Logins
Typed your username and password into a web site and then forgot what they were? Firefox can help. Choose Tools→Options to bring up the Options dialog box. On Unix/Linux, it’s under Edit→Preferences. On Macintosh it’s under Options in the Application menu. Click the Privacy icon. Note the Saved Form Information and Saved Passwords items. Click each one’s expando (the small plus icon) in turn. Turn on the various options by clicking their corresponding checkboxes, as shown in Figure 1-8.
Visit a web page with a form containing at least one text box, fill it in, and submit. Google’s home page (http://www.google.com) is a good choice. Open a new Firefox window. Visit the page again. Left-click on the textbox twice. A drop-down menu appears, showing you the value you just typed. Pick the one you want.
Alternatively, visit a web page requiring a login. I log in at http://bugzilla.mozilla.org a lot (follow the login link). Use Firefox’s form completion to enter your username, and Password Manager automatically adds the password. Just click the Login button and you’re in.
Later on, you can review what you’ve saved. Back in the Options dialog box, under Privacy→Saved Passwords, click the View Saved Passwords button. In the resulting dialog box, click Show Passwords and Yes. Your passwords appear in plain text as an additional table column. Found them!
Search the Web
The Navigation toolbar includes a Search field on the extreme right. It uses the Google search engine by default. Type a keyword into the field and press Enter. Google replaces the current page with its search results. Alternatively, click on the small Google icon to see the other search engines installed by default; you can use any of them as well. Empty the Search field again and type a common letter, such as a. The Search box drops down a list of keywords starting with a that you’ve typed before.
Search for Firefox Preferences
Firefox has lots of preferences. Type in the URL about:config to see many (but not all) of
them. There are too many to understand all at once. Type anything into
the textbox labeled Filter: to
restrict the list to the ones you care about (try typing go). The set of preferences is marginally
different between Linux and Windows, but 99 percent of Firefox
preferences apply to all platforms.
Identify and Use Toolbar Icons
This hack explains the mystery icons that sometimes appear on Firefox toolbars.
It’s up to you whether you take advice or not. Firefox delivers a number of passive warnings and cautions to you in the various toolbars of the browser window. Here’s a rundown of what those things mean.
Tip
If you choose one of the many themes offered by Firefox’s Theme Manager, then all the icons will likely appear different. Their locations will be the same, though.
This hack describes only the Firefox-specific icons that are different from standard browser icons:
| This is the standard icon for a Mozilla Extension, Plugin, or Theme. Extensions are small add-on pieces of logic (or whole applications) that can be run or used as part of general web activity. If you have installed one or more extensions into Firefox, then something is going to work differently from the default behavior. |
| This icon sometimes appears at the bottom-right edge of the status bar. It tells you that the web page you’re looking at has an RSS feed that complements its normal HTML content. You can hover your cursor over the icon to see the status of the feed. Click on the icon to capture the feed as a set of Firefox Live Bookmarks [Hack #33] . See http://www.mozillazine.org for an example. |
| This icon sometimes appears at the bottom-right edge of the status bar. It tells you that the web page you’re looking at has alternate stylesheets. You can apply any of the stylesheets provided by clicking on the icon. |
| This icon sometimes appears at the bottom-right edge of the status bar. It tells you that the web page you’re looking at has blocked a pop up. Click on the icon to see details of the page blocked, or to alter pop-up-blocking settings. |
| One of these three icons sometimes appears in the top-right corner of the menu bar. They indicate that there is an update (a patch or new release) for Firefox or for one of the extensions or themes that you’ve installed. Beware that issues with color and accessibility might mean these icons have been changed by the time you read this. Each icon indicates a different severity. Red means that a security problem with your browser has been detected at the moment, and you should grab the recommended fix by clicking on the icon. The other severities don’t require any action, but it’s good practice to keep your browser fully up to date. That makes these icons go away. |
| A subset of these icons appears in the Mozilla Extension Manager and Theme Manager dialog boxes. From left to right, they stand for “uninstall from the local disk,” “update from the Web,” and “configure options for a given extension or theme.” Hover over the icons with the mouse to remind yourself what they’re for. |
| These icons sometimes appear on the Find toolbar at the bottom of the browser window. The first one indicates that your search has been unsuccessful. The second indicates that the search has just wrapped, which means you’ve just reached the bottom (or the top) of the web page and the find process will continue again from the other end. |
| These icons sometimes appear at the right end of the Location bar, where the
current page’s URL is shown. They can also appear at the right
edge of the status bar, at the bottom of the window. The
uncrossed icon appears when the web page you are viewing is
served up securely. That usually means that Secure HTTP
( |
Use Keyboard Shortcuts
Driving Firefox from the keyboard is both the same as and different from other browsers.
This hack shows you which keyboard moves come standard with Firefox. There are many extensions that modify the available set of keystrokes and key chords. You can also hack the keyboard set yourself in a number of ways [Hack #77] .
Many Firefox keyboard combinations are the same as those of Internet Explorer. In particular, menu navigation uses the same combination of arrow keys and Alt as most Windows applications, and navigation within text-editing fields supports the same keystrokes as most text editors (Ctrl-left arrow to move one word left, for example). Scrolling keys such as Page Up and Page Down work as you’d expect, too. Table 1-2 shows the major keys used by both browsers.
Key combination | Use |
Ctrl-A | |
Ctrl-C | |
Ctrl-D | |
Ctrl-H | |
Ctrl-I (and Ctrl-B) | |
Ctrl-N | |
Ctrl-O | |
Ctrl-P | |
Ctrl-R, F5 | Reload current page |
Ctrl-Shift-R, Ctrl-F5 | |
Ctrl-V | |
Ctrl-W, Ctrl-F4 | |
Ctrl-X | |
Ctrl-Y (and Ctrl-Shift-Z) | |
Ctrl-Z | |
Alt | |
Alt-D, F6 | |
Alt-F4 (also Ctrl-Shift-W) | |
Alt-Home | |
Alt-Left Arrow, Backspace | |
Alt-Right Arrow, Shift-Backspace | |
Delete | |
End | |
Esc | |
F11 | |
Home |
Firefox also has some unique keyboard combinations. Table 1-3 shows the common ones that don’t match Internet Explorer.
Key combination | Use |
Ctrl-hyphen | |
Ctrl-+ | |
Ctrl-0 (Ctrl-Zero) | |
Ctrl-Down Arrow | |
Ctrl-F, / | |
Ctrl-G, F3 | |
Ctrl-J (Ctrl-Y on Linux) | |
Ctrl-K | |
Ctrl- | |
Ctrl-S | |
Ctrl-T | |
Ctrl-Tab, Ctrl-Page Down | |
Ctrl-Shift-Tab, Ctrl-Page Up | |
Ctrl-U | |
' | |
Alt-Enter | |
F6 | |
F7 | |
Shift-F3 |
Finally, here are some more detailed resources on Firefox keys. There’s an up-to-the-minute list in the Firefox Help system, under Help→Help Contents, Keyboard Shortcuts. Otherwise, look here for recent changes:
| http://www.mozilla.org/support/firefox/keyboard |
More technically, there’s some newer discussion about key changes here:
| http://www.mozilla.org/access/keyboard/proposal |
You might also want to look at this older URL:
| http://www.mozilla.org/unix/customizing.html |
And finally, this page provides general accessibility information for Mozilla:
| http://www.mozilla.org/access/ |
Make Firefox Look Different
Don’t put up with blank walls. You can wallpaper Firefox back into your life.
The menus, toolbars, and dialog boxes that Firefox provides can all be changed. Collectively, they are called the chrome . You can change the content of the chrome, which includes the set of widgets that are made visible in the window. Alternatively, you can change just the appearance of the chrome. In that case, the buttons and other widgets stay the same, but the graphics, text, and colors that decorate them are all different.
To change chrome content, install an extension from the Tools→Extensions menu. Extensions are small pieces of programs, not too different from a Java Applet or a Microsoft Excel macro. Some are very sophisticated and are effectively whole applications. This book is full of discussions about which extension does what. Chapter 4 Chapter 4, Web Surfing Enhancements, is a good starting point. We won’t go into detail about extensions here. We’ll just cover the install process with the simpler example of adding themes, which is done the same way.
To change the wallpaper style of Firefox’s chrome, install a new theme. A theme is a bundle of plain content with no program logic. Both extensions and themes are available by default through the trusted http://update.mozilla.org content portal, which provides security and safety. Even in the wild, themes are overall much safer than extensions. At most, they make Firefox illegible and unworkable, whereas a truly wild extension can make Firefox curl up and die completely.
A theme is made out of a set of skins . A skin is a cluster of files associated with a single application or application subsystem. There’s a single skin called the global skin that applies to all applications. A sensible theme creator will always provide a global skin in his theme. A creative theme maker will also supply skins for common applications run by Firefox (such as the browser and the DOM Inspector). If applications change, then skins must change to catch up. So, an actively maintained theme is more desirable than one that’s been created and left to rot.
To pick up a new theme, connect to the Web and choose Tools→Themes. Figure 1-9 shows the Theme Manager with five themes already installed: that’s four, plus one that is the default.
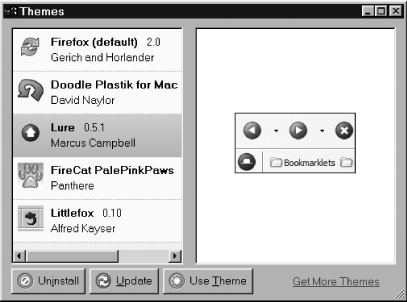
This information is read from datafiles stored in the Firefox user-profile area. Pressing the Update button grabs any updates to your existing, installed themes that have been created since you last checked. If you press the Get More Themes link, a shopping-mall web page is displayed where you can pick the theme that suits you.
Themes are installed by a bit of Mozilla called XPInstall (Cross(X) Platform Install). A summary of the process goes like this. A theme is delivered as a single archive of small files. The archive is named with a .xpi extension, but it’s actually in ZIP format. These files are copied into the Firefox profile area. Some registration and housekeeping is done. The theme is detected the next time Firefox starts up. If you know the URL of such an archive, you can simply download it to disk separately from XPInstall and have a look inside.
Figure 1-10 shows Firefox after FireCat PalePinkPaws has been installed and chosen as the current theme.
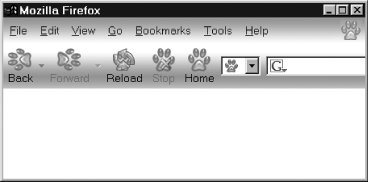
Just click on the theme name, then on Use Theme, and then restart the browser to make the theme appear.
Stop Once-Only Dialogs Safely
Don’t like to be bothered? Here’s how to shut Firefox up and how to deal with the consequences.
After first installation, Firefox intermittently throws up a series of dialog boxes. For a first-time user, these can be confusing. Here’s how to shut them up if you don’t like them. Also here’s how to make them appear, so that you can shut them up if you’re installing Firefox for someone else.
Figure 1-11 shows the first dialog presented.
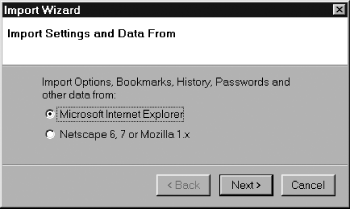
By the time you read this, Firefox will be able to import from a number of other browsers, so the Import Wizard might look a bit more detailed than it is shown here, especially if it detects other browsers on your computer. You can cancel this import process safely. It can be repeated at any time after installation from the File→Import... menu.
Importing is a safe process unless you have sophisticated favelets or bookmarklets stored in your other browsers. Web developers are the main users of these small diagnostic helpers. In general, if you choose to import, there are two consequences. First, the bookmarks toolbar might be loaded with old stuff that might confuse Granny. Second, the surfing you did last week with that other browser might be copied into Firefox. That could be awkward if Granny isn’t aware of your personal style and spots it.
Once Firefox starts, it confronts you with the dialog shown in Figure 1-12.
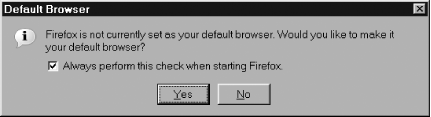
On Windows, this makes small changes to the Registry. It’s harmless to make Firefox the default browser. If you have accidental viruses, spyware, or other nasties on your computer, it might improve security to make Firefox the default. Don’t click Yes or leave the checkbox ticked if temporary product evaluation is your goal. If you want Firefox to be the default, but you still want Internet Explorer to work, see [Hack #40] . Whether Firefox checks at startup time that it’s the default browser can be configured with this preference:
browser.shell.checkDefaultBrowser /* true or false */
The first time you surf to a web site over a secure connection, you get a warning. Then, when you leave that web site, you get warned again. Figure 1-13 shows the two warnings.
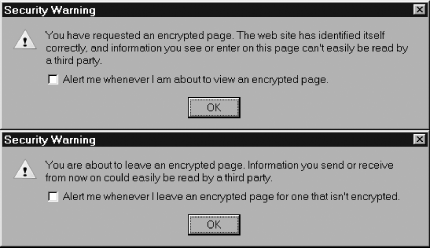
These messages are border security warnings. When interacting with a web site over plain HTTP (that’s the normal case), content sent both ways can possibly be viewed by a spy. If the HTTP connection is performed over Secure Sockets Layer (SSL), then no spying is possible. These warnings tell you that you’re either entering or leaving spy-safe territory. If you fail to click the checkboxes, you’ll never be warned again. You’ll never know if you are surfing “out in the open” or not. But you also won’t be driven crazy by dialog boxes. These alerts can be set with these preferences:
security.warn_entering_secure             /* true or false */
security.warn_leaving_secure              /* true or false */
security.warn_entering_secure.show_once   /* true or false */
security.warn_leaving_secure.show_once    /* true or false */
The kind of spying that SSL prevents is fairly obscure. It requires that someone either wrap equipment around your physical telephone line or cable line, or else get access to one of the computers between yours and the remote web site. An ISP staff member is unlikely to spy like this unless they’re assisting some security agency. Your privacy might be an issue if you are surfing from inside a corporate intranet. There, a corporate web server proxy could log any out-in-the-open activities.
If you are out in the open, web page forms you fill in have the same problem. The first time you attempt to submit a form, you’ll be greeted with the dialog shown in Figure 1-14.

If you click Continue or Cancel, you’ll never see this warning again, just like the previous examples. Here are the matching preferences:
security.warn_submit_insecure            /* true or false */
security.warn_submit_insecure.show_once  /* true or false */
Finally, if the web page form is a login form, Firefox will detect this and ask if you want your login details remembered locally. Figure 1-15 shows the permission request.
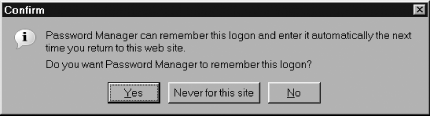
If you choose Yes, that password will be held insecurely on your PC. You must have some other password protecting your PC if you don’t want that password exposed to office theft. The options are a boot password, a Firefox master password (Tools→Options, Privacy, Saved Passwords, Set Master Password), or a decent operating system login password. Set this preference for the equivalent effect:
security.ask_for_password /* 0 = once, 1 = every time, 2 = only on expiry */
A password normally expires in 30 days, at which point the user must enter it again. Here is the preference for the expiry horizon:
security.password_lifetime /* An integer, default = 30 (days) */
Chapter 2 has a lot more to say about security issues in Firefox, but here’s a summary of this hack: if you always hit Enter or Return when one of these dialogs comes up, you won’t be annoyed by them any more. Your privacy will be only moderately protected afterward, but your online safety will remain high.
Flush and Clear Absolutely Everything
Paranoid about Firefox’s tendency to store things about web pages? Reset your browser back to zero.
You might be confident that Firefox can reset itself for you, or you might only be happy if you scrub the decks for yourself. You can do it either way. A further decision you’re faced with is this: do you want to clear out just the data that Firefox has stored, or do you also want to clear out all modifications to the browser since it was first installed?
Dispose of Ordinary Web Surfing Information
To clear, flush, and reset everything from inside the browser, proceed as follows:
Leave just one Firefox browser window open. Change the URL of the currently viewed page to the URL
about:blankand display it.Display the Options dialog box using the Tools→Options or Edit→Preferences menu items. Click on the Privacy icon. Click the Clear All button at the base of the window. That clears just about everything associated with web pages.
For web development activity, that’s all you really need to do.
Dispose of Everything Else via the User Interface
If you want to hack further into the state of the browser, you certainly can. To go much, much further, proceed as follows:
Click the General icon in the Options dialog box. Then click the Fonts and Colors button. Uncheck all checkboxes except Underline Links and click OK.
Back at the previous dialog, click the Languages button. Remove all languages except [en] and possibly [en-us]. Click OK.
Back at the main Options dialog box, click the Web Features icon. Three buttons appear at the top right, labeled Allowed Sites, Allowed Sites, and Exceptions. Click each of these buttons and delete any records that are shown.
Return back to the main Options panel. Click the Downloads icon. In the box labeled File Types, delete all items by clicking on them in turn and then clicking Remove. Click the Plugins button. Disable all plug-ins by unchecking the column labeled Enabled. Click OK.
You can also flush out all your security records:
Click the Advanced icon in the Options Dialog. Under Software Updates, click Check Now and update Firefox to the latest minor releases (this step takes time).
When that’s done, click the Certificates item to open it up. Click Manage Certificates, and in each of the tabs except Authorities, delete any shown records. Don’t remove anything from the Authorities tab. Click OK.
Click the Validation item to open it. Click the Manage CRLs button and remove any and all records.
If you’re very keen, you can also clear out any user preferences
that you’ve set. Type in the URL about:config. Context-click on any and all
preferences that are bold and choose Reset.
Finally, if you want to remove all your bookmarks and customizations, open the Bookmark Manager from the Bookmarks menu. Click on all items—except for the item labeled Bookmarks Toolbar Folder and its immediate parent—and press Delete. Under the Tools menu, choose first Extensions and then Themes. In each resulting window, uninstall everything. Finally, under View→Toolbars→Customize, click Restore Default Set, and then click Done.
Shut down Firefox and make sure no extra Firefox processes are still hanging around. Restart, and everything’s as clean as you could hope for by using this method.
Dispose of Everything via the Filesystem
Perhaps you wonder if Firefox is doing everything right for you. The alternative is to clean up Firefox using the operating system only. Here’s how.
First, shut down Firefox completely. Then, under Unix/Linux, delete the folder ~/.mozilla. Under Microsoft Windows, delete the Mozilla folder that appears in the path to the Firefox profile; that’s the one under Application Data. Similarly, under Mac OS X, delete the Mozilla folder. That removes nearly everything the user ever created. When you restart Firefox, a new, clean Mozilla folder is created with all the necessary files.
For a less extreme solution, navigate to the profile directory (the one with the weird, jumbled name) and delete these files: everything in the Cache folder; prefs.js; user.js; bookmarks.*; cookies.txt; downloads.rdf; formhistory.dat; history.dat; localstore.rdf; mimeTypes;rdf; search.rdf; and XUL.*.
Strip the Firefox Install Area of Extras
While cleaning house, you can also remove a few items from the Firefox install area:
Make Firefox Go Fast
Don’t wait for the Web. Firefox can go faster if you just tune it up a bit.
Here are a few steps you can perform to speed up Firefox. Back to performance basics first, though: the user is the slowest thing attached to the computer. Better use of Firefox’s features will speed up the user, so be sure to read the rest of the hacks in this chapter.
Fix Dial-Up Modem Bottlenecks
Any dial-up modem you use is the slowest network hardware you have, so tune it wisely. Make sure any modem connection is running as close as possible to the maximum speed for POTS (plain old telephone system) phone lines. That line is usually a 64 Kb service (unless you’re stuck on an ancient analog exchange). No one gets every drop of 64 Kb out of it, unless they pay a fortune for ISDN, but you should get 53.3 Kb at least.
If you’re on Windows, your modem driver and chipset should support the latest compression standards now available. Update the modem and the modem’s Windows driver directly from the chipset manufacturer. Look on the modem card to see who made the chips; don’t bother with who made the card. If you buy a cutoff switch that lets you isolate your answering machine, fax, and telephone gear while you’re on the Internet, then you won’t strain the line voltage as much, and you’ll have less noise causing error-correction delays.
If your connection is still slow, ring your telephone provider and complain that their voltages and noise filters are all wrong—they can test and adjust from their end. Ring Microsoft and complain that Windows hasn’t tuned your PPP connection correctly. Ring your ISP and complain that their modem bank isn’t negotiating the best possible speed. None of that will do you much good, but it’s nice to vent sometimes. Move to broadband.
If you’re stuck on dial-up, the biggest performance plus you can get from Firefox without using caching is to turn images off [Hack #35] . That’s in the Options dialog box under Web Features. Turning off images might reduce your web experience to an unacceptable low, so it’s a dramatic step. You can also change the following preference [Section 1.2.3, in the introduction to this chapter], which ensures that web pages are checked for updates only once per browsing session, instead of every time you look at them:
browser.cache.check_doc_frequency /* set it to 0, normally 3 */
This preference change shouldn’t affect you much if you’re just surfing idly. If you spend a lot of time with online message boards or similarly intensive web-based applications, it might cause confusion, though, so avoid it in that case. One possible compromise is to create a separate “I’m not working” profile and turn the preference on in that profile. Use that profile for recreation only. Some of the Firefox ad-blocking extensions prevent advertising images from being downloaded, which is a further performance-saving feature.
Overclock Firefox
Some obscure preferences exist that affect the network performance and display performance of Firefox. They’re the equivalent of special hardware tweaks that enthusiasts use to make your CPU run faster. There are security implications to modifying the network performance [Hack #16] . They might make you a hazard as you burn down the street. There are also stability risks in cranking up the display performance. Such tweaks are really meant only as debugging tools. If you can’t keep your hands off the engine, here’s how to proceed without warranty.
Speed up network access
The following preferences might not make you a good web citizen, but they’ll get you as much bandwidth as you can manage. Note, however, that too many simultaneous network connections will just slow you down. The best possible performance occurs when there’s one connection only and the remote web server is blindingly fast. If web servers or other hops in the network are comparatively slow, try playing with these many preferences.
Turn the following preferences on for dial-up; they produce little effect for broadband connections. A few web pages that don’t support HTTP/1.1 will be confused, but all modern web sites should handle it fine:
network.http.pipelining                 /* default = false */
network.http.proxy.pipelining           /* default = false */
Raise the following for dial-up only. It states how many pipelined requests are possible (has a minor effect only):
network.http.pipelining.maxrequests /* default = 4 */
Set the following higher if you want to hammer web servers with many simultaneous requests (suitable for broadband use only):
network.http.max-connections-per-server /* default = 8 */
Set the following higher if you want to keep an unfair share of web servers that you access a lot. The web server must also be too dumb to deny your request for extra access:
network.http.max-persistent-connections-per-server /* default = 2 */
Set the following higher if you want an unfair share of web proxies that you access a lot. The web proxy must also be too dumb to deny your request for extra access:
network.http.max-persistent-connections-per-proxy /* default = 4 */
Set the following higher if you keep millions of tabs and/or windows open (suitable for broadband use only).
network.http.max-connections /* default = 24 */
Speed up page display
To display pages faster, you first need a fast CPU and memory. Don’t try the following things on an ancient Pentium II, unless specifically noted here.
Setting the following preference to false is a brutal performance tweak that
tells Firefox to process every byte of Web content as soon as it
arrives, rather that buffering it in sensible chunks. This makes
Firefox web-page handling work extremely hard but theoretically puts
page content on the screen faster (recommended only for burning-hot
CPUs with super-fast display cards and dial-up connections):
content.notify.ontimer /* default = true */
An even more brutal tweak shuts out all interruptions (including user input) while the incoming web page content is analyzed (not recommended at all unless Firefox is being used as an untended monitoring station):
content.interrupt.parsing /* default = true */
If content.notify.ontimer
sensibly remains false, this is
the time-out interval for collecting sensible chunks of incoming web
page. Lower it for faster incremental page display. Lower it below
10000, and web-page handling will be working extremely hard again
(recommended for dial-up):
content.notify.interval /* default = 120000 (micro-seconds) */
For Granny’s slow computer, if nothing’s arrived recently, then do extra buffering, which saves more CPU cycles. Set to the number of milliseconds to back off each time the network connection is found to be idle (recommended for ancient PCs on dial-up only):
content.notify.backoffcount /* default = -1, meaning never */
Make Firefox pay more attention to the mouse and keyboard at the expense of other activities. Making this a larger polling delay slows down recognition of user input but marginally improves page display:
content.max.tokenizing.time /* default = 360000 (micro-seconds) */
If the user is in the habit of opening 10 web pages (especially 10 tabs) and then sipping coffee while the pages load, making the following parameter’s value larger will speed up page display (recommended for slow CPUs):
content.switch.threshold /* default = 750000 (micro-seconds) */
Make a big memory buffer for big pages. Set to a power of 2 minus 1—e.g., 16385 (recommended for broadband):
content.maxtextrun /* default = 8191 */
Here are a couple of additional oddments. The following preference tells Firefox to start putting received web pages on the screen right away, even if not much content has been received yet:
nglayout.initialpaint.delay /* set to 0, default = 250 (millisecs) */
The following preference tells Firefox not to bother putting image placeholders on the screen while the real images are fetched, which will also speed page display up a bit (recommended for broadband):
browser.display.show_image_placeholders /* default = true , set to false */
Finally, on Linux/Unix, don’t run Firefox with X-servers and X-clients on different machines; that can be quite slow. VNC (or PC-Anywhere, or Windows Remote Desktop) does not affect Firefox performance, except for capping the speed at which desktop updates occur. That is not a Firefox-specific effect, though.
Expand Your Caching
Your best defense against a slow network is a big local cache. In the Options panel, make the cache as big as you can manage. It’s really the memory part of the cache that provides the performance, so if your computer is low on memory, a big disk cache won’t help much. Buy more memory; Firefox will find it and use it. If you want to set the size of the memory cache explicitly, use these preferences:
browser.cache.memory.enable     /* default is true */
browser.cache.memory.capacity   /* -1 = size to fit, 123 = 123 Kb */
Start Up Faster
You can get a faster startup if you turn on Quick Launch when you first install Firefox. Extensions and fancy themes will encumber performance slightly, so you should avoid those. Windows XP is supposed to be smart enough to optimize disk storage of frequently used applications, but it’s doubtful that will help much, even if you can figure out how to control it, and even if you defragment the disk.
On Linux, if you use KDE as the default desktop, you pay a lot when Firefox starts up, because it requires the GNOME Gtk subsystem, and that means extra startup effort. You could use GNOME instead, at least until the KDE project’s Qt Mozilla port is fully polished and ready.
Ultimate Speed Improvements
Note also that the standard distributions of Firefox for x86 (Intel) architectures are compiled for the lowest common denominator. They’re compiled with dynamic link libraries and support everything back to a 386 (OK, that’s an exaggeration). In theory, you can get much better performance if you upgrade your compilers to a recent version and compile a static build of Firefox that’s also optimized for (say) [Hack #92] . There is some evidence that this will speed up your user experience. It has been shown to reduce the runtime size of Firefox, at least on Linux.
Start Up from the Command Line
You can start Firefox without using the mouse.
How is Firefox started? This hack describes all the command-line options. To see command-line options, most
technical people instinctively open a command-line window, such as an
xterm (Linux) or an MS-DOS or
cmd window (Windows). Then they type
program /?
or program --help, depending on the operating system. The
latter option works everywhere except in Windows, because Firefox
doesn’t provide console-based help there. So Windows is a special case:
help information isn’t automatically spat out there. To see command-line
options on Windows, you have to go further with a DOS or cmd box. On Windows, start up a command line
(Start→Programs→MS-DOS Prompt) and follow these
steps:
            C:
cd "Program Files"
cd Firefox
            firefox --help > help.txt
            type help.txt
The help options will appear in the newly created file
help.txt. This advice goes for all options that
provide command-line output, such as -version. You don’t need to redirect anything
on other platforms.
On Windows, you can use /
(forward slash) or // (double forward
slash) as the command-line switch prefix. On all platforms,
Firefox-specific options can be preceded with - (minus) or -- (minus, minus). These two command lines are
the same on Windows, but only the first one will work on Linux:
firefox -console --jsconsole http://www.example.com
firefox --console /jsconsole http://www.example.com
On Unix/Linux, some X11 options are supported. X11 X resources aren’t supported, because the Unix/Linux port uses the Gtk configuration system. Table 1-4 describes the user-oriented options.
See Also
For the more detailed programmatic command-line options, search
for the DumpHelp() function at http://lxr.mozilla.org. For Unix/Linux
specifically, consider also this URL: http://www.mozilla.org/unix/remote.html.
Get Firefox Hacks now with the O’Reilly learning platform.
O’Reilly members experience books, live events, courses curated by job role, and more from O’Reilly and nearly 200 top publishers.

