Sharing Workbooks
To share a workbook through SharePoint:
Open the workbook in Excel and select Tools â Shared Workspace. Excel displays the Shared Workspace task pane, as shown in Figure 5-2 .
Type the address of your SharePoint site in the Location box and click Create.
The SharePoint site may ask you to sign in. Enter your user name and password and click OK.
Once the workbook is shared, Excel changes the task pane. You can click on Open site in browser to view the new shared workspace.
Warning
Don't confuse Tools â Shared Workspace with File â Save Workspace. The latter creates an .xlw file that stores your Excel windows and open documents. Also don't confuse it with Tools â Share Workbook. Share Workbook is the old way of allowing multiple authors to edit a workbook at the same time.
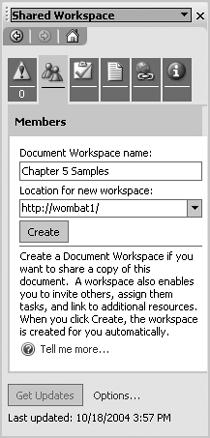
Figure 5-2. Sharing a workbook using the Excel task pane
Excel connects to the SharePoint site and creates a new document workspace for each workbook you share from Excel. The workbook stored locally on your computer is now linked to the workbook stored on SharePoint. If you save the workbook, changes are saved locally and then sent to the server. If you close and then reopen the local workbook, Excel connects to SharePoint to get any changes from others as shown in Figure 5-3. See the section "Reconciling Changes and Viewing History" later in the chapter for an explanation of how to manage changes ...
Get Essential SharePoint now with the O’Reilly learning platform.
O’Reilly members experience books, live events, courses curated by job role, and more from O’Reilly and nearly 200 top publishers.

