Creating a New Entry
Now that your blog is configured, you are ready to post an entry. In the lefthand navigation bar, click New Entry. The New Entry screen (Figure 5-16) that pops up lets you create a new entry.
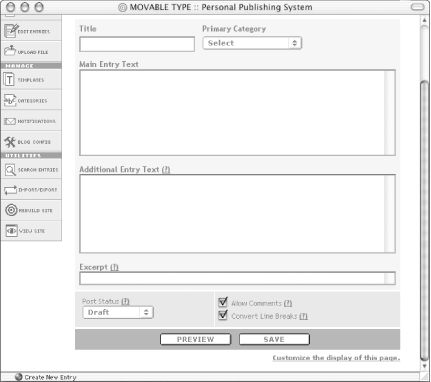
Figure 5-16. New entry page
There are several fields on the screen:
- Title
The title of your entry.
- Main Entry Text
The main body text of your entry.
- Additional Entry Text
An extended piece of your text.
- Excerpt
A brief summary of your entry.
- Category
To assign categories to your entry.
- Post Status
Determines whether or not this entry will be published to your public blog Entries marked “Publish” will be published, while entries marked “Draft” will be saved in the system, but not published to your blog.
- Allow Comments
Determines whether you will allow readers of your site to post public comments.
- Convert Line Breaks
Controls the appearance of the entry’s text.
You do not have to fill in the Additional Entry Text and Excerpt boxes. And in fact, if you do not want them to appear on this page, you can make them disappear. See Chapter 8 for more details.
Fill in the Main Entry Text with the body of the entry, type in an appropriate title into the Title box, and select Publish from the Post Status. Then click the Save button. The system should now tell you that your entry has been saved successfully (Figure 5-17).
Figure 5-17. Successfully saved entry
If, instead, you see an error message, you should ...
Get Essential Blogging now with the O’Reilly learning platform.
O’Reilly members experience books, live events, courses curated by job role, and more from O’Reilly and nearly 200 top publishers.

