Chapter 3. Java Done Quick
Get your stopwatch ready because we're going to create and run some simple Java code as quickly as possible. Ready⦠set⦠go!
Creating a Project
An Eclipse project is just a directory that holds your program's resources (source code, icons, and so forth). Usually projects are subdirectories in your workspace (see the "Specify a Workspace" section in Part I). You can import an existing project, but for this exercise, we'll make one from scratch.
To create a project, select File â New â Project⦠and then double-click Java Project. This opens the New Java Project wizard (see Figure 11).
For "Project name," type in something original like Hello. Under "Project layout," enable the "Create separate source and output folders" option.
Tip
As a best practice, always use separate directories for the source and output folders.
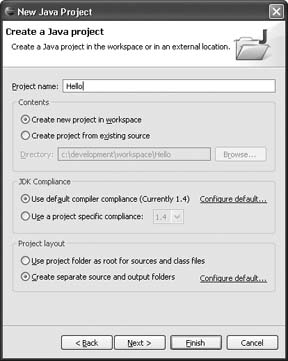
Figure 3-1. The New Java Project wizard configures a new directory for your code.
Click Finish to accept the default options and let Eclipse create the project. If you see a dialog that says Confirm Perspective Switch, enable the "Remember my decision" option and click Yes. Also, if you see a dialog about Java 5.0 compliance, enable compliance for the entire workspace (not just the project).
After a moment, you should see your new empty project in the Package Explorer view (see Figure 12).
Figure 3-2. A new Java project is born.
Get Eclipse IDE Pocket Guide now with the O’Reilly learning platform.
O’Reilly members experience books, live events, courses curated by job role, and more from O’Reilly and nearly 200 top publishers.

