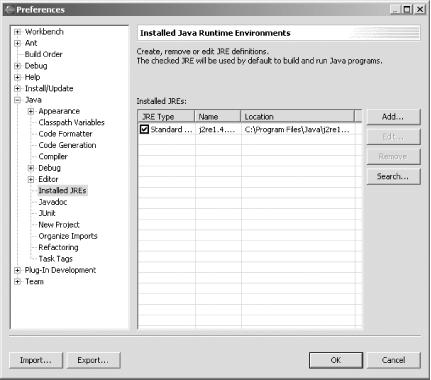
You can specify what Java runtime you want Eclipse to use by selecting Window→ Preferences, clicking Installed JREs, and choosing the JRE you want (use the Add button to add JREs and SDKs).
When you first run Eclipse, it searches for installed Java runtimes, which means it might not use the one you want to use. For example, Eclipse might want to use the outdated JRE that came with your browser instead of the new Java SDK you’ve just downloaded. To specify what runtime to use, select Window→ Preferences, click Installed JREs, and choose the JRE you want, as shown in Figure 4-14.
Tip
To set a project-specific JRE (as when you want to target a project to a specific JRE), select Project→ Properties→ Java Build Path, click the Libraries tab, click JRE System Library, and click Edit. In the dialog that appears, select a project-specific JRE.
Recipe 4.9 on running code; Chapter 2 of Eclipse (O’Reilly).
Get Eclipse Cookbook now with the O’Reilly learning platform.
O’Reilly members experience books, live events, courses curated by job role, and more from O’Reilly and nearly 200 top publishers.

