Motion menus can feel restrictive when you get to the point where you're creating the buttons that show up on the screen. Highlighting rectangles on the screen just isn't as fancy as you might want to get. The Apple-supplied shapes help, but even those can be a bit repetitive. Although you are restricted to using overlays when you have a motion menu, you can make some pretty creative custom overlays.

At its heart, an overlay is just a Photoshop layer that tells DVDSP what to draw when you select the rectangle that defines a button. The default overlay is a solid layer, so the highlighted rectangle shows up as just that: a rectangle. But you can make fancier overlays.
If you want a shape other than a rectangle to show up, you can create a Photoshop document to aid in this endeavor. Start with the standard NTSC-DV size document. Make the background completely white (or transparent). Now draw shapes in black wherever you want a custom-shaped button to appear. We often start with a still image of the video we'll be overlaying as the background. Then we make the overlay layer partially transparent so that we can see where to draw our shapes. Check out Figure 4-35 for an example of creating skiff-shaped buttons.
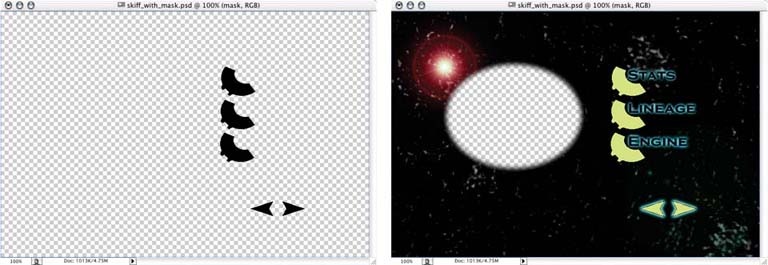
Figure 4-35. A 1-bit button mask (left), and the same mask laid over our menu image (right, with false coloring)
The black parts will show up as the buttons in DVDSP. But be careful: only the black parts will show up. Notice that we had to create shapes for the "next" and "previous" arrows in our menu, too!
Here are the steps to follow to create a 1-bit overlay:
Create a Motion Menu. Start by creating another motion menu using the same video clip you used for the previous project. You even will use the same number of buttons. This time, however, you're going to add the overlay layer for the skiff-shaped buttons.
Import the Photoshop Document and Set the Overlay Options. Import the skiff_with_mask.psd document into DVDSP. In the property sheet for the menu, notice the overlay options (see Figure 4-36).
Set the overlay to use the skiff_with_mask.psd document. If you have more than one layer in the document, you'll also have to pick which layer to use. Figure 4-37 highlights this part of the Inspector.
Pick the Highlight Colors. You also should pick your highlight colors now. If you don't, you won't be able to see your buttons as you draw their bounding rectangles in the Menu editor. For our current menu, we'll use both sets of highlights. We'll use light blue for the skiff cutouts and light green for the next and previous buttons. Figure 4-38 shows the exact values we chose.
Define the Buttons. If you haven't defined the buttons yet, go ahead and do that now. There's nothing fancy to do here; just set up the same old boring rectangular buttons. This time, though, make your rectangles cover the custom shapes you built in Photoshop. Figure 4-39 shows the results of outlining a masked area. Table 4-1 lists the exact coordinates for the buttons in this menu.
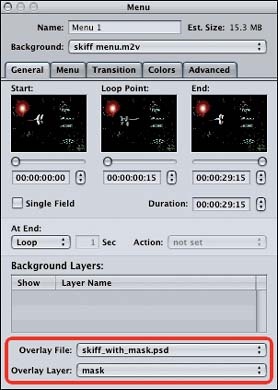
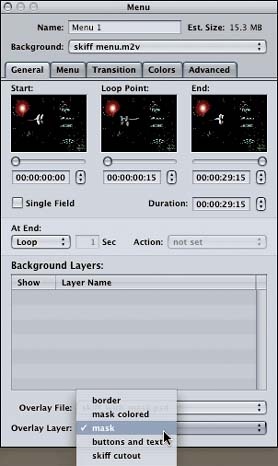

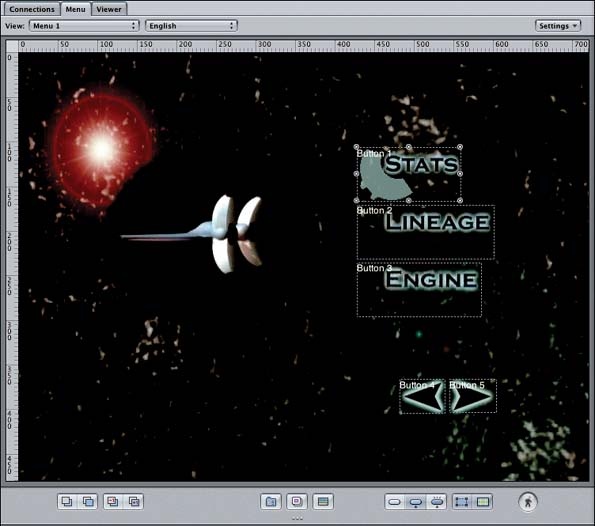
Table 4-1. Button coordinates for the skiff menu
|
Button |
Left |
Top |
Right |
Bottom |
|---|---|---|---|---|
|
Stats button |
427 |
106 |
558 |
166 |
|
Lineage button |
427 |
171 |
600 |
231 |
|
Engine button |
427 |
235 |
584 |
295 |
|
Prev button |
481 |
366 |
538 |
405 |
|
Next button |
544 |
366 |
603 |
405 |
All is good so far. When you preview the menu, you should see shiny new skiff buttons, as shown in Figure 4-40.
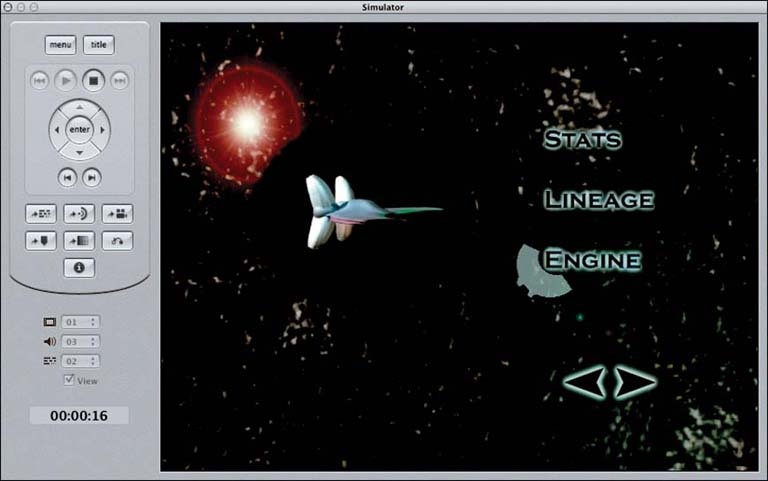
You can use this same trick to create underlines, text, picture frames, or any other shape to use as a highlight. It obviously takes more planning than the simple highlights, but the results usually are worth the effort.
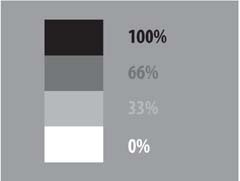
Although 1-bit overlays are easier to deal with, you can, in fact, use a 2-bit overlay with black, white, and two shades of gray (66% and 33%, respectively). Figure 4-41 shows these grays against a blue background for proper contrast.
You can use the shades of gray in one of two ways: as translucent variations of the highlight color, or as four separate colors. See Figure 4-42 for an illustration.
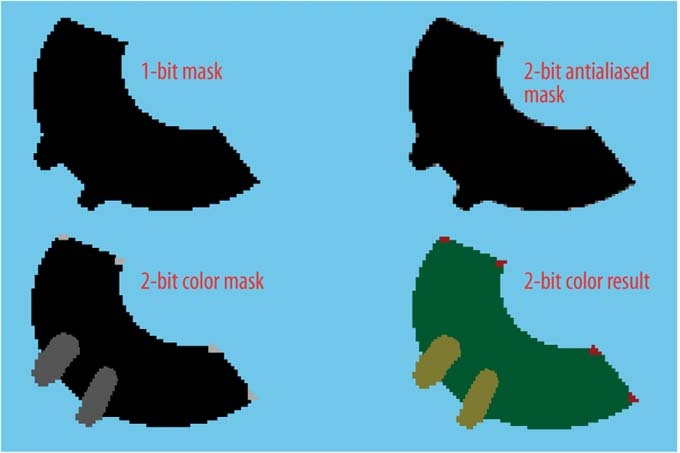
The translucent variations on the highlight color enable you to do things such as antialias your highlight shape. That can provide some smoother, more professional highlights.
The multicolor trick works even better, but requires a great deal of attention to details. You have to draw with the shades of gray, but you have to think in terms of the highlight colors. (Usually you'll leave white as the completely transparent background.)
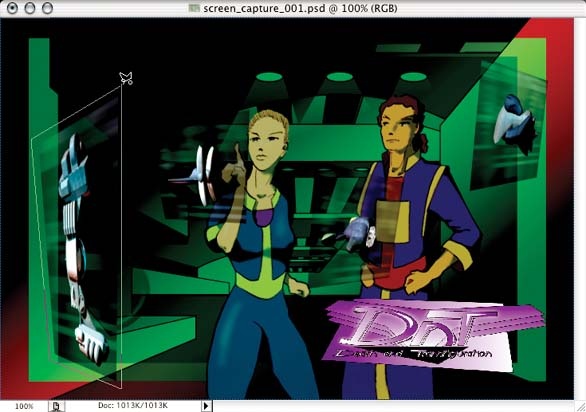
Let's try this for ourselves. For the 2-bit overlays, we'll work on the main skiff menu for Death and Transfiguration (which we covered earlier in this chapter). It has four screens that lead to the detail pages for each of the four skiffs. We want to highlight each screen in a separate color as the user navigates around the menu.
First we start off by making our video clip for the menu. The creators of Death and Transfiguration built a control room with several video screens, one for each of the four skiffs. We'll put a little spinning version of each skiff in its respective screen. Because they wanted to play with perspective and blinking lights and whatnot, the creators used After Effects to create this motion menu. Figure 4-43 shows the basic menu with and without the video elements.
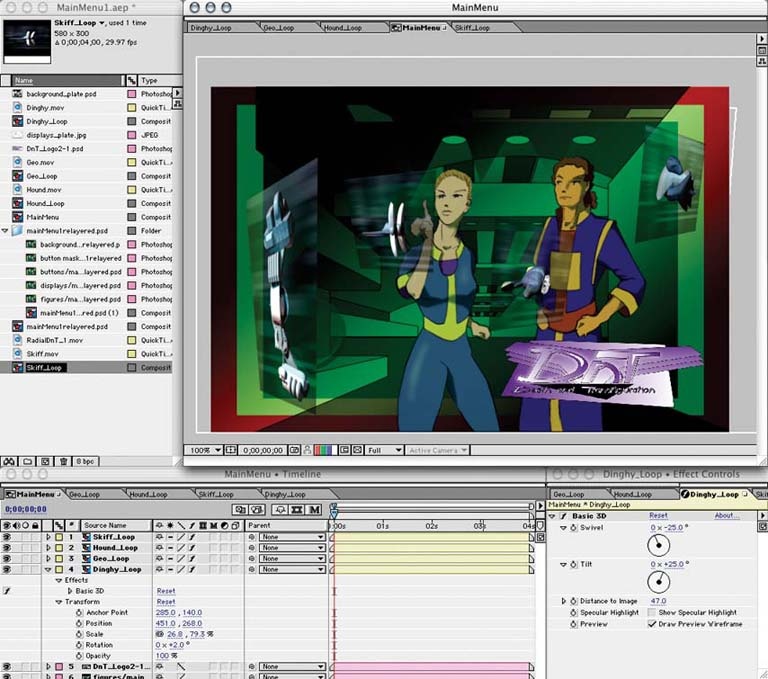
We don't have time to go through all the details of making the video in After Effects, but you can look at the complete project on your own. The dnt_main.aep file contains this project as well as the complete animation. The upshot is that we included four video loops that were imported as QuickTime movies. We ran the loops continuously for 30 seconds and exported the final product to DV, then used Compressor to get our MPEG-2 resource.
We could have done similar work with video drop zones in DVDSP, but the odd perspectives of the video clips and their short durations made it easier to build the loops in an external program.
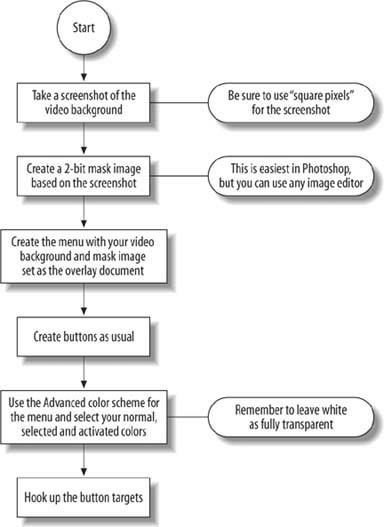
Figure 4-44 outlines the steps we'll have to go through to get our video menu and overlay ready for primetime.
Now that we have the video, we can create our overlay. Using the same basic menu background from the After Effects project (leave it at 720x480), start a new Photoshop document. Alternatively, you can make a screenshot of your menu at 100% in After Effects. That's cheap, but at least you get a picture of the whole menu to play with. Create a new layer with a transparent background. (We'll change it to a white background as our last step.) We'll create borders around the various floating screens containing the skiffs, and we'll use the different shades of gray to achieve different border colors for each skiff.
For each skiff screen, use the Polygon Select tool to create an outline similar to the screen, but a bit bigger. Figure 4-45 shows an example for the first skiff.
Fill that selection with one of your three grays (black, dark, or light).
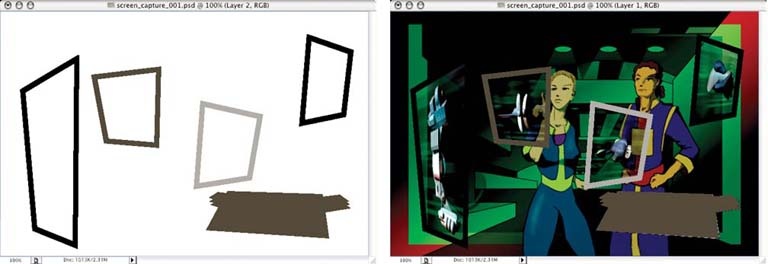
Then choose Select â Modify â Contract to make the selection shrink by about 10 pixels. Now select Edit â Clear to remove that selected area. Now your screen should pop through a nice gray border. Figure 4-46 shows the results for the first skiff. Figure 4-47 shows the borders for all four skiffs and the Death and Transfiguration logo.
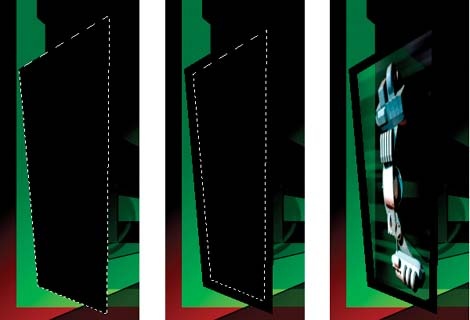
Figure 4-46. Creating a button frame: the first fill (left), the contrasted selection (center), and the final, cleared result (right)
Before you save the file, be sure to fill in the background of your mask layer to make it white. Save that file and import it into DVDSP. You'll need to specify the overlay document and layer, just as you did before. Now edit the menu to create buttons over each of the four video screens in the menu. Figure 4-48 shows a completed menu. You can see that our outline shows up nicely for the currently selected button.

Back in the property sheet for our menu, you'll need to modify one more thing. For the overlay, you need to use a custom color scheme, so you can't use the "simple colors." Set the Overlay property to Advanced. You should see several new properties. We'll pick some nice, garish colors and set their opacity to 10 (see Figure 4-49). For the Activated state, bump up that opacity to 15.
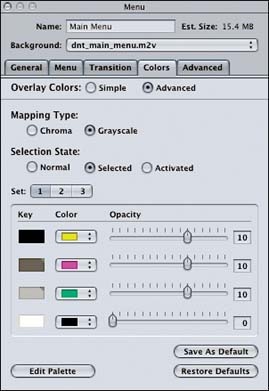
Set the 100%, 66%, and 33% options for Set 1 to yellow, magenta, and light green, respectively. Each color you use for the outlines should be 60% opaque for the Selected state and 100% opaque for the Activated state. You certainly can play around with those values to suit your tastes. (For example, you could set the Selected states to 100% opaque and then have all the Activated states set to 100% white.)
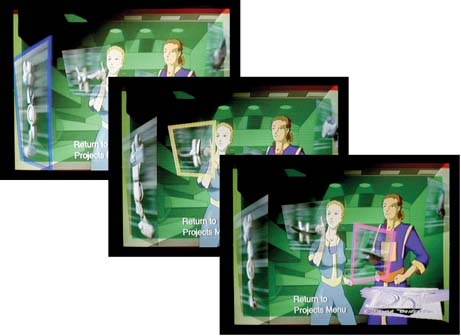
Notice that there are two sets of colors. You have three color schemes available for your buttons. Each scheme can have its own three colors plus a transparent option. We used the second set to give us five distinct colors for our outlines, plus the logo. It's all a matter of planning out what you need to accomplish. If you've watched many DVDs lately, you can see that many designers aren't that ambitious. But don't let that stop you! Well-defined color overlays can create great-looking menus that exhibit great performance, too. Figure 4-50 shows some shots of our fancy overlay menu as seen from a television set.
Get DVD Studio Pro 3: In the Studio now with the O’Reilly learning platform.
O’Reilly members experience books, live events, courses curated by job role, and more from O’Reilly and nearly 200 top publishers.

