Inserting a Navigation Bar
One of the best reasons to use frames is to keep a navigation bar visible on the screen at all times. A navigation bar (called a “nav bar” in the trade) is a set of interactive buttons that let visitors jump to different pages or load pages into different frames. To make your life easier, Dreamweaver’s Navigation Bar object makes quick work of adding complex interactive navigation bars to your frames.
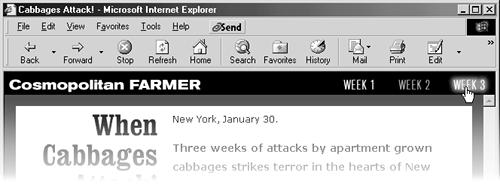
Like the Rollover object described in Chapter 5, nav bar buttons use Dreamweaver Behaviors—JavaScript programs—to dynamically swap graphics files. Nav bar buttons also offer two additional styles that help your visitors know where they are in your site (see Figure 7-12).

Figure 7-12. When a button first appears on a page, it’s usually in its up state—untouched, ready to be clicked. But when the user moves her mouse over the button, it changes to its over state—useful for indicating that the button actually does something.
To create a navigation bar:
Create graphics for the buttons in your navigation bar.
Each button in a navigation bar can have up to four different looks, or states, based upon an interaction with the user. You’ll need to create multiple graphic files for each button, using a graphics program like Fireworks or Adobe Image-Ready. And, as with rollover images, make sure that each button graphic is exactly the same size. Otherwise, you’ll get distortion ...
Get Dreamweaver MX: The Missing Manual now with the O’Reilly learning platform.
O’Reilly members experience books, live events, courses curated by job role, and more from O’Reilly and nearly 200 top publishers.

