Printing From Picasa, Step by Step
Picasa's print options aren't quite as elaborate (or confusing) as iPhoto's, but it's hard to imagine anyone complaining about their flexibility. Here's the whole process, in words and pictures.
Step 1: Choose the Photos to Print
Just highlight the ones you want, using the techniques described on Selecting Photos. Their icons appear at the left side of the Photo Tray, the little holding area at the bottom of the Picasa window.
When you're ready, click the Print button in that photo tray (or choose File â Print). The Picasa Print dialog box appears.
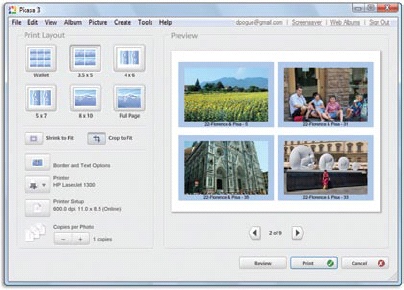
Step 2: Choose a Layout
At the top left of the Print screen, you'll see that you have several layout options. Mostly, they indicate how many photos you'll get on a sheetâthe more pictures, the smaller they'll be. (Physics is funny that way.)
Your options include Wallet (nine per page); 3.5 x 5 inches (four per page); 4 x 6 (two per page); 5 x 7 (two per page); 8 x 10 (one per page) or Full Page.
All of these options assume that you're printing on standard 8.5 x 11-inch paper.
Now, the thing is, your photos might not all be 3.5 x 5 inches or 4 x 6 inches. In other words, they might not fit into these standard-size prints; as described on How to Crop a Photo, most digital cameras produce photos with slightly different proportions.
Yes, you could go in and hand-crop them (Chapter 10). But if you're in a hurry, ...
Get David Pogue's Digital Photography: The Missing Manual now with the O’Reilly learning platform.
O’Reilly members experience books, live events, courses curated by job role, and more from O’Reilly and nearly 200 top publishers.

