Chapter 4. Iterative Development
For the most part, I have been designing the weather app you are now building exactly as I would have designed it without you along for the ride. I am a firm believer in iterative development. The basic principle of iterative development is to perform small design changes, one step at a time, such that at the end of each step, you have a working application. It may not be complete in terms of the design requirements, but it is complete in terms of the current version of itself.
Each chapter in this book is a development iteration. This is convenient for me, as an author, because it gives me an end game to focus on for each chapter. However, this is just a lucky coincidence. I hope that you will follow a similar iterative process in developing your own Kivy applications. Indeed, if you really want your iterations to make sense, I advise that your version-control commit messages tell a story, much like this book.
Note
Iterative development is indoctrinated in various formal methodologies of software development. These are useful when you are coordinating development teams, as the more developers a project has, the more communication overhead there is.
If you’re working in a team environment (and you will be, at some point), you might want to search the Web for terms such as extreme programming or Scrum. However, if you’re developing mobile Kivy applications by yourself, you can probably get away with informal iterations and a notebook of ideas.
It’s impossible to complete everything a project needs in a single development sprint. Therefore, you have to focus on the tasks you want to get done and organize the things that are being set aside. While each iteration is different, I find there are two broad categories:
- New feature development, where one or two major features are added in a single sprint. At the end of the iteration, the features will be working and functional, though they may not be complete.
- Code cleanup, where minor tweaks are made to a variety of previously implemented features to take it from a working demo to a usable product.
This chapter is going to be one of the latter type. You’ll learn a few new Kivy principles while solidifying your knowledge of the topics we’ve already covered. At the end of it, you’ll have a functional program that actually renders weather information. It might not be ready for consumption by the general public, but it will work!
Improving the Add Location Form
It would be handy for the search box text input to be automatically focused when the Add Location form is displayed. We can easily accomplish this using the focus property on the TextInput widget.
You can also hook up the widget such that an Enter keypress fires the search, by using the on_text_validate event. However, that event fires only if the TextInput has had multiline mode disabled (since the Enter key would insert a line break in multiline mode). For this particular TextInput, multiline mode doesn’t make sense anyway.
The best part is that this change only has to be made in the weather.kv file, as the Python code was designed with the reusable search_location method. You can borrow this method in the on_text_validate event handler, and the form will respond exactly as though the Search button had been clicked.
These two properties, along with the new focus property, are displayed in Example 4-1.
TextInput:id:search_boxsize_hint_x:50focus:Truemultiline:Falseon_text_validate:root.search_location()
If you run the app now, it will look the same, but you’ll notice that it is much less painful to interact with. This is a big usability win for three lines of code!
Caching Widgets
Once created, widgets don’t always have to be descended from the root window. Obviously, if they are not, they won’t be visible on the screen. For example, when the user switches from the CurrentWeather to the Forecast view and back, it probably makes sense to place the same widget back on the screen, rather than hitting the network and rendering the data all over again.
This chapter doesn’t feature a Forecast view just yet, but in preparation for it, add to AddLocationForm a cached property and a Cancel button that switches back to the previous location when clicked. Most of this work can happen in the show_current_weather method, as shown in Example 4-2.
current_weather=ObjectProperty()
defshow_current_weather(self,location=None):
self.clear_widgets()iflocationisNoneandself.current_weatherisNone:
location="New York (US)"iflocationisnotNone:
self.current_weather=Factory.CurrentWeather()self.current_weather.location=locationself.add_widget(self.current_weather)
-
Create an
ObjectPropertyon the class to store the widget in.-
Add a default value to the
locationparameter so that API users (including your future self) know thatNoneis an option and will check the method contents to see what happens.-
A rather ugly special case: if both
locationandself.current_weatherareNone, hardcode a default location. This method is typically called in one of two ways. In the first, a location is passed in, because the user just searched for a new location. In that case, the first conditional is skipped, and a whole newself.current_weatherwidget is constructed in the second conditional. The second way is to passNoneinto the method, which indicates that the user clicked Cancel on the Add Location form. In this case, bothifstatements are bypassed and theself.current_weatherthat was previously displayed is shown once again. The special case happens if there is noself.current_weatherwidget because the user pressed Cancel the very first time the form was shown. Then the first conditional triggers, and it replaces theNonevalue with a hardcoded location as if the user had actually searched for New York.-
If the location is not
None, either because it was passed in explicitly or hardcoded above, construct a newCurrentWeatherwidget. Immediately cache its value inside theObjectProperty.
Regardless of whether the cached widget was constructed from scratch or previously stored, add it back into the window.
There are two so-called code smells in this function. The first is the hardcoded value for location. This is going to cause grief later if you change the format of the location; this hardcoded value won’t be in the new format and will have to be updated separately.
The second is the special case on location. If location is None, the method is supposed to render the previously rendered widget. However, the special case occurs if there is no previously rendered widget. Your code has to either explicitly check for this special case, as in Example 4-2, or ensure that the case never occurs. I mention two options for exploring this in the exercises for this chapter.
This isn’t a horrible amount of code, but it’s about as much code as I ever want to write without testing that it’s working properly. To test it, add the Cancel button to the weather.kv file, being sure to call the show_current_weather method in its on_press handler. Place the button at the same indentation level as the ListView so it takes up the full width of the screen. You can probably figure this one out on your own by now to confirm; have a look at Example 4-3.
Button:height:"40dp"size_hint_y:Nonetext:"Cancel"on_press:app.root.show_current_weather(None)
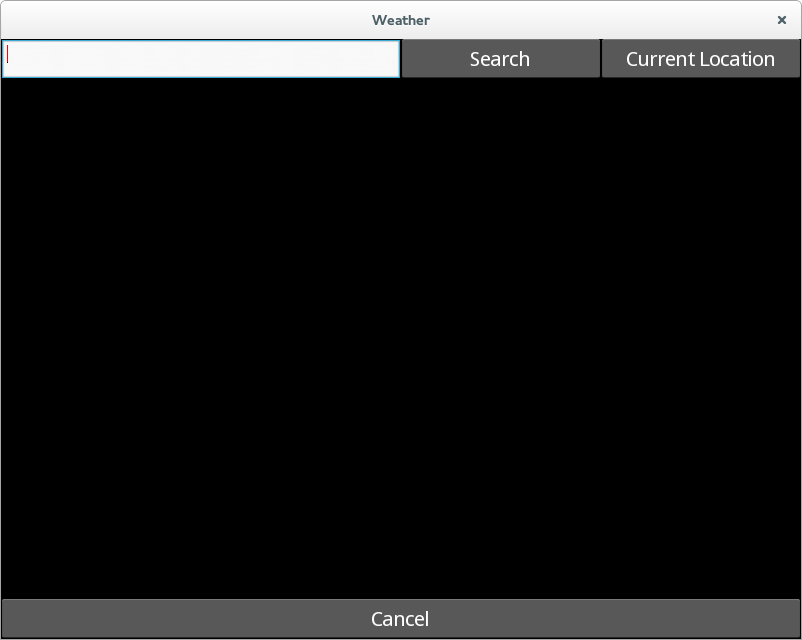
Running this code changes the form slightly to look like Figure 4-1.
You should test all three branches through this code. If you run the program and immediately click Cancel, it should render the location as New York (US). If you click Add Location, do a search, and select a different city, it should render that city. Click Add Location once again followed by Cancel to see that the previously selected city still works.
Storing Actual Locations and Converting Arguments
The Open Weather Map API expects the city and country name to be specified in a comma-separated list. However, so far, I have combined it into a somewhat more human-readable city (CC) format, where CC is the country code. (I’m not sure what Open Weather Map does if more than one city in a country has the same name!) Take a few minutes to think of some ways to solve this code design issue.
Off the top of my head, I can think of three possible solutions:
- Use regular expression matching to split the city and country back into their component parts. This would probably work flawlessly, but it makes me a bit nervous in case there is some bizarre city out there that has brackets in its name or something.
-
Change the format stored in the string to a
city,CCvalue so it can be submitted directly to Open Weather Map. This would also work all right, but would it not be overly readable for the user and would eventually break when Open Weather Map changes its API. - Store the city and country as a tuple of values so that their structure can be derived and rendered independently. This is probably best for long-term maintenance and will help avoid surprises or difficulty in the future.
The ListAdapter API allows you to separate data from representation of the data. Since you’re already using a ListAdapter, you can easily change the representation of the cities assignment in the found_location function to store a list of tuples instead of a list of formatted strings. See Example 4-4.
cities=[(d['name'],d['sys']['country'])fordindata['list']]
Tip
If you read the documentation for the ListView API, you will discover that there is also a DictAdapter class that allows you to store data in a dictionary instead of a list. This API requires you to maintain both a dictionary and a list of the dictionary’s keys (to provide ordering) inside the adapter.
I personally recommend never using this API. Find a way to change your data so that the ListAdapter API works instead. Some options include keeping a separate dictionary and storing only the keys in the ListAdapter, or making the ListAdapter store tuples of (key, value) pairs or, possibly, a list of dictionaries.
After you change the strings to tuples, though, if you run the app, it will break. The default behavior of ListAdapter is to assume it is storing a list of strings and set the text property on whatever display class is being used (LocationButton, in this case) to whatever value that is. Trying to set the text property to a tuple causes Kivy to crash.
So, you need a way to convert the data from a list of tuples to a set of property associations on the LocationButton. Kivy does this very Pythonically, by assigning a custom function called args_converter. This function should accept two values: the index of the item being rendered, and the item itself. Kivy will call this function repeatedly for each item in the underlying data list. This allows you to store the data in whatever format makes sense for your application’s underlying data model, and then to convert it to the format that makes sense for your widget’s UI only when it is time to invite the UI to render it. Kivy takes care of all of this internally; all you really need to know is that your args_converter takes an item from the data list as input and outputs a dictionary. The keys in this dictionary are any properties (including custom properties) that can be set on the item being rendered (LocationButton). The values are, of course, the values to set for those properties. Example 4-5 summarizes the new method added to the AddLocationForm class.
defargs_converter(self,index,data_item):city,country=data_itemreturn{'location':(city,country)}
All it does is set a location property on the button. However, LocationButton doesn’t have a location property, so we’ll alter that next. You’ll want a ListProperty, so adjust your imports first, as shown in Example 4-6.
Now it’s a trivial thing to add the location property to the LocationButton class. See Example 4-7.
classLocationButton(ListItemButton):location=ListProperty()
Then you’ll also want to set the text property in the KV language file from this location and pass location rather than text into show_current_weather, as shown in Example 4-8.
-
The
textis set from the value of thelocationproperty.-
The argument passes the
locationproperty, rather thantext.
This still won’t work because you haven’t actually told the ListAdapter what function to use as an args_converter. Do this in the KV language file when the ListView is constructed. Example 4-9 illustrates.
adapter:ListAdapter(data=[],cls=main.LocationButton,args_converter=root.args_converter)
Now the ListView will render correctly, but when you select a location from the list, it will crash spectacularly. The show_current_weather function is receiving a tuple instead of the text it currently expects. You could solve this by changing the location back to a string at this point, but it actually makes more sense to change the KV file, as shown in Example 4-10.
<CurrentWeather@BoxLayout>:location:['New York','US']conditions:Nonetemp:Nonetemp_min:Nonetemp_max:Noneorientation:"vertical"Label:text:"{} ({})".format(root.location[0],root.location[1])BoxLayout:orientation:"horizontal"size_hint_y:Noneheight:"40dp"Button:text:"Add Location"on_press:app.root.show_add_location_form()Button:text:"Forecast"
-
You have to convert the location to an implicit
ListProperty. I tried it without this and it crashed with anIndexError.-
Format the text based on the location. There’s another code smell here, because we’re formatting locations in multiple places. As an exercise, you may want to find a way to refactor this into a static method.
Remember also to update the default location in main.py to be a tuple instead of a string. I told you this design was going to come back and bite me! See Example 4-11.
iflocationisNoneandself.current_weatherisNone:location=("New York","US")
Well! That was a lot of work to make the application continue to do exactly what it was doing before. However, this code refactor makes it almost trivial to implement the code that looks up the actual weather, which we’ll do in the next section.
Retrieving Weather Data
Now it’s time to actually retrieve the weather information from the Internet and render it. This code should clearly go in its own method. In the Python file, the new method could maybe go on the WeatherRoot class. However, it would be better to put that method on the CurrentWeather class, which contains the data that is being updated. So, do one more minor refactor first: change the dynamic CurrentWeather class into one that is defined in the main.py file. The new class is shown in Example 4-12 (note that you’ll have to add StringProperty and NumericProperty to the list of imports). Notice how the properties that were originally defined in the KV language file have been moved here.
classCurrentWeather(BoxLayout):location=ListProperty(['New York','US'])conditions=StringProperty()temp=NumericProperty()temp_min=NumericProperty()temp_max=NumericProperty()
You’ll also want to construct the new class directly in show_current_weather, rather than using the factory. See Example 4-13 (remember to remove the Factory import).
iflocationisnotNone:self.current_weather=CurrentWeather(location=location)
The KV language file has also changed for this refactor. However, for once, the changes have all been to make the code simpler! The class is no longer dynamic because the @BoxLayout has been removed from the rule. Also, all the properties have been removed. The top of the rule is displayed in Example 4-14.
Now you can add a simple method to the CurrentWeather class that updates the weather from Open Weather Map using the same UrlRequest technique you used for searching. The new methods are displayed in their entirety in Example 4-15. Notice that, being Canadian, I prefer to get my weather in metric. If you’re of the old school, you can set the units in the weather_template to imperial instead. Otherwise, you’ll get strange values from Open Weather Map that don’t make much sense at all, no matter where you are from.
defupdate_weather(self):weather_template="http://api.openweathermap.org/data/2.5/"+"weather?q={},{}&units=metric"weather_url=weather_template.format(*self.location)request=UrlRequest(weather_url,self.weather_retrieved)defweather_retrieved(self,request,data):data=json.loads(data.decode())ifnotisinstance(data,dict)elsedataself.conditions=data['weather'][0]['description']self.temp=data['main']['temp']self.temp_min=data['main']['temp_min']self.temp_max=data['main']['temp_max']
Remember to call the method after constructing the CurrentWeather widget in show_current_weather. It also turns out that you can simplify the special cases now, since the location is hardcoded in the new class. Simplifying (or removing) special cases is one of the most satisfying kinds of refactoring! See Example 4-16.
defshow_current_weather(self,location=None):self.clear_widgets()ifself.current_weatherisNone:self.current_weather=CurrentWeather()iflocationisnotNone:self.current_weather.location=locationself.current_weather.update_weather()self.add_widget(self.current_weather)
The final step is to update the weather.kv file to reference the new properties. You can lay this out however you like. I suggest doing some sketches on paper or in a mockup app before you actually start laying things out. The KV language is very easy to work with and can be useful for mocking out interfaces. However, if you don’t actually draw it out on paper, you might end up doing what I did and forget to include the current temperature! My mockup looks like Figure 4-2.
I didn’t mimic this exactly in my code, as displayed in Example 4-17, but I did get all the elements in place.
<CurrentWeather>:orientation:"vertical"BoxLayout:Label:text:"{} ({})".format(root.location[0],root.location[1])font_size:"30dp"Label:text:"{}".format(root.temp)font_size:"30dp"Label:text:root.conditionsBoxLayout:orientation:"horizontal"Label:text:"Low: {}".format(root.temp_min)Label:text:"High: {}".format(root.temp_max)BoxLayout:orientation:"horizontal"size_hint_y:Noneheight:"40dp"Button:text:"Add Location"on_press:app.root.show_add_location_form()Button:text:"Forecast"
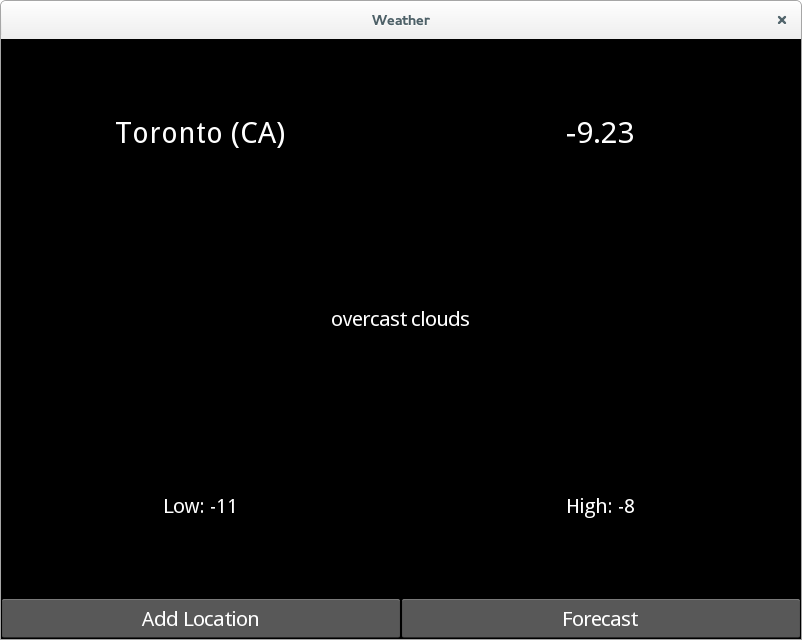
Now you can run the app to check the weather for some common cities. Figure 4-3 shows that it is somewhat chilly in Toronto today.
File It All Away
In this chapter, you iterated on your previous work. You refactored your code into a more maintainable codebase. While you didn’t add too much new functionality, aside from actually looking up the current conditions and temperature, you made huge strides. Your future work will go much more quickly because of the changes you made here.
You might want to explore some additional refactorings or new features. Here are some suggestions:
-
Don’t render the Cancel button on the Add Location form on the initial run of the application. This should reduce the need for the special case in
show_current_weather. - While the search request is being performed, clear any previous search results. This will be important if you do a search and then search for a different location without selecting anything in the result list.
- If you’re feeling particularly adventurous, render a pop-up while the search is being performed. As it is, the interface provides no indication that the network request occurred. This is barely noticeable on a Silicon Valley Internet connection, but on a cellular network in the desert it’s going to be a frustrating wait to answer the question, “How damn hot is it, anyway?”
-
See if you can use the
indexparameter to theargs_convertermethod to alternate the background color of individualLocationButtons. - The code now has two functions that construct a URL from a template string and request data from that URL. Perhaps these lines of code should be refactored into a module-level function. Duplicate code is a bad thing. Don’t repeat yourself.
- For clarity, I didn’t do any error checking on either of those requests. This is fatal in production, because the Internet never stays on all the time. Handling errors in Kivy can be ugly, not because the API is bad, but because there are so many decisions that need to be made, and many of them involve the user. You’ll need to learn how to do this if you want to release your apps in the wild.

Get Creating Apps in Kivy now with the O’Reilly learning platform.
O’Reilly members experience books, live events, courses curated by job role, and more from O’Reilly and nearly 200 top publishers.

