Time for action – creating a pre-defined report
- Go to the console tab.
- Click on NMID | Manage Reports.
- An empty table will be shown. Click on the Add link at the top right of that table.
- On the new page, enter Interface Report as the Report Name.
- Enter a short Report Description of the report. This description will be shown at the beginning of the final PDF report.
- Select 1 Day as the Default Report Timespan.
- Keep the rest to their default entries.
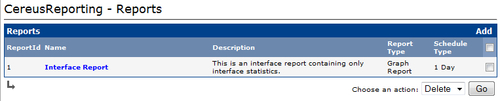
- Click on the Save button. You will be redirected back to the report overview table as shown in the following screenshot:
- Click on the graphs tab.
- Select a host entry from your Cacti tree.
- Select the checkbox next ...
Get Cacti 0.8 Beginner's Guide now with the O’Reilly learning platform.
O’Reilly members experience books, live events, courses curated by job role, and more from O’Reilly and nearly 200 top publishers.

