Chapter 4. Securing User Data
Early in my web development career I took on a freelance role with a small retail company. Part of the company’s business model was catering to corporate clients. Generally, I was doing small site maintenance that involved updating HTML, CSS, and Perl code developed a few years earlier by a (likely more expensive) consulting company. A few days into the job I was familiarizing myself with the codebase when I came across a file named cc.txt. This file contained the credit card information of hundreds of corporate clients, stored as plain text. I quickly deleted the file from my local machine and, I’m pretty sure, closed the laptop’s lid and backed away from it slowly. In the end, I asked to be let out of the contract: I advised the company that this needed to be fixed and told them they should hire someone more experienced than me to do it. I hope they took that advice.
It seems like every few weeks there’s a major breach that leaks user information. Brian Krebs does a good job of cataloging these events on his site, KrebsOnSecurity. Here a few highlights that have been heavily covered by the news media:
- In 2015 it was uncovered that the United States Government’s Office of Personnel Management (OPM) had undergone a data breach involving millions of government employee records. These records included security clearance details, personal information, and fingerprints.
- The extramarital dating website Ashley Madison was infamously breached in 2015, with the attackers revealing user information such as names, addresses, email addresses, and phone numbers.
- In 2015 the insurance provider Anthem Inc. was breached. Hackers stole over 78 million records containing names, birth dates, medical IDs, Social Security numbers, street addresses, email addresses, and employment details.
- In 2016 the professional social network LinkedIn announced that it had been breached in 2012 and that hackers had released a data set containing over 100 million users’ email addresses and hashed passwords.
- In 2016 the file syncing service Dropbox also announced a 2012 breach, which included account information for over 60 million of its users.
It’s not all doom and gloom, however. The web is a wonderful place and a reflection of both the positives and the negatives of our society. Just as we wouldn’t leave our front doors wide open when we’re not at home, there are steps we can take to lock the doors of our web applications. Taking these measures will help protect the valuable information our users share with us. In this chapter we’ll explore the basics of web development security.
Building on a Strong Foundation
Being web developers means that we are constantly learning about and using new tools. It’s an exciting perk of the job. That said, when building secure applications, we are often best served to use established frameworks that have been thoroughly vetted and that provide baked-in security support. As an example, let’s look at the security options when building a web application with Python or Node.js.
The Python environment is relatively stable, and most web applications are built using either the Django or Flask web frameworks. Django provides many security features out of the box, such as cross-site scripting (XSS), SQL injection, and clickjacking protection. As Flask is an intentionally more lightweight framework, it comes with relatively few built-in security features, such as manageable XSS protection. Additional security features can be added with the Flask-Security extension.
Node.js is notorious for its rate of change and the number of available frameworks and libraries. This can be both something to love about the platform and a frustration point for many developers. The site Node Frameworks attempts to catalog them all. Despite there being dozens of Node.js web framework options, when considering security we are likely to be best served by choosing an established framework that is used in production by other web applications, such as Express.
Similar to Flask, Express is a lightweight application framework, but there are several plug-ins that enhance its security features. The two most common are Lusca, which was developed by PayPal, and Helmet. These both add sensible defaults for features such as XSS protection, cross-site request forgery (CSRF) protection, and content security policy settings, among others.
In addition to using security-focused libraries, we should also work to ensure that our dependencies are up to date and free of known vulnerabilities.
In Python we can check for outdated pip-installed packages with:
$ pip list --outdated
Similarly, in Node.js we can list outdated packages with npm:
$ npm outdated
In addition to these manual methods, there are tools that will help maintain dependency updates and scan for security vulnerabilities. Greenkeeper will scan your project for outdated Node.js dependencies and create a pull request with the updates. Greenkeeper will also run your application’s test suite, ensuring that the updated dependencies do not break the build. Snyk is a tool that will scan Node.js packages for known vulnerabilities and alert you to insecure dependencies. The site also provides a command-line means to fixing these vulnerabilities.
Though these examples are limited to Python and Node.js, I hope that you can see how the concepts map to your web stack of choice. When we use established technologies and take advantage of built-in or plug-in-based security features, we are creating solid security foundations for our sites.
OWASP Top 10
Now that we’ve started our application off on a strong foundation, it’s worth exploring the common security vulnerabilities that we should be aware of. Every few years the Open Web Application Security Project (OWASP) publishes a list of the most critical web application security flaws. As of the most recent publication, the OWASP Top 10 is comprised of:
- Injection
- Broken authentication and session management
- Cross-site scripting
- Insecure direct object references
- Security misconfiguration
- Sensitive data exposure
- Missing function-level access control
- Cross-site request forgery
- Using components with known vulnerabilities
- Unvalidated redirects and forwards
This list of common vulnerabilities can provide us with an awareness of potential weaknesses in our own applications.
Secure User Authentication
When a user creates an account with our site, she is placing her trust in us. Often in this process the user may agree to terms of service about how she may interact with our site and services and how the site owners will use the data and information users provide within the application. One crucial step in upholding our end of this agreement is to ensure that user login information is kept secure and private. Let’s explore how we can do so.
Creating Our Own Login System
When creating our own authorization system, it is critical that we send this information over an HTTPS connection, as discussed in the previous chapter, and that we effectively obscure our users’ passwords when they are stored in our database. To effectively do this we should use a combination of hashing and salting.
Hashing is the act of obscuring a string of text by turning it into a seemingly random string. Hashing functions are “one way,” meaning that once the text is hashed it cannot be reverse engineered back to the original string. When hashing a password, the plain text version of the password is never stored in our database.
Salting is the act of generating a random string of data that will be used in addition to the hashed password. This ensures that even if two user passwords are the same, the hashed and salted versions will be unique.
bcrypt is a popular hashing function, based on the Blowfish cipher, that is commonly used in a range of web frameworks. In Node.js we can use the bcrypt module to both salt and hash our passwords.
First we install bcrypt with npm:
$ npm install bcrypt --save
Then, in our application code, we require the module and write a function to handle the salting and hashing using bcrypt:
// require the module
var bcrypt = require('bcrypt');

// the cost of processing the salting data - 10 is the default
var saltRounds = 10;

// function for hashing and salting
function passwordEncrypt(username, password) {
  // generate the salt
  bcrypt.genSalt(saltRounds, function(err, salt) {
    // generate the hash
    bcrypt.hash(password, salt, function(err, hash) {
      // store username, hash, and salt in your password DB
    });
  });
}
For example, the password PizzaP@rty99 would generate the hashed and salted output $2a$10$HF2rs.iYSvX1l5FPrX697O9dYF/O2kwHuKdQTdy.7oaMwVga54bWG (which is the salt plus the encrypted password string). Now, when checking a user’s password against the hashed and salted password, we can use bcrypt’s compare method:
// password is a value provided by the user
// hash is retrieved from our DB
bcrypt.compare(password, hash, function(err, res) {
  // res is either true or false
});
All other major web frameworks also support the use of bcrypt. For example, Django’s documentation provides an excellent overview of integrating bcrypt into an application. Though bcrpyt is a popular and easy-to-implement hashing function, there are several other effective options available, such as PBKDF2 and scrypt. I won’t debate the benefits and merits of these individually, but when implementing a login system I encourage you to research various options and choose the one most appropriate for your application.
OAuth 2.0
An alternative option to providing our own login system is to use OAuth 2.0. OAuth 2.0 is a user authorization system that lets us provide a user login option through popular third-party sites such as Google, Facebook, Twitter, LinkedIn, and more. This allows us to both rely on large and trusted third parties for providing authentication and pull in useful user information, as authorized by the user, from the chosen service.
Even if you have never worked with OAuth as a developer, you are likely familiar with the flow from the perspective of a user.
First, a user clicks a login link from our application (Figure 4-1).
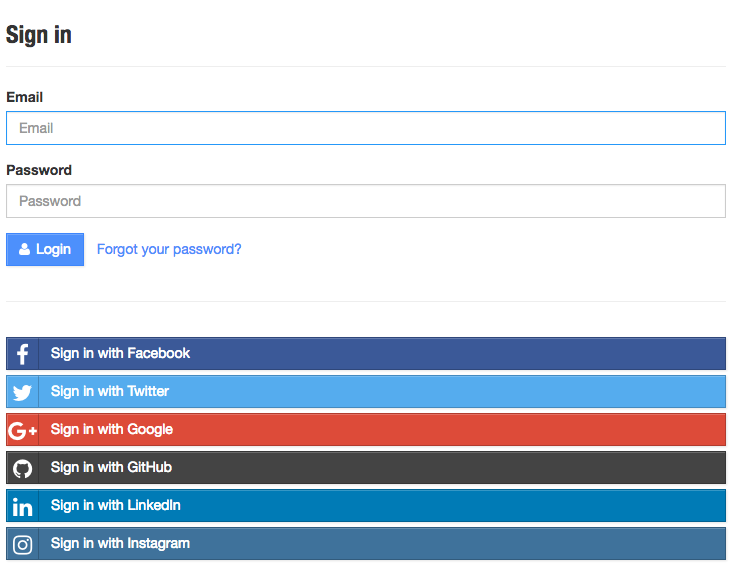
Figure 4-1. An OAuth 2.0 sign-in form (image from the Hackathon Starter Kit)
The user is then directed to an access request for the specified service provider, like the one in Figure 4-2. This request details the level of access to user information that the accessing application will have.
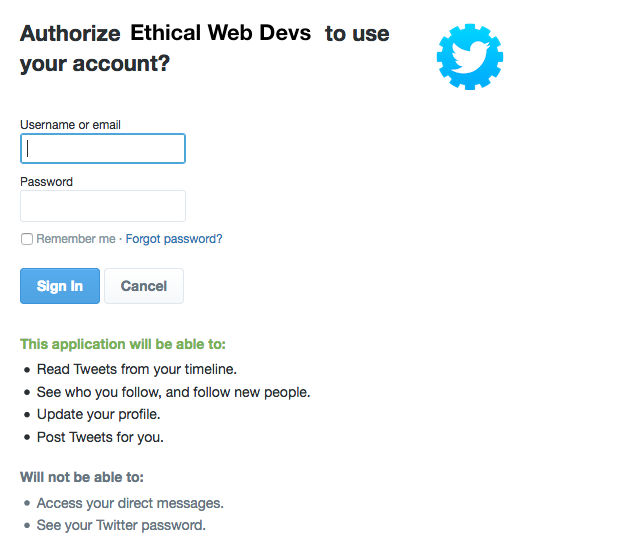
Figure 4-2. An example OAuth 2.0 access request
If the user grants the authorization, the service redirects the user back to our site with an authorization code. Our server will then exchange the authorization code for an access token. Once the access token has been granted, that will be used to access the user information from the third-party service.
Links to libraries for popular programming languages and web frameworks, tutorials, and documentation can be found on the OAuth website. Additionally, Aaron Parecki, the maintainer of OAuth, has written a fantastic guide called “OAuth 2 Simplified.”
Password Strength
Strong user passwords are good for security, but giving users requirements such as characters the password must contain and a required length will often frustrate them. Some password policies are even just plain silly. Worst of all, the resulting passwords may actually be less secure, as the policies provide potential hackers with guidelines for password formats when attempting brute force penetration. Additionally, users who don’t utilize password management software are likely to look for workarounds or write them down or store the passwords somewhere less secure.
If you would like to guide users toward more secure passwords, a better alternative is to use a password strength estimator. The Carnegie Mellon University study “How Does Your Password Measure Up? The Effect of Strength Meters on Password Creation” measured the impact of password strength meters and password requirements:
We found that meters with a variety of visual appearances led users to create longer passwords. However, significant increases in resistance to a password-cracking algorithm were only achieved using meters that scored passwords stringently. These stringent meters also led participants to include more digits, symbols, and uppercase letters.
I’m a big fan of the library zxcvbn, created by the team at Dropbox. The plug-in is reasonably simple to use, but more importantly it is based on a really sound methodology for determining password strength, which the Dropbox team has helpfully detailed.
If your organization is interested in password requirements, steering them instead toward password strength indicators may provide a better experience for users, as well as leading to better password security.
Multifactor Authentication
One way we can provide a more secure authentication system to our users is by making multifactor authentication available. Multifactor authentication is done by combining two more or more of the following:
- A secret known to the user, such as a password or PIN
- A physical object in the user’s possession, such as a mobile phone or a USB FIDO U2F Security Key (Figure 4-3)
- A physical characteristic of the user, such as a fingerprint or typing speed

Figure 4-3. A USB FIDO U2F Security Key
In web applications, the most common pattern is to make two-factor authentication available by providing a physical authentication in addition to the standard username/password flow. Often, users will receive a text message on their mobile phone or install a multifactor authentication application that will provide the appropriate code for this additional verification step. Adding a physical dimension reduces the possibility of password theft providing access to a user’s account. Though many users may opt not to enable two-factor authentication, providing this option is a good step toward better security than standard username and password authentication.
Other Types of Authentication
In addition to the standard username/password and two-factor authentication models, there are less common authentication techniques such as one-time passwords and biometrics. Though uncommon, these may be worth exploring further.
One-time passwords work by generating a unique token and sending it directly to a user, typically via email or a mobile device. The popular chat application Slack makes use of one-time passwords, generating a unique link and sending it to a user when they sign into a Slack channel. This can also be paired with two-factor authentication to add an extra layer of user protection.
Another interesting approach is the use of biometrics. We’ve likely all seen science fiction movies where a retina scanner or fingerprint scanner is used to open a door, but this technology is not something unattainable. In fact, most smartphones now ship with a biometric fingerprint login. Though not currently used on the web, it’s not hard to imagine a future where there are biometric login options. If that time comes, however, there will need to be thoughtful discussions around user security and privacy.
Encrypting User Data
Depending on the types of applications we work on, they may contain sensitive user information beyond user credentials. Our applications may store user locations, journal entries, Social Security numbers, health records, or any number of private bits of information that users have entrusted us with. When this is the case, it becomes important to encrypt sensitive user information, in addition to passwords. Doing this acknowledges that we are willing to take extra steps and security precautions with our users’ information.
We’ve recently seen a rise in the popularity of services that encrypt and secure user data. The email provider ProtonMail offers secure and encrypted email accounts, and the mobile messaging application Signal is fully encrypted. We’ve also seen encryption become a selling point for mainstream applications. For instance, the popular messaging app WhatsApp now provides end-to-end encryption for user conversations. Even if a user is unaware of this feature, it is provided as an additional layer of security and privacy.
Encrypting user data can be useful for much more than messaging and email applications, however. For example, in the case of the OPM hack mentioned at the beginning of this chapter, government employees would have greatly benefited from having their records encrypted rather than stored as plain text in the database.
In Node.js we can use the built-in crypto library to encrypt and decrypt user data. Here’s a very basic example of what that might look like with a pair of functions that encrypt and decrypt some plain text using a provided password:
var crypto = require('crypto');

function dataEncrypt(password, text) {
  var cipher = crypto.createCipher('aes192', password);
  var encrypted = cipher.update(text, 'utf8', 'hex');
  encrypted += cipher.final('hex');
  return encrypted;
}

function dataDecrypt(password, encrypted) {
  var decipher = crypto.createDecipher('aes192', password);
  var decrypted = decipher.update(encrypted, 'hex', 'utf8');
  decrypted += decipher.final('utf8');
  return decrypted;
}

// encrypt some data
var encrypt = dataEncrypt('Password', 'This is encrypted!');
// returns f53a6a423a11be8f27ff86effa5ace548995866009190a90...
var decrypt = dataDecrypt('Password', encrypt);
// returns This is encrypted!
By storing user data in an encrypted format we are taking an extra step toward securing that data for our users.
Sanitizing and Validating User Input
Interactive form fields and text input are often the differentiator between a website and a web application. Introducing this type of interactivity opens a site up to both database injections and cross-site scripting attacks, two of the top three security vulnerabilities on the OWASP Top 10 list. Database injections occur when an attacker injects code or database commands (such as SQL statements) into the database. Cross-site scripting can occur when an attacker is able to inject malicious scripts into a site. Steps can be taken to prevent both of these potential attacks by sanitizing and validating user input.
To sanitize user-submitted content, we should whitelist the HTML input that our application will accept. Whitelisting is preferred to blacklisting user input as it gives us fine-grained control over the type of content being entered and stored. If users are able to add HTML to a field, we can choose the tags that should be available to the user and whitelist those. We should be sure to avoid giving users the ability to execute JavaScript or <script> tags within our applications.
In Node.js we can use the sanitize-html module to do this. First, we install the module as a project dependency:
$ npm install sanitize-html --save
Now in our project code we can include the module and sanitize using a whitelist of accepted tags:
var sanitizeHtml = require('sanitize-html');

var dirty = 'HTML entered from the client';
var clean = sanitizeHtml(dirty, {
  allowedTags: [ 'b', 'i', 'em', 'strong', 'a' ],
  allowedAttributes: {
    'a': [ 'href' ]
  }
});
To avoid database injection, we should further sanitize our user input. When using an SQL database it is important to prevent characters being entered into the database so that SQL statements cannot be injected. By contrast, NoSQL injections may be executed at either the database or application layer. To prevent attacks when using a NoSQL database, we should again ensure that executable code or special characters used by the database are not entered into it.
Cross-Site Request Forgery Attacks
Cross-site request forgery (CSRF) is a type of attack where a site utilizes a user’s browser to manipulate a web application. Through CSRF, an attacker can forge login requests or complete actions that are typically done by a logged-in user, such as posting comments, transferring money, or changing user account details. These attacks can be carried out by utilizing browser cookies or user IP address information. Whereas cross-site scripting attacks exploit a user’s trust in a site, CSRF attacks exploit the trust a site places in the user’s browser.
Wikipedia defines the following common CSRF characteristics:
- They involve sites that rely on a user’s identity.
- They exploit the site’s trust in that identity.
- They trick the user’s browser into sending HTTP requests to a target site.
- They involve HTTP requests that have side effects.
Two possible steps we can take to prevent CSRF attacks are to include a secret token in our forms and to validate the Referer header in requests.
When dealing with form submission, most web frameworks provide CSRF protection or have available plug-ins for generating and validating the tokens. The Django web framework includes default middleware for creating posts with CSRF tokens. The Node module csurf provides the same functionality for applications built using the Express framework.
The second protective measure we can take is to verify the Referer header and, if it is not present or comes from an incorrect URL, deny the request. It should be noted that this header can be spoofed, so this is not a failsafe measure, but it can add a layer of protection for users. Additionally, be aware that some users may disable this header in their browsers due to privacy concerns and thus will not benefit from Referer header validation.
Security Headers
To further harden our application’s security, we can set a number of HTTP headers that give our users’ browsers information about the types of requests possible on our site. Enabling each of these headers will provide further protection for our users against potential threats such as cross-site scripting and clickjacking.
Content-Security-Policy (CSP)
The Content-Security-Policy header is useful for mitigating XSS attacks by limiting the use of resources outside the current domain. When enabling CSP we are able to specify that all resources must come from the current domain. We can do this in our Apache configuration as follows:
header always set Content-Security-Policy "default-src 'self';"
The default-src setting is a catch-all that includes all resources, such as JavaScript, images, CSS, and media. Our policy can be more specific and use directives that specify individual resource policies. For example, the following policy would only permit requests from the origin domain ('self') for scripts, AJAX/Web Socket requests, images, and styles:
default-src 'none'; script-src 'self'; connect-src 'self';
            img-src 'self'; style-src 'self';
The Content Security Policy Quick Reference Guide provides a full list of directives.
It’s also possible to create a whitelist that will permit access to an external domain, such as a content delivery network or analytics host. The following example would permit scripts from cdn.example.com:
script-src 'self' cdn.example.com;
A helpful guide to writing content security policies is available on the KeyCDN website, and the site CSP Is Awesome provides an online generator you can use to create a custom CSP configuration.
X-Frame-Options
The X-Frame-Options header provides clickjacking protection for our sites. It works by disabling or limiting content rendered in a <frame>, <iframe>, or <object> tag.
The possible directives for X-Frame-Options are:
X-Frame-Options: DENY
X-Frame-Options: SAMEORIGIN
X-Frame-Options: ALLOW-FROM https://example.com/
In Apache, we can specify that only content from our domain can be embedded within <frame>, <iframe>, or <object> tags by using the following configuration:
header always set x-frame-options "SAMEORIGIN"
X-XSS-Protection
The X-XSS-Protection header enables the cross-site scripting filter in a user’s browser. Though this setting is typically enabled by default in modern browsers, the use of this header will enforce the policy if it has been disabled.
To configure X-XSS-Protection in our Apache configuration, we can include this line:
header always set x-xss-protection "1; mode=block"
X-Content-Type-Options
The X-Content-Type-Options header is used to enforce file content types. When a browser is unsure of a file type, the browser may do content (or MIME) sniffing to guess the correct resource type. This opens up a security risk as it can allow a user’s browser to be manipulated into running executable code concealed as another file type.
We can configure Apache to disallow content sniffing as follows:
header always set X-Content-Type-Options "nosniff"
Checking Security Headers
Once our security headers have been set, we can use securityheaders.io to scan our site. The tool analyzes the site’s response headers and produces a grade indicating the level of protection. Scanning the tool’s own site results in an A+ score (Figure 4-4).
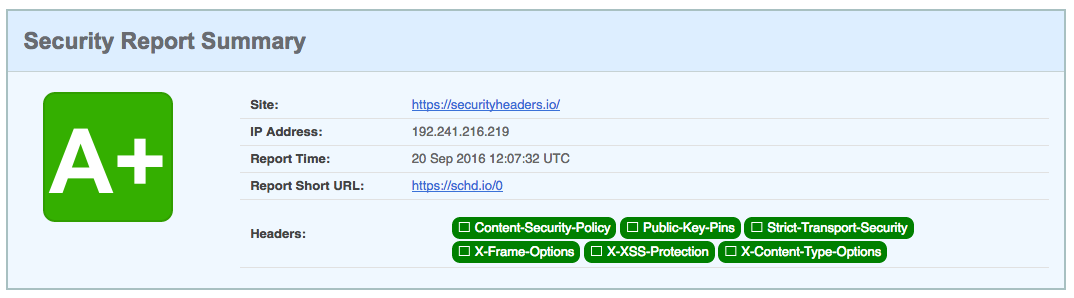
Figure 4-4. Security header results for securityheaders.io
Security Disclosures and Bug Bounty Programs
No matter how diligent we are about security, there may be flaws in our application. To improve security and the user experience, we should acknowledge this potential by having a strong security disclosure plan and consider implementing a bug bounty program.
Developer Jonathan Rudenberg’s post “Security Disclosure Policy Best Practices” provides a succinct strategy for handling security disclosures. In it, he outlines the following key points for having an effective security program:
- Have a security page with an email address and PGP key for submitting security disclosures.
- Have a clear, concise, and friendly security policy.
- Disclose any reported vulnerability.
- Respond to the vulnerability quickly.
- Don’t place blame on teammates or employees.
- Alert customers and inform them of the remediation steps.
As part of this process, you may want to offer a bug bounty for security researchers who discover vulnerabilities. The site Bugcrowd has compiled a list of bug bounty programs that can serve as exemplars. Some well-known sites that offer bug bounties include Facebook, Google, GitHub, and Mozilla. Recently the United States Department of Defense has even gotten in on the action, launching the Hack the Pentagon program.
By providing clear steps for reporting security vulnerabilities and transparent communication about remediation steps, we can work to build additional trust in our users.
Conclusion
There are a dizzying number of possibilities when it comes to web application security, but by building on a solid foundation, following best practices, and providing clear security information to our users, we can work to build a more secure web. I hope that this chapter serves as a strong jumping-off point for your efforts to build and maintain secure web applications.
Further Reading
- Identity and Data Security for Web Development by Jonathan LeBlanc and Tim Messerschmidt (O’Reilly)
- Security for Web Developers by John Paul Mueller (O’Reilly)
- Awesome AppSec
- “A Practical Security Guide for Web Developers” by FallibleInc
- OWASP Testing Guide
- “Python & Django Security on a Shoestring: Resources” by Kelsey Gilmore-Innis
- “Security Tips for Web Developers” by Jesse Ruderman
- “The Password Manifesto” by Andrew A. Gill
- “Mozilla Cybersecurity Delphi 1.0: Towards a User-Centric Policy Framework”
- XATO: Security
- xkcd: Password Strength
Get Building Web Apps that Respect a User's Privacy and Security now with the O’Reilly learning platform.
O’Reilly members experience books, live events, courses curated by job role, and more from O’Reilly and nearly 200 top publishers.

