Chapter 4. Building the RocknRollCall Prototype: Templates
In Chapter 3, we learned about modern workflow tools that take the guesswork and gruntwork out of setting up complex web applications. Now that we have a nicely organized project set up, itâs time to start writing some code.
In this chapter, weâll focus on the templating systemâHandlebars.jsâthat comes along with a default Ember setup. Itâs always tough to figure out where to start explaining a system like this, with so many interdependent âchickensâ and âeggs,â but we chose to start with the templating angle because thatâs where we think you should actually start an ambitious project. By the time you turn the last page in this chapter, youâll know how to inject âliveâ (two-way-bound) variables into an HTML template, how to automatically generate (and re-generate/update) HTML lists (UL and OL tags) from array references, and even how to use some logic (if/then/else) in your templates.
Rock ânâ Roll
When it comes time to write an application for the purposes of demonstrating a new framework or an idea for how to write applications, it seems that writing a to-do application is the only choice. We wonder if that has something to do with the culture of Silicon Valley. We live in Austin, TX, sometimes called âSilicon Hillsâ because so many technology companies have moved some or all of their offices from California to Austin. They come here for many reasons, including far more affordable land and labor, but we canât help but think the pace is part of the draw. And so, to demonstrate, our demo application will not be a productivity application. We will build something akin to The Internet Movie Database that indexes bands and musicians rather than films, directors, and actors. We call it âRockânâRoll Call.â Besides, thereâs already a great Ember to-do demo application at TodoMVC.
For such an app to be useful, it has to provide at least these features:
- The user should be able to search for artists and songs by name
- Ideally, users should not have to specify that they are searching for an artist or a song; they should just be able to type in their search terms and hit âgo.â
- Search results should be displayed with an indication of what type of entity was found (i.e., artist or song)
- We do not want to encumber users by requiring them to specify whether they wanted to search for an artist or song, but the results should probably have filters so that users can at that point, if they so desire, narrow their results to just artists or just songs.
- Search results should link to a page with more details about the found entity
- It would be great if this page included a short description of the search resultâa biography of an artist or a history of the song, as well as links to further information and even online media.
- For fun, letâs also enable users to track the popularity of the music and musicians they search for, so users can gauge how âpopâ their tastes may be
- Weâll need to persist such data somewhere, and ideally we would have some novel way of visualizing this data.
Obviously, weâre going to need a lot of music data in order to pull this off. Perhaps the best thing about using this application, rather than a to-do list application, as our example, is that this app would be nearly impossible to build all on its own. To-do apps are islandsâthere neednât be any data that isnât generated by the user. This application, like most you will end up building in real-world development, will rely on interfacing with web servicesâother peopleâs servers providing data. In this case, we built this application to talk to The Echo Nest, an excellent âmusic intelligenceâ service with a robust feature set, an enormous and growing database, great documentation, and a JavaScript API.
Spoiler alertâhereâs how weâre going to pull all of this off:
-
Weâll create a template that has an Ember TextField, bound to a variable weâll call
searchTerms, with anactiondefined in the ApplicationController that will transition to aSearchResultsRoute, whoseSearchResultsControllerwill query the Echo Nest API with thesearchTermsvariable.SearchResultsControllerwill query the Echo Nest API twice, once assuming the user is searching by artist name and once searching by song title. -
Our
search-resultstemplate will iterate over the search results separately, applying classnames that let us visualize the artists and songs in discrete ways.Our
search-resultstemplate will include a couple Ember Checkbox input helpers, and the display of our list of artist search results and song search results will be conditionally rendered based on the values of those checkboxes. -
Echo Nest search results include unique IDs for the entities that match the search results. Our
search-resultstemplate will includelink-tohelpers that will link to routes specifically set up to show a detailed view of artists (ArtistRoute) and songs (SongRoute). These routes will make an additional query on the Echo Nest API, requesting entity information and passing the unique ID associated with the link the user clicked from the search results list.Armed with a model generated from the Echo Nest response, the
ArtistVieworSongViewwill render, pulling images, video, and textual depictions of the entity from the Echo Nest response and populating theartistorsongtemplate. -
When the user clicks on a search result, the
SearchResultsControllerwill write a record to local storage, capturing a timestamp, and the unique ID, display name, type, and âhotttnesssââEcho Nestâs proprietary measure of how popular an entity may beâof the entity. Later weâll look at persisting that data remotely.A link in the main navigation will lead the user to an
ActivityRouteandactivitytemplate, which will include a component that makes use of D3 to visualize the userâs activityâall the data captured as theyâve used the application. Because weâre visualizing something called âhotttnesss,â we think a heat map is an appropriate visualization scheme.
Starting with HTML
If youâve paid any attention to the topic of modern web development workflows, youâve heard conversation lately about the increasing irrelevance of traditional workflows and approaches. âWaterfallâ is becoming more and more a dirty word. The very tools used and artifacts created during development have been called into question. Mocking up a design for a responsive web application with Photoshop, for instance, creating renderings of your site at the myriad widths and heights that a browser may choose (or be constrained) to render your site within, is a never-ending task. Designing for ideal devicesâlarge desktop monitors and powerful processorsâsimply doesnât cut it anymore.
When possible, your best bet is to design within the browser. If you are a designer who can write just enough HTML and CSS to mock up your designs, that is great. If youâre a developer working with a designer who is not so confident with HTML and CSS, itâs in your best interest to make yourself available to build these mockups early and often. And this is one of the great things about Emberâs typical implementation: your templates are written in HTML.
For this application, rather than starting with wireframes or visual mockups, we actually mocked up our ideas in HTML and CSS. Having been at this for many years, this was a bit of a new experience for us. Most of the time our work feels like that of a building contractor being handed blueprints and going in with a nailgun and a pile of lumber, but this process felt more like being a sculptorâlike the HTML was so much clay that we could push and pull around until it started to look the way we wanted it to.
The Basics of Handlebars.js
You can start your project by simply building plain old static HTML. Youâll come back and swap in Handlebars helpers and fold in conditionals and bound variables later. Letâs start by building the global content in our application: the header, global parts of the page body, and the footer. We can simply add code like thisâwhich makes use of Twitter Bootstrapâright into our app/templates/application.hbs:
<divclass="wrapper"><divclass="navbar navbar-inverse"role="navigation"><divclass="navbar-header"><buttontype="button"class="navbar-toggle"data-toggle="collapse"data-target="#navbar-collapse-1"><spanclass="sr-only">Toggle navigation</span><spanclass="icon-bar"></span><spanclass="icon-bar"></span><spanclass="icon-bar"></span></button><ahref="#"class="navbar-brand">Rock'n'Roll Call</a></div><divid="navbar-collapse-1"class="collapse navbar-collapse"><ulclass="nav navbar-nav search-lockup"><liclass="search-group"><inputclass="search-input"placeholder="Search for artists or songnames"><buttonclass="btn btn-primary"><iclass="glyphiconglyphicon-play"></i></button></li></ul><ulclass="nav navbar-nav navbar-right"><li><ahref="#">Activity</a></li></ul></div></div><divclass="container-fluid"><divclass="row-fluid"><!-- page content here --></div></div></div><footer><p><iclass="glyphicon glyphicon-copyright-mark"></i>2013 Companion to O'Reilly's<em>Building Web Apps with Ember.js: Write Ambitious Javascript</em><ahref="http://twitter.com/emberbook">@emberbook</a></p><p>Authors: Jesse Cravens<ahref="http://twitter.com/jdcravens">@jdcravens</a>and Thomas Q. Brady<ahref="http://twitter.com/thomasqbrady">@thomasqbrady</a></p></footer>
And because this book isnât really about CSS, we will go ahead and add all of the siteâs CSS at once.
See the change in this commit.
Twitter Bootstrap
If you are wondering how Twitter Bootstrap was included in your application, it was injected by Yeoman in Chapter 3, after we selected Y at this prompt:
Would you like to include Twitter Bootstrap for Sass? (Y/n)
Figure 4-1 shows what the site looks like at the moment.
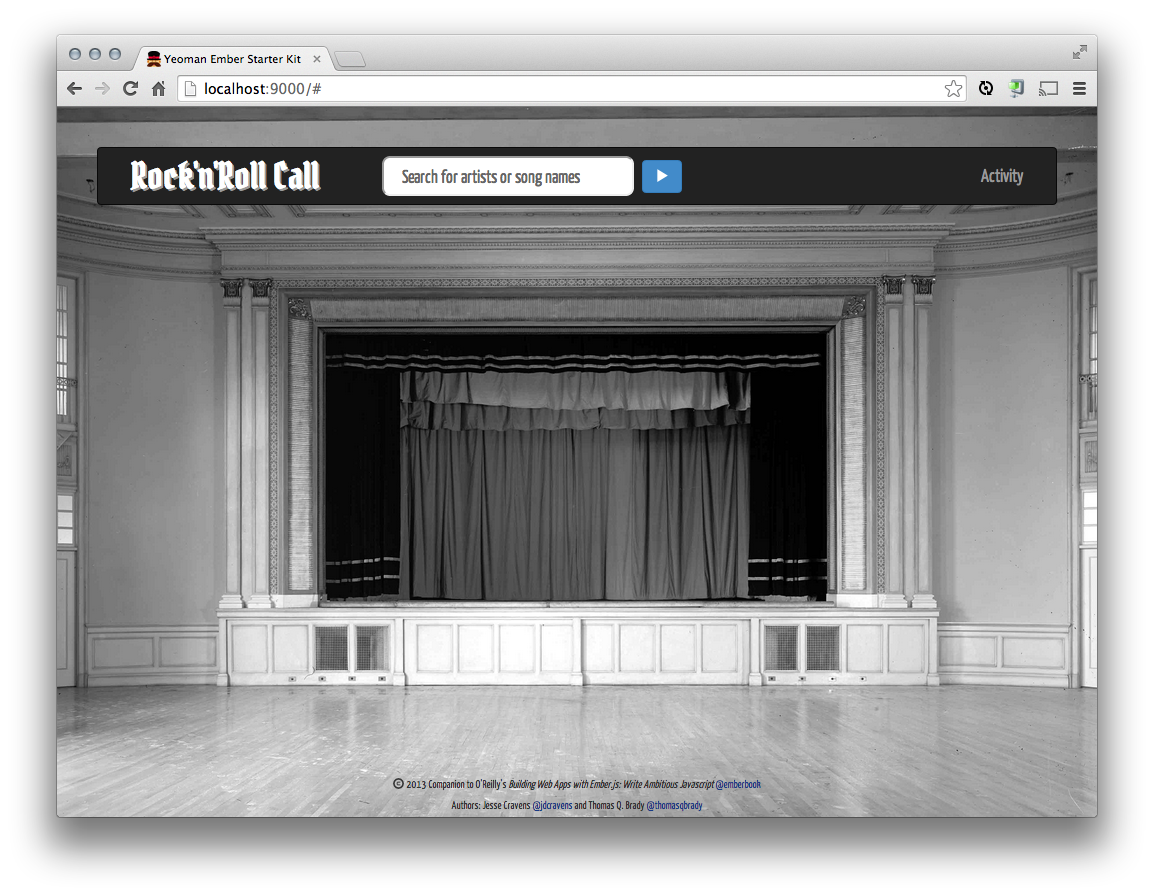
Figure 4-1. Our barebones site, with a generous helping of CSS
Variables
Now that we have a page thatâs doing what we want and looking the way we want, we can begin to replace static elements with programmatic elements using Handlebars. Letâs start with our applicationâs name. Letâs say you want to localize the name of your application, showing âRock Uppropâ for your Swedish users, for instance. Weâll need to do at least two things to make this work:
-
Weâll need to use Handlebars to render a variable in place of our static HTML content.
-
Weâll need to define that variable somewhere.
In practice, the definition of that variable could get quite involved. For now, letâs just hang a variable on our RocknrollcallYeoman object. Speaking of, letâs see what JavaScript was given to us by Yeoman in our app/scripts/app.js file:
varRocknrollcallYeoman=window.RocknrollcallYeoman=Ember.Application.create();/* Order and include as you please. */require('scripts/controllers/*');require('scripts/store');require('scripts/models/*');require('scripts/routes/*');require('scripts/views/*');require('scripts/router');
Letâs add a line, after the line in which we call Ember.Application.create(), that looks like this:
RocknrollcallYeoman.applicationName="Rock'n'Roll Call";
See the change in this commit.
In the future, we can add some fancy functionality that sets this variable to a localized version in any languages we wish to support. For the time being, this does mean that if we decided to change the name of our application, as long as we use Handlebars helpers every place we want to display the applicationâs name, weâd only have to make that change in one place.
So, back to our template. Now we can simply change this line:
<ahref="#"class="navbar-brand">Rock'n'Roll Call</a>
to this:
<ahref="#"class="navbar-brand">{{RocknrollcallYeoman.applicationName}}</a>
See the change in this commit.
As we have seen before, this doesnât just inject your variable when the page is loaded. If RocknrollcallYeoman.applicationName were to change while the user was using your applicationâif, for instance, the user chose a different language from a preferences drop-downâthat anchor tagâs contents would be updated, automatically, without you having to write any more code than what weâve written.
Linking with the {{link-to}} Helper
While weâre at it, that dummy link should be easy enough to actually hook up. Weâll probably want clicking on the logo to take you back to the default state of the application, as though youâd just arrived. We havenât created any routes or controllers, yet, but, keep in mind, that doesnât mean that Ember hasnât. The page weâre currently looking at in our browser is the⦠did you guess it? Itâs the default IndexRoute, nestled within the default ApplicationRoute. From here, our user will type in some search terms and hit Enter or click Play, either of which will take him to a search results route. Or he could click Activity to see a visualization of his search activity, which would take him to ActivityRoute. So, if he wanted to come back to this page weâre looking at now, he would want to return to the IndexRoute. Well, thatâs easy enough. Replace that anchor tag with a Handlebars link-to, like so:
Static HTML:
<ahref="#"class="navbar-brand">{{RocknrollcallYeoman.applicationName}}</a>
becomes the Handlebars template:
{{#link-to "index" class="navbar-brand"}}{{RocknrollcallYeoman.applicationName}}{{/link-to}}
See the change in this commit.
Youâre probably picking up on most of how this syntax works. The {{ and }} bits basically replace HTMLâs < and >. Like the opening an closing anchor tag in HTML, the link-to requires and opening tagâ{{#link-to â¦}}âand a closing tagâ{{/link-to}}. Inside that opening tag, just as with HTML, you can declare attributes of the anchor tag that will actually be rendered to the page, as we did in this example by declaring the classname of navbar-brand. The part you might be wondering about is that string right before that classname declaration: "index". Whereas with an HTML anchor you declare your target with an href attribute, with the Handlebars link-to helper, you pass a route, by name, as the first parameter. The naming convention is simple, once you get the hang of it. You take the camelcase version of your routeâs name (IndexRoute, in this case), remove Route, insert a hyphen before any capital letter but the first, separate the words if there are more than one, and make all the letters lowercase. That sounds complicated, written out that way, but visually it makes sense. Letâs do a couple:
-
Declaration name
IndexRoutewould be passed to alink-toasindex. -
Declaration name
SearchResultsRoutewould be passed to alink-toassearch-results.
You can read all about Emberâs naming conventions at Ember Guides: Naming Conventions.
Input with the {{input}} Helper
As you can imagine, the contents of that search input are going to become pretty important.input field as it isâaccessing its value and intercepting its submit even with JavaScriptâbut itâs far easier to let Handlebars and Ember do their thing. Letâs replace our input tag with a Handlebars input helper:
Static HTML:
<inputclass="search-input"placeholder="Search for artists or song names">
becomes the Handlebars template:
{{input type="text" class="search-input" placeholder="Search for artists or song names"}}
See the change in this commit.
As it is there, that input isnât going to do much. Weâll look at binding its value and its submit event in the next chapter.
Letâs turn our attention to search results. Hereâs the static HTML mockup we came up with:
<divclass="container-fluid"><divclass="row-fluid"><divclass="search-results-wrapper clearfix"><divclass="search-facets col-md-2"><h3>Show:</h3><ulclass="facets"><li><label>Artists</label><inputtype="checkbox"checked="checked"></li><li><label>Songs</label><inputtype="checkbox"checked="checked"></li></ul></div><divclass="results col-md-10"><h3>Artists</h3><ulclass="search-results artists"><li><ahref="#">Tom Waits</a></li><li><ahref="#">Tom Waits w; Keith Richards</a></li><li><ahref="#">Tom Waits/Keith Richards</a></li><li><ahref="#">Tom Waits [Vocalist]&Orchestra [Orchestra]&Michael Riesman [Conductor]&Bryars, Gavin [Composer]</a></li><li><ahref="#">Tom Waits [Vocals]&Gavin Bryars Ensemble [Ensemble]</a></li><li><ahref="#">Tom Waits [Vocalist]; Orchestra [Orchestra]; Michael Riesman [Conductor]</a></li><li><ahref="#">Tom Waits [Vocals]&Gavin Bryars Ensemble [Ensemble]&Bryars, Gavin [Composer]</a></li><li><ahref="#">Tom Waits [Vocalist], Orchestra [Orchestra]&Michael Riesman [Conductor]</a></li></ul><h3>Songs</h3><ulclass="search-results songs"><li><ahref="#">"Tom Waits," by Panic Strikes a Chord</a></li><li><ahref="#">"Tom Waits," by Doug Kuony</a></li><li><ahref="#">"Tom Waits," by The Moonband</a></li><li><ahref="#">"Tom Waits," by The Moonband</a></li><li><ahref="#">"Tom Waits," by Spaghetti Western</a></li><li><ahref="#">"Tom Waits," by The Passionate&Objective Jokerfan</a></li><li><ahref="#">"Tom Waits," by Mike Macharyas</a></li><li><ahref="#">"Tom Waits," by Junkyard Poets</a></li><li><ahref="#">"Tom Waits," by The Fall of Troy</a></li><li><ahref="#">"Tom Waits," by Anouk</a></li></ul></div></div></div></div>
For now, we wil add these results to index.hbs. We also need to add in a {{outlet}} to tell Ember where to render the template associated with the current route (index).
Figure 4-2 shows what the site looks like at the moment.
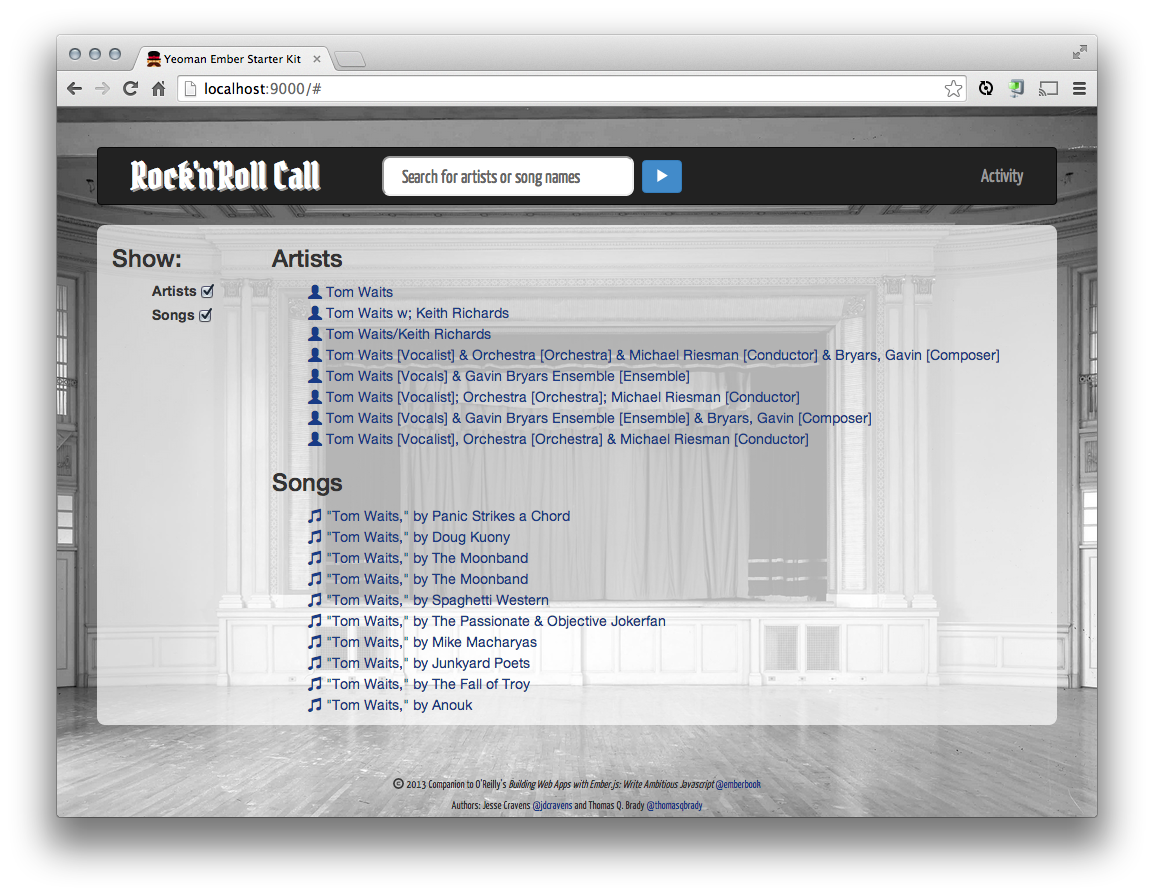
Figure 4-2. Our search results template, rendered
But What Is This {{outlet}}, IndexRoute, and index.hbs?
We havenât covered how to get back and forth from one template to another. So for now, just know that we are rendering the content associated with the IndexRoute and index.hbs template into the {{outlet}} of application.hbs. Later, in the next chapter, weâll cover generating new templates, routes, and hooking everything up!
See the change in this commit.
Lists with the {{each}} Helper
The first thing that might jump out at you as something inherently template-worthy might be those unordered lists. Handlebars has a nifty little helper for just such a thing. Letâs reduce each of those lists to one item each, first, and then look at how to use the helper to replicate that template for each item we get back in our search results. So, hereâs the HTML version of the artists list:
<ulclass="search-results artists"><li><ahref="#">Tom Waits</a></li></ul>
In the end, weâll want one ul tag, just like that one, but weâll want potentially lots of li tags within it. Handlebars has an each helper that will iterate over an array, rendering a sort of inner template for each item in the array. So letâs first create a dummy array object we can render. Add this line to app.js, just below our applicationName declaration:
RocknrollcallYeoman.dummySearchResultsArtists=[{id:1,name:'Tom Waits',nickname:'Tommy',type:'artist',enid:'ARERLPG1187FB3BB39'},{id:2,name:'Thomas Alan Waits',type:'artist',enid:'ARERLPG1187FB3BB39'},{id:3,name:'Tom Waits w/ Keith Richards',type:'artist',enid:'ARMPVNN13CA39CF8FC'}];
See the change in this commit.
Now we can iterate over that array in our template. Replace that lonely little li tag with a helper, like so:
<ulclass="search-results artists">{{#each RocknrollcallYeoman.dummySearchResultsArtists}}<li><ahref="#">{{name}}</a></li>{{/each}}</ul>
See the change in this commit.
Magical, isnât it? Itâs one thing that this helper is looping over our global variable. Like so much of Ember and Handlebars, the really magical part comes when the variable you passedâin our case, the global dummySearchResultsArtistsâchanges, and your list updates automatically.
Notice that the contextâor variable scopeâchanges within the each helper. The text node within our anchor tag is referenced simply with \{{name}}, not App.dummySearchResultsArtists[index].name or anything of the like. Within the each loop, the context is set to the current object found within the array, and you can access its named properties by simply naming them.
What if we had a nicknames property on each of our dummySearchResultsArtists objects, which was an array of nicknames the artist had used. Suppose we wanted to display each of those nicknames as its own search result, so that âTAFKAPâââThe Artist Formerly Known as Princeââwould be its own search result. And to reduce confusion, weâll include âAKA: [real name, or original stage name here].â Someone might be searching for someone by a nickname and not even know itâs only a nickname, after all.
Youâre probably thinking, because youâre so clever, that our context switching might not be so convenient in this scenario. Letâs take a look at why. Hereâs a first stab at this theoretical template (weâd really do it, but The Echo Nest doesnât supply nicknames):
<ulclass="search-results artists">{{#each RocknrollcallYeoman.dummySearchResultsArtists}} {{#each ...
Oh, right! What do we call our local object? Well, you wonât do this often, if ever, in practice, but it turns out, you can call it this:
<ulclass="search-results artists">{{#each RocknrollcallYeoman.dummySearchResultsArtists}}<li><ahref="#">{{this.name}}, AKA "{{this.nickname}}"</a></li>{{/each}}</ul>
But, using this here just doesnât seem right, so fortunately Handlebars has us covered with another syntax for the each helper that lets you name your iterated variable, like so:
<ulclass="search-results artists">{{#each artist in RocknrollcallYeoman.dummySearchResultsArtists}}<li><ahref="#">{{artist.nickname}}, AKA "{{artist.name}}"</a></li>{{/each}}</ul>
And, if you want to remove even more characters and simplify further, we donât even have to use this or a variable name. By convention, Handlebars will make the assumption that the current model object in the interated array is the current context:
<ulclass="search-results artists">{{#each RocknrollcallYeoman.dummySearchResultsArtists}}<li><ahref="#">{{nickname}}, AKA "{{name}}"</a></li>{{/each}}</ul>
But now weâve run into a different issue. Our artists with nicknames are rendering beautifully, but our artists without nicknames arenât rendering at all. This makes perfect sense, looking at our code. If you didnât have an array called nicknames, you would bypass that portion of the code altogether. We need something like an if statement. And, it may not surprise you at this point, Handlebars has this handled.
Conditionals with the {{if}} and {{else}} Helpers
Letâs check to see if the current artist has any nicknames first and then choose to loop over them or use a simpler template.  That might look something like this:
<ulclass="search-results artists">{{#each RocknrollcallYeoman.dummySearchResultsArtists}} {{#if nickname}}<li><ahref="#">{{nickname}}, AKA "{{name}}"</a></li>{{else}}<li><ahref="#">{{name}}</a></li>{{/if}} {{/each}}</ul>
Figure 4-3 shows what the site looks like at the moment.
See the change in this commit.
You may be wondering whatâs required of the nicknames attribute to evaluate as false. We would all expect the usual suspects to qualify, if assigned to that attribute in our data: false, null, undefined. But what if there was an empty array: []? Handlebars evaluates all of those as false, rest assured.
Now we can remove the nickname logic, as it was purely for demonstration purposes. It wonât really be supported, once we hook up to the real Echo Nest API service.
See the change in this commit.
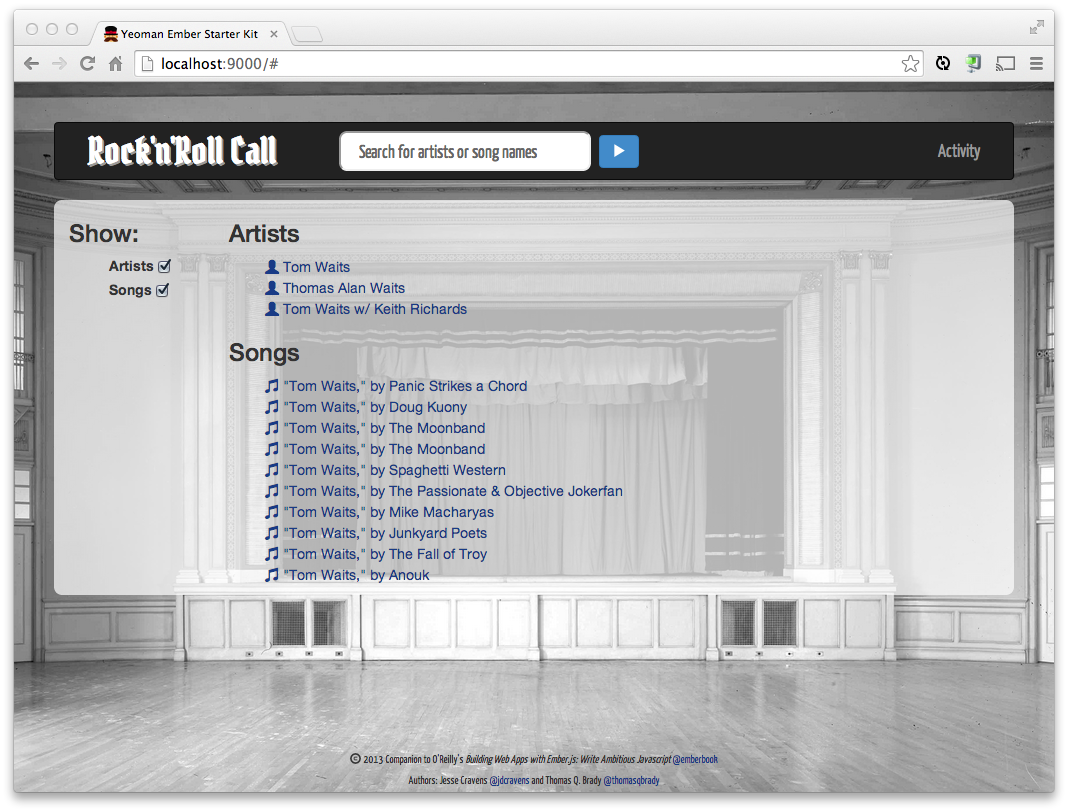
Figure 4-3. Our search results template with dummy data and conditional logic, rendered
Capturing User Interaction with the {{action}} Helper
The {{action}} helper is available to capture events as the user interacts with your application. The action will bubble up to the controller that is associated with the current route. This will make more sense later once we have fully covered routes, but from your introduction in Chapter 2, you should at least be familiar with the basics.
The most common use case is to use an action to capture click events on an anchor tag or a button:
<button{{action'doSomething'}}>CLICK ME!</button>
In order to handle this action, we need somewhere to handle the action. So letâs create an IndexController by creating app/scripts/controllers/index_controller.js:
RocknrollcallYeoman.IndexController=Ember.Controller.extend({});
See the change in this commit.
By creating this controller, we are actually overriding an exisiting IndexController that Ember created for us through active generation. You will learn more about active generation in the next chapter.
You can now handle this action on the current controller, which is the IndexController we just created, because we are hitting root URL (http://localhost:3000/). If thatâs confusing, hang tight; you will learn more about routing in Chapter 5:
RocknrollcallYeoman.IndexController=Ember.Controller.extend({actions:{viewedArtist:function(artist){console.log('hang on I"m viewing: '+artist.name)}}});
We can then use an anchor tag and a custom actions to capture the click activity of our users, like this:
<li><a{{action'viewedArtist'this}}>{{name}}</a></li>
See the change in this commit.
For more details on how we handle the action, stay tuned. In Chapter 7, we go into detail on how to persist this activity data locally and remotely.
Bound Attributes
Continuing down our happy path, letâs say the user clicks on an artistâs name in those search results and is taken to an entity page. Later, in the next chapter, youâll learn how to create this new route, or application state, and navigate to it. For now, weâll look at the final template first and then dissect what we see. Add the following to app/templates/artist.hbs:
<divclass="entity-artist page-container"><divclass="artist-bio-lockup clearfix">{{#if model.image}} {{#if model.license}} {{#if model.license.url}}<a{{bind-attrhref="model.license.url"}}><img{{bind-attrsrc="model.image.url"}}class="pull-right"></a>{{else}}<img{{bind-attrsrc="model.image.url"}}class="pull-right">{{/if}} {{else}}<img{{bind-attrsrc="model.image.url"}}class="pull-right">{{/if}} {{/if}}<h3class="fancy">{{model.name}}</h3><h4>{{hotttnesss-badge model.hotttnesss}}</h4><pclass="bio pull-left">Biography(from {{model.biography.site}}): {{model.biography.text}}</p><a{{bind-attrhref="model.biography.url"}}class="pull-left">Read more</a></div>{{#if model.videos.length}}<divclass="videos"><h5>Videos</h5>{{#each video in videos}}<a{{bind-attrhref="video.url"}}><img{{bind-attrsrc="video.image_url"}}class="video-thumbnail"></a>{{/each}}</div>{{/if}}</div>
See the change in this commit.
Look over that block of code a few times. Guess what? Thereâs only one new Ember concept in there. That new concept is expressed in the template as bind-attr attributes, which youâll see are inside curly braces and found inside HTML tags, where youâd normally find attributes declared. Thatâs because they get rendered as attributes, eventually. The bind-attr directive allows you to dynamically assign any HTML attribute you like from any variable available in your context at runtimeâmost often from your model, but it could be something generated by a controller, view, or route.
The syntax is pretty simple. Itâs not a tag, so thereâs no opening and closing and therefore no need for a hash sign or a closing forward slash sign. You simply declare:
<[some tag] {{bind-attr }}>
Then you name the attribute you wish to populateâin this case, letâs create a working link:
<a{{bind-attrhref=video.url}}>Watch now on Vimeo</a>
Looking back at our template, youâll see plenty of examples of populating href attributes, src attributes of images, and one example of a data- attribute. You can bind to any attribute you like, including the class attribute. The class attribute, though, is a bit trickier, as youâll often have more than one, and each of them will need to be bound to different inputs. Handlebars offers a number of nifty tricks to handle lots of combinations of dynamic and static classname bindings, all detailed in this entry in the Ember.js guides, âBinding Element Class Namesâ.
Now letâs take a look at how we can create our own helper to refactor the code that we used earlier to display a hotttnesss badge.
Creating Custom Helpers
So far, we have looked at helpers that are already included in Ember.js, such as the input Handlebars helper. The input helper is actually included in the Ember.js library as an extension to Handlebars. In fact, here it is, at the time of writing, on line 31514 in Ember.js 1.4.1+pre.af87bd20:
Ember.Handlebars.registerHelper('input',function(options){Ember.assert('You can only pass attributes to the `input` helper,not arguments',arguments.length<2);varhash=options.hash,types=options.hashTypes,inputType=hash.type,onEvent=hash.on;deletehash.type;deletehash.on;if(inputType==='checkbox'){returnEmber.Handlebars.helpers.view.call(this,Ember.Checkbox,options);}else{if(inputType){hash.type=inputType;}hash.onEvent=onEvent||'enter';returnEmber.Handlebars.helpers.view.call(this,Ember.TextField,options);}});
The cool thing is we can build our own custom Handlebars helpers, following this same pattern provided as an extension point by Handlebars. To demonstrate this, letâs build a hotttnesss badge that displays flames and a number based on the hotttnesss property on our model.
If we were to do this without a helper, we would need to add multiple icon elements to app/templates/index.hbs, like this:
<h4>Hotness: {{#if model.hotttnesss}}<iclass="hotttnesss"><iclass="glyphicon glyphicon-fire hotttnesss0"></i><iclass="glyphicon glyphicon-fire hotttnesss1"></i><iclass="glyphicon glyphicon-fire hotttnesss2"></i><iclass="glyphicon glyphicon-fire hotttnesss3"></i><iclass="glyphicon glyphicon-fire hotttnesss4"></i><iclass="glyphicon glyphicon-fire hotttnesss5"></i><iclass="glyphicon glyphicon-fire hotttnesss6"></i><iclass="glyphicon glyphicon-fire hotttnesss7"></i><iclass="glyphicon glyphicon-fire hotttnesss8"></i><iclass="glyphicon glyphicon-fire hotttnesss9"></i></i><spanclass="hotttnesss-badge"{{bindAttrdata-hotttnesss="model.hotttnesss"}}></span>{{/if}}</h4>
We would also need to create a style for each of those icon elements, such as the following for hotttnesss0:
h4.hotttnesss.hotttnesss0{font-size:190%;top:-45%;left:-45%;position:absolute;color:#FF0000;direction:rtl;unicode-bidi:bidi-override;}
So, instead of including all 10 i elements in the markup, we can write a helper that will include the markup based on the length of the model. We do this by converting the hotttness property that is stored as a value from between 0 and 1 to a value between 1 and 10, iterating over that value, dynamically creating the HTML, and outputting it:
Ember.Handlebars.helper('hotttnesss-badge',function(value,options){varh=parseFloat(value);varhotttnesss_num=Math.round(h*100);varhotttnesss_css=Math.ceil(h*10)-1;varhtml="<h4>Hotness: ";if(hotttnesss_num>0){html+='<i class="hotttnesss">';for(vari=0;i<hotttnesss_css;i++){html+='<i class="glyphicon glyphicon-fire hotttnesss'+i+'"></i>';}html+="</i>";html+='<span class="hotttnesss-badge">'+hotttnesss_num+'</span></h4>';}else{html+="0</h4>";}returnnewHandlebars.SafeString(html);});
And finally, we need to add the hotttnesss property to our dummy data in app/scripts/app.js:
RocknrollcallYeoman.dummySearchResultsArtists=[{id:1,name:'Tom Waits',type:'artist',enid:'ARERLPG1187FB3BB39',hotttnesss:'1'},{id:2,name:'Thomas Alan Waits',type:'artist',enid:'ARERLPG1187FB3BB39',hotttnesss:'.89'},{id:3,name:'Tom Waits w/ Keith Richards',type:'artist',enid:'ARMPVNN13CA39CF8FC',hotttnesss:'.79'}];
Now we can just add the helper in the template and pass in the data as the first parameter through the model like so:
{{hotttnesss-badge model.hotttnesss}}
See the change in this commit.
Figure 4-4 shows what the site looks like at the moment.
And, there you have it. Not only are we creating only the markup needed, we are also simplifying our template to a single helper declaration.
This detailed information is better suited for a detail or entity view that we can navigate to in order to get more information on the particular search result. In the next chapter, we will be setting up those views, so we will move the hotttnesss-badge to the Song and Artist entity pages. Stay tuned!

Figure 4-4. The hotttnesss badge
Wrapping Things Up
Take a break for a minute and think about what weâve done so far. Weâve written the vast majority of the markup for our site and even written a lot of it in such a way that itâs dynamically rendered, injection-model data, conditionally rendering portions of our template and even iterating over arrays in our models.
Think, again, about the kind of work weâve been doing. For the most part, an unskilled team member could have contributed a lot so far. Anyone who can edit HTML could have done the majority of this work, and with a little bit of investment on your part to teach them the concepts of variables, bound attributes, and conditionals, they could quite possibly do all of the kind of work we covered in this chapter without you. Thatâs powerful, isnât it?
With that covered, letâs move on to what you could be concentrating on while youâre enlisting interns to input all your markup. The real models have to be created, and their data has to be funneled through these templates at some point. In Chapter 5, we will explore the router and basic models to see how.
Get Building Web Apps with Ember.js now with the O’Reilly learning platform.
O’Reilly members experience books, live events, courses curated by job role, and more from O’Reilly and nearly 200 top publishers.

