If you think the scene you are working at the moment still needs additional lights, you can try to increase the exposure of your scene. Just like in photography, the exposure will let more light into the camera, resulting in a brighter image.
Blender has exposure controls for both Cycles and Eevee at the same location. You will find these in the Scene tab in your properties window.
Look for the Color Management options, and you will find the exposure settings as follows:
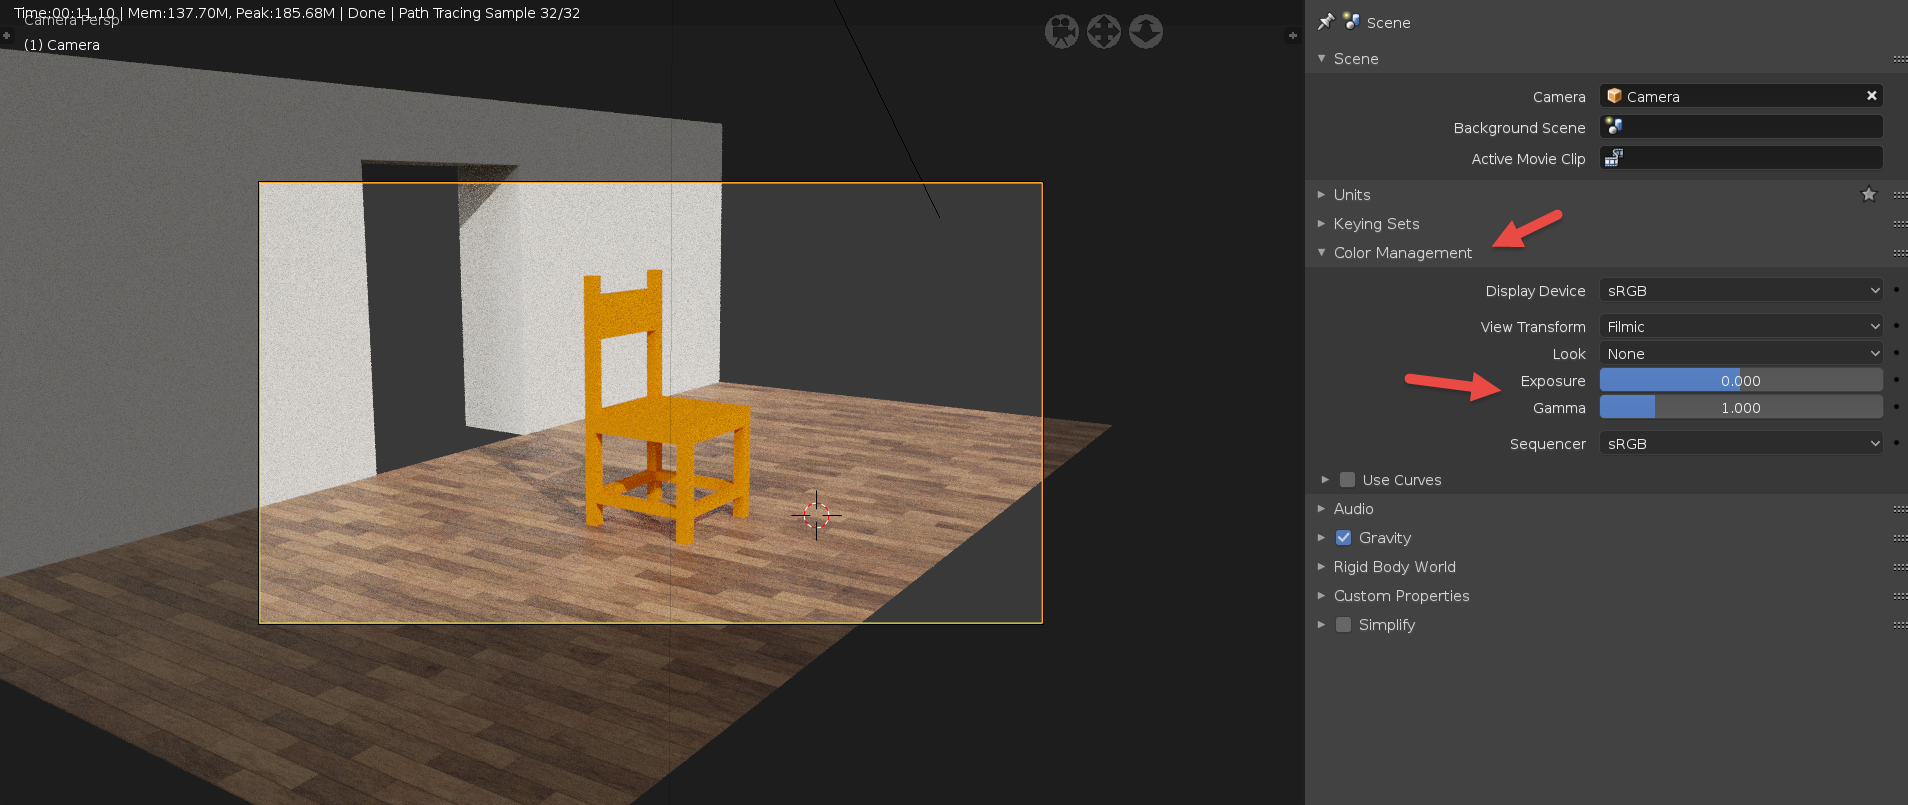
With a default value of zero, you will get a standard exposure for all scenes, but raising it to something like 1.5 will make any scene brighter, ...

