Chapter 1. Before You Hack
When you get a new computer, iPhone, or iPod, the device comes preconfigured in the way Apple feels will be of most use to the greatest number of their customers. Apple usually gets the out-of-the-box experience just right, thus Apple products are quickly set up and easy to use with the factory-set defaults. The problem is that you’re not a faceless average Apple user, you’re an individual, and you likely want to make your Apple product conform to your wishes rather than conforming to the way Apple intended you to use the product. This is the essence of hacking: getting your stuff to do what you want in the manner you want. Fortunately, tech stuff tends to be near infinitely hackable, customizable, and extensible, which means that you can truly be the unbending overlord of all your Apple gadgets. That said, there are a few initial steps that will make your forays easier and safer. The hacks in this chapter are where to begin.
HACK 01: Back Up Now with Disk Utility
When it comes to backing up your data, the options are bountiful. This hack reveals how to make an exact copy of your hard drive using Apple’s free Disk Utility.
There’s an old joke that says it isn’t a question of “if” your hard drive will crash, it is a question of “when.” Which is undoubtedly true: given enough time, everything will fail. This is a certainty that many of us have avoided either by dumb luck or buying a new machine every couple of years. That means that the people who haven’t suffered a computer catastrophe feel immune to the possibility of massive data loss and behave accordingly. If you’re one of the smug folks thinking unintended data destruction will never happen to you, please note that in your hands you are holding The Big Book of Apple Hacks and realize that things are different now. Once you start hacking, you’re implicitly taking a chance that something could go wrong.
So back up your files. If you’re running Leopard, you can let Time Machine do the heavy lifting; if you’re running an older version of OS X or if you don’t like Time Machine for some reason, you can try one of these strategies.
Backing Up with Disk Utility
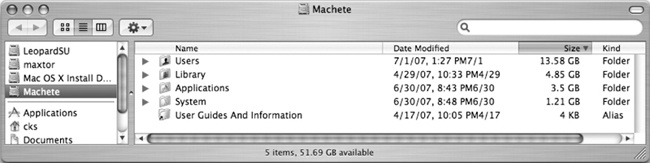
There are a lot of options when it comes to backing up your files. A backup could be as simple as a copy of your data on the same hard drive or as complex as a secure hard drive stored in a fireproof and waterproof box with full-time security guards. This hack covers a middle ground of sorts: your data stored on a separate hard drive but a hard drive you can still use on a day-to-day basis. What no-cost, included-on-every-Mac application can be used to make an all-inclusive backup? Why, the aptly named Disk Utility! (see Figure 1-1.)
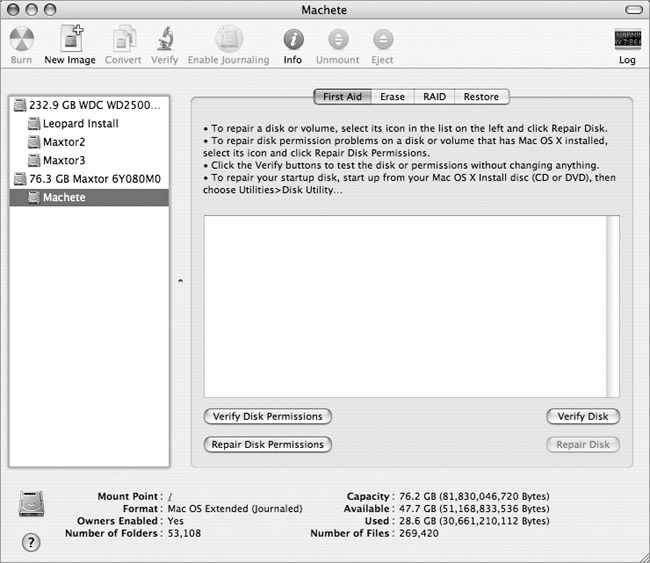
The confusing thing for some is Disk Utility’s terminology. Instead of calling the process something recognizable to the average guy, Disk Utility calls the copies it creates images. These images are much more useful than a simple drag-and-drop copy. Disk Utility manages to maintain permissions, hidden Unix files and a plethora of other unseen, but very important, data throughout the process. The upshot of all this careful copying is that the copy is, when restored, exactly like the original.
First things first: to use Disk Utility to copy your startup drive, you’ll have to start up from an alternate source. The source could be an OS X installation disk, another Mac in FireWire disk mode, or even another partition.
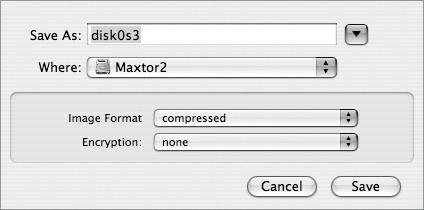
Once your Mac has been restarted from an alternate source, you can go about the business of copying your hard drive. Select the drive you want to back up, and click the New Image button. Once the selection is made, you’ll get a chance to name the image and select where you want the image to live (Figure 1-3).
You’re also presented with some other options. Clicking the arrows next to the Image Format label gives you some exclusionary options. You can pick one of the following:
Read-only
Compressed
Read/write
CD/DVD master
Your choices come down to read only, compressed, or read/write. Since we are backing up an entire disk for archival reasons, the two best choices are either read-only or compressed. Choose read-only if you have copious amounts of backup space and want the process to go a little faster; choose compressed to save some precious hard drive space.
Note
Read-only and compressed make sense but what about read/write? Creating a disk image with read/write generates an image that, when mounted, can be manipulated. It’s a very useful feature if you want to add files at a later date or trouble-shoot a software problem, but since you’re after a rock-solid immutable backup, it’s not the ideal option in this instance.
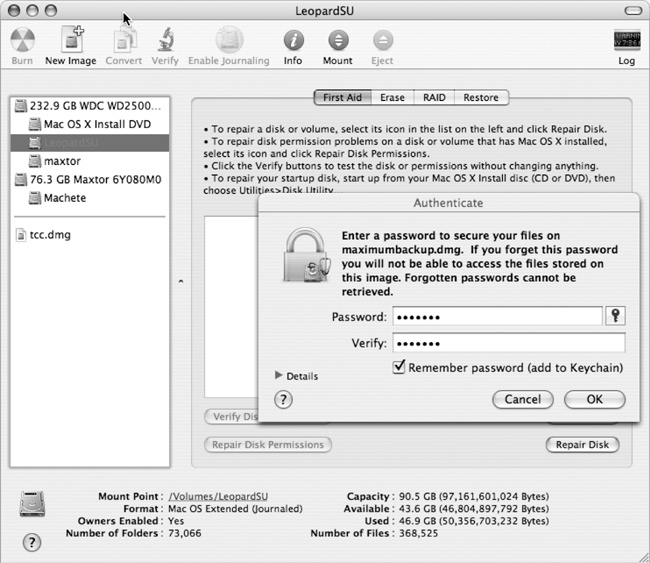
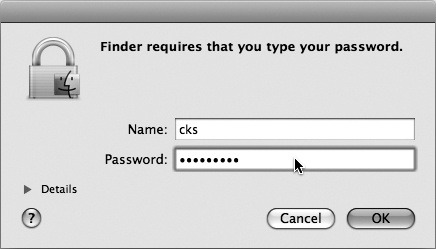
Finally, you can chose between an encrypted image and one that anyone can use. Choosing AES-128 (Advanced Encryption Standard) encryption results in Disk Utility asking for a password and requiring said password before you can get at the stored data. With that in mind, either go unencrypted or take pains to make sure the password is not lost. Saving the password in the Keychain is the default option, but this is one case where that isn’t enough. You’ll need this image in case of catastrophic failure and that means you might not be able access Keychain. Hence, if you choose to password-protect your data, write your password down somewhere safe. A backup you can’t access is exactly as useful as no backup at all.
Once all the choices have been made, click Save, and Disk Utility will create a disk image containing all of your valuable data (see Figure 1-4).
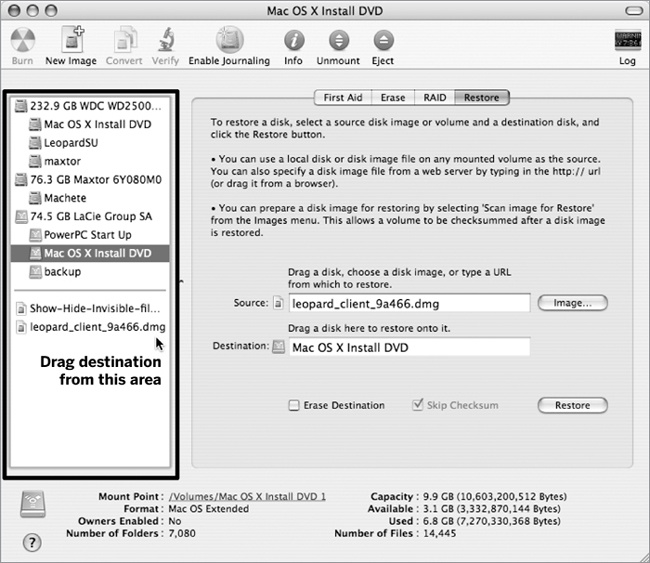
Now that you’ve done all this work, you’re ready for the worst, or at least a sudden complete hard-drive failure. Once that happens, you’ll want to know how to get your precious data back in a usable format. The process is deliciously simple: open up Disk Utility, click on the Restore option, and drag the disk image you want to use as your source to the Source field. Choose the drive you want the disk to be restored to, and drag it to the (predictable) Restore field. There is a bit of oddness about Disk Utility in Tiger that isn’t present on Leopard. In Tiger, for some unknown reason, in some instances you can only drag the disk to the Restore field from the Disk Utility window (see Figure 1-5).
All that is left to do is sit back and wait for Disk Utility to complete the restoration process. Be aware that restoring a drive can take a substantial amount of time, and you’ll lose any changes since you’ve created the disk image, so restoring from a Disk Image should be only attempted after other repair methods have failed.
That’s Great, But I’ve Got One Mac and No External Hard Drive!
The weakest form of backup is the backup that exists on the same drive as the rest of your data. In the event of a physical hard drive failure or even a mistyped command, backup data stored on the same disk as the one you are backing up can be lost. That said, the duplication of information provides some level of security, and if your options are limited and your hard drive is spacious enough, a second copy of all your data on the hard drive is a worthwhile investment of time and gigabytes.
Unfortunately you can’t create an image of the disk and store it on the disk with Disk Utility because, while Disk Utility is attempting to image the disk, it will also be attempting to image the image that is imaging the disk. Another tactic is needed. First, you’ll need to create at least two partitions on your hard drive and then copy the partition where your precious data resides to the newly created partition following the steps outlined earlier. For information on nondestructive partitioning, see HACK 66: Nondestructively Partition Your Hard Drive.
HACK 02: Create an Emergency Bootable Flash Drive
A full reinstall of a backup isn’t necessary every time something goes wrong; often problems can be fixed with your favorite Disk Utility or a copy of free software found on the Web. This hack shows you how to create an emergency boot volume with the fix-it applications of your choice.
It would be nice to be able to burn a startup Mac OS X DVD with repair tools of your choice on the disk, but that is a very tricky thing to do. Some high-level Apple developers have the tools to pull it off, but those without access to the tools, you can’t create a bootable DVD. Since creating a bootable DVD is out of the question, it is time to think of a second option. How about flash memory? Flash memory is ideal for this hack because it is not volatile (the contents don’t change if the chip is powered down), can be found everywhere (thumb drives, iPod nanos, and camera cards all employ flash), and is relatively cheap. (A 4 GB thumb drive sufficient for our purposes retailed for $20.44 on Amazon at the time of writing.) Flash also has one important advantage over a DVD in this case, it can be written to during the boot process, which is the primary sticking point about creating a bootable DVD.
If your Mac won’t boot, it isn’t the most efficient idea to immediately reach for an alternative boot disk. Most of the time, booting into safe mode (power up the Mac and hold the Shift key as soon as you hear the start-up chime) will fix the problem. Safe mode forces your Mac to check the directory and tells the Mac to ignore kernel extensions, fonts, or startup items that may be the source of the problem. After a successful boot into safe mode, restart your Mac, and everything should be back to normal.
If safe mode fails to resolve the problem, Apple recommends booting from a disk and running Disk Utility. If you’re loath to spend the time required to boot from a DVD, or your drive refuses to work, you can consider trying a single-user mode boot. Hold down the Command key (better known as the ![]() key) and “s” while starting, and the Mac will boot to a command line. Type
key) and “s” while starting, and the Mac will boot to a command line. Type fsck -fy followed by the Return key, and hope for the best (the y flag tells fsck you want to answer yes to all questions, and the f flag forces fsck to run). fsck will check your files and do its fscking best to fix them. Type reboot to restart the machine normally. This is a safe process, but it may generate some false error messages when your Mac restarts.
Before getting started, it is important to note that this process is much easier with Intel-based Macs. USB thumb drives are everywhere. USB flash drive readers can be found as cheap as $5, and you probably already have one built into your printer. This ubiquity of USB flash devices is great if you have an Intel Mac but doesn’t do much for you if you have a PowerPC-based Mac. While Intel Macs can boot off of USB with aplomb, PowerPC Macs can’t boot from USB. Well, that isn’t strictly true. By meddling with the firmware, it is possible to boot at least some PowerPC-based Macs from USB drives, but the results are far from ideal. The cheapest way to boot a PowerPC-based Mac from flash is to obtain a FireWire card reader. While much pricier than USB card readers, you’ll not only be able to boot your PowerPC-based Mac from flash, you’ll be able to transfer pictures in record time. One option for a FireWire card reader is produced by Lexar (www.lexar.com), though there are undoubtedly others.
Creating a Bootable Disk
The goal is clear: devise a method to slim down the system folder from a bloated all-inclusive mess to a svelte, useful copyable size. There are obstacles in the way, though. As mentioned before, just dragging and dropping isn’t going to cut it. Not only will that method not maintain symbolic links and permissions, it will also fail to catch invisible files and folders. To perform this hack, we’ll need a few things:
A partitioned drive or flash media with at least 4 GB of space
A willingness to use SuperDuper! or Terminal and
rsync.
Warning
Don’t try to pull off this hack using your current startup disk as a guinea pig (i.e., erasing huge chunks of your drive). The best-case scenario is that you’ll still be able to boot your computer with a loss of functionality; the worst-case scenario is that you’ll have a machine that won’t boot and no emergency boot disc.
Time to get started creating something bootable. If you use SuperDuper!, you’ll note that you have only one option if you want your system to end up on the target disk. That is, you’ll have to clone the entire drive. If you have the space, the replication doesn’t matter, you’ll be deleting files as soon as the process is over. Think of it as a momentary inconvenience.
You aren’t left out if you simply don’t have the space to clone your drive: rsync can come to the rescue. While SuperDuper! insists on cloning the whole drive, rsync can selectively clone folders. It is a little more work in the Terminal but the process is less drive space-intensive.
Note
You can use scripts with SuperDuper!, so a script to clone just selected parts of the drive is possible. By the time you wrote the script, if you were so inclined, you could have accomplished the task with rsync. If you find yourself repetitively using SuperDuper!, it is well worth your time to write a script to free you from repetitive tasks.
Before going further, take this moment to inspect your target disks to ensure they are ready for the process. The things to be aware of are the partitioning scheme used and the Ownership and Permissions settings. For the partition scheme, you’ll want to choose the appropriate scheme for your particular Mac. For Power PC-based Macs, the choice is Apple Partition Map (APM), while Intel-based Macs prefer the Globally Unique Identifier (GUID) partition scheme. Determine which partition schemes your disk is using, and change them if necessary using Disk Utility.
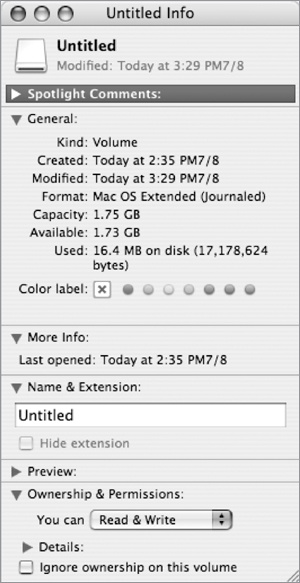
Just one more step to fully prepare for this hack: checking the Permissions for the target disk. By default, OS X ignores ownership on disks connected through FireWire and USB but that isn’t an option for a bootable drive. Right-click the disk(s) you’ll copy to and choose Get Info. Finally, uncheck the box next to “Ignore ownership on this volume” (see Figure 1-7).
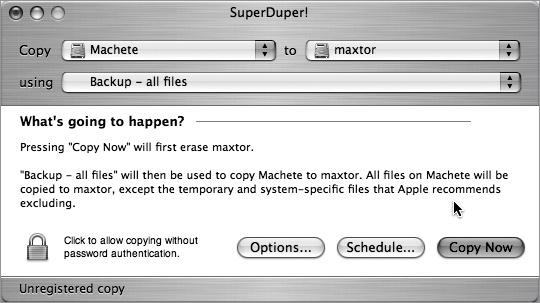
If you’re using SuperDuper! for this hack, the first step is easy: fire up SuperDuper!, and choose the drive to copy and the destination you want the copy to occupy (see Figure 1-8).
Once the copying process is complete, you really ought to remove any unnecessary (for booting) files. This can seem an impossible task. Sorting through all your files and culling the superfluous would be impossible even if you were blessed with an uncanny ability to tell what each file did simply by looking at the filename.
As fate (or Apple programmers) would have it, it turns out that only a few folders and files are necessary to boot your Mac. It further turns out that these files and folders are invisible. So the chances of deleting the bin folder accidentally are zero. All that means is that once you’ve copied your drive with SuperDuper!, you can delete everything but the System folder, and the drive will boot your Mac. Be aware that if you just wantonly pitch everything but the System folder, your Mac will boot, but you won’t be able to do much. After all, all the applications are gone.
The easiest thing to do is to pitch everything but the System folder, but recreate an Applications folder on the bootable drive and place copies of the applications you wish to use in case of sudden nastiness there. This will work flawlessly for programs you install via drag and drop. Other programs rely on more invasive installs; the likelihood that these programs will continue to function without complaint is small.
Now that your system is sufficiently slim to fit on 4 GB of flash media, it is time to put the system on the flash drive. Select the drive, and choose Get Info. Ensure the box is checked next to Ignore Ownership on this volume, and use SuperDuper! to copy your slimmed-down emergency drive with your hand-selected applications to the flash drive. Once SuperDuper! is finished, you are in possession of a bootable flash drive suitable for dire situations.
Using SuperDuper! is a great option if you have the required drive space and the time to fiddle with multiple copies. If you don’t, then rsync is the answer you’re looking for. With rsync, you can specify which folders to copy or exclude, and write everything directly to the flash drive. The downside is that you’ll have forgo the easy-to-use GUI of SuperDuper! and rely on the Terminal.
The tempting thing to think is that you can simply copy the System folder with rsync and be done with the problem. That isn’t the case; necessary folders like /usr and /bin don’t actually reside in the System folder as you might expect. Instead, the required folders reside at the root level of your directory. You just can’t see them because they are invisible. Hence a more encompassing approach is needed. The solution is to tell rsync to copy the entire disk except the folders that aren’t needed.
If you’ve been playing along, you know that the only folder you need that you can actually see is the System folder. On a typical Mac, at the root level, you’ll have just a few folders. My machine looks like Figure 1-9.
There are three directories we want to exclude from the copying. By default, rsync copies everything. To exclude specific directories (folders), rsync has to be made aware of your wishes. A typical rsync command to complete the operation will look something like:
$ sudo rsync -av --exclude /Users/ --exclude /Applications/ \
  --exclude /Library/ / /Volumes/Emerboot
The command is a little cryptic to the average user, so a look at what each bit of instruction is doing is required.
The sudo command authenticates the user to make sure you have sufficient privileges to run the process (rsync needs to run as root). Leave this step out, and you’ll get a ton of messages telling you about insufficient privileges.
The rsync part of the command line invokes the program. It might not a have a GUI interface but rsync is still a powerful program.
Right after rsync are a collection of “flags” that indicate various options involved in running rsync. The -av you see is really two flags mashed together for ease of typing. The -a tells rsync to copy the directories recursively and preserve things like symbolic links. The -v notifies rsync that you want some feedback while it is doing the job. This isn’t strictly necessary to get the job done, but at least you’ll see what files are being copied.
A little further out the line, the single slash, /, indicates the root of your filesystem, while the /Volumes/Emerboot identifies the target you want to copy to. Mac OS X puts all its disks and disk images into the /Volumes directory, which is a little confusing because that’s under the root level. Just think of it as a way to keep track of the things in the upper left corner of your Finder windows. The rsync program won’t try to copy in that directory, so you don’t really have to worry about it.
Finally the three --exclude declarations tell rsync what not to copy, a critical factor when you’re trying to save space. In this case, you are telling rsync to leave the /Users, /Applications and /Library folders alone.
Hit return, and let rsync do all the hard work of duplicating bits and bytes, and when the process is complete, you’ll have a destination disk with the necessary files for booting your Mac. Create an Applications folder (File→New folder) on your new boot drive, drop the applications you want to use when things go wrong into your new emergency drive, and you’re ready to go!
Using the Emergency Boot Disk
With all that work behind you, you now have a bootable flash disk. When booting off this disk, some disconcerting things will happen. The Dock will be full of transparent question marks (remember, you didn’t copy all the space-hogging programs when you were making the disk), and your Mac will launch into the Setup Assistant. Ignore the Setup Assistant (you can delete Setup Assistant.app from your system folder if you don’t want to deal with it) or use the Finder to force quit if necessary. Navigate to wherever you chose to store your emergency repair programs, and run them until your Mac’s built-in drive is returned to a working state.
HACK 03: Install Developer Tools
Every Mac ships with a copy of Apple Developer Tools; install these free tools for maximum hacking fun.
It wasn’t that long ago that if you wanted to use Apple Developers Tools, you had to steel yourself for a wallet-lightening experience. That changed when Panther shipped, and every copy of the system came bundled with a full copy of Apple Developers Tools.
Developer Tools might seem like a waste of disk space if you’re not planning to develop any software for Macs, but the free Developers Tools aren’t useful only to clever caffeine-fueled programmers. The programs included with Apple Developer Tools can be useful to just about anyone who owns a Mac.
What You’ll Get
The Xcode installer installs a suite of programs. Each one does something different, and together they can generate powerful applications for OS X. We’re not concerned with all the programs that come with an Xcode install but a few programs are valuable hacking tools referenced later in this book. The programs that are particularly useful for the hacks in this book are:
Property List Editor (great for editing .plist files)
Interface Builder (for giving applications a face lift)
Icon Composer (for making your art into icons)
Installing Xcode
Xcode uses an installer program, so installing it isn’t much of a trick. There aren’t an abundance of customization options, so just click the installer, and let it go. You can minimize even that step by installing Xcode when you’re installing OS X.
While the install is easy, finding Xcode can be a chore. You know you’ve installed Xcode, but it isn’t in the Applications folder where the tools you use every day usually reside. This can cause more than a little confusion; after recommending a friend install Xcode, he later confided he tried to install the suite again and again. He could tell something was happening because the free space on his hard drive shrank with every install (a standard Xcode install requires 2.8 GB of hard drive space), but he couldn’t find Xcode.
Instead of being installed in the Applications folder (where you’d expect), Xcode is installed at the root level of your hard drive, under Developers (where developers expect it). To get at Xcode, use the Finder and have fun exploring.
HACK 04: Understand Your User Account
Before Mac OS X was released, there wasn’t really a concept of a user or account in the Macintosh environment. This hack introduces you to what it means to have an account and what this business of a Home directory is all about.
When Mac OS X first appeared, a lot of old-school Mac users were aghast at the concept of user accounts, especially when they were the only ones using their computer. “Why go through all the hassle when I’m the only one who uses my computer?” they asked. The complaints only intensified as users were asked to enter an administrator password for access to certain files, sometimes even denied access to settings and files on their very own computers—the gall of it!
The reasoning is twofold: to protect you from yourself and to support Mac OS X’s multiuser environment.
The concept of protecting you from yourself might at first blush appear intrusive, but we’ve all had an instance in which we’ve deleted an innocent file from our OS 9 System folder, only to discover our idiocy when our system didn’t reboot, our printer didn’t print, or our modem didn’t sizzle. In this regard, OS X has your back; crucial files necessary for everyday operation are protected from overzealous removal.
The multiuser environment of OS X is based on technology that’s been around for a while in the Unix world: a system of checks and balances that stop your kid sister from gleefully deleting that Photoshop file you’ve been working on all weekend. Whether you’re the only user isn’t a concern; protection from the inside (yourself or your kid sister) and protection from the outside (malicious crackers, viruses, and Trojans) becomes paramount.
While a determined user can delete any file on his OS X machine with enough effort, Apple has wisely made it difficult to do so through Mac OS X.
What’s in a Name?
When creating an account (System Preferences→Accounts→New User), either the initial account upon installing Mac OS X, or an additional account—you’re prompted for both your Name (e.g., John Jacob Jingleheimer Schmidt) and something called a Short Name, as shown in Figure 1-10.
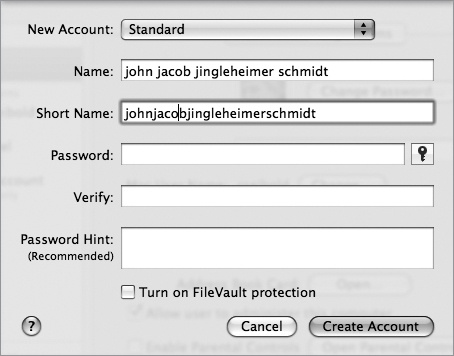
Your Short Name is your actual username, or login name, the name by which your computer knows you. It is usually three to eight characters long, composed of letters or numbers. While Mac OS X attempts to choose a Short Name for you based upon what you entered as your Name, it doesn’t do a particularly good job if your name isn’t as simple as Sam Smith. And, trust me, you don’t want to spend your days being known by your computer as johnjacobjingleheimerschmidt. Choose something short and quick to type, like john, johnj, or schmidt. Here’s why. ...
Your Home Directory
Your home directory, shown in Figure 1-11, is where you’ll be keeping all your stuff. In it you’ll find special directories for your documents, pictures, movies, and settings (that’s what the Library is). Of course, you’re not forced to organize your stuff this way, but it is a good convention. Feel free to settle in, create new folders, and shuffle things about. It’s generally a good idea not to throw out the special folders because the operating system and its applications often use them and expect them to be there. In particular, don’t touch your Library folder; it’s the home of your preferences, settings, and other pieces used by particular applications.
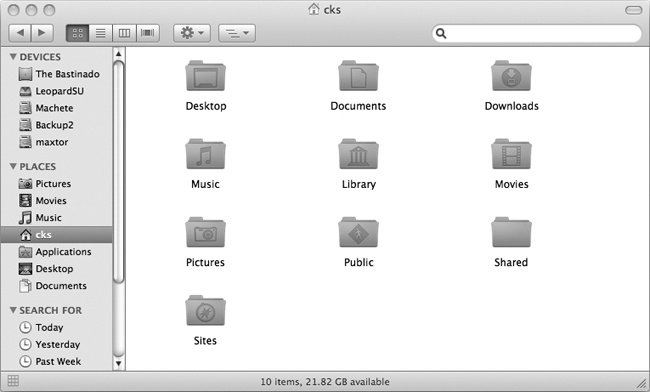
If you chose john as your Short Name, your home directory is Macintosh HD→Users→john. By creating a central place for all your important data, Mac OS X ensures easy backup or deployment on other machines. Instead of having to single out your favorite control panels or extensions from OS 9, you can simply back up your home directory. When you’re ready to restore, simply copy it over to the same location, and your environment (iTunes music library, Desktop pictures, added software tweaks, etc.) takes effect the next time you log in.
From the command line’s point of view, your home directory (again, assuming your Short Name is john) is /Users/john. You’ll sometimes see it referred to on the command line as the ~ symbol. That’s a shortcut that saves you from having to type your full login name when you refer to your home directory. So, ~/Documents actually refers to /Users/john/Documents (Macintosh HD→Users→john→Documents in the Finder).
Who’s the Boss?
As the primary user of your computer (or at least as the user you created when you installed the system), you’re automatically afforded administrative privileges, which means you can install just about any software, modify settings that affect how Mac OS X functions, and create and delete other accounts. Needless to say, if you don’t want that kid sister messing up your computer, you shouldn’t make her an administrative user. Give administrative access only to those people (read: accounts) that truly need it.
Deleting an Account
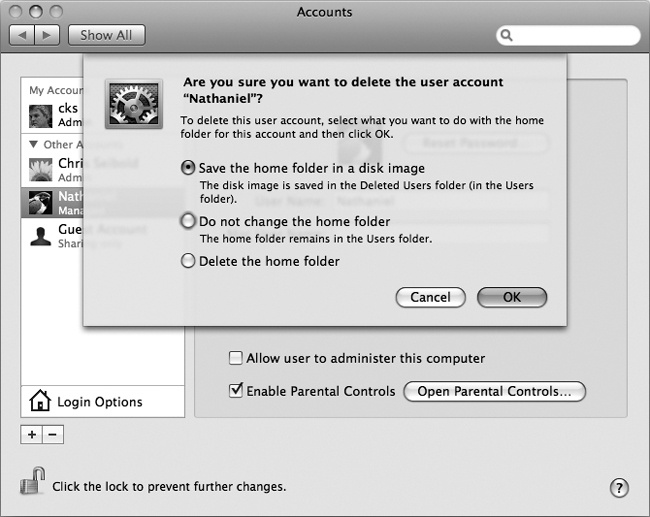
Deleting an account under Mac OS X is easy using the Accounts System Preferences pane (System Preferences→Accounts→Delete User). This removes the account and disables the associated home directory.
Deleted accounts, however, do not have to be completely forgotten. If you take a moment to actually read the confirmation dialog shown in Figure 1-12, you can specify the fate of the soon-to-be-deleted account’s home directory.
HACK 05: Become an Administrator for a Moment
Your Mac does its best to protect you from yourself and your family by requiring authentication, both in the GUI and on the command line, when you’re about to do something potentially problematic.
OS X, being a multiuser Unix system at its heart, tries to prevent you (or your family) from doing anything that might adversely affect your Mac. It does so by denying access to particular files that keep your system running and disallowing actions that it considers potentially harmful. Every now and again, however, you need to install a piece of software or touch a vital Unix configuration file to get something done. Before it lets you do so, Mac OS X requires that you authenticate yourself as an administrative user, known in Unix parlance as root.
Desktop Root
While most applications can be installed simply by dragging them into the Applications folder, some require a little more tomfoolery. Application and package installers often need to create folders, drop files into place, and adjust configuration settings in restricted parts of the operating system.
At these times, you’re either not allowed to continue if you’re not listed as an administrative user of the system (take a look at the System Preferences Users pane) or prompted for your password if you are. Figure 1-13 shows a typical Authenticate dialog.
You’ll notice that there is a Details arrow button in the window. Clicking this will let you see exactly which application is requesting the use of the password.
After you type in your password, the Installer continues. In effect, you’ve become an administrator with full power over your system, if only for a moment. You’ve then granted the Installer similar power to do what it needs to do.
Warning
Whenever you authenticate yourself to an application, realize that it’s going to fiddle with your system, and make sure you have some idea what it’s trying to do. Read the notices displayed by installers carefully.
You’ll also encounter times when you need to authenticate yourself to make a configuration change in System Preferences or the like. If you’re unable to change some settings that seem as if they should be editable, look around the window for a little lock icon. If it’s locked (see Figure 1-14), you might need to unlock it (click on the lock icon) and authenticate yourself.
If you feel the need to lock the settings again when you’re done, click the lock again.
Command-Line Root
On the command line, there is no fancy dialog for authenticating you as the root user. The sudo utility (the name is a shortened form of substitute-user do) allows you to gain temporary root privileges on a per-command basis. To use sudo, simply preface the command you want to run as root with sudo and a space; sudo prompts you for your (not root’s) password. If you have administrator privileges, entering your password runs the sudoed command as if the root user were doing it.
Use sudo with care. You can easily make mistakes with sudo that could require a complete reinstallation of the OS to get going again. If that thought makes you queasy, you’re better off avoiding it.
Typical sudo use looks like this:
$ sudo apachectl restartWarning
The Terminal is discussed with much more detail in Chapter 4, but for now, remember that the $ represents the Terminal prompt; don’t type the $.
Here are a few notes about sudo:
The first time you run
sudo, you’ll see another reminder to use sudo with care.You need to enter your password only when you haven’t already used
sudowithin the last five minutes.It’s not necessary to activate the root account or do anything else special to start using
sudo.If you need to execute several commands as root in a row and don’t want to type
sudocontinually, you can get a shell as the root user by using the following command:$ sudo -s Password: ***** #
The prompt changes to
#to indicate that every command typed will run as the root user.
Warning
Even though it takes more work, you can and should avoid opening root shells using the sudo command. By making the extra effort, you are less likely to make a horrific mistake and hose your system.
If you want to run a particular shell as root, say bash, you can also use the following command:
$ sudo bashEnabling the Root Account
Some people really want to be able to log into their system as root. For some reason, having administrative privileges and the ability to execute any command by using sudo isn’t enough. If you are one of these people, you can enable the root user so that you can log into either the GUI or the command line and have unfettered and unmonitored access to your system. We don’t recommend you do this, but if you insist, here’s how:
For Leopard:
For Tiger:
Launch NetInfo Manager (/Applications/Utilities).
Authenticate yourself using the SecurityAuthenticate menu.
Enable the root user using the SecurityEnable Root menu.
Give the root user a password that is as secure as you would give any administrator of the system.
If you follow this procedure, you will have a fully functional root user.
Logging in as root
Log in as root just as you would log in as a user. The only difference is that root won’t appear in the list of users and their associated cute icons. Click Other, enter root as the Name, and enter the password you assigned to the root account as Password.
— Chris Stone and Rael Dornfest
HACK 06: Behold the Power of PLIST
PLIST files are strewn all over your Mac, but chances are you never see them. That’s too bad: PLIST files offer one of the most direct ways to hack your machine. Spend a few moments with this hack, and discover techniques to conquer those PLIST files.
PLIST is short for “property list,” and the files are the main method used by Mac OS X (and some other operating systems) to organize data so that is accessible by programs and structured enough that you can generate your own if need be. That very brief explanation doesn’t really say much, but the explanation of what PLIST files actually do is a little dense. If you’re really interested in the functionality of PLIST files, check out http://developer.apple.com/documentation/Darwin/Reference/ManPages/man5/plist.5.html or type man plist into the Terminal.
PLIST Files for Hackers
When you are bending your machine to your will, the most frequent PLIST files you’ll be mucking with are the ones that store the default values of parameters for various programs. These can range from default colors to default behaviors. These files are typically found in the Library→Preferences folder of your Home directory. Tweaking these files can yield unexpected functionality and is mostly harmless. If you screw one up, you can always just drag the PLIST file to the trash, and a new one will be generated. Of course you’ll lose your preference set for that program, so the better way (as with all hacking when possible) is to back up the file so you’ll have a ready-made replacement.
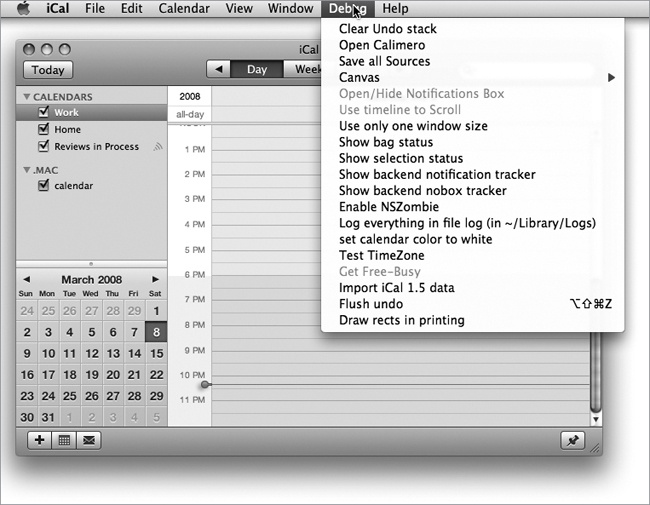
There is more than one way to access PLIST files. The quickest is the Terminal, via the default command. An example will help. Some programs can be made to display a Debug menu (most can’t), and iCal is one of these. For most of us, an iCal Debug menu is just a distraction, but for heavy iCal users, a Debug menu can be very useful. Time to add the Debug menu:
Quit iCal if necessary.
Fire up Terminal (Applications→Utilities→Terminal).
At the $ prompt, type:
defaults write com.apple.iCal IncludeDebugMenu 1Relaunch iCal.
Like magic, iCal has a brand new Debug menu (see Figure 1-15).
The Terminal is great when you know specifically what you want to change, but not so useful if you just want to know what you can change. For this, you need the property list. As mentioned in the beginning of this section, you’ll usually find the PLIST files you want to hack in the Library folder of your home directory. The specific path for the iCal property list I’m using for an example is ~/Library/Preferences/com.apple.ical.plist. Once you’ve navigated to the file, open it with a property list editor. If you’ve worked through HACK 03: Install Developer Tools, you have a powerful PLIST editor installed on your Mac already. It is called (without much originality) Property List Editor. You can find it under /Developer/Applications, or just double-click on the PLIST file to open it, and see all your options (see Figure 1-16).
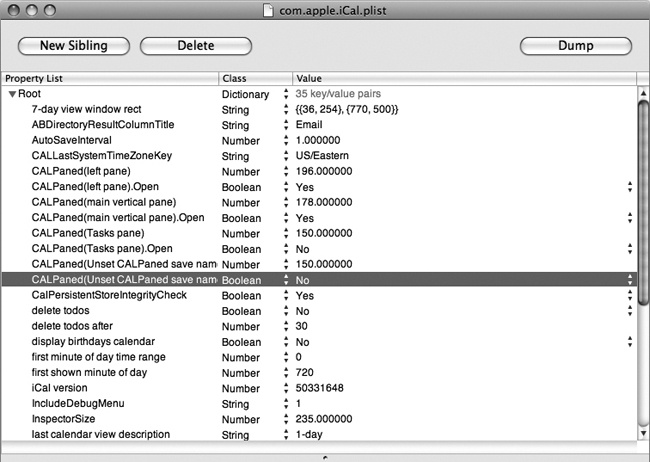
You can change any of the lines you see when the file is opened. Most of the lines don’t mean much to you (or me), but some have obvious functionality. Changing the number on the line “delete todos after” from 30 to 60 tells iCal to keep your todos for 60 days.
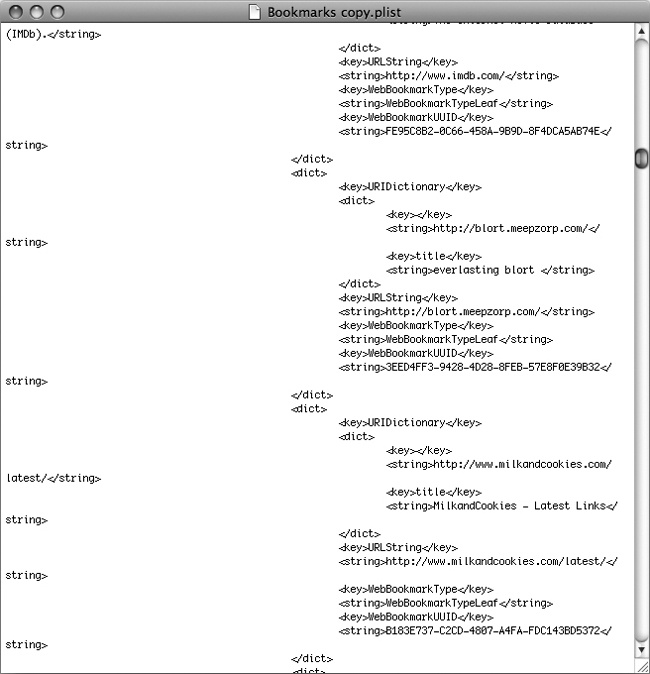
So now you are armed with a command-line method and a program to tweak PLIST files. It turns out you can also touch up PLIST files with a text editor. In the days before Tiger rolled out, you could just open a PLIST file with a text editor directly, but now the files are stored in binary format. To open a PLIST in a text editor, you’ll have to convert it first. The easiest way to convert said PLIST file? The Terminal. iCal’s PLIST has been abused enough for now, so try poking around in Safari’s bookmarks. The location of this file is ~/Library/Safari/Bookmarks.plist. Since it is smart to work off a copy, right-click the file, and choose Duplicate from the contextual menu. Convert the file with the command line:
$ plutil -convert xml1 ~/Library/Safari/Bookmarks\ copy.plistHere the plutil command invokes the property list utility, -convert xml1 (that’s the letters “x-m-l” followed by the number “1”) tells plutil to convert the property list to XML, and the rest is just the path to the file. Once the command has run, navigate to the location of the file with Finder, right-click and choose Open With→Other, and pick Text Edit. The formerly unreadable PLIST is now easily understandable (see Figure 1-17).
There’s much more to learn about PLIST files, but these tidbits should get you comfortable enough to start PLIST hacking adventures and let you know what is going on when the things get abused throughout the rest of this book.
Get Big Book of Apple Hacks now with the O’Reilly learning platform.
O’Reilly members experience books, live events, courses curated by job role, and more from O’Reilly and nearly 200 top publishers.

