9.1. Views Overview
InfoPath provides views (pages) to help you create forms that are organized in a way that makes sense for users, rather than just putting all the data on a single page.
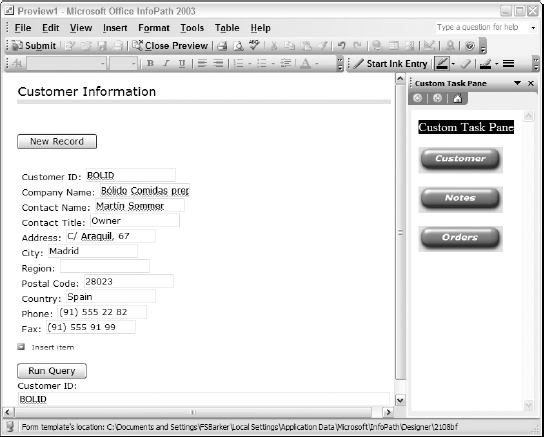
You can see in Figure 9-1 where views have been created for Customer, Notes, and Order information, tied together with a custom task pane.
For the purpose of this chapter, one InfoPath form will be created from start to finish based on the database called Chapter 9.mdb. The tables called tblCustomers and tblOrders will be used.
Besides creating views to break up information, you can also create views based on secondary data sources, or special views made to print information for current views. These are discussed in the last section in this chapter.
Figure 9.1. Figure 9-1

9.1.1.
9.1.1.1. Try It Out: Creating the Default View
To get started with managing multiple views, you need to start with one view. To give you a feel for creating more than one view, you will specify the data as you would in real life.
Open InfoPath.
Click on Design a Form. The Design a Form task pane will appear.
Click on New from Data Connection.... The Data Connection Wizard will start, with the first page asking if you would like to use a database or Web service.
Click Next, specifying to use a database by default. The next page displays only one button, Select Database.
Click the Select Database button. The Select Data ...
Get Beginning InfoPath™ 2003 now with the O’Reilly learning platform.
O’Reilly members experience books, live events, courses curated by job role, and more from O’Reilly and nearly 200 top publishers.

