4.2. Enhancing the GridView Control
You fulfilled the Retrieve requirement of the CRUD implementation at the end of the previous chapter. The GridView control presents the data in a rather ugly grid. You beautify it in the next sections.
4.2.1. Adding a dash of color to the GridView control
The drag-and-drop routine in the preceding chapter put a GridView control on the page. The GridView control is one of several powerful and versatile design-time controls that ship with ASP.NET.
Visual Web Developer supports the design-challenged by providing some reasonably attractive starter designs. Follow these steps to use the AutoFormat feature:
Select the GridView control, and then click its Smart Tag button.
The Tasks menu opens.
Click AutoFormat.
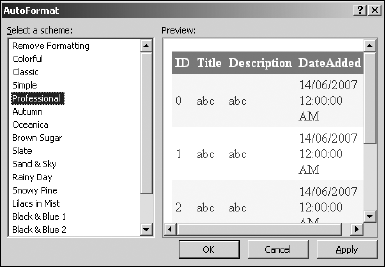
The AutoFormat window, shown in Figure 4-2, previews the available schemes.
Select a scheme (for example, Professional), and then click OK.
Figure 4-2. The AutoFormat tool applies a quick and not-too-shabby makeover for the design-challenged.
4.2.2. Sorting, editing, and deleting with the GridView
The GridView control has several excellent features that are inactive by default. Follow these steps to add sorting, editing, and deleting to the GridView control:
Open the GridView control's Tasks list by clicking the Smart Tag button in the upper right of the control.
The GridView control's Tasks list appears, as shown in Figure 4-3.
Enable the check ...
Get ASP.NET 3.5 For Dummies® now with the O’Reilly learning platform.
O’Reilly members experience books, live events, courses curated by job role, and more from O’Reilly and nearly 200 top publishers.

