Hardware configuration
We are now going to configure the hardware part of the project. As we have a relatively small number of simple components, the configuration of this project will be really easy and straightforward. This is a schematic to help you out:
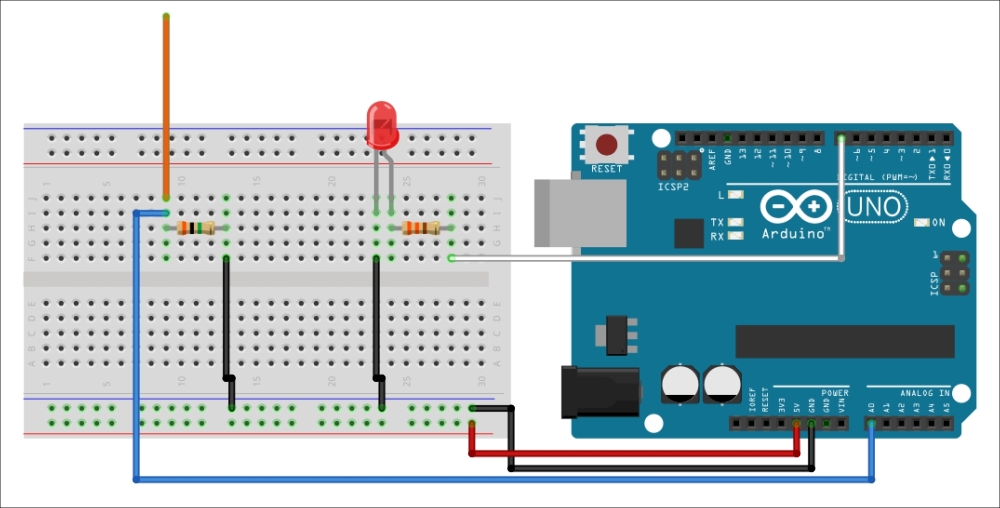
As you can see, the LCD screen is not present on this schematic. We'll first see how to connect all the other components and then see how to connect the LCD screen at the end of this section.
First, connect the power to the breadboard: connect GND to the blue power rail of the breadboard and the +5V pin to the red power rail.
Then, we are going to connect the antenna: first, place it on the breadboard ...
Get Arduino: Building exciting LED based projects and espionage devices now with the O’Reilly learning platform.
O’Reilly members experience books, live events, courses curated by job role, and more from O’Reilly and nearly 200 top publishers.

