Chapter 1. The Arduino Family
This chapter provides a brief history of the Arduino, along with a terse genealogy of the various board types created since 2007. It doesn’t cover boards produced before 2007, nor does it attempt to be comprehensive in its coverage of the various clones and derivatives that have been produced. The main focus here is on the differences between the various primary types of Arduino boards, with a specific focus on the types of processors used and the physical design of the boards. It also takes a quick look at the range of possible applications for Arduino circuit boards.
Chapter 2 provides general information about the internal functions of the Atmel AVR processors, and Chapter 3 covers the specific processors used in Arduino boards. With the exception of the Yún, Chapter 4 describes the physical characteristics of different official Arduino boards introduced in this chapter.
A Brief History
In 2005, building upon the work of Hernando Barragán (creator of Wiring), Massimo Banzi and David Cuartielles created Arduino, an easy-to-use programmable device for interactive art design projects, at the Interaction Design Institute Ivrea in Ivrea, Italy. David Mellis developed the Arduino software, which was based on Wiring. Before long, Gianluca Martino and Tom Igoe joined the project, and the five are known as the original founders of Arduino. They wanted a device that was simple, easy to connect to various things (such as relays, motors, and sensors), and easy to program. It also needed to be inexpensive, as students and artists aren’t known for having lots of spare cash. They selected the AVR family of 8-bit microcontroller (MCU or µC) devices from Atmel and designed a self-contained circuit board with easy-to-use connections, wrote bootloader firmware for the microcontroller, and packaged it all into a simple integrated development environment (IDE) that used programs called “sketches.” The result was the Arduino.
Since then the Arduino has grown in several different directions, with some versions getting smaller than the original, and some getting larger. Each has a specific intended niche to fill. The common element among all of them is the Arduino runtime AVR-GCC library that is supplied with the Arduino development environment, and the on-board bootloader firmware that comes preloaded on the microcontroller of every Arduino board.
The Arduino family of boards use processors developed by the Atmel Corporation of San Jose, California. Most of the Arduino designs utilize the 8-bit AVR series of microcontrollers, with the Due being the primary exception with its ARM Cortex-M3 32-bit processor. We don’t cover the Due in this book, since it is radically different from the AVR devices in many fundamental ways and really deserves a separate discussion devoted to it and similar microcontrollers based on the ARM Cortex-M3 design.
Although an Arduino board is, as the Arduino team states, just a basic Atmel AVR development board, it is the Arduino software environment that sets it apart. This is the common experience for all Arduino users, and the cornerstone of the Arduino concept. Chapter 5 covers the Arduino IDE, the libraries supplied with the IDE, and the bootloader. Chapter 6 describes the process of creating software for an AVR MCU without using the Arduino IDE.
Types of Arduino Devices
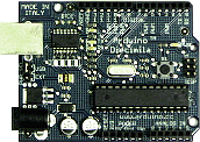
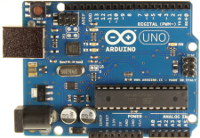
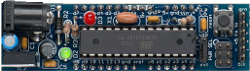
Over the years the designers at Arduino.cc have developed a number of board designs. The first widely distributed Arduino board, the Diecimila, was released in 2007, and since its initial release the Arduino family has evolved to take advantage of the various types of Atmel AVR MCU devices. The Due, released in 2012, is the first Arduino to utilize a 32-bit ARM Cortex-M3 processor, and it breaks from the rest of the family in terms of both processing power and board pinout configuration. Other boards, like the LilyPad and the Nano, also do not have the same pinout as the other members of the family, and are intended for a different range of applications—wearables in the case of the LilyPad; handheld devices for the Esplora; and compact size in the case of the Mini, Micro, and Nano.
With each passing year new types of Arduino boards appear, so what is listed here may be out of date by the time you’re reading it. The newer versions have more advanced processors with more memory and enhanced input/output (I/O) features, but for the most part they use the same pinout arrangements and will work with existing add-on boards, called shields, and various add-on components such as sensors, relays, and actuators. Table 1-1 lists the Arduino types that have appeared since 2005. The newer versions of the Arduino will also run most of the sketches created for older models, perhaps with a few minor tweaks and newer libraries, but sketches written for the latest versions may or may not work with older models.
Table 1-1 is not a buyer’s guide. It is provided to give a sense of historical context to the Arduino. As you can see, the years 2007 and 2008 saw the introduction of the LilyPad; the small form-factor boards like the Nano, Mini, and Mini Pro; and the introduction of the Duemilanove as a natural evolutionary step based on the Diecimila. While there are no significant physical differences between the Diecimila and the Duemilanove, the Duemilanove incorporates some refinements in the power supply, most notably in its automatic switchover between USB power and an external DC (direct current) power supply. Later versions of the Duemilanove also utilize the ATmega328 MCU, which provides more memory for programs.
Table 1-1 doesn’t include the Arduino Robot, which is a PCB with motors and wheels attached. One of the newest boards in the Arduino lineup is the Yún, an interesting beast that has both an ATmega32U4 microcontroller and a Linino module with an Atheros AR9331 MIPS-based processor capable of running a version of the Linux-based OpenWrt operating system. I won’t get into the OpenWrt end of the Yún, but the Arduino side is basically just a standard Arduino (a Leonardo, to be specific). If you want to learn more about the Yún, I would suggest checking it out on the Arduino website.
| Board name | Year | Microcontroller | Board name | Year | Microcontroller |
|---|---|---|---|---|---|
Diecimila |
2007 |
ATmega168V |
Mega 2560 |
2010 |
ATmega2560 |
LilyPad |
2007 |
ATmega168V/ATmega328V |
Uno |
2010 |
ATmega328P |
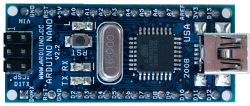
Nano |
2008 |
ATmega328/ATmega168 |
Ethernet |
2011 |
ATmega328 |
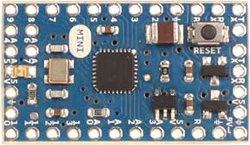
Mini |
2008 |
ATmega168 |
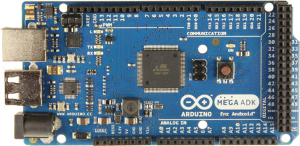
Mega ADK |
2011 |
ATmega2560 |
Mini Pro |
2008 |
ATmega328 |
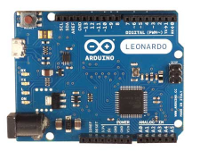
Leonardo |
2012 |
ATmega32U4 |
Duemilanove |
2008 |
ATmega168/ATmega328 |
Esplora |
2012 |
ATmega32U4 |
Mega |
2009 |
ATmega1280 |
Micro |
2012 |
ATmega32U4 |
Fio |
2010 |
ATmega328P |
Yún |
2013 |
ATmega32U4 + Linino |
When more than one microcontroller type is shown in Table 1-1, it indicates that a particular version of an Arduino board was made initially with one microcontroller, and later with the other (usually more capable) device. For example, an older version of the Duemilanove will have an ATmega168, whereas newer models have the ATmega328. Functionally the ATmega168 and the ATmega328 are identical, but the ATmega328 has more internal memory.
The latest additions to the Arduino family, the Leonardo, Esplora, Micro, and Yún, all use the ATmega32U4. While this part is similar to an ATmega328 it also incorporates an integrated USB-to-serial interface component, which eliminates one of the integrated circuit (IC) parts found on boards like the Uno and Duemilanove.
The programming interface also behaves slightly differently with the boards that use the ATmega32U4, but for most people this should be largely transparent. Chapter 2 describes the general functionality of AVR microcontrollers, Chapter 3 contains descriptions of the specific AVR MCU types found in Arduino devices, and Chapter 4 provides descriptions of the primary Arduino circuit boards and their pinout definitions.
Arduino Galleries
Tables 1-1 through 1-5 show some of the various types of Arduino boards, both past and present. It is not completely inclusive, since new types and updates to existing types occur periodically. The following images show the wide diversity in physical shapes and intended applications of the Arduino.
Physically, an Arduino is not a large circuit board. The baseline boards, which have the physical pin arrangement commonly used for add-on boards (called shields, described in Chapter 8), are about 2.1 by 2.7 inches (53.3 by 68.6 mm) in size. Figure 1-1 shows a selection of Arduino boards with a ruler for scale, and Figure 1-2 shows a Nano mounted on a solderless breadboard.
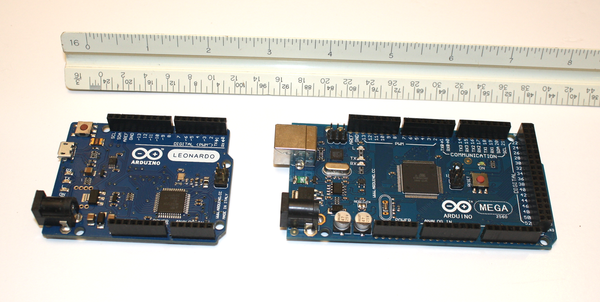
Figure 1-1. Relative sizes of Arduino boards
Chapter 4 contains reference drawings with dimensions and pin definitions for most of the common Arduino boards. Note that while it is small, a board like the Nano has all of the same capabilities as a Duemilanove, except for the convenient pin sockets and regular (type B) USB connector. It is ideal for applications where it will not be disturbed once it is installed, and where small size is a requirement. Some applications that come to mind are autonomous environmental data collection devices (automated solar-powered weather data stations or ocean data collection buoys, for example), timing and data collection for model rockets, security systems, and perhaps even a “smart” coffee maker.
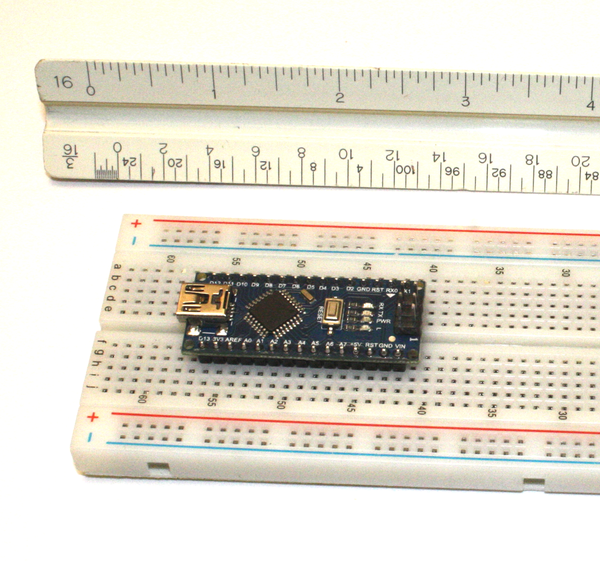
Figure 1-2. An Arduino Nano on a solderless breadboard
| Type | Year introduced | |
|---|---|---|
|
Diecimila |
2007 |
|
Duemilanove |
2008 |
|
Uno (R3 version) |
2010 |
|
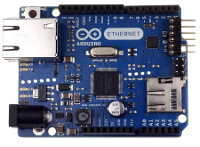
Ethernet |
2011 |
|
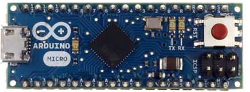
Leonardo |

| Type | Year introduced | |
|---|---|---|
|
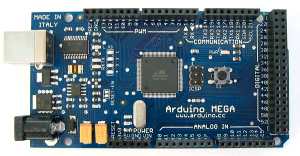
Mega |
2009 |
|
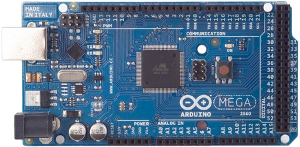
Mega 2560 |
2009 |
|
Mega ADK |
| Type | Year introduced | |
|---|---|---|
|
Nano |
2008 |
|
Mini |
2008 |
|
Fio |
2010 |
|
Micro |
2012 |
| Type | Year introduced | |
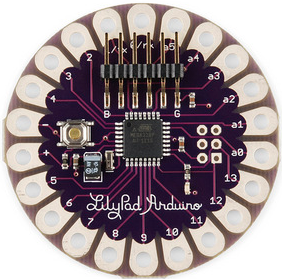
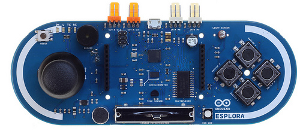
|---|---|---|
|
LilyPad |
2007 |
|
Esplora |
Arduino-Compatible Devices
In addition to the various board types designed or sanctioned by Arduino.cc, there are many devices that are either hardware compatible or software compatible. What makes these devices Arduino compatible is that they incorporate the Arduino bootloader (or something that works like it), and they can be programmed with the Arduino IDE by selecting the appropriate compatible Arduino board type from the IDE’s drop-down list.
Hardware-Compatible Devices
An Arduino hardware–compatible device is one where the various I/O pins on the board have been arranged to match one of the existing Arduino form factors. A hardware-compatible board can (usually) accept any of the shields and plug-in modules created for an official Arduino board. The reasons behind this are covered in “The Arduino Naming Convention”.
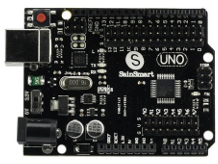
In most cases hardware-compatible boards look like any other Arduino board, except that the official Arduino logo and silkscreen graphics are missing. Other hardware-compatible products might not look anything like a typical Arduino board, but do provide the pin sockets in the correct arrangement for using a standard Arduino-type shield board. Some hardware-compatible products include additional connections, like the SainSmart version of the Uno with additional connectors for I/O functions. Table 1-6 lists a few Arduino clones and compatible boards that are available. There are many more than what is shown here, but this should give some idea of what is available.
| Name | Type | Origin | |
|---|---|---|---|
|
SainSmart UNO |
Uno clone |
China |
|
SainSmart Mega2560 |
Mega 2560 clone |
China |
|
Brasuino |
Similar to the Uno, |
Brazil |
|
Diavolino |
An Arduino layout–compatible |
USA |


Note that Diavolino is a kit and requires assembly.
Software-Compatible Devices
There are many Arduino software–compatible boards available. These utilize the Arduino bootloader and development environment, but do not have a completely Arduino-compatible physical form factor. Software-compatible devices can be programmed with the Arduino development tools, but may use a different arrangement of I/O pins, or perhaps use some other types of connectors in place of the pin sockets found on stock Arduino boards. Custom circuits based on an AVR microcontroller and built into some larger device or system would fall into the software-compatible category if the Arduino bootloader is installed in the microcontroller.
The core of the Arduino is the processor and the preinstalled bootloader. Using that definition, one could have just a bare ATmega AVR IC with the Arduino firmware loaded into it. It could then be used with a solderless breadboard and the Arduino development environment. AVR MCU ICs with preloaded bootloader code are available for purchase from multiple sources, or you could do it yourself. Chapter 5 describes the steps necessary to load an AVR MCU with the Arduino bootloader firmware.
It is interesting to note that some of the boards from Arduino, such as the Mini, Micro, Nano, LilyPad, and Esplora, are not hardware compatible in terms of using the “standard” I/O connector layout. They can’t be used directly with a conventional shield, but they are still Arduino boards, and they are supported by the Arduino IDE.
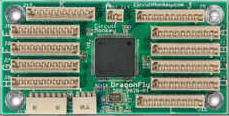
The Boarduino from Adafruit Industries is one example of an Arduino software–compatible device. This board is designed to mount on a standard solderless breadboard much like a full-size 40-pin IC. It is available in two styles: DC and USB. The DC version does not have an on-board USB chip, so an external USB adapter is needed to program it. Another example of a software-compatible board is the Dragonfly from Circuit Monkey, which uses standard Molex-type connectors instead of the pins and sockets used on a conventional Arduino. It is intended for high-vibration environments, such as unmanned aerial vehicles (UAVs) and robotics.
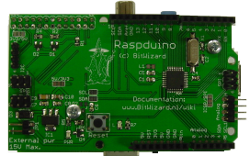
The Raspduino is designed to mount onto a Raspberry Pi board, and it is functionally equivalent to an Arduino Leonardo. This results in a combination that is roughly equivalent to the Yún, but not exactly the same. Each setup has its own strengths and weaknesses. Table 1-7 lists a few Arduino software–compatible boards.
| Name | Description | Origin | |
|---|---|---|---|
|
Boarduino DC |
Designed to fit on a solderless breadboard |
USA |
|
Boarduino USB |
Designed to fit on a solderless breadboard |
USA |
|
Dragonfly |
Uses Molex-type connectors for I/O |
USA |
|
Raspduino |
Designed to fit on a Raspberry Pi board |
Netherlands |
This is just a small selection of the various boards that are available. Because the AVR microcontroller is easy to integrate into a design, it has found its way into numerous applications. With the Arduino bootloader firmware, programming a device is greatly simplified and the design possibilities are vast.
The Arduino Naming Convention
While the circuit design and software for the Arduino are open source, the Arduino team has reserved the use of the term “Arduino” for its own designs, and the Arduino logo is trademarked. For this reason you will sometimes find things that behave and look like official Arduino devices, but which are not branded Arduino and have not been produced by the Arduino team. Some of them use “-duino” or “-ino” as part of the product name, such as Freeduino, Funduino, Diavolino, Youduino, and so on. Some, like the boards made by SainSmart, use just the model name (Uno and Mega2560, for example).
Note
At the time of this writing, there was an ongoing dispute between the company created by the original founders (Arduino LLC) and a different company started by one of the original founders (Arduino SRL). As a result, Arduino LLC uses the trademark Arduino within the United States and Genuino elsewhere.
Occasionally someone will produce a board that claims to be an Arduino, but is in fact just a copy that uses the Arduino trademark without permission. The silkscreen mask used to put the logo and other information on an official Arduino is also copyrighted, and the Arduino folks don’t release the silkscreen with the PCB layout files. Massimo Banzi has a section of his blog devoted specifically to these unauthorized boards, and his examination of blatant and shameless copies is interesting, to say the least. Just search for the “hall of shame” tag.
The bottom line here is that you are welcome to copy the schematics, the bootloader code, and the Arduino IDE, and use these to create your own version of an Arduino. It is, after all, open source. Just don’t call it an Arduino or use the artwork from Arduino.cc without permission.
What Can You Do with an Arduino?
In addition to the ease of programming made possible by the Arduino IDE, the other big feature of the Arduino is the power and capability of the AVR microcontroller it is based on. With a handful of readily available add-on shields (described in Chapter 8) and a wide selection of low-cost sensor and actuator modules (these are described in detail in Chapter 9), there really isn’t a whole lot you can’t do with an Arduino provided that you keep a few basic constraints in mind.
The first constraint is memory. The AVR MCU just doesn’t have a whole lot of memory available for program storage and variables, and many of the AVR parts don’t have any way to add more. That being said, the ATmega32 and ATmega128 types can use external memory, but then the I/O functions for those pins are no longer readily available. Arduino boards were not designed to accommodate external memory, since one of the basic design assumptions was that the AVR chip itself would have the necessary I/O and that the user would be running a relatively short program. The Arduino was not intended to be a replacement for a full-on computer system with gigabytes of RAM and a hard disk drive (HDD). There are inexpensive Intel-based single-board computers that fit that description, but they won’t fit into an old mint tin, a section of PVC tubing strapped to a pole or a tree, a small robot, or the payload section of a model rocket. An Arduino will.
The second constraint is speed. The Arduino CPU clock rate is typically between 8 and 20 MHz (see Chapter 4 for a detailed comparison of Arduino AVR device types). While this may sound slow, you should bear in mind two key facts: first, the AVR is a very efficient RISC (reduced instruction set computer) design, and second, things in the real world generally don’t happen very quickly from a microcontroller’s perspective. For example, how often does a so-called smart thermostat need to sample the temperature in a home or office? Once a second is probably overkill, and once every 5 or even 10 seconds will work just fine. How often does a robot need to emit an ultrasonic pulse to determine if there is an obstacle ahead? A pulse every 100 ms is probably more than enough (unless the robot is moving very, very fast). So, for an Arduino running at 16 MHz (like the Leonardo, for example), there will be on the order of 1,000,000 or more CPU clock ticks between sensor pulses, depending on whatever else the CPU is doing with the pulses. Given that an AVR can execute many instructions in one or two clock cycles, that’s a lot of available CPU activity in between each pulse of the ultrasonic sensor.
The third main constraint is electrical power. Since the Arduino hardware is actually nothing more than a PCB for an AVR IC to sit on, there is no buffering between the microcontroller and the external world. You can perform a fast “charcoal conversion” of an AVR (in other words, overheat the IC and destroy it) if some care isn’t taken to make sure that you aren’t sourcing or sinking more current than the device can handle. Voltage is also something to consider, since some of the AVR types have 3.3V I/O, whereas others are 5V tolerant. Connecting 5V transistor-transistor logic (TTL) to a 3.3V device usually results in unhappy hardware, and the potential for some smoke.
With the preceding constraints in mind, here are just a few possible applications for an Arduino:
-
Real-world monitoring
-
Automated weather station
-
Lightning detector
-
Sun tracking for solar panels
-
Background radiation monitor
-
Automatic wildlife detector
-
Home or business security system
-
-
Small-scale control
-
Small robots
-
Model rockets
-
Model aircraft
-
Quadrotor UAVs
-
Simple CNC for small machine tools
-
-
Small-scale automation
-
Automated greenhouse
-
Automated aquarium
-
Laboratory sample shuttle robot
-
Precision thermal chamber
-
Automated electronic test system
-
-
Performance art
-
Dynamic lighting control
-
Dynamic sound control
-
Kinematic structures
-
Audience-responsive artwork
-
In Chapters 11, 12, and 13 we will look at applications such as a smart thermostat, a programmable signal generator, and an automated rocket launch control system to help fulfill your suborbital yearnings. These are just the tip of the iceberg. The possibilities are vast, and are limited only by your imagination. So long as you don’t try to make an Arduino do the job of a full-on computer system, you can integrate one into all sorts of interesting applications—which is exactly what the folks at Arduino.cc want you to do with it.
For More Information
The boards listed in this chapter are just a small selection of what is available, and there is much more to the story of the Arduino. Entering “Arduino” into Google’s search bar will produce thousands of references to explore.
The official Arduino website can be found at http://www.arduino.cc.
Massimo Banzi’s blog is located at http://www.massimobanzi.com.
Also, check the appendixes for more website links and book recommendations.
Get Arduino: A Technical Reference now with the O’Reilly learning platform.
O’Reilly members experience books, live events, courses curated by job role, and more from O’Reilly and nearly 200 top publishers.

