Recipe 3.5 Further Customizing Each Row with Additional TextViews
Android Versions
Level 1 and above
Permissions
None
Source Code to Download from Wrox.com
CustomListView.zip
The previous recipe showed how to customize each row within a ListView with various views. This recipe shows you how to further customize each row with more views.
Solution Part One: Adding Additional TextViews
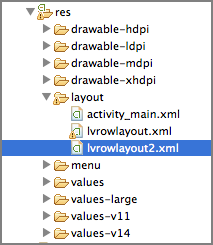
Let’s further customize the content of each row by adding additional TextViews to it. You may want to add another layout XML document to the res/layout folder (see Figure 3-7).
Populate the content of the lvrowlayout2.xml file as follows:
<LinearLayout xmlns:android="http://schemas.android.com/apk/res/android" android:layout_width="fill_parent" android:layout_height="fill_parent" android:orientation="horizontal" > <ImageView android:id="@+id/icon" android:layout_width="60dp" android:layout_height="60dp" android:layout_marginBottom="5dp" android:layout_marginLeft="5dp" android:layout_marginRight="5dp" android:layout_marginTop="5dp" android:src="@drawable/ic_launcher" /> <LinearLayout android:layout_width="fill_parent" android:layout_height="90dp" android:orientation="vertical" > <TextView android:id="@+id/txtPresidentName" android:layout_width="wrap_content" android:layout_height="wrap_content" android:textSize="25sp" /> <TextView android:id="@+id/txtDescription" android:layout_width="wrap_content" ...Get Android Application Development Cookbook: 93 Recipes for Building Winning Apps now with the O’Reilly learning platform.
O’Reilly members experience books, live events, courses curated by job role, and more from O’Reilly and nearly 200 top publishers.

