After all that work you might argue that, for all their
fl exibility, dynamic effects don’t necessarily save on brute
force or sheer, mind-numbing effort. Which is true. But
having done the job once, you can repurpose the fruits
of your labors over and over again.
For example, with the big circle still selected, press Shift+F5 to
open the Graphic Styles panel. Press the Alt (or Option) key and
click the
icon at the bottom of the panel. Name the new style
“Spectral Brooch,” and click OK. Now press F7 to switch to the
Layers panel. Click the
in front of the Circle layer to turn it
off, and then turn on the Other Shapes layer. Now experiment
with applying the Spectral Brooch style to each of the four
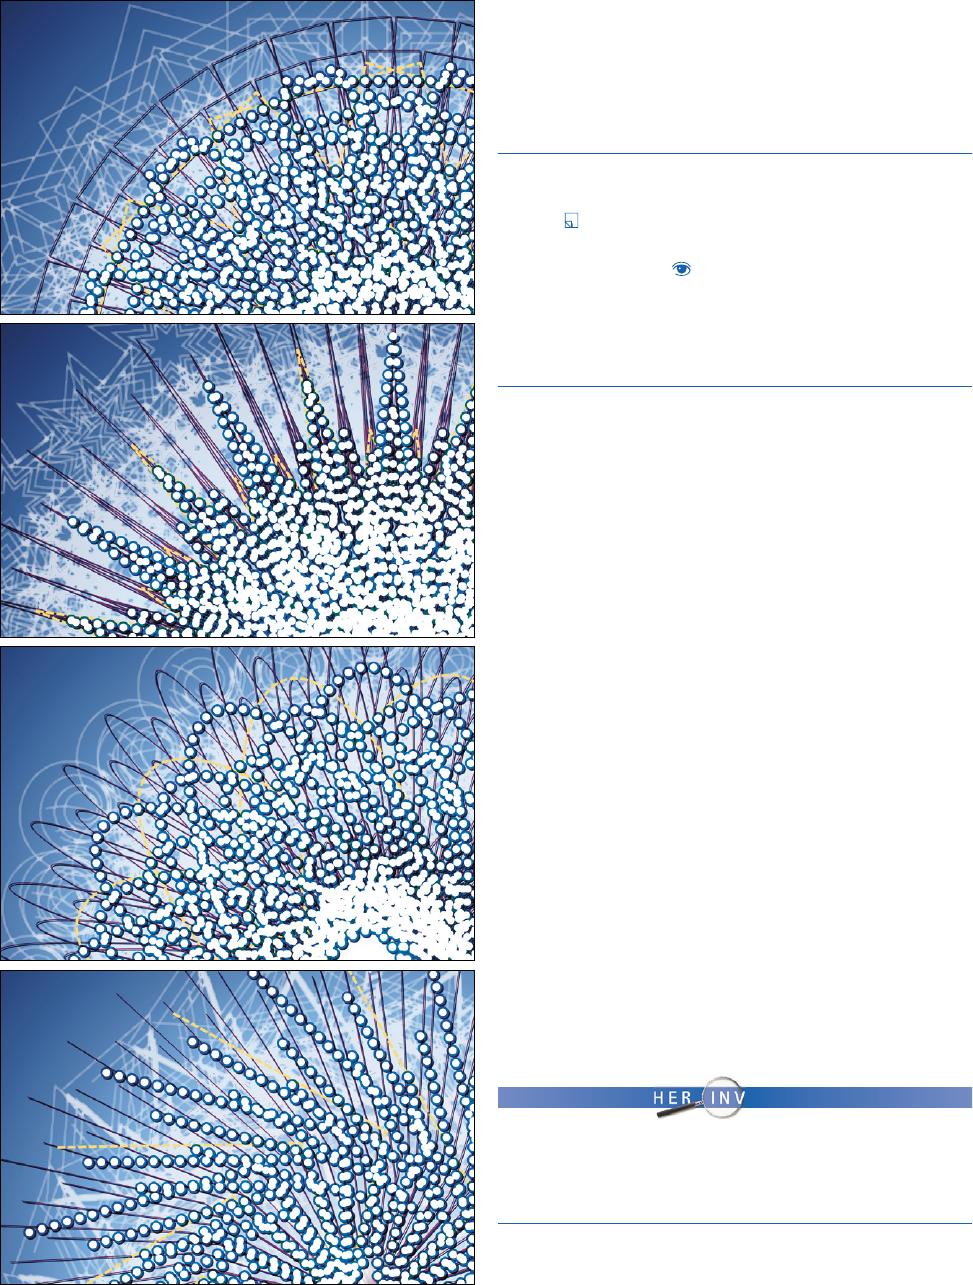
paths on the new layer. Figure 10-63 shows a detail from each
and every path, independently of the others.
What I love about this (or any) graphic style is that every
path subjected to the style exhibits a unique fl aw—which
is consistent with the implementation of any piece of
artwork, automated or otherwise. And if the symmetry
bothers you, then crop it. Change the size of the artboard,
move the styled path outline one direction or another,
much as I did to create the details in Figure 10-63.
Creating 3D Text and Graphics
In this last exercise, I’ll introduce you to 3D in Illustra-
tor, which is another of the program’s dynamic effects.
Don’t get too excited. Illustrator has always been—and
may forever be—a two-dimensional vector drawing
program. You can’t construct a full 3D scene, establish
shared light sources, or set objects so that they cast
shadows onto each other. You can’t create refl ections,
refractions, or camera angles. What you can do is cre-
ate single 3D objects at a time, each of which exists al-
together independently of each other.
In this project you’ll create 3D text and map artwork
onto the various surfaces of a 3D jewel case. While Il-
lustrator’s brand of 3D is hardly robust, it’s a lot of fun.
F U R T H E R I N V E S T I G A T I O N
To learn more about 3D in Illustrator, sign up for your free
seven-day trial account at www.lynda.com/deke. And then
check out my video series Illustrator CS5 One-on-One: Mastery.
I explore Illustrator’s 3D capabilities in Chapter 29, “3D Effects.”
Figure 10-63 .
Square
Star
Spiral
Zig

3D Effect 12
3D Effect 14
3D Effect 18
1. Open a basic illustration. For the fi nal time in this
lesson, navigate your way to the Lesson 10 subfolder
in the Lesson Files-AIcs5 1on1 folder. Then open the
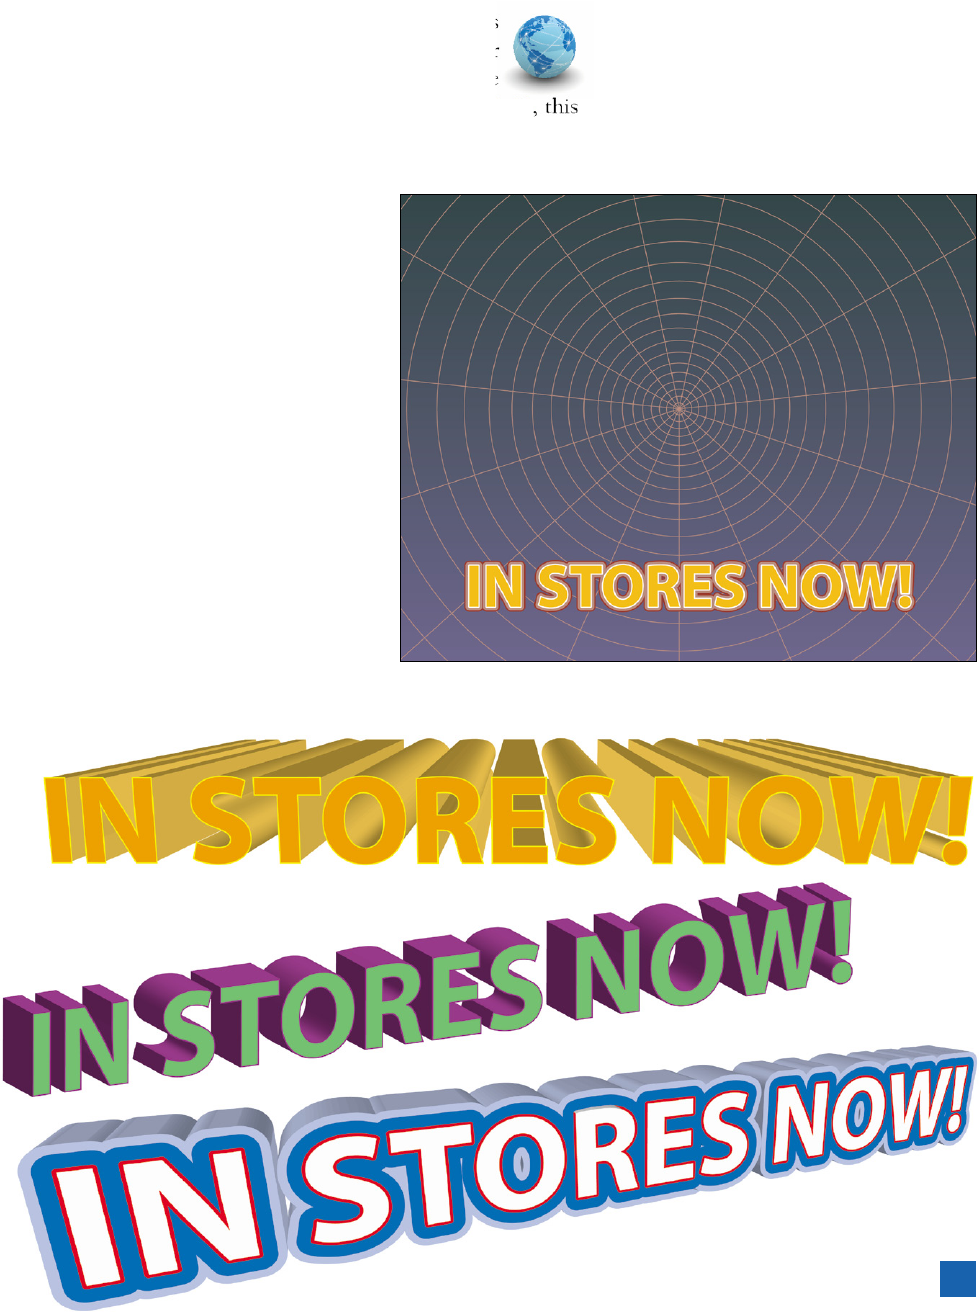
fi le called Text & symbols.ai. Pictured in Figure 10-64
document contains a background grid, a line of point type, a
hidden rectangle (which will become the jewel case), and a few
symbols to map onto your 3D art.
2.
Apply a few 3D styles to the text. Click
on the type with the black arrow tool
to select it. Then press Shift+F5 to open
the Graphic Styles panel. Assuming that
your panel is six thumbnails wide, you’ll
fi nd 3D styles in the third, fourth, and
fi fth rows (all of which I culled from
the 3D Effects library that ships with
Illustrator). To get a feel for how they
work, apply a few to the selected type.
Figure 10-65 shows three examples.
(Sadly, Illustrator sometimes has trou-
bles rendering 3D effects accurately, so
some styles may exhibit problems.)
3.
Restore the original type. When you’ve
had your fi ll of playing around, choose
File→Revert or press F12 to reload the
saved document.
Figure 10-64 .
Figure 10-65 .
373
Creating 3D Text and Graphics
Get Adobe Illustrator CS5 One-on-One now with the O’Reilly learning platform.
O’Reilly members experience books, live events, courses curated by job role, and more from O’Reilly and nearly 200 top publishers.

