
BOENZ
BOENZ
The idea behind this exercise is that—thanks to graphic styles, the
Appearance panel, and dynamic effects—you can use a single base
fi le to create a series of continuous, fl uid variations. If you have any
doubt, compare Figures 10-5 (page 334), 10-15 (339), 10-25 (346),
and 10-28. What starts as a birthday napkin for Babs becomes a
kid’s Halloween decoration. And because all effects are scalable,
you can make the net result any size you like. Only in Illustrator.
Exploiting the Transform Effect
As I mentioned at the outset, Effect→Distort & Transform→Transform
is my favorite dynamic effect. This one command lets you move,
fl ip, scale, rotate, and clone the appearance of one or more selected
objects, all from a central dialog box. The net result is that you can
create patterns of paths or text blocks at a moment’s notice, and
then manipulate the whole pattern in one fell swoop by making
adjustments to the original object.
In this exercise, I’ll demonstrate how to create a simple rotation
pattern, create a beveled stroke effect, and nudge an object using
the Transform Effect. You’ll also get a chance to try your hand at
one of my favorite path wigglers, Pucker & Bloat.
1.
Open a simple line drawing. Open the fi le called
Boenz.ai found inside the Lesson 10 folder. The fi le
contains three objects: a background square (which
will remain unchanged), a compound shape (the cartoon bone)
that comprises fi ve subpaths, and an oddly spelled line of
point type. Pictured in Figure 10-29, the document can safely
be termed unremarkable. But with the help of Transform and
Pucker & Bloat, it’ll develop into a high-impact graphic design.
2.
Apply a thick stroke to the bones. Click the outline of any
of the four circles or rectangle associated with the vertical
bone shape to select it. Open the Stroke panel and change the
Weight value from 20 to 200 points. The result is a chunky
outline that nearly obscures the bone-colored fi ll.
3. Send the stroke to the back. By default, Illustrator positions
a stroke in front of its fi ll, in deference to the behavior of the
PostScript printing language (which does the same). But you
don’t have to leave it that way. To restore the fi ll—so no por-
tion of it is covered—bring up the Appearance panel. And
drag the Stroke item below Fill (just above the bottom Opac-
ity item). Figure 10-30 shows the result.
Figure 10-29 .
Figure 10-30 .
349
Exploiting the Transform Effect
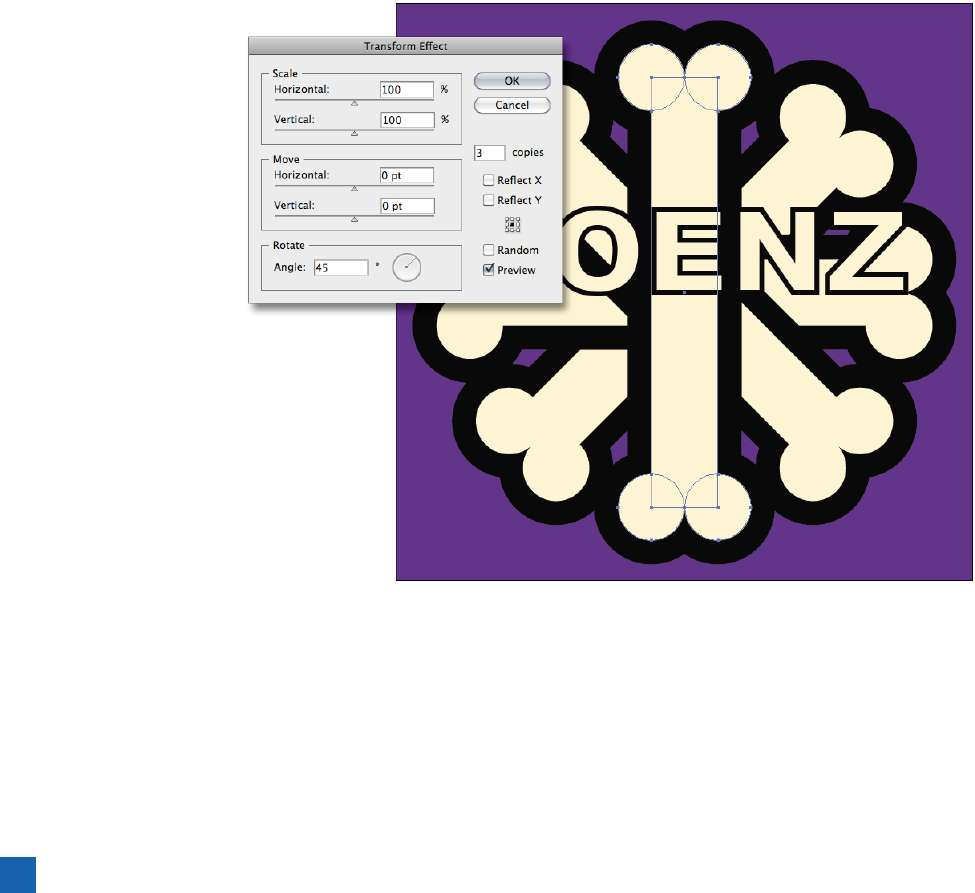
4.
Rotate three duplicates of the bones. Choose Effect→Distort &
Transform→Transform or, if you loaded dekeKeys back in the
Preface, press Ctrl+E (-E on the Mac). In the Transform Effect
dialog box, turn on the Preview check box so you can see the
results of your efforts. Change the Angle value at the bottom of
the dialog box to 45 degrees and press the Tab key to highlight
the Copies value and invoke the preview. Illustrator rotates the
preview of the bone, but its path outlines remain unchanged.
With the Copies fi eld active, press the key to nudge the value
up one copy at a time. With Copies set to 1, Illustrator restores
a bone at the original position. Once you get to 3, Illustrator
completes the pattern, as in Figure 10-31. That’s one original
plus three copes, for a total of four bones. Then click OK.
5. Add the virtual paths together. Unfortunately, in rotating the
paths, we’ve also managed to rotate the strokes so that they
cover each other. To merge the strokes, we need to merge the
base bone shape with its virtual copies. To do this, choose
Effect→Pathfi nder→Add.
6.
Move the Transform effect above Add. Well, that didn’t do
anything. But that’s because the effects are applied in the wrong
order. Go to the Appearance panel, and notice that Transform
Figure 10-31 .
350
Lesson 10: The Amazing World of Dynamic Effects
Get Adobe Illustrator CS5 One-on-One now with the O’Reilly learning platform.
O’Reilly members experience books, live events, courses curated by job role, and more from O’Reilly and nearly 200 top publishers.

