
Enhancing Line Art
with Art Brushes
In this fi rst exercise, I’ll show you how to apply and
customize art brushes in Illustrator. I’ve created all the
paths for you in advance. But remember, if you want to
paint your own brushstrokes, you can do so with the
paintbrush tool, which you get by pressing the B key.
This is particularly useful if you own an art tablet with
a pressure-sensitive stylus, such as one of the Intuos
line of tablets from Wacom (www.wacom.com). That
said, standard paths typically offer the most precision,
which is why I employ them in the following steps.
1. Open an illustration with colored lines.
Find the Lesson 09 folder inside the Les-
son Files-AIcs5 1on1 folder, and open the
fi le called Eyeliner.ai. Shown in Figure 9-5
newest version of the Eye of Horus artwork that
you fi rst drew in Lesson 2. Only this time Horus is
a pop band and Eyeliner is the name of the group’s
debut single (with the obligatory David Guetta
remix and an ill-advised collaboration with Akon).
2.
Open the Brushes panel. Choose Window→Brushes
or press the F5 key. Pictured in Figure 9-6, the
Brushes panel contains a row of calligraphic brushes,
followed by Basic and six art brushes. Like the
icon at the bottom of the panel, Basic removes any
brush and restores an unadorned stroke.
P E A R L O F W I S D O M
Like symbols, swatches, and other panel items, Brushes are
saved along with an illustration. So the brushes shown in
Figure 9-6 are specifi c to the Eyeliner.ai fi le. The brushes
that Illustrator includes with a new document vary from
one version of the software to the next. But they always
start with a row of calligraphic brushes, followed by Basic
and at least a couple of art brushes.
3. Apply the Rough Charcoal brush to the eyebrow.
Using the black arrow tool, select Horus’s dark
red eyebrow. Then click the fi rst art brush in the
Brushes panel, called (if you hover over it) Rough
Charcoal. Illustrator stretches the art brush across
the length of the eyebrow, as in Figure 9-7.
Figure 9-5 .
Figure 9-6 .
Figure 9-7 .
275
Enhancing Line Art with Art Brushes
4.
Scale and fl ip the brushstroke. Sized by default to fi t a 1-point
line weight, the brushstroke is too thin, plus it traces the eyebrow
in the wrong direction. Fortunately, an art brush is a graphic
that fl ows along a path outline. So it stands to reason that you
can transform the brush independently of the path.
There are two ways to edit a brush assigned to a path.
• One is to double-click on the brush in the Brushes panel.
But that’s a global edit that changes all future applications
of the brush, which is rarely what you want.
• The other is to edit the brush as it’s applied to the selected
path only, which is what we’ll do in this step.
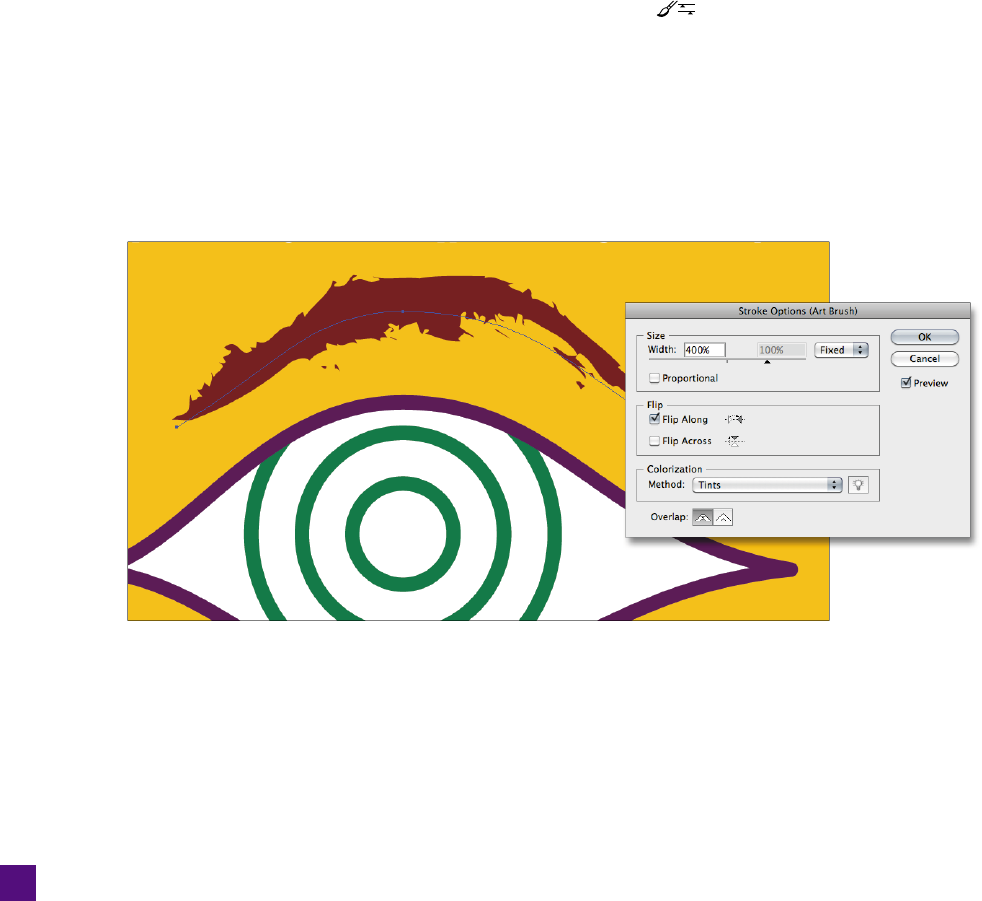
With the eyebrow path selected, click the middle icon at the bot-
tom of the Brushes panel ( ) to bring up the Stroke Options
(Art Brush) dialog box. Turn on the Preview check box. Then
try turning on the Proportional check box, which ignores the
line weight and scales the brush proportionally to the length of
the path. That’s too thick for my taste. For something less Ne-
anderthal, turn off Proportional and raise the Width value to
400 percent. Select the Flip Along check box, which refl ects the
brush along the length of the path, as in Figure 9-8. Click OK.
5.
Scale the path outline. The now-hairy eyebrow appears too
small to fi t the eye. Press the S key to select the scale tool. Then
click along the top of the purple eye path to set the transfor-
mation origin. Position your cursor 45 degrees from the origin
point, and drag away from it to scale the path so the top of the
eyebrow approaches but doesn’t quite touch the R in Horus, as
in Figure 9-9 on the next page. The brush resizes to fi t.
Figure 9-8 .
276
Lesson 9: Brushes and Symbols
Get Adobe Illustrator CS5 One-on-One now with the O’Reilly learning platform.
O’Reilly members experience books, live events, courses curated by job role, and more from O’Reilly and nearly 200 top publishers.

